


AppStore Submission Process
First, prepare a personal developer account or a company developer account. --- I am using a company developer account here; the type of account doesn't matter, as long as it has the necessary (AppStore publishing) permissions.
Prepare Xcode and the project to be submitted. (Xcode version 7.1 or later is recommended) -- My Xcode version is 7.1.
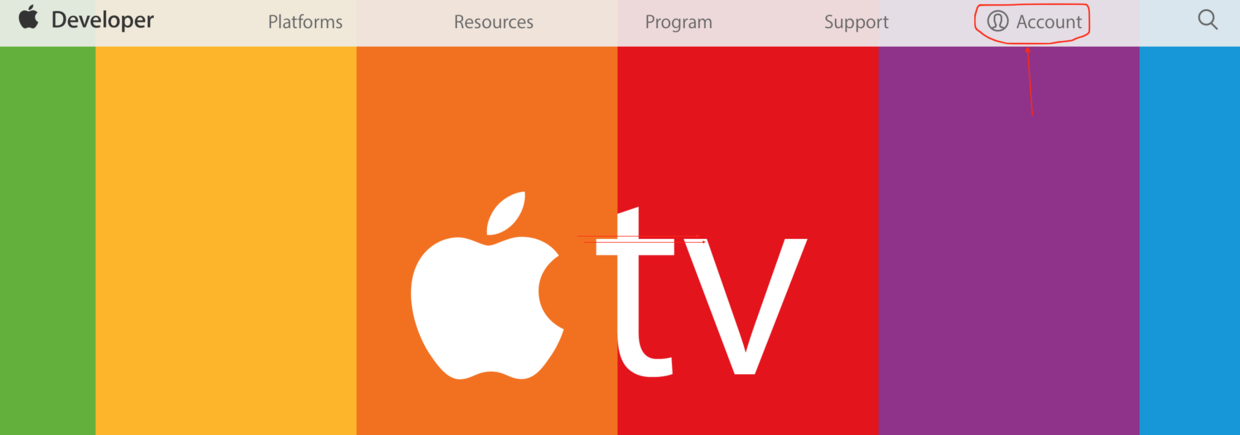
Go to the Apple Developer website: developer.apple.com
Click on "account", as shown below:
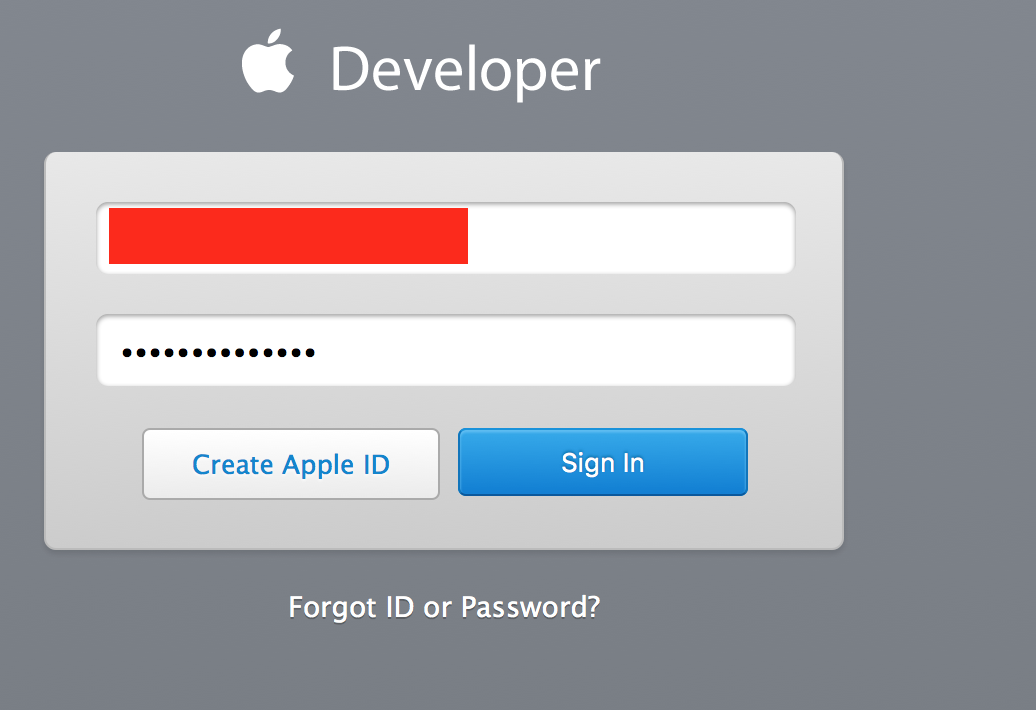
Enter the login screen and log in.
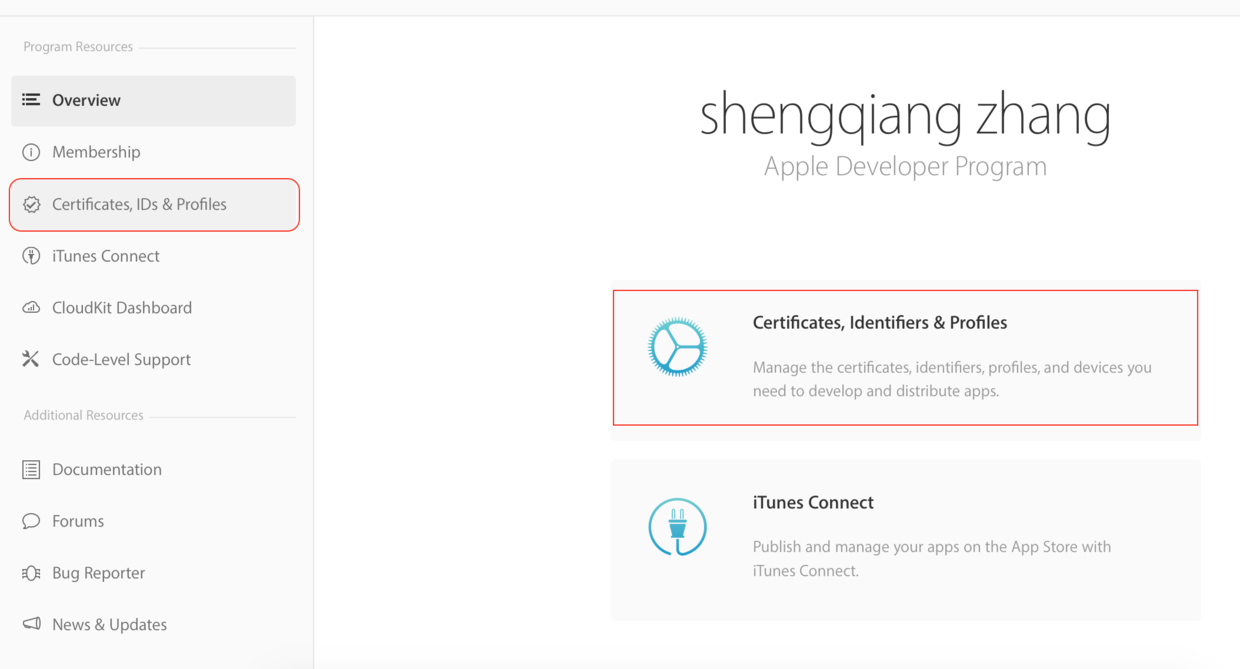
- After logging in, click on "Certificates, Identifiers & Profiles" to create a Bundle ID, distribution certificate, and provisioning profiles for the project.
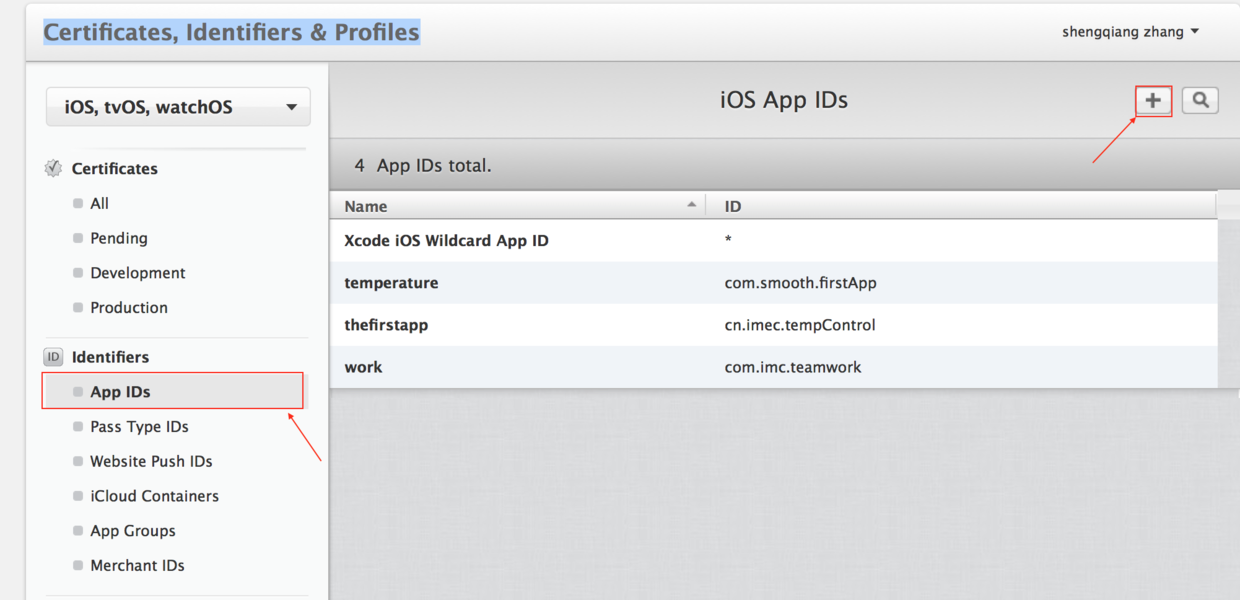
After entering "Certificates, Identifiers & Profiles", click on "App IDs" --> the "+" add button to add a Bundle ID for the project.
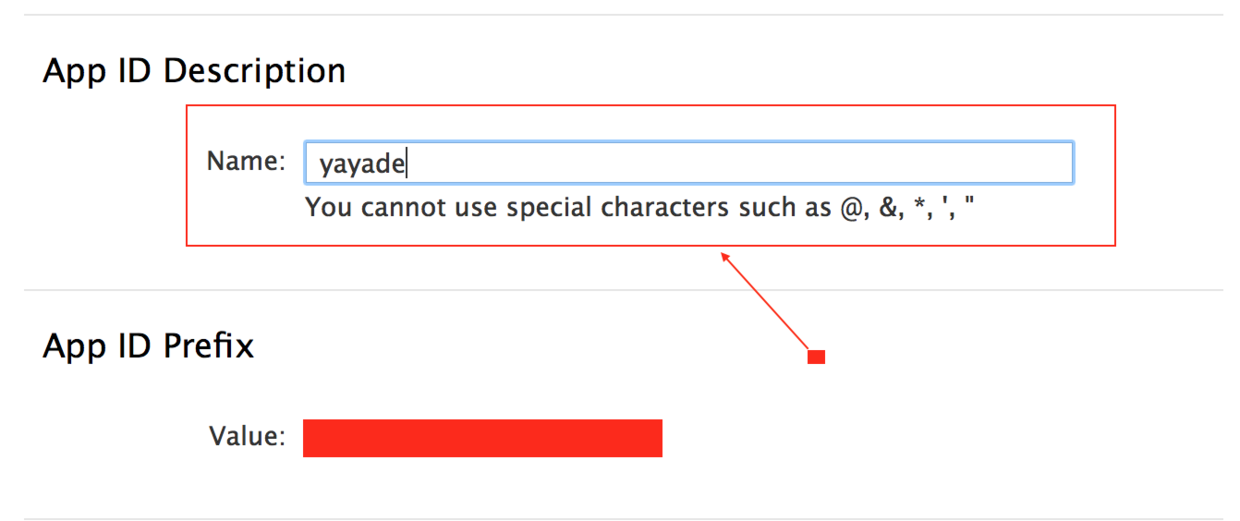
Enter the "Create APP IDs" interface.
The "name" in "App ID Description" can be anything.
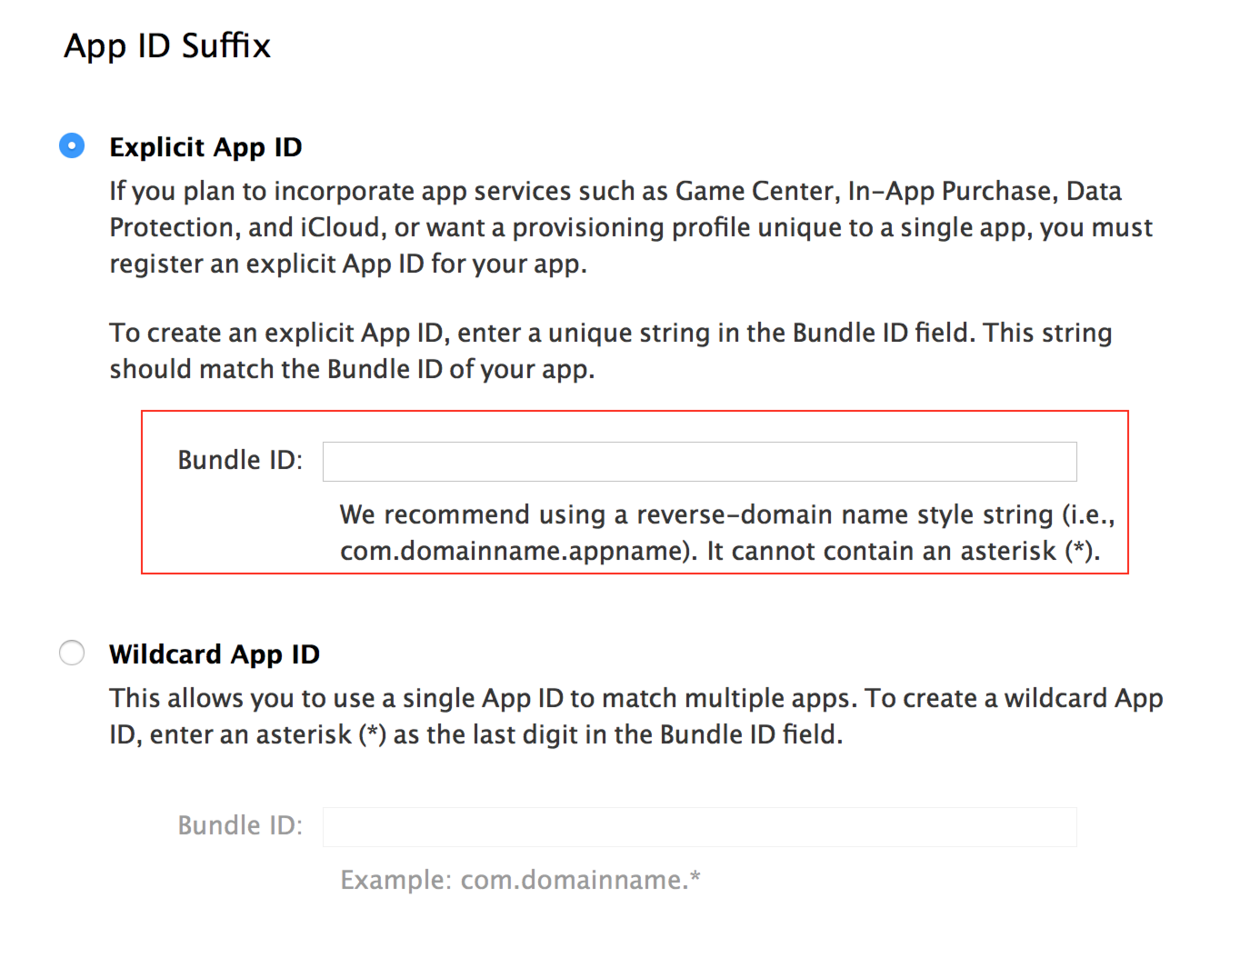
The best format for the Bundle ID is: (e.g., com.company.yayade).
The Bundle ID here must match the Bundle ID in your Xcode project. (It's best to copy the Bundle ID from your project.)
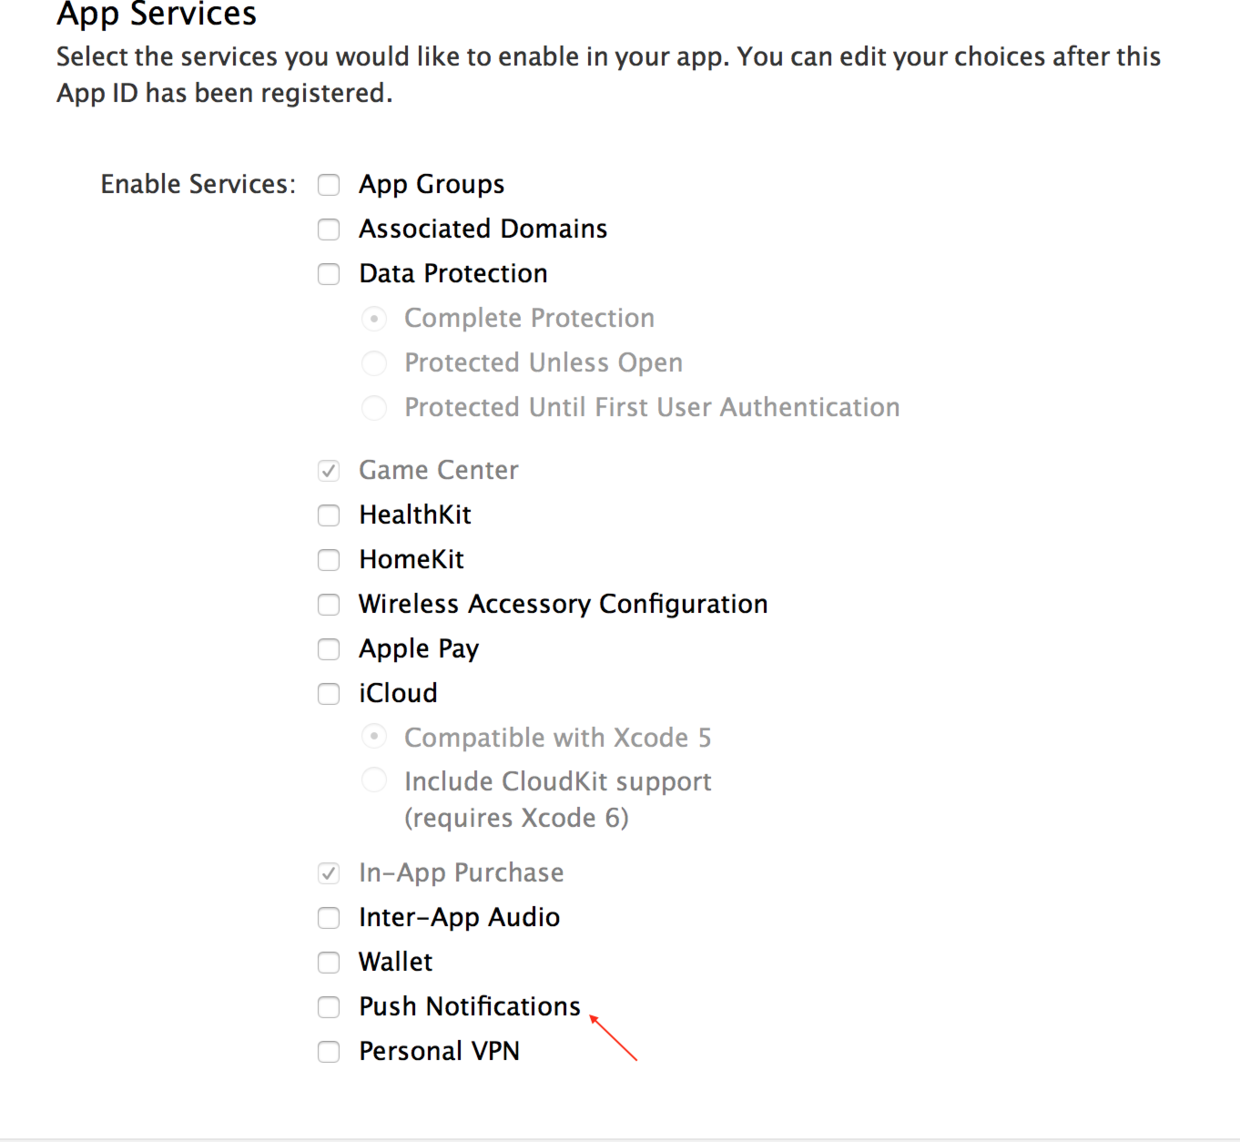
If you need push notification functionality, check "Push Notifications". In short, check the corresponding options for any services or features your project uses.
Then click continue --> register to complete the Bundle ID registration.
- Next, request a certificate.
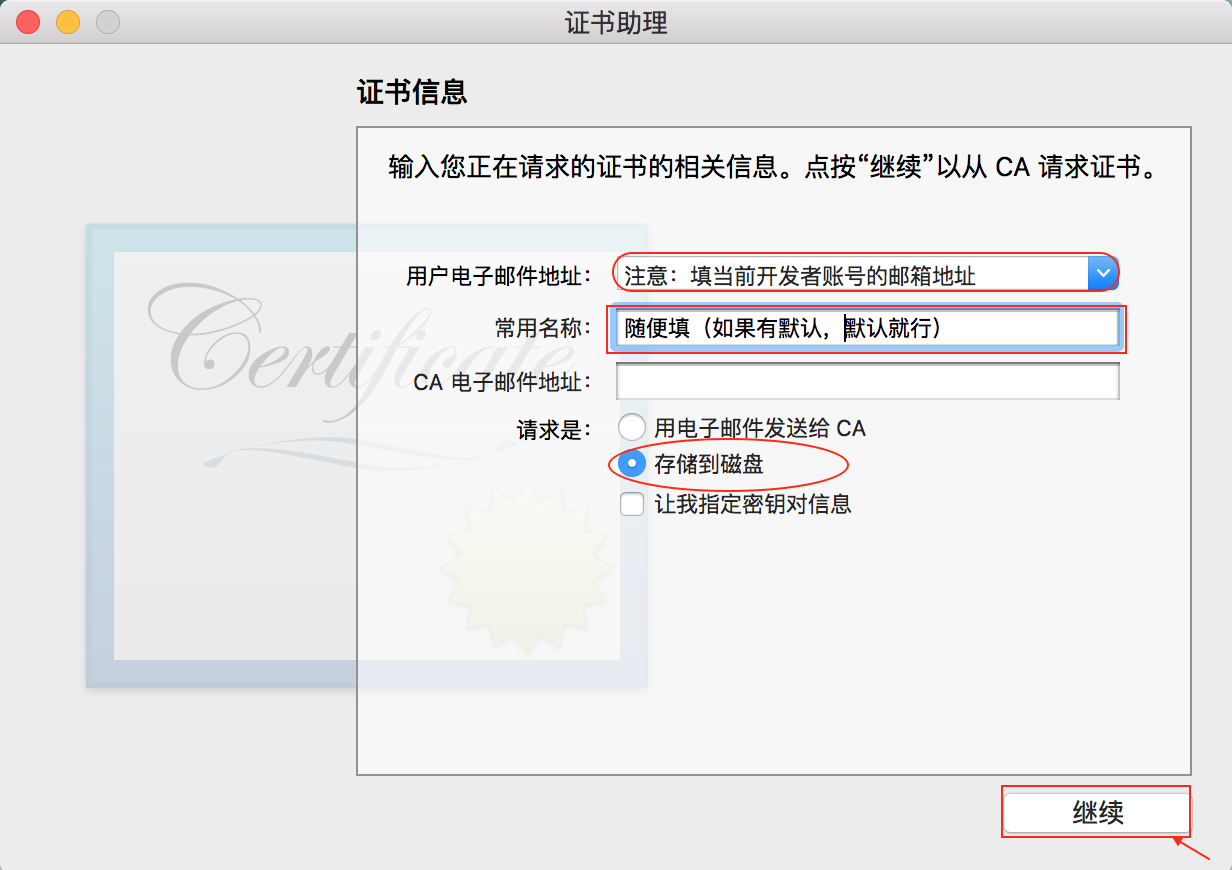
Find the built-in "Keychain Access" application on your Mac. Go to Keychain Access --> Certificate Assistant --> Request a Certificate from a Certificate Authority.
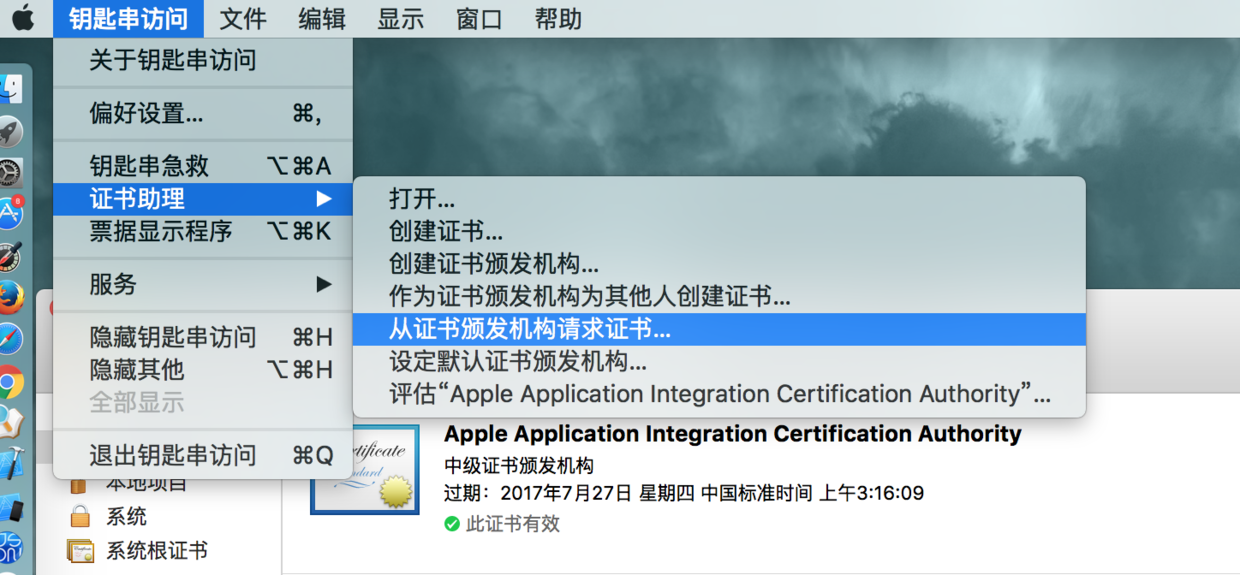
Fill in the relevant information in the Certificate Assistant interface and save it to your local desktop.
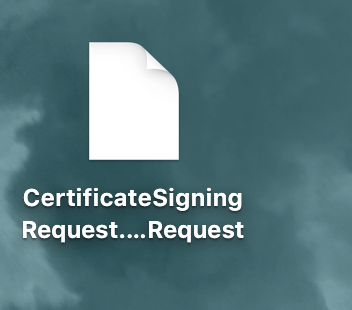
The .certSigningRequest certificate file generated on the desktop is shown below.
- Return to the developer website:
Sign in with your Apple ID - Apple Developer
Generate a distribution certificate.
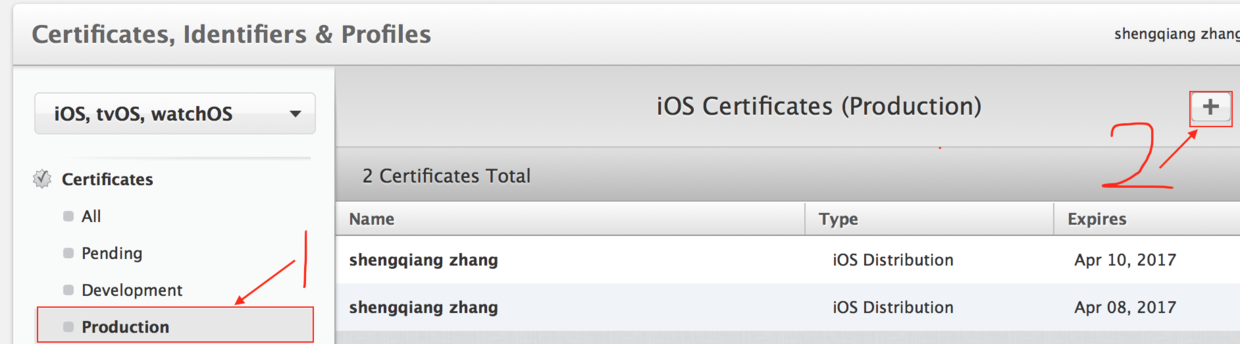
After clicking the "+" button, the following content interface appears. Simply select "App Store and Ad Hoc" and then click continue.
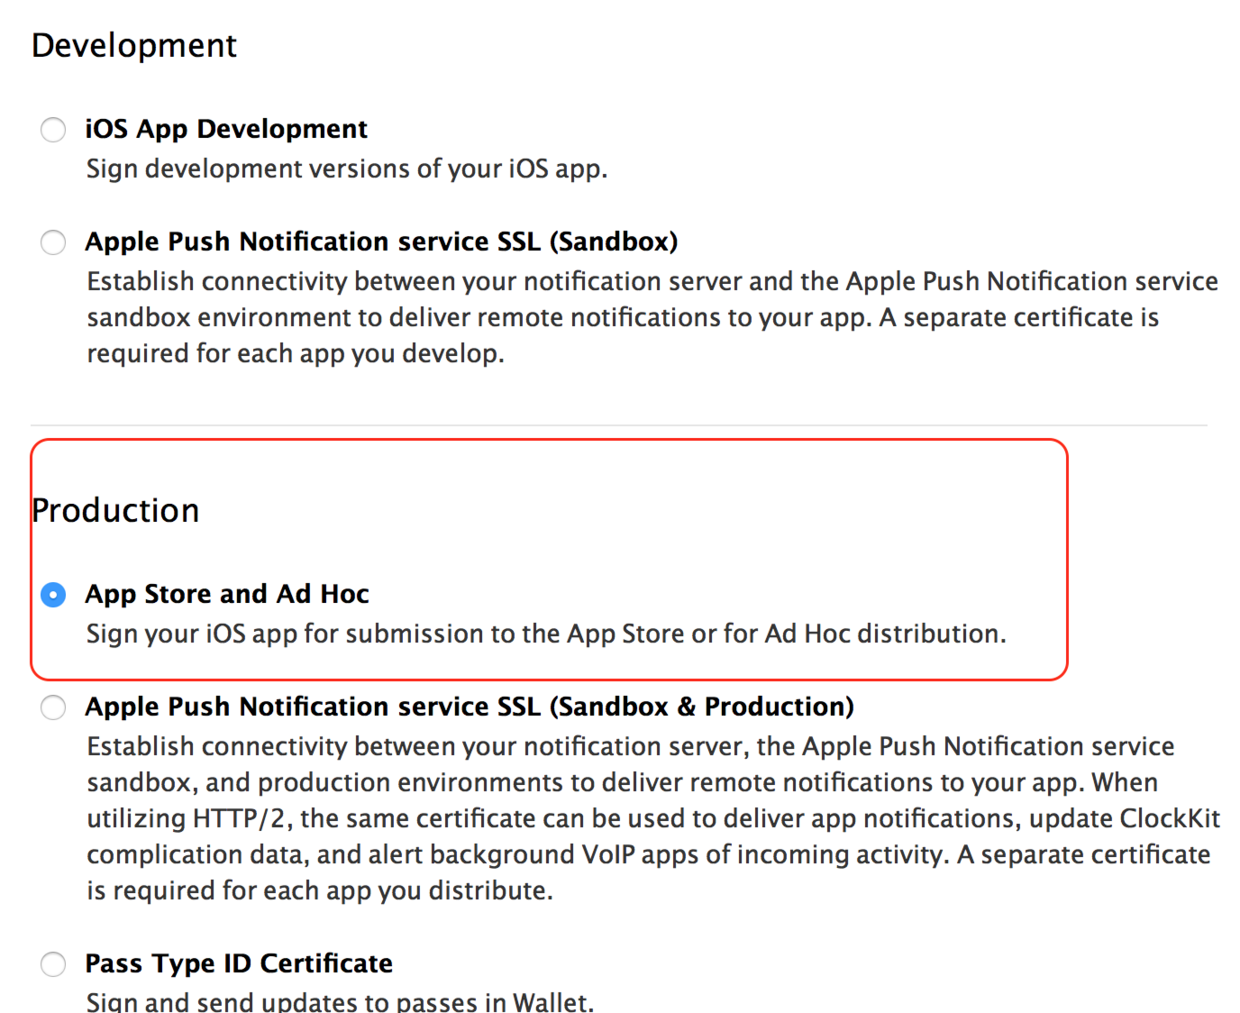
If you find that "App Store and Ad Hoc" under "Production" is not selectable!!!
Reason and Solution: Only one distribution certificate can exist under a single username at a time. If you previously created a certificate that hasn't been used, you cannot create a new one. Revoke it or use it first before creating a new one.
After clicking continue twice, you will see the following interface (as shown below).
Click the "Choose File..." button to import the .certSigningRequest certificate we just generated. --> continue --> download --> Done
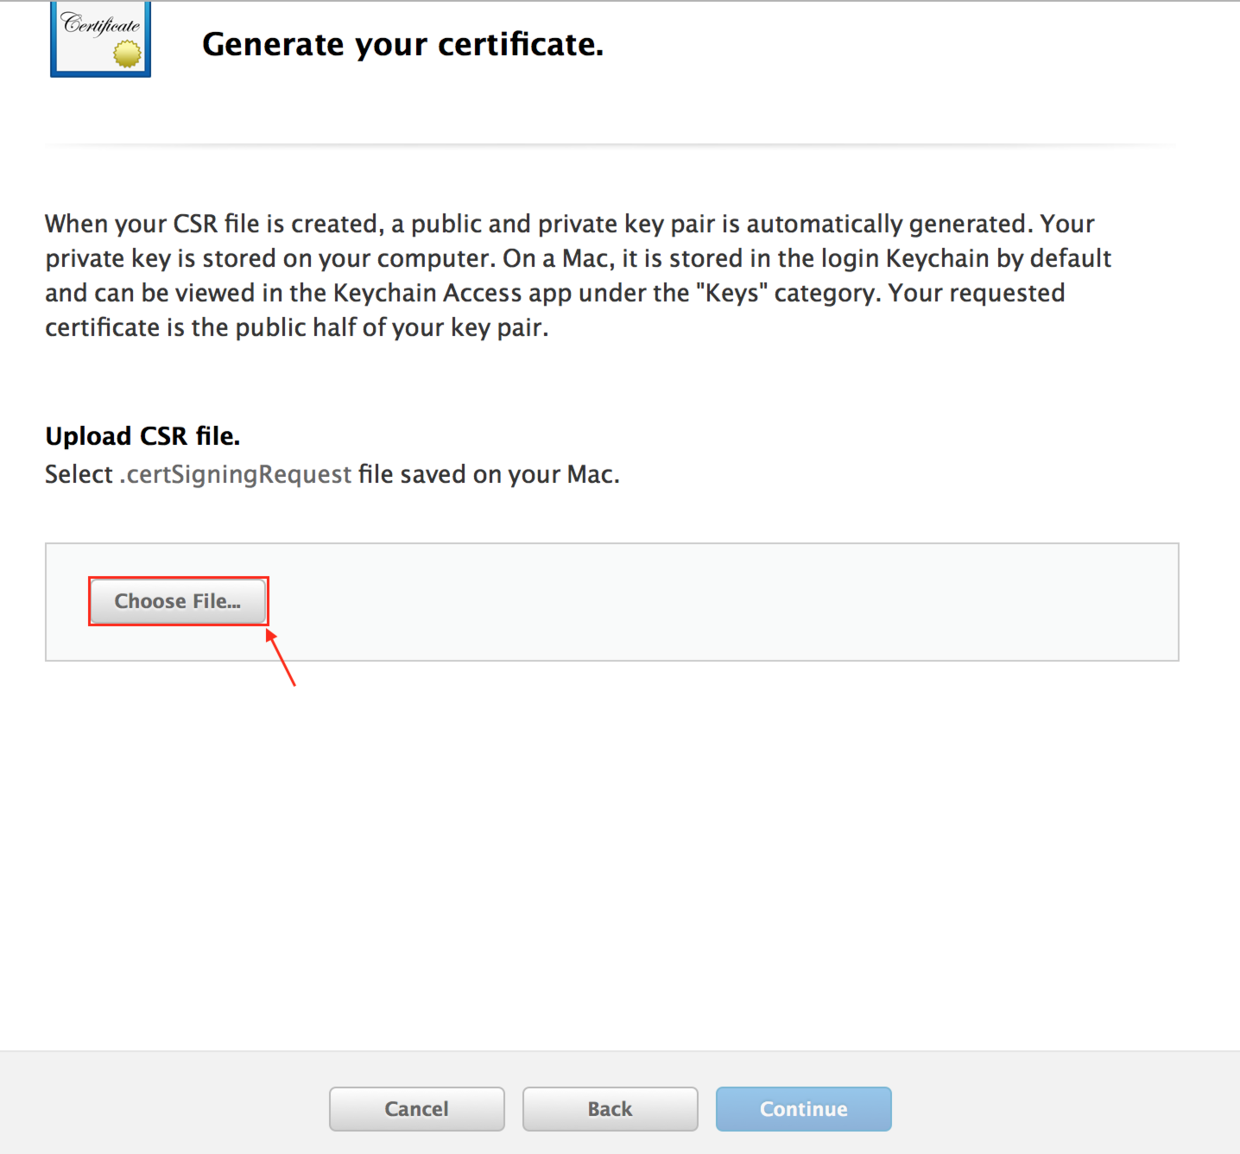
After generating the distribution certificate, download it --> find the downloaded file and double-click to install it automatically.
You can then see the newly installed distribution certificate in the "Keychain Access" application.
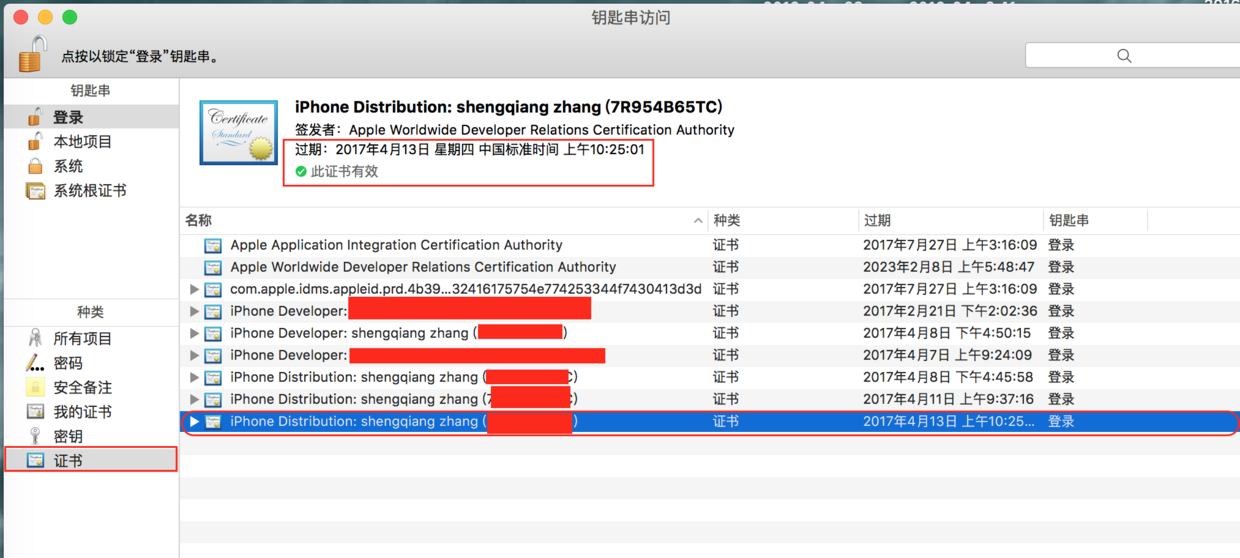
If you see that the developer certificate is invalid.
Solution details: http://my.oschina.net/sfandy/blog/617139?fromerr=OT2Ptq54
If you resolve the "developer certificate invalid" issue, you must repeat step 6 to generate a valid certificate.
- Generate provisioning profiles.
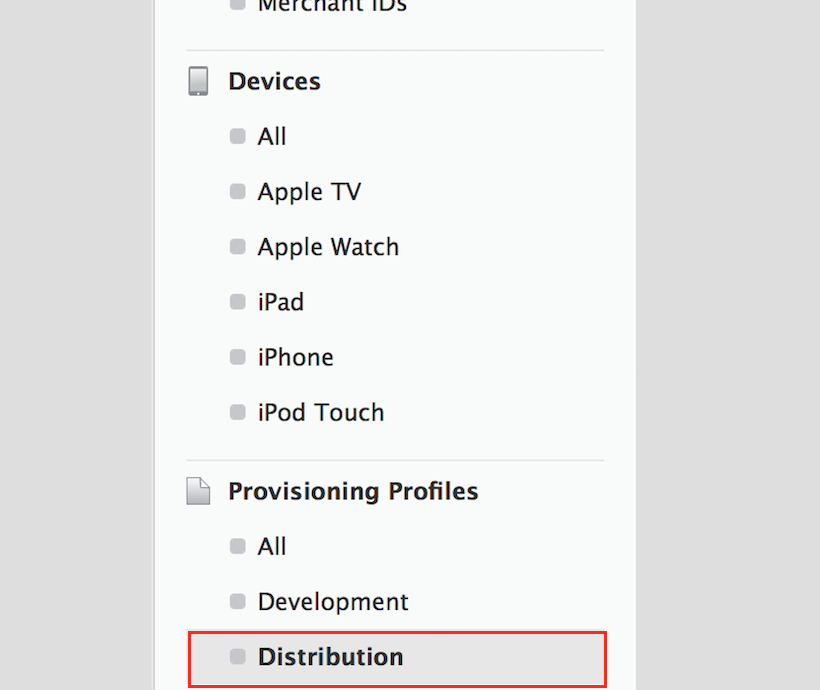
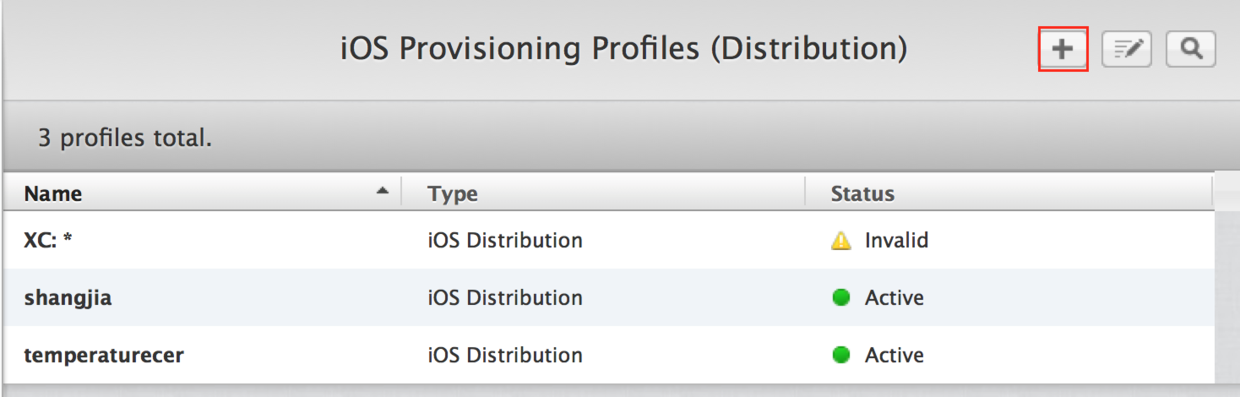
After clicking the "+" button.
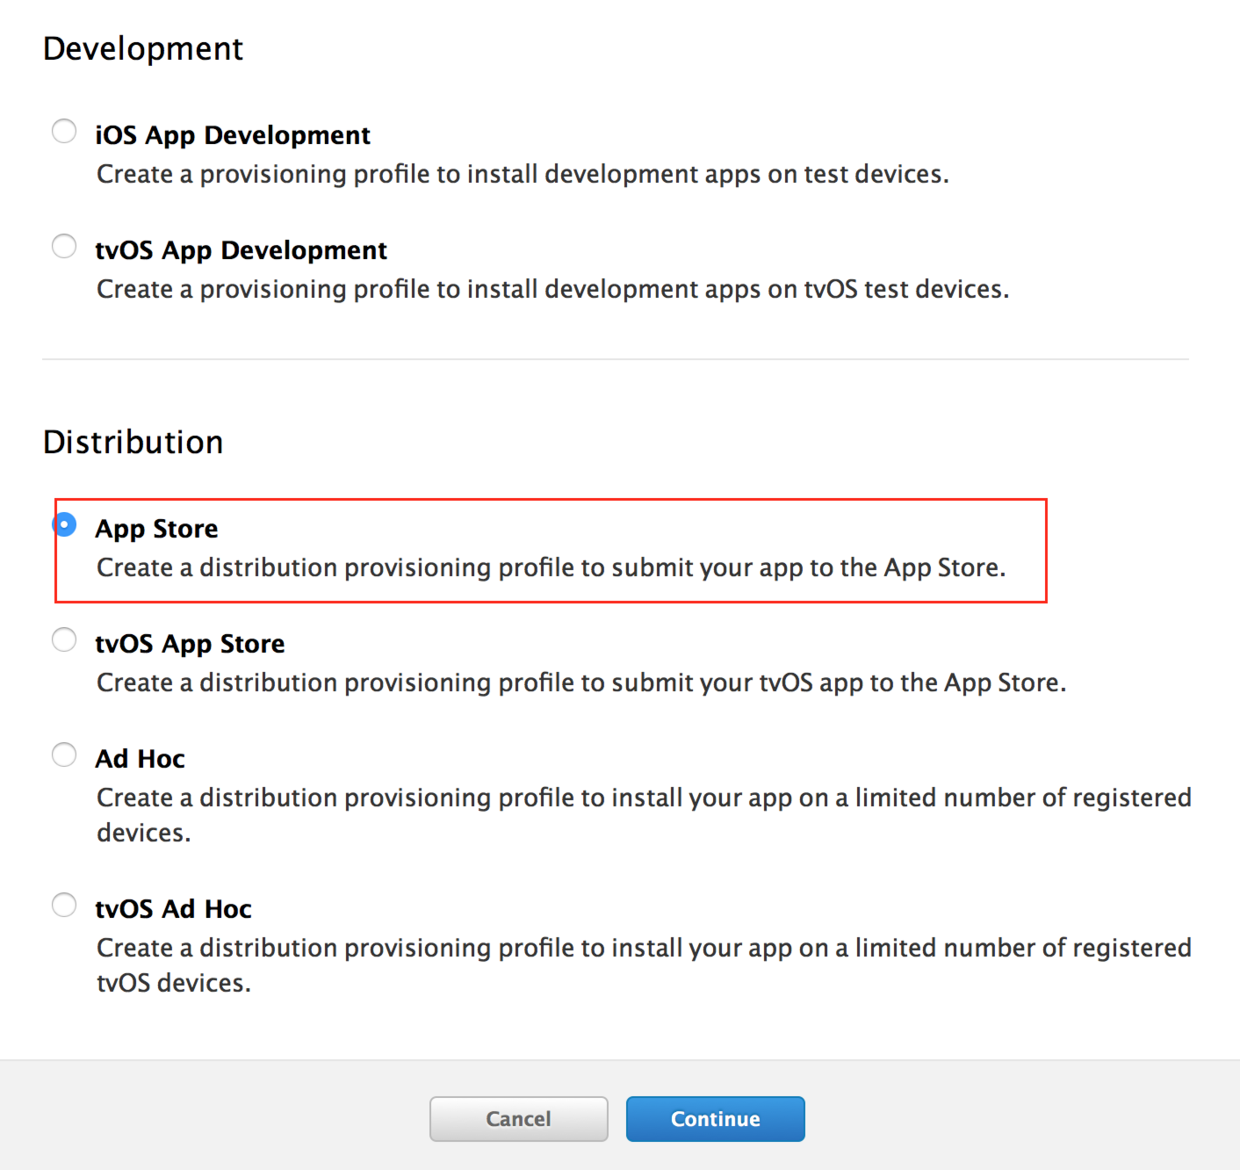
App ID: Select the App ID containing the corresponding Bundle ID.
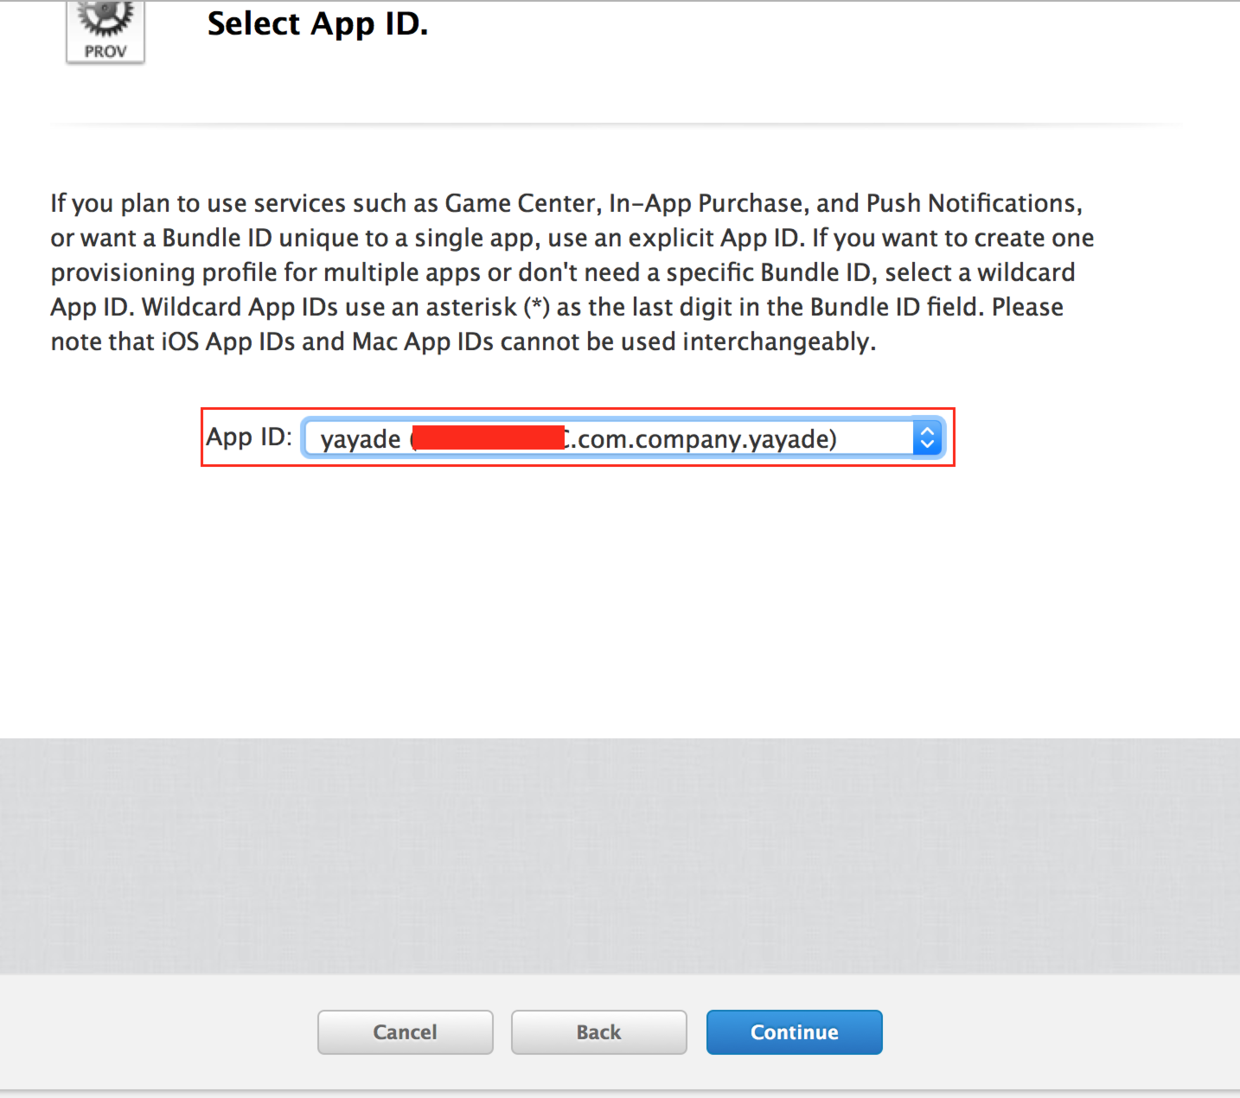
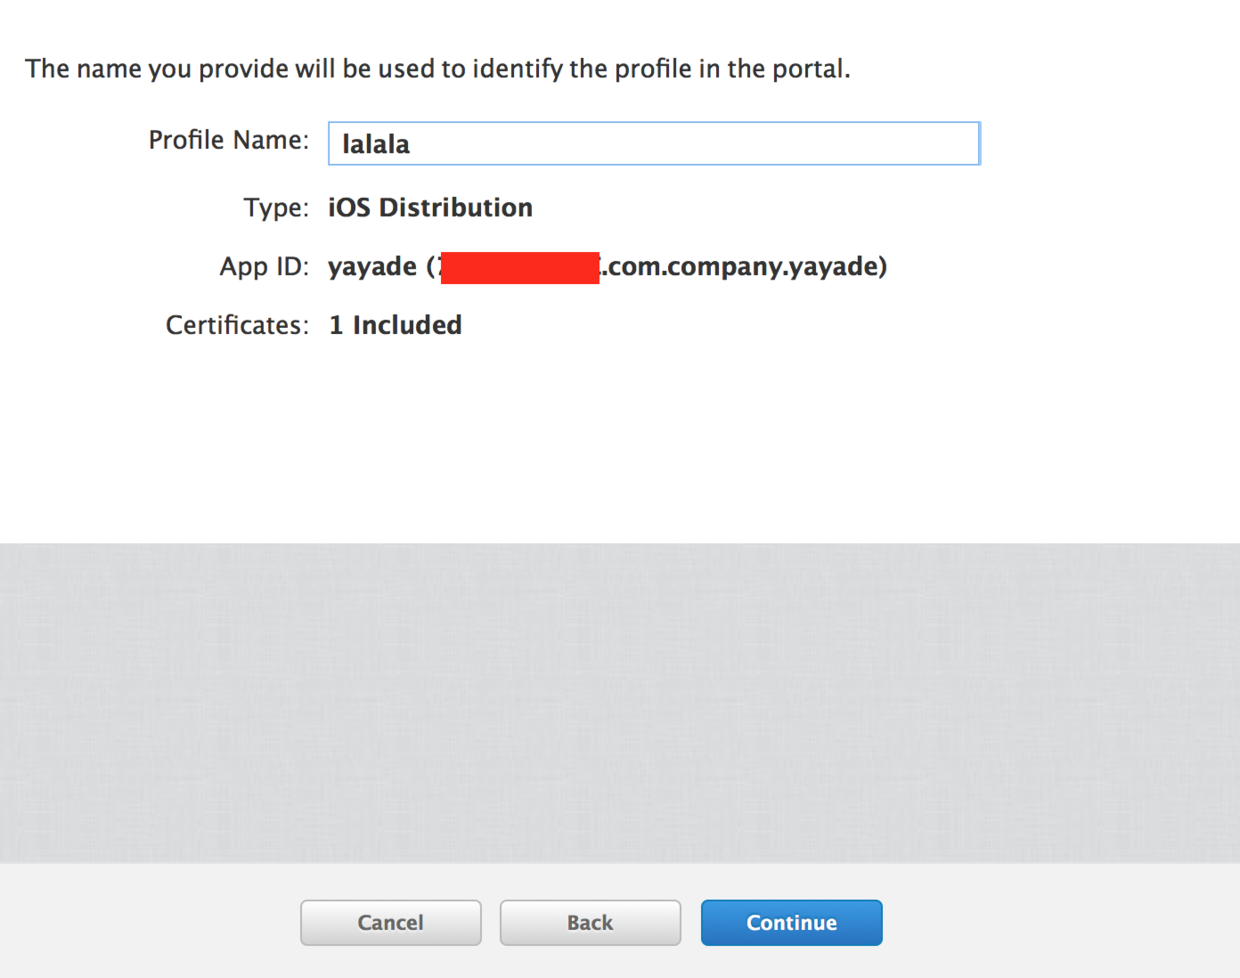
Then download the file: download --> find the downloaded file and double-click to install it automatically.
- Enter iTunes Connect.
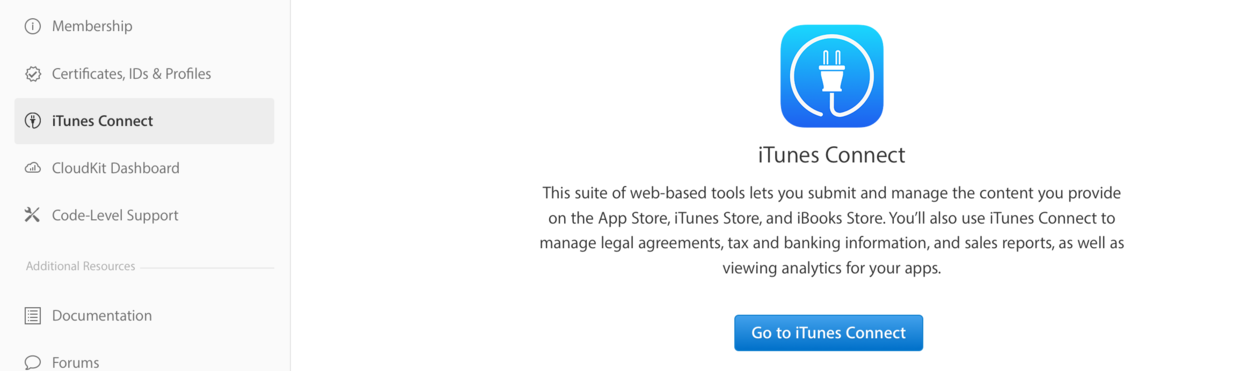
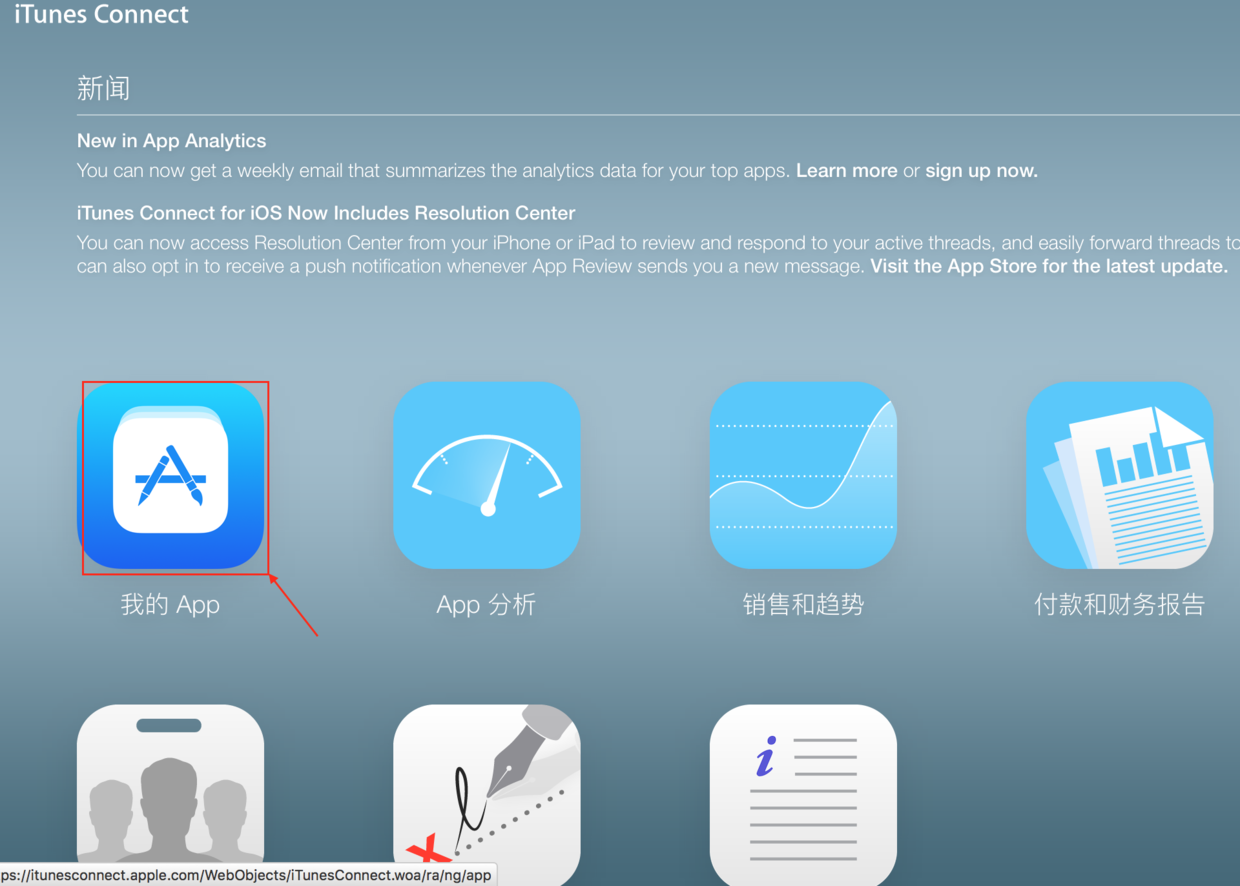
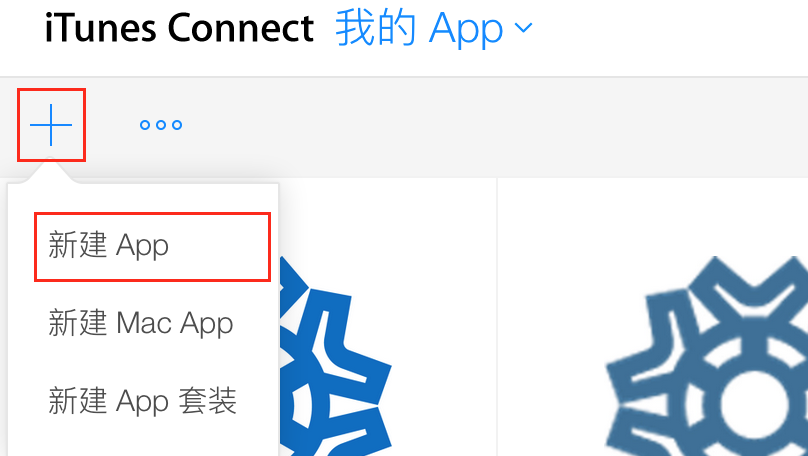
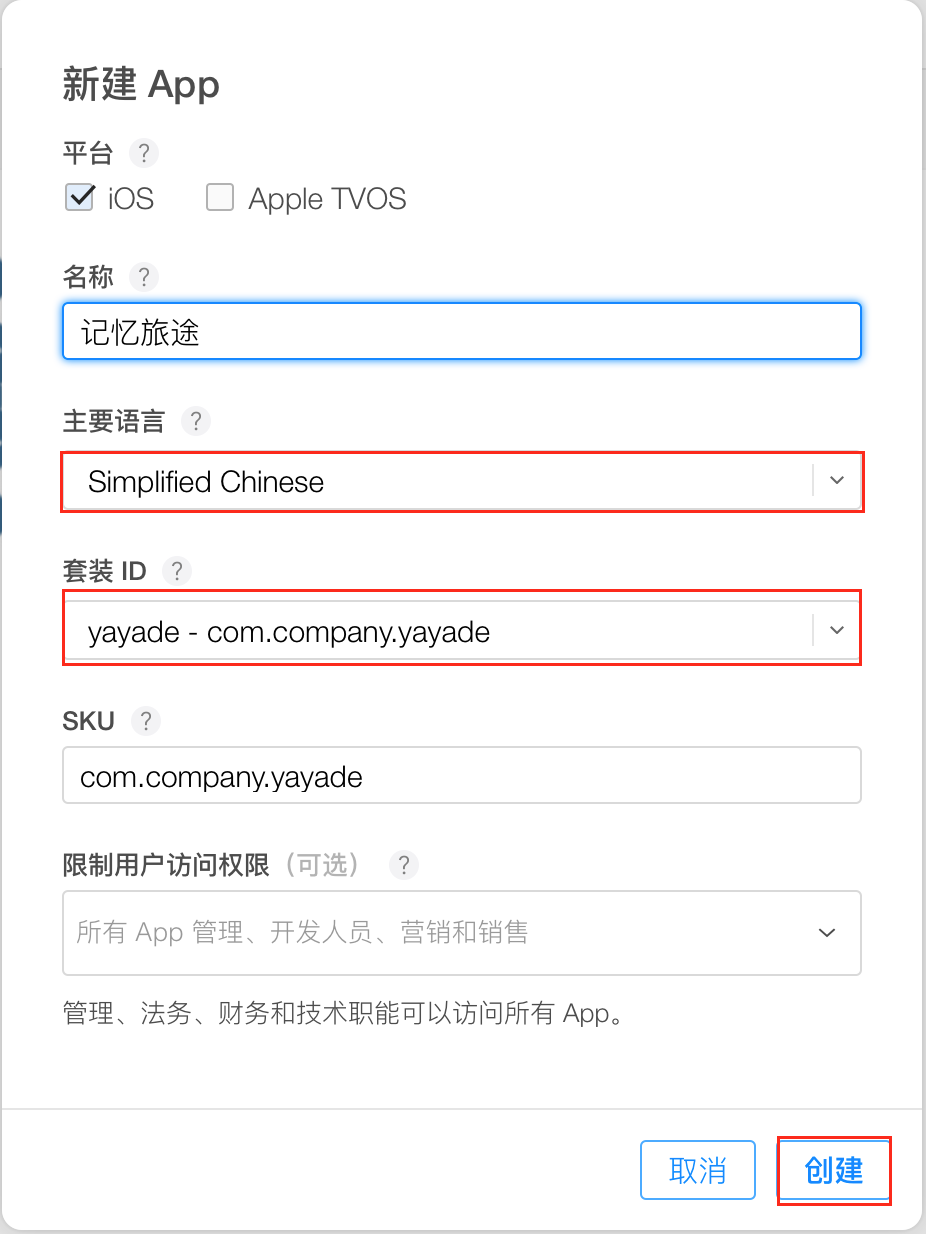
After successful creation, you will see:
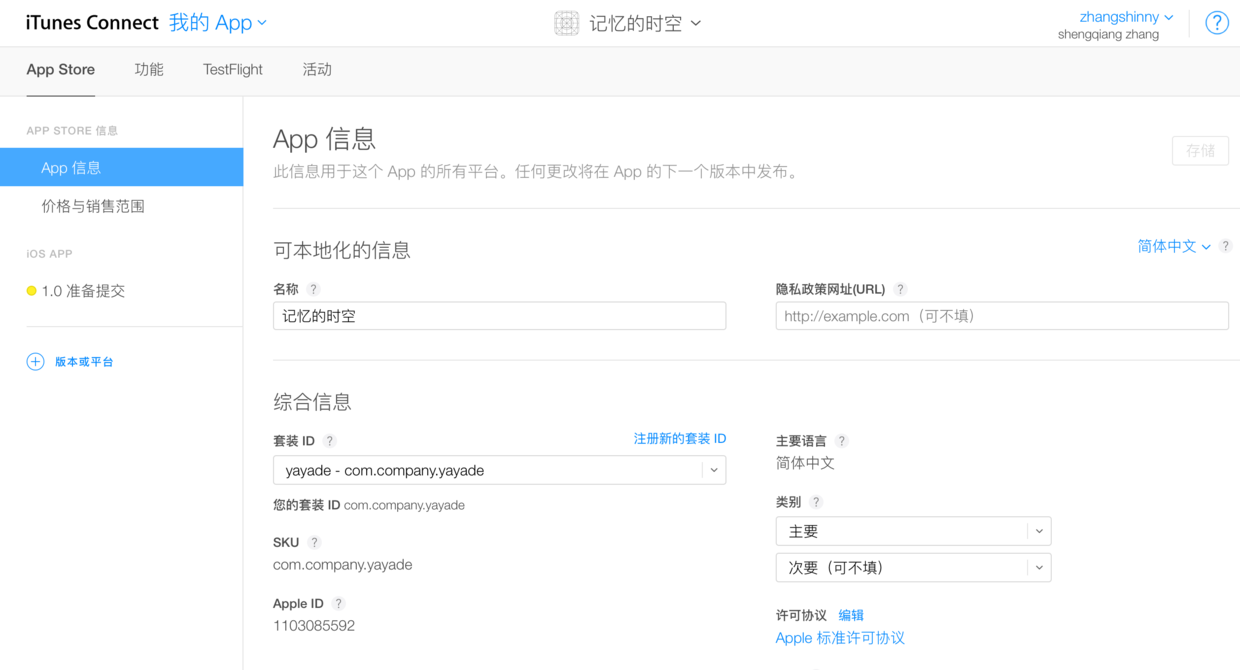
- Open the project you want to submit in Xcode.
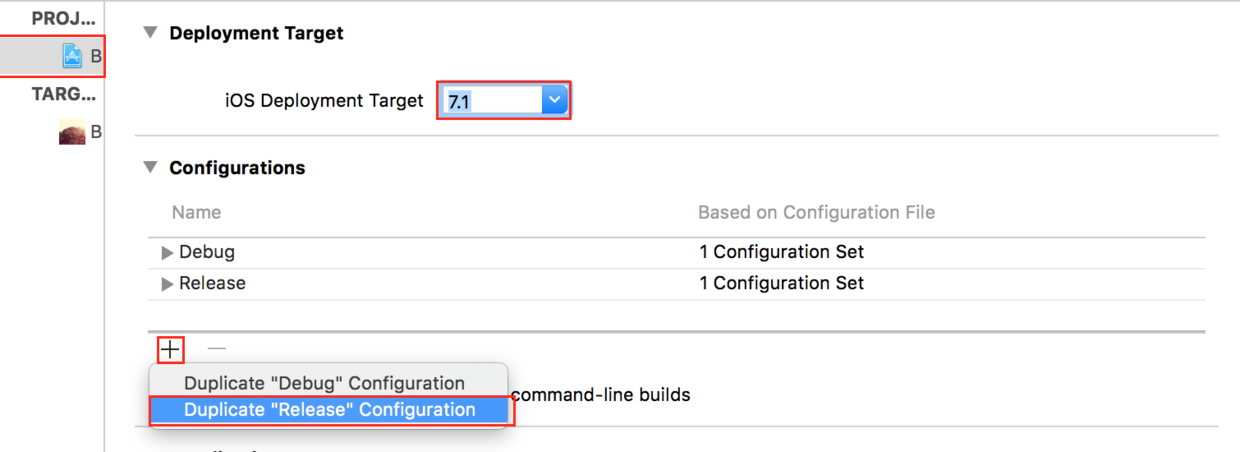
Change "Release copy" to "distribution", as shown below.
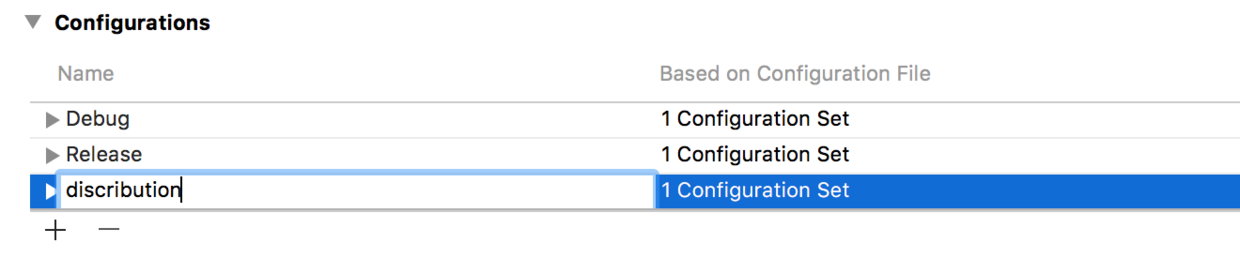
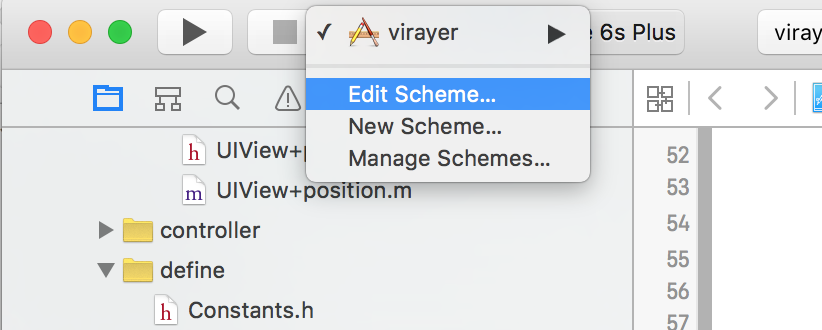
Select the "distribution" we just created.
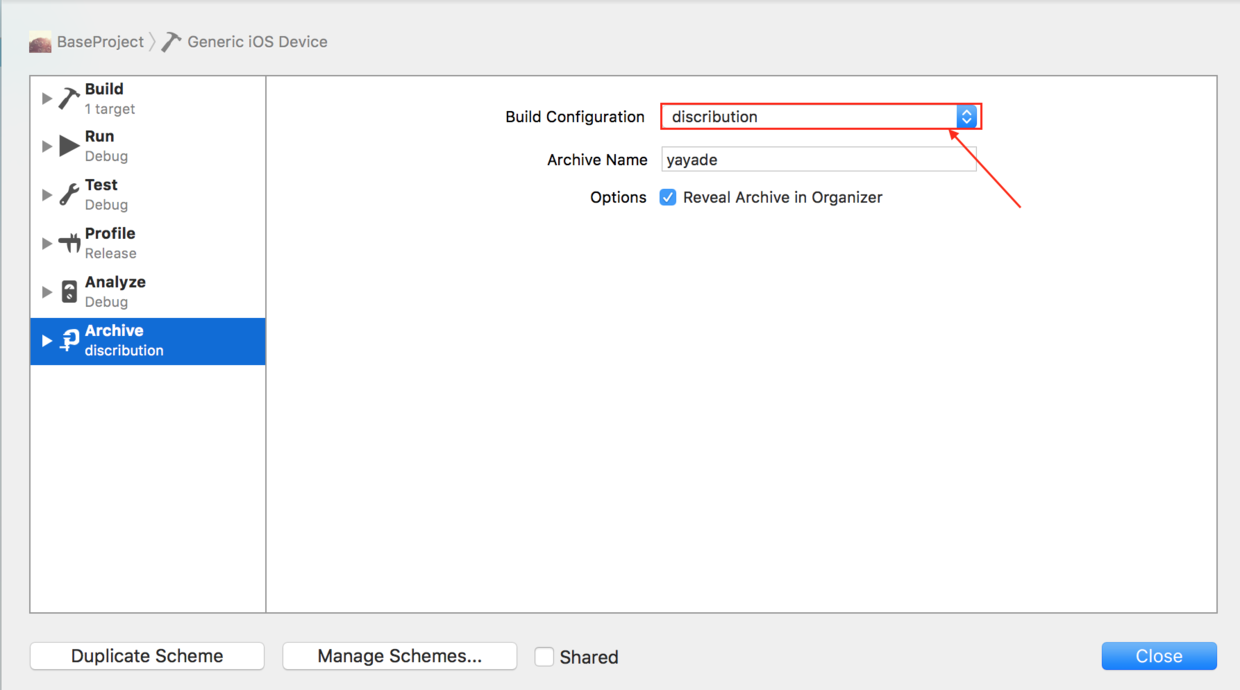
Configuration:
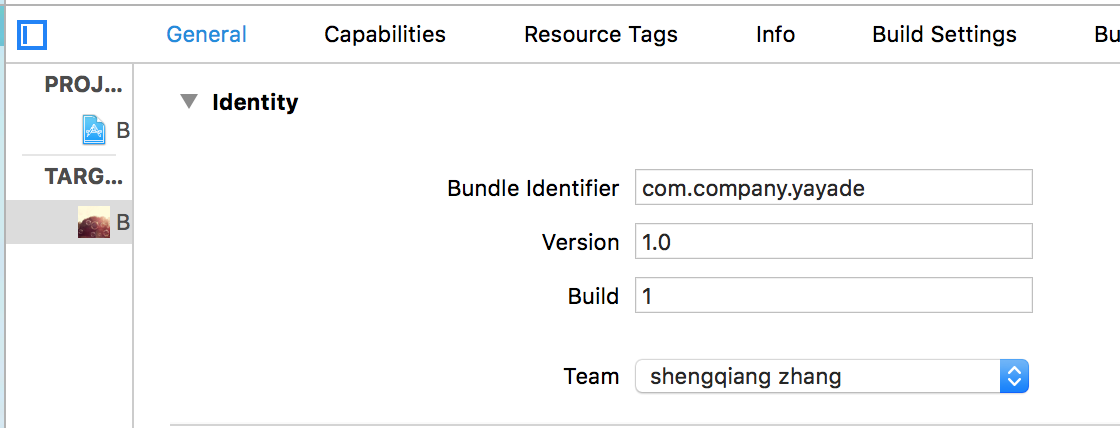
9.1 The Bundle Identifier in TARGETS --> General.
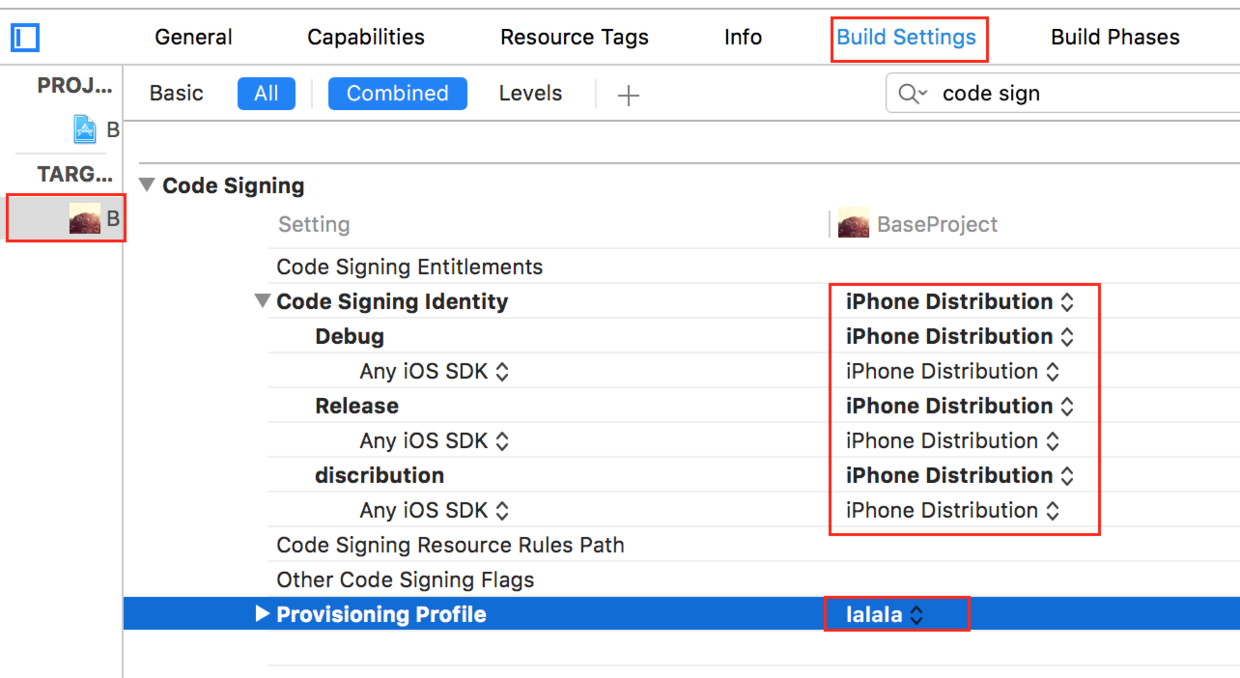
9.2 The Code Signing Identity in TARGETS --> Build Settings.
Select the provisioning profile we generated for "Provisioning Profiles".
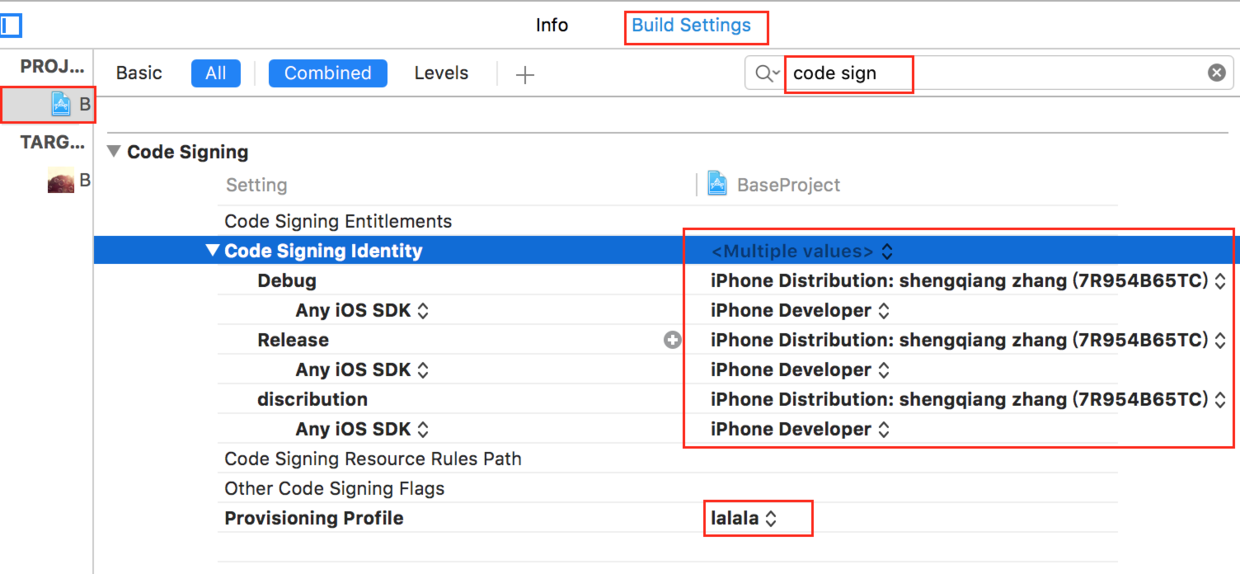
9.3 The Code Signing Identity in PROJECT --> Build Settings.
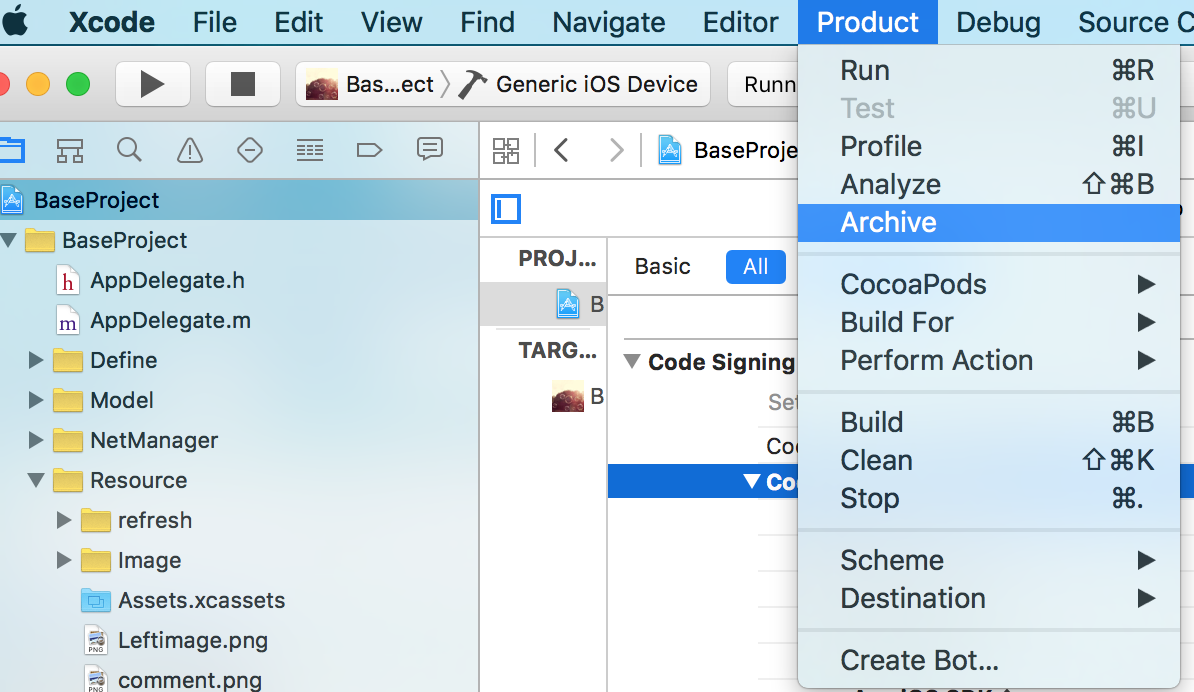
- Archive.
Various failures can occur during archiving:
10.1

Solution: Re-import the third-party frameworks by running the command in the terminal: pod update.
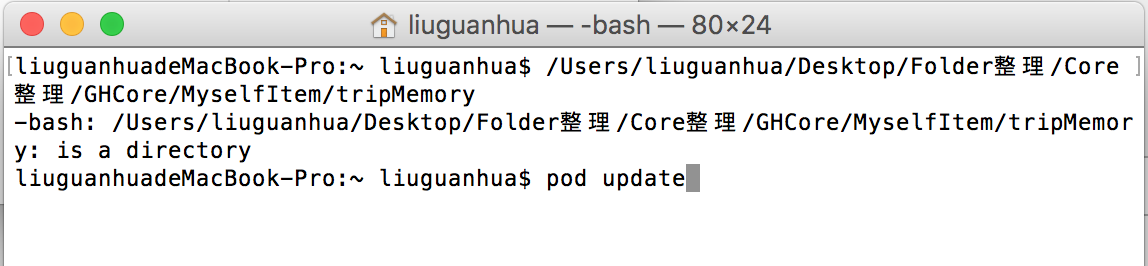
10.2 ERROR ITMS-90096
Solution: ios app upload ERROR ITMS-90096
10.3 Invalid Code Signing Entitlements
Solution:
Option B: The "Provisioning Profiles" under Target or Project --> Build Settings --> Code Signing Identity does not have the correct provisioning profile selected.
10.4 Error message: "No matching provisioning profile found: Your build settings specify a provisioning profile with the UUID “7738acfb-4d92-4525-adbe-fb66e9957009”, however, no such provisioning profile was found."
Solution:
Try this: Your build settings specify a provisioning profile with the UUID
If archiving is successful, you will see:
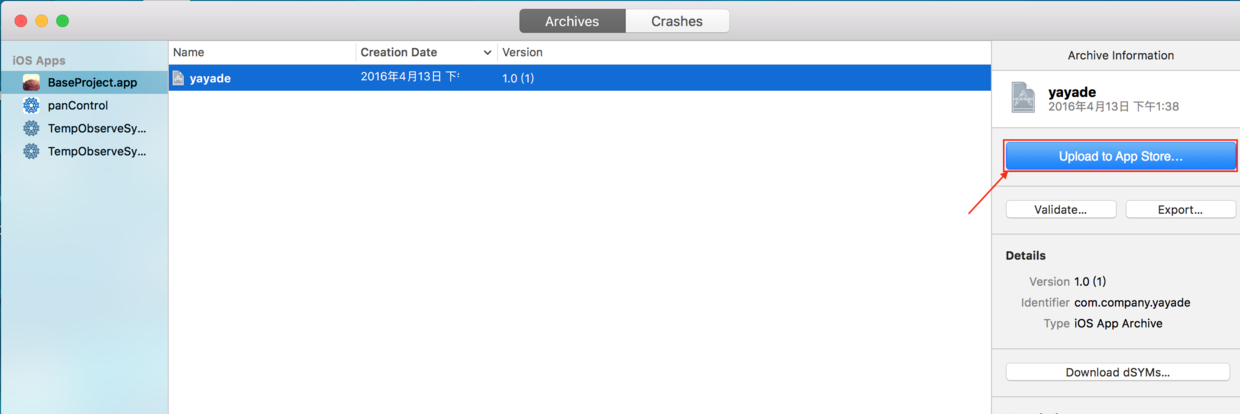
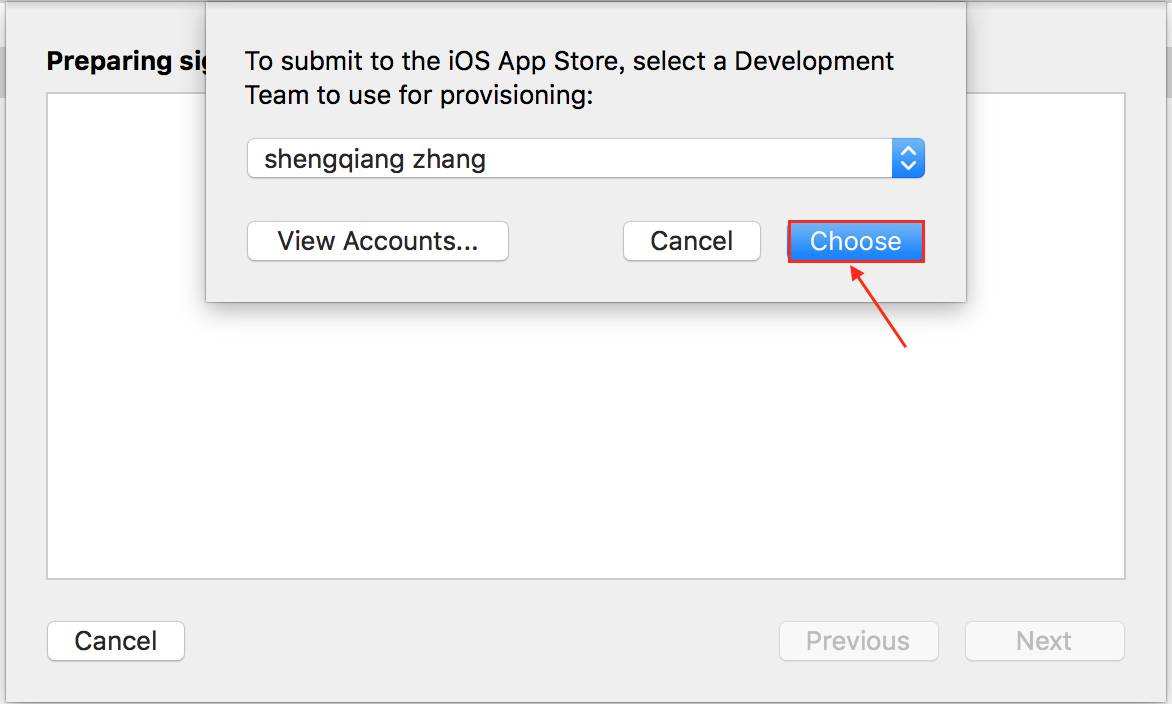
If "Upload to App Store" results in the following error:
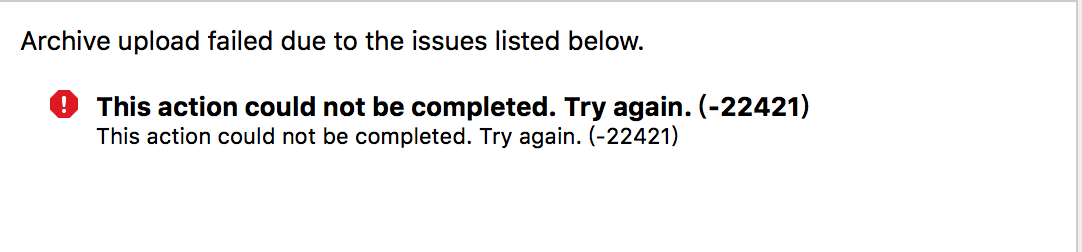
Solution: Re-upload to App Store.
- After successfully uploading to App Store, return to iTunes Connect.
Complete the specific app information.
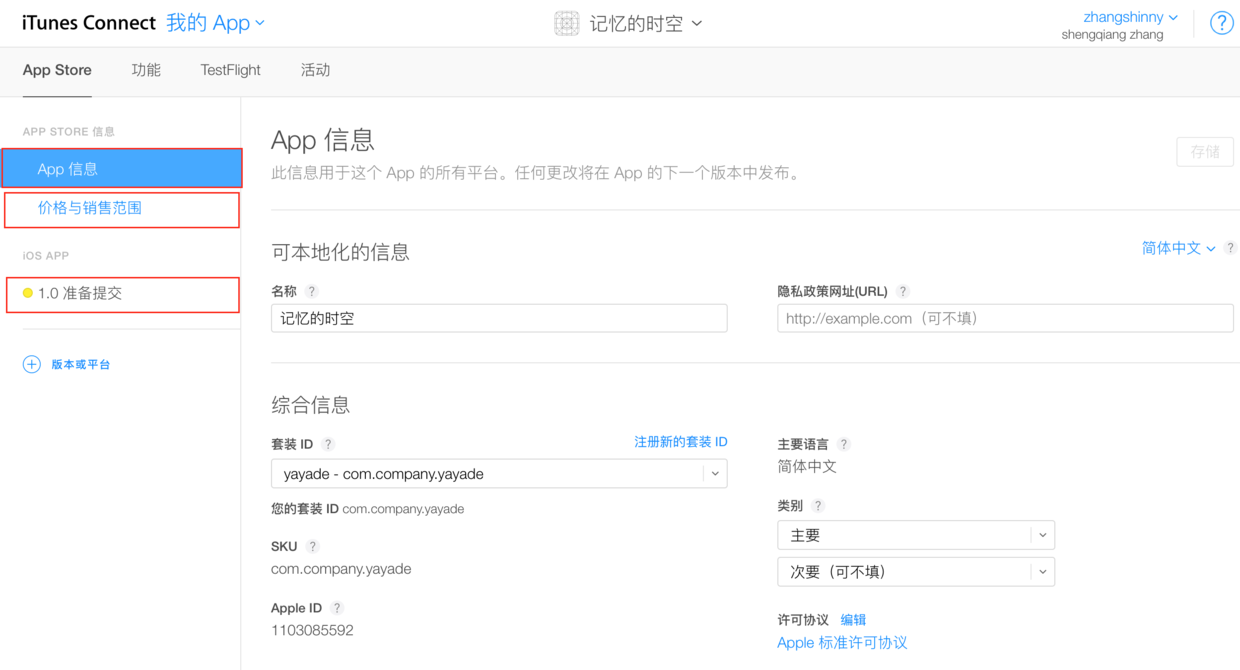
Note:
The build version will appear within half an hour after a successful upload to App Store.
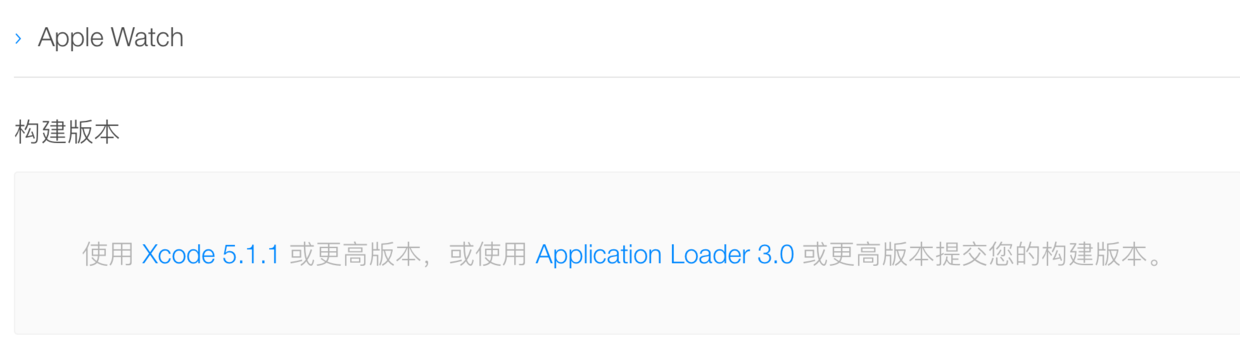
After half an hour, the following will appear (remember to refresh the page):
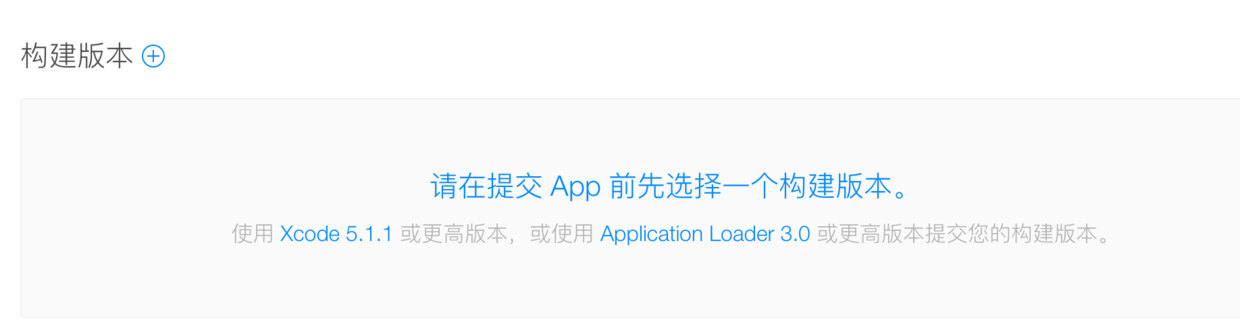
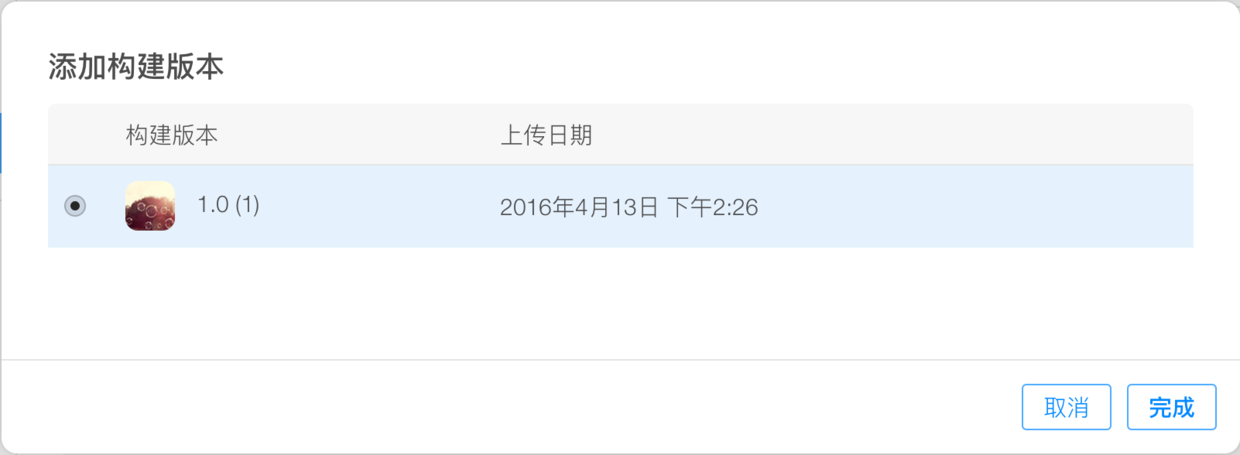
Once the above content appears under "Build", submit it for review directly.

If submission fails with the following error:
Solution: The support website field is empty. Fill it in.
Reprinted: Author: /做一只会思考的pig (Jianshu author)
Original link: http://www.jianshu.com/p/996672107eb1
