


Camera Settings Operation Guide
Feature Overview
Using the Camera Settings feature, you can customize and add or modify the camera effects you want to display.
Terminology
Fixed Camera: A camera that stays in a fixed position within the virtual scene and cannot be rotated or moved.
Motion Camera: A camera that sets 1 to 5 position points within the virtual scene. Using the playback function, the camera moves sequentially from position 1 to the last position. Adjust the movement speed and the position and angle of each point to achieve the best visual effect.
Point: Refers to an individual camera position within a motion camera.
How to Use
Accessing the Feature
Log in to the MR console via a web browser on your computer, select a scene to enter, and click Camera Settings.
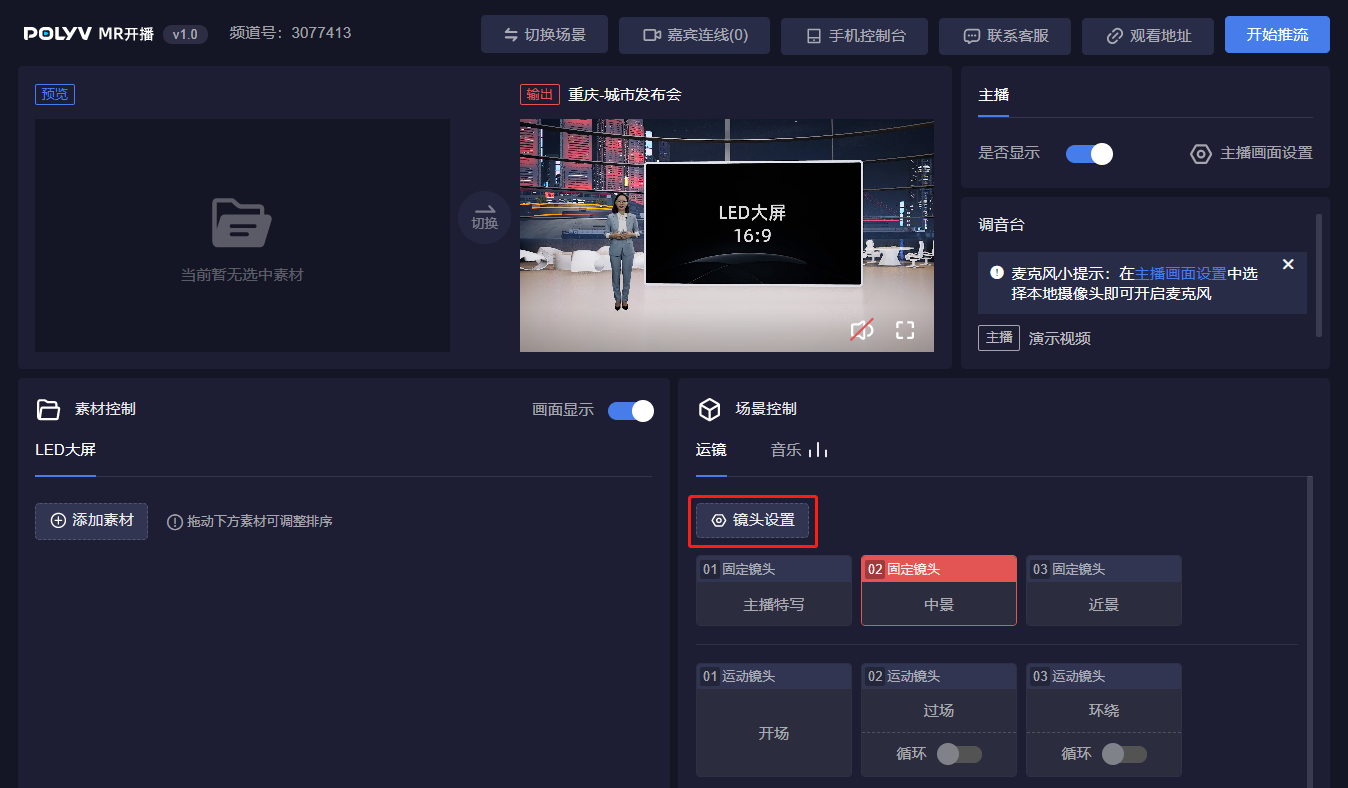
After entering Camera Settings, add or modify cameras as needed:
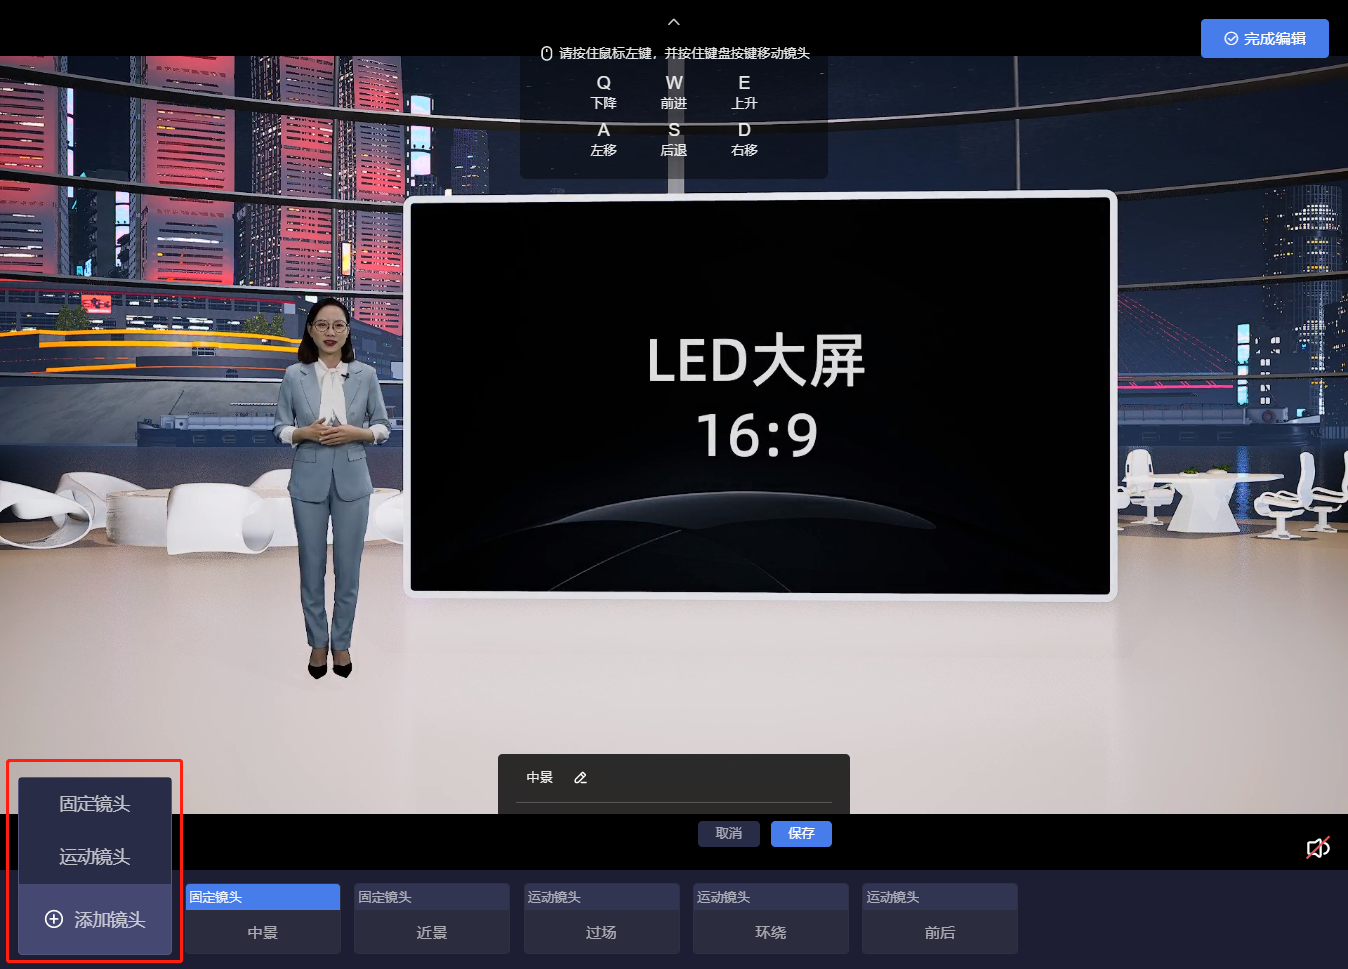
Add a Camera: Click Add Camera in the bottom-left corner and select Fixed Camera or Motion Camera.
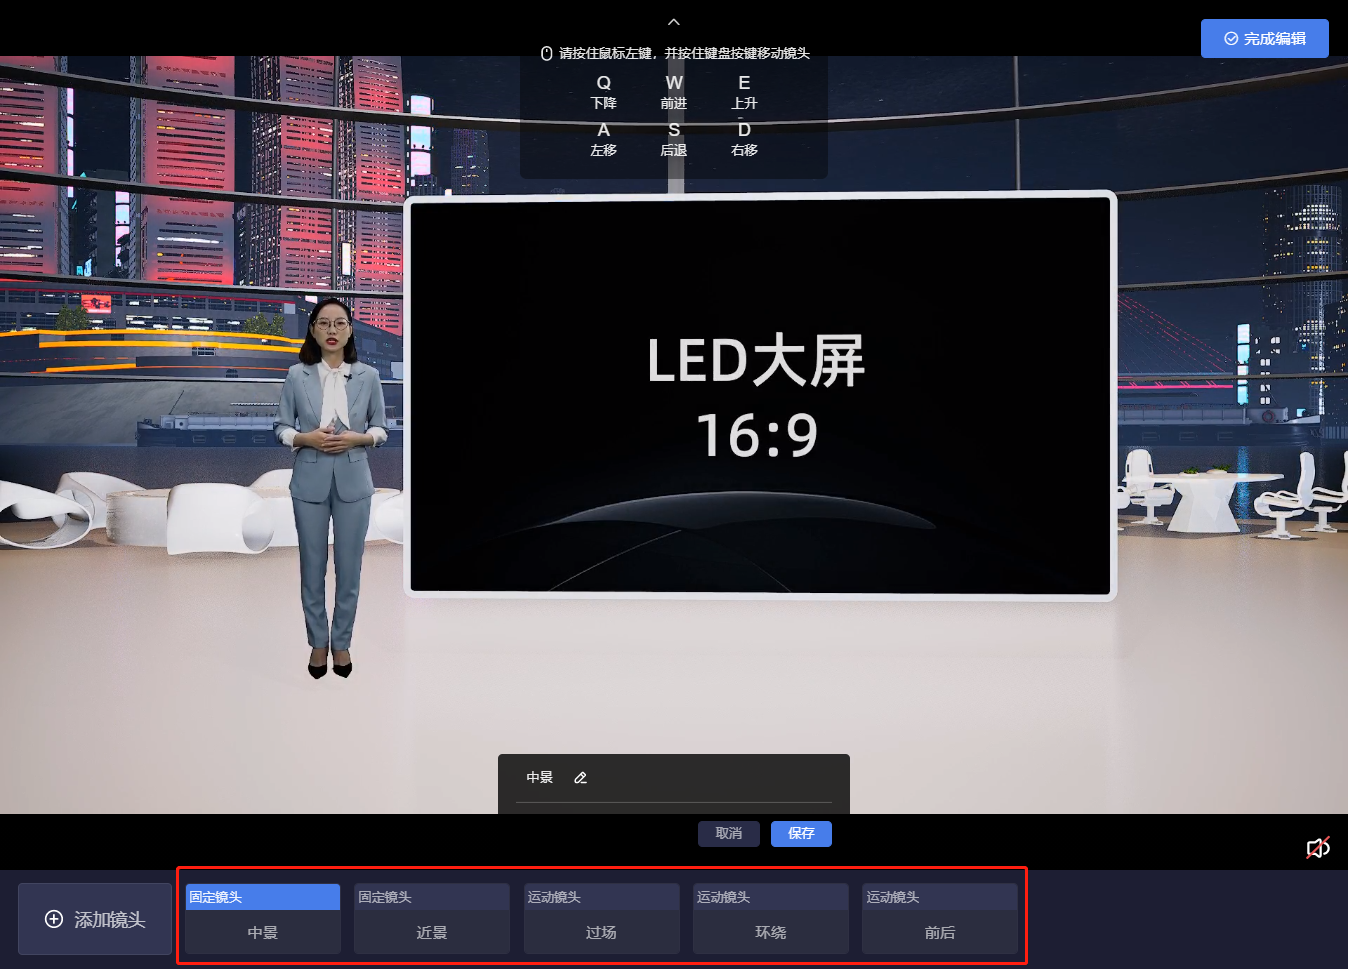
Modify a Camera: Click directly on the camera you want to modify below.
Setting a Fixed Camera
① Adjusting Camera Position
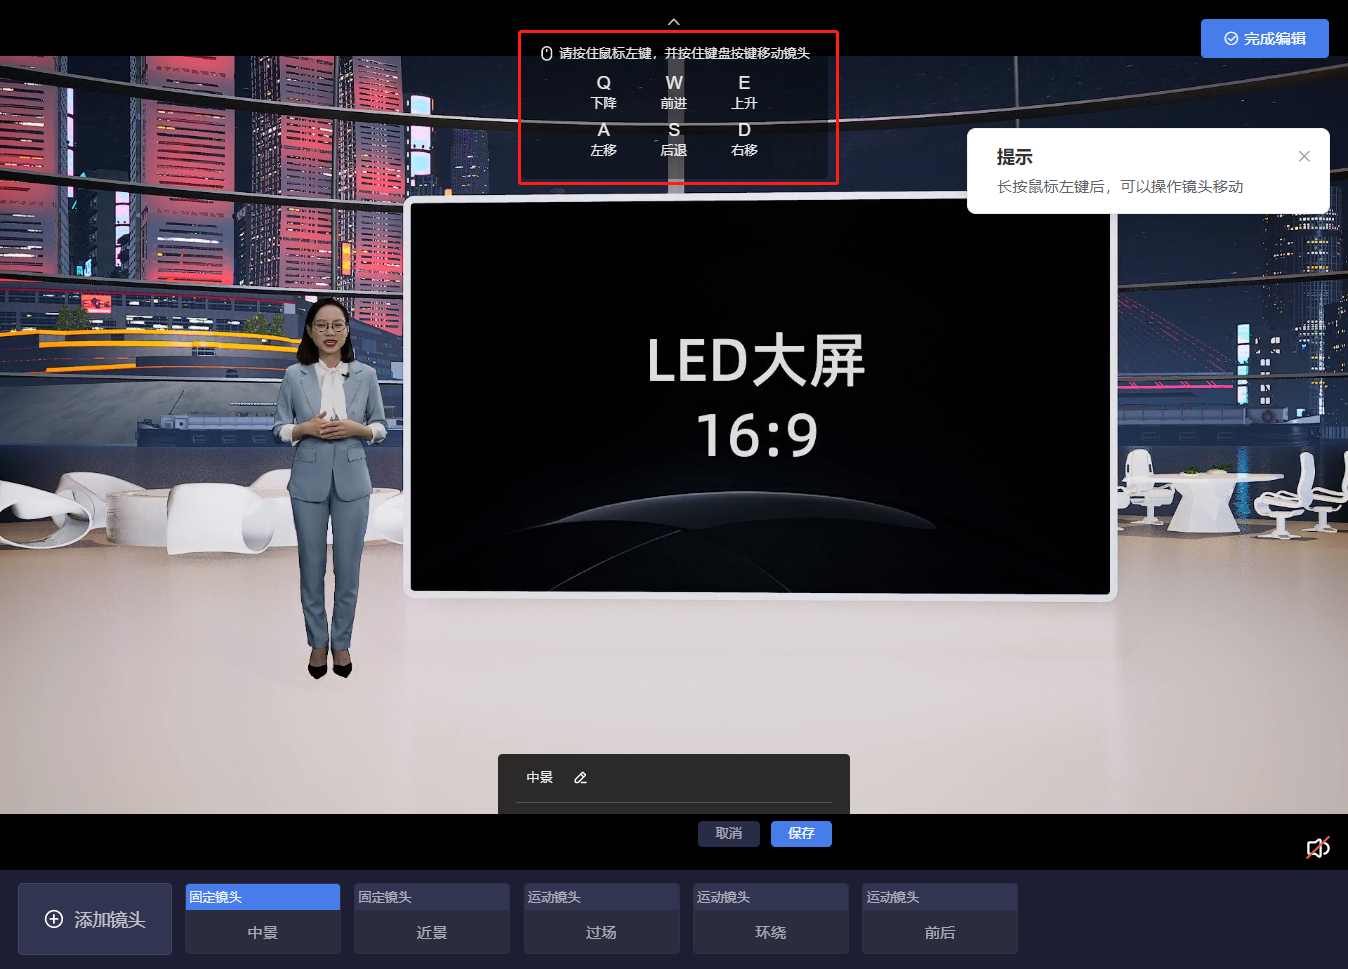
Hold down the left mouse button and use the keyboard keys WASDQE to adjust the camera position:
- W: Move camera forward
- S: Move camera backward
- A: Move camera left
- D: Move camera right
- Q: Move camera down
- E: Move camera up
Note: The scene has boundaries. The camera cannot move beyond the scene boundaries and will stop moving if it "hits a wall."
② Adjusting Camera Angle
Hold down the left mouse button and drag to freely rotate the angle 360 degrees.
③ Saving the Camera
After adjusting the camera, click the Save button below to save. Do not switch to another camera or click Finish Editing before saving, otherwise the camera data will be lost and you will need to redesign it!
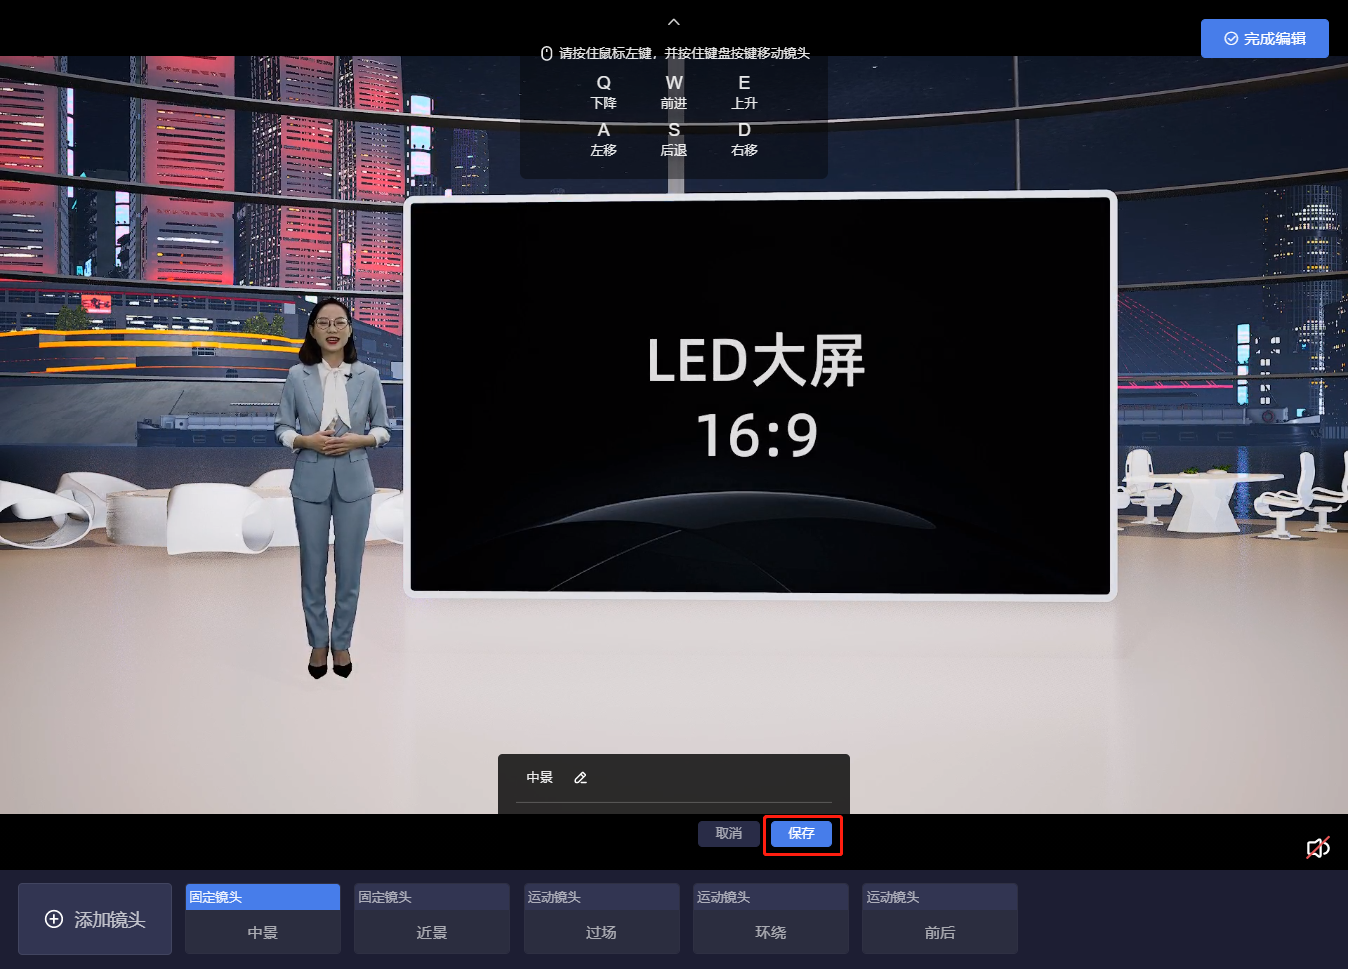
If you need to modify the camera name, you can do so here before saving.
Setting a Motion Camera
① Setting Points
A motion camera can have up to 5 points (each camera within a motion camera is called a "point"). Click the + button to add a new point, click the - button on a point to delete it, and click on a point to select it for configuration.
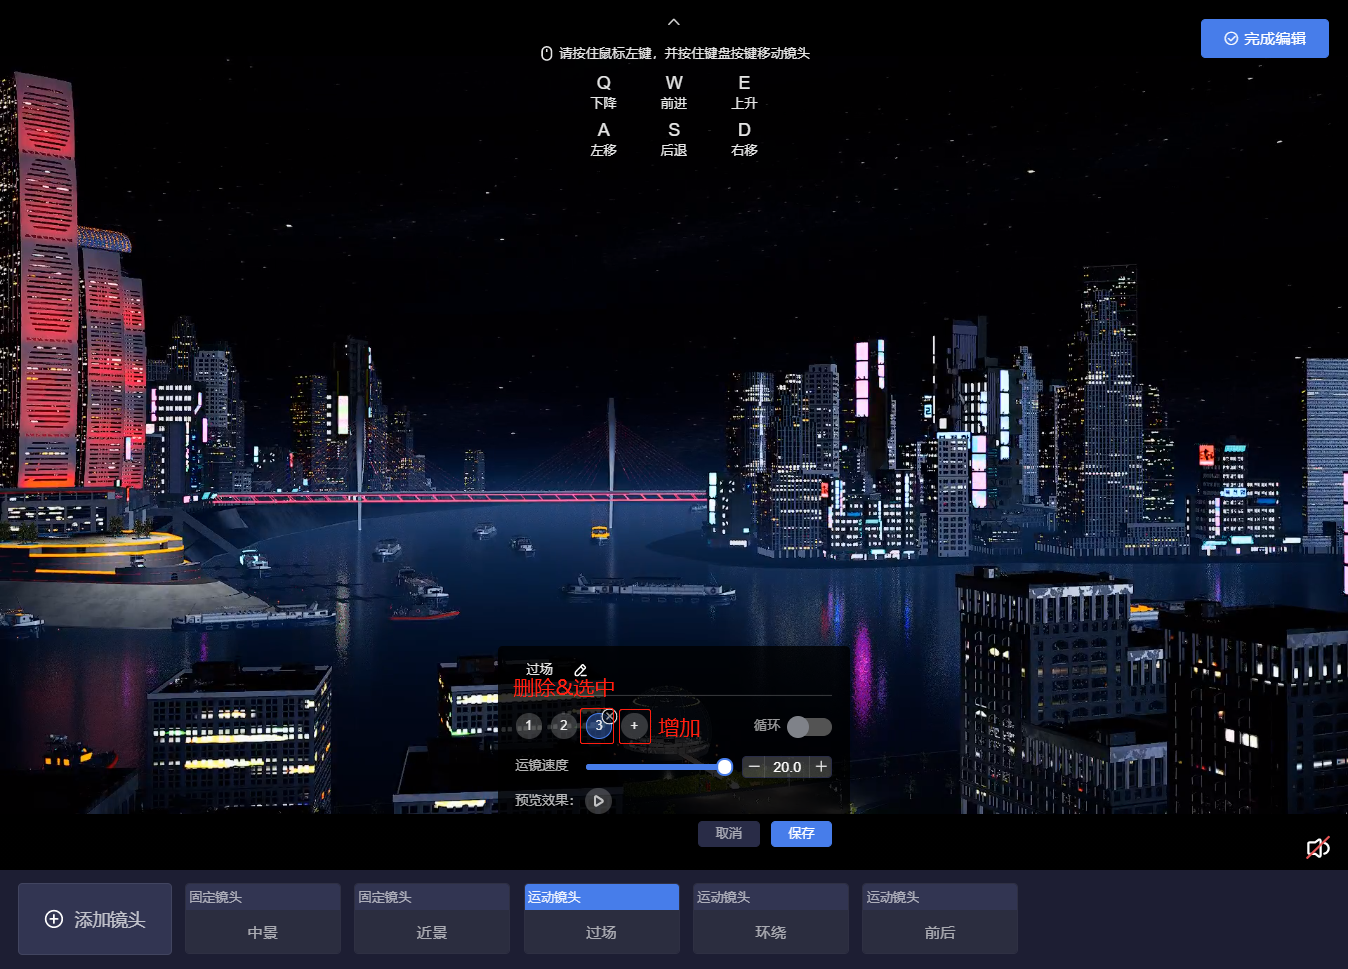
② Adjusting Point Position & Angle
The operation is the same as setting a fixed camera. Refer to the Setting a Fixed Camera section above.
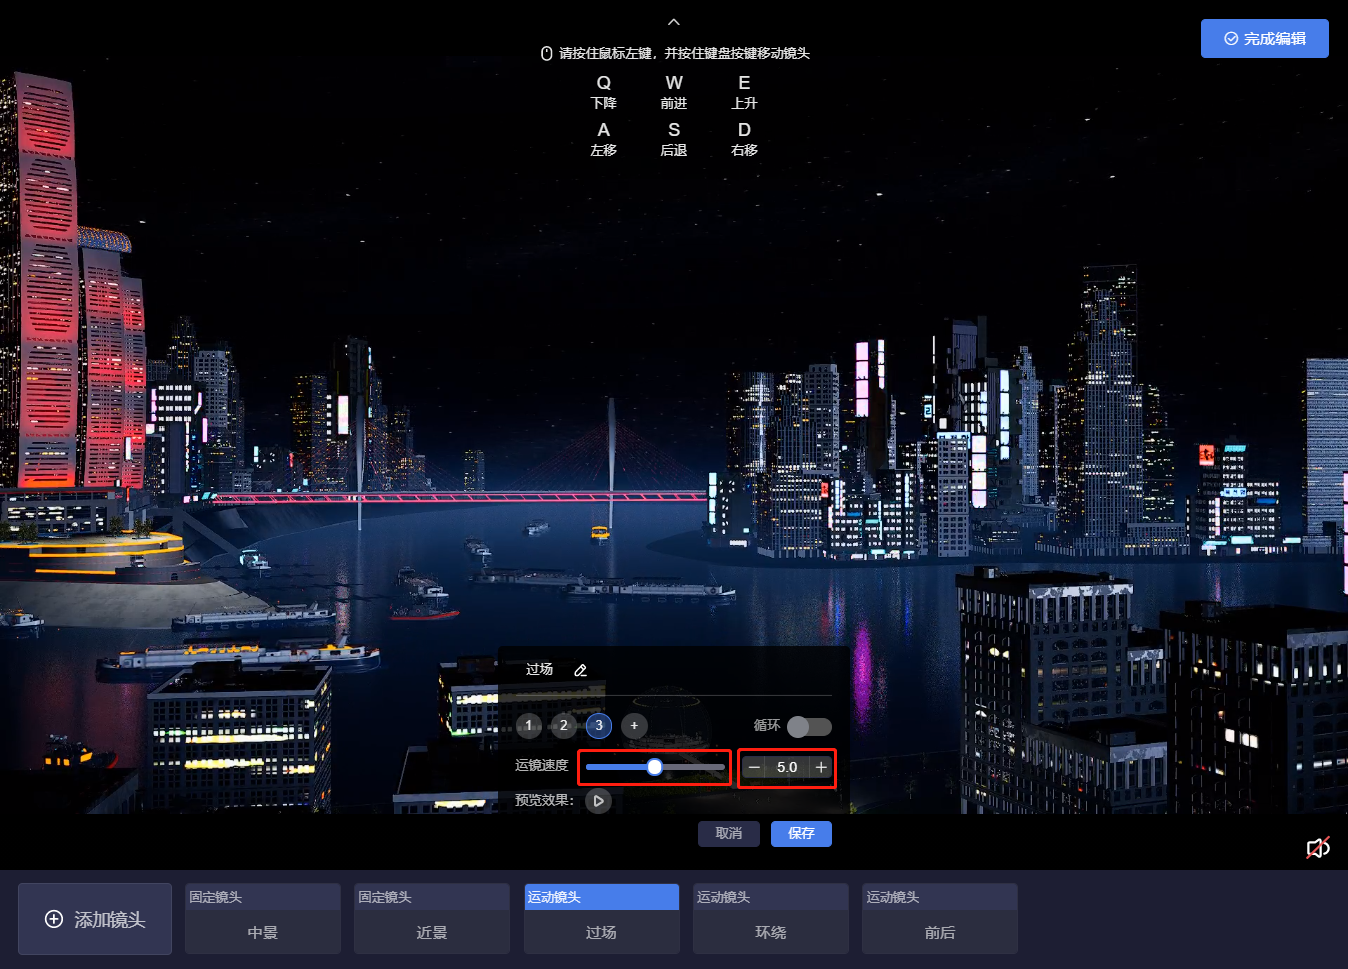
③ Adjusting Camera Speed
Drag the speed slider to adjust the camera's movement speed. The minimum is 0.1 m/s and the maximum is 10 m/s. You can also manually enter a speed to exceed the upper limit.
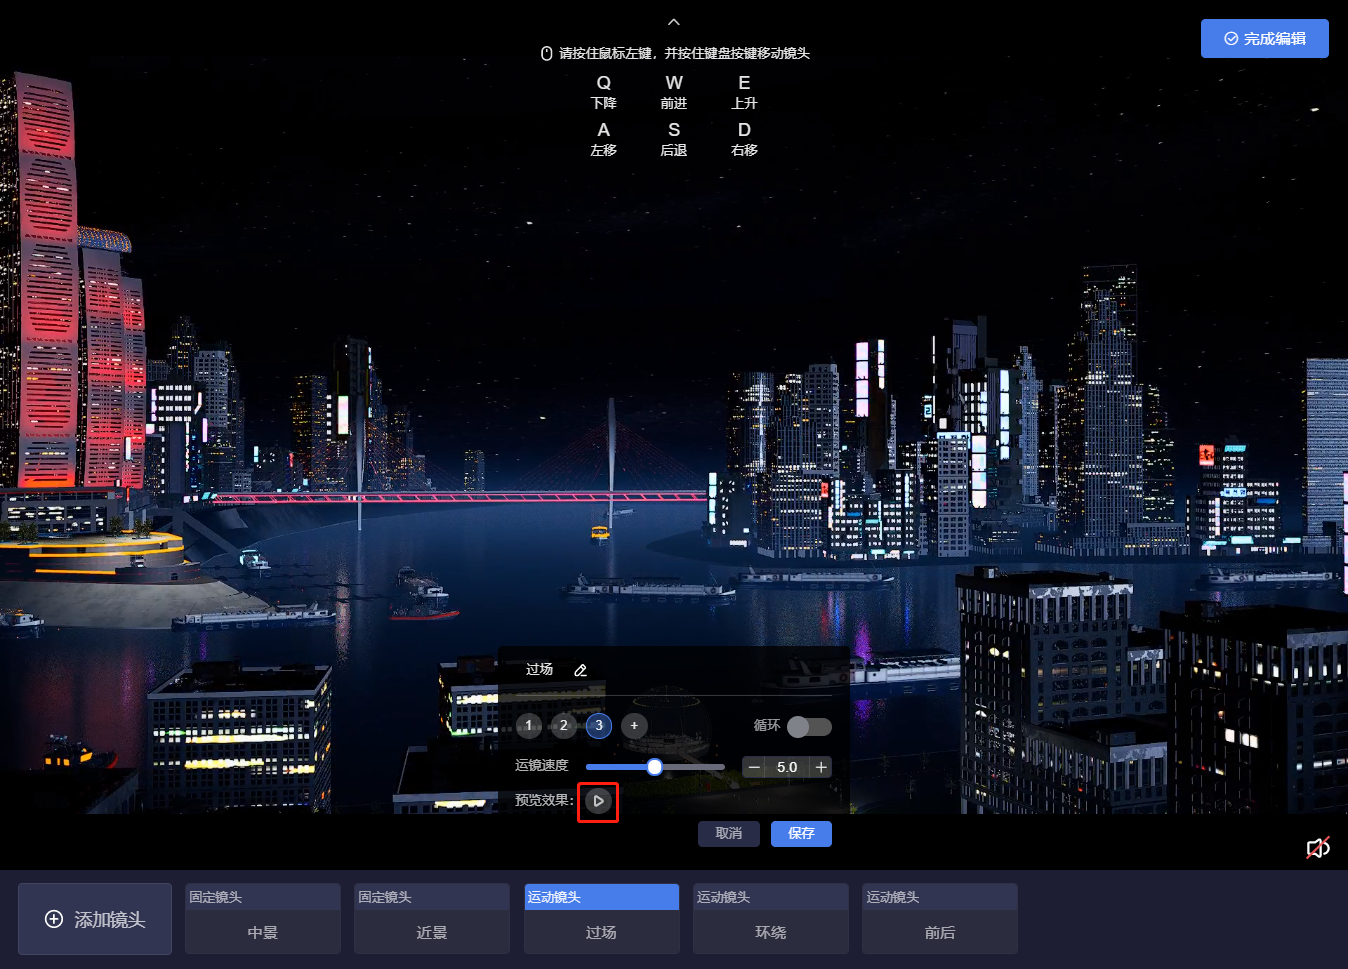
④ Previewing Camera Movement
Click the play button to preview the camera movement effect. Click it again to stop the preview and return to the starting point.
⑤ Camera Movement Trajectory & Tracking
The movement trajectory is automatically calculated based on the point positions and shooting angles:
- If the camera moves from the left side of the scene to the right side, with the angle always facing the center of the stage, the trajectory will automatically be an arc.
- If the camera moves from the front to the back, with the angle always facing the center of the stage, the trajectory will automatically be a straight line.
Cameras set through Camera Settings will always ensure the host automatically faces the camera to avoid capturing the host's side or back, preventing awkward shots.
⑥ Saving the Camera
After adjusting the camera, click the Save button below to save. Do not switch to another camera or click Finish Editing before saving, otherwise the camera data will be lost and you will need to redesign it!
If you need to modify the camera name, you can do so here before saving.
Other
Configured cameras are saved with the channel and do not need to be reset the next time you enter.
