


How to Zoom In and Restore a Shared Desktop Screen During a Live Stream
When sharing your desktop using a live streaming client, you can use the "Desktop Source Follows Mouse Zoom" feature to magnify the area you are currently explaining, helping viewers see menu options, tool icons, or parameter text clearly. After the explanation, use a shortcut key to restore the screen and continue demonstrating the full workflow.
1. Applicable Scenarios
- Software Operation Tutorials: When expanding menus, selecting tools, or switching functions, zoom in on the corresponding area to help viewers see menu names and options.
- 3D Software Training: When demonstrating modeling, material editing, or render settings, magnify the toolbar and parameter panel so viewers can easily identify parameter names and values.
- Other Fine Operation Demonstrations: When explaining spreadsheet formulas, design software layers, or complex settings, zoom in on the current operation area to facilitate viewer learning.
2. Effect Demonstration
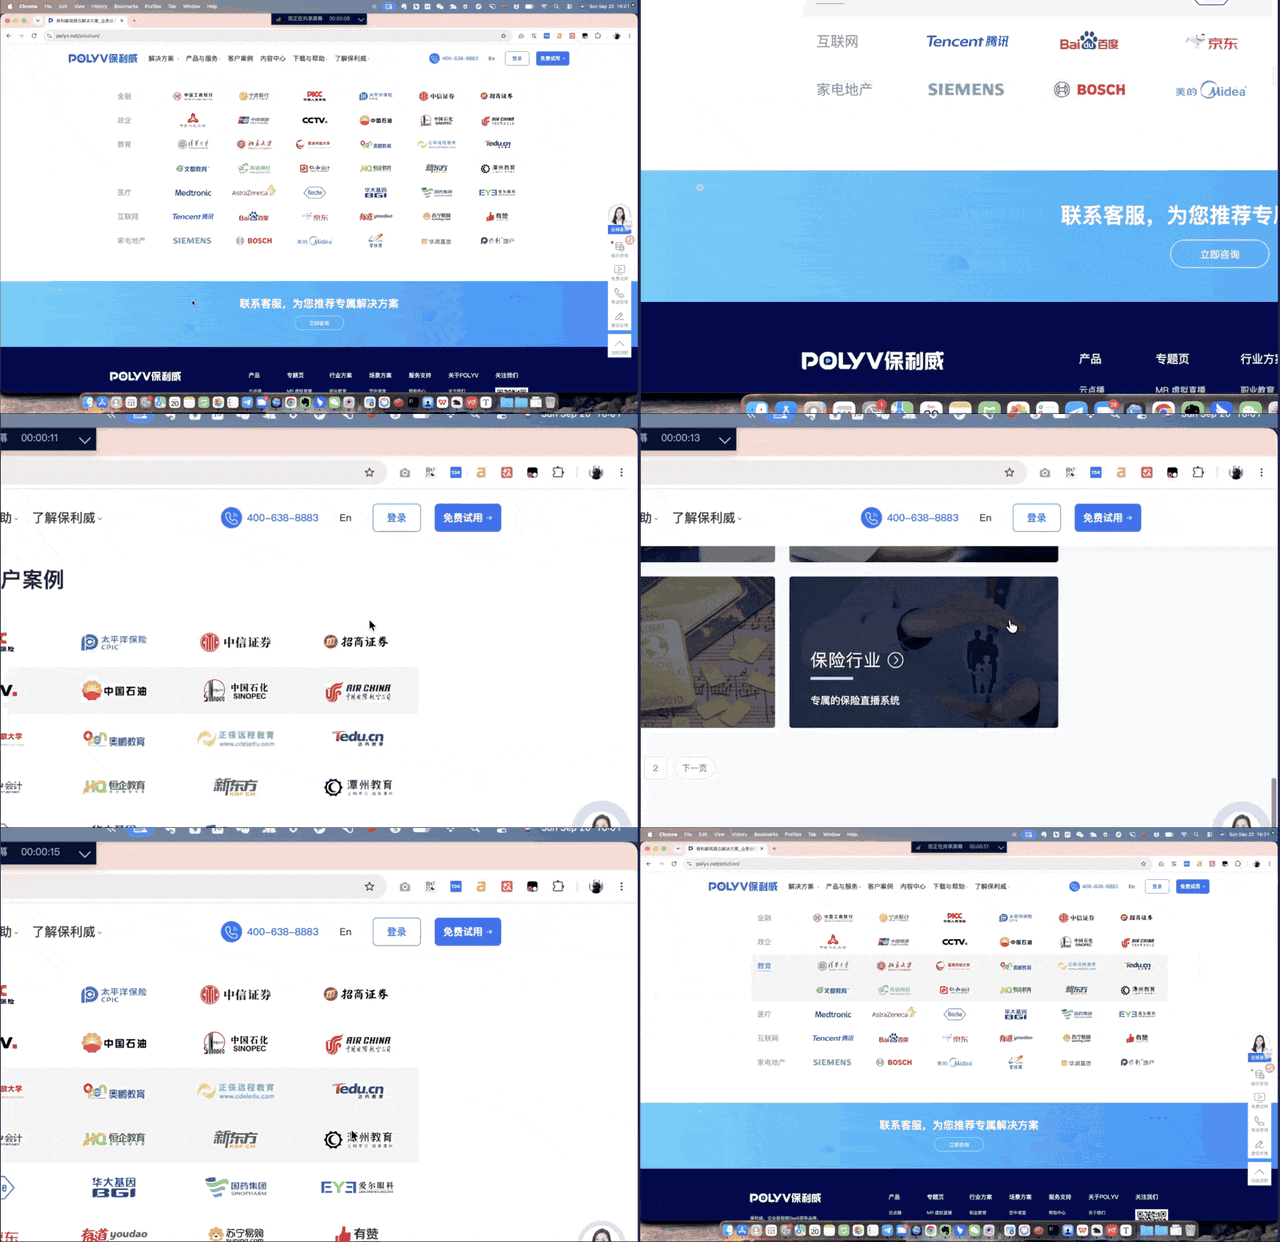
The following animation demonstrates the effect of zooming in and restoring a shared desktop screen. The example uses a webpage as the display content, but during software training, it can also be used to highlight menus, toolbars, and other operation areas.
3. Configure Shortcut Keys
Open [System Settings] in the live streaming client, go to [Shortcut Keys], and find the following configuration items:
| Configuration Item | Purpose |
|---|---|
| Start Desktop Source Follows Mouse Zoom | Enables the zoom effect that follows the mouse on the shared desktop screen |
| Stop Desktop Source Follows Mouse Zoom | Stops the zoom and restores the shared desktop screen |
Click the corresponding shortcut key input box and directly press the key combination you want to set. It is recommended to set easy-to-remember combinations for starting and stopping, avoiding conflicts with system or teaching software shortcuts.
If you need to use the shortcut keys while operating other windows, set the [Response Mode] to [Enabled in Any State].
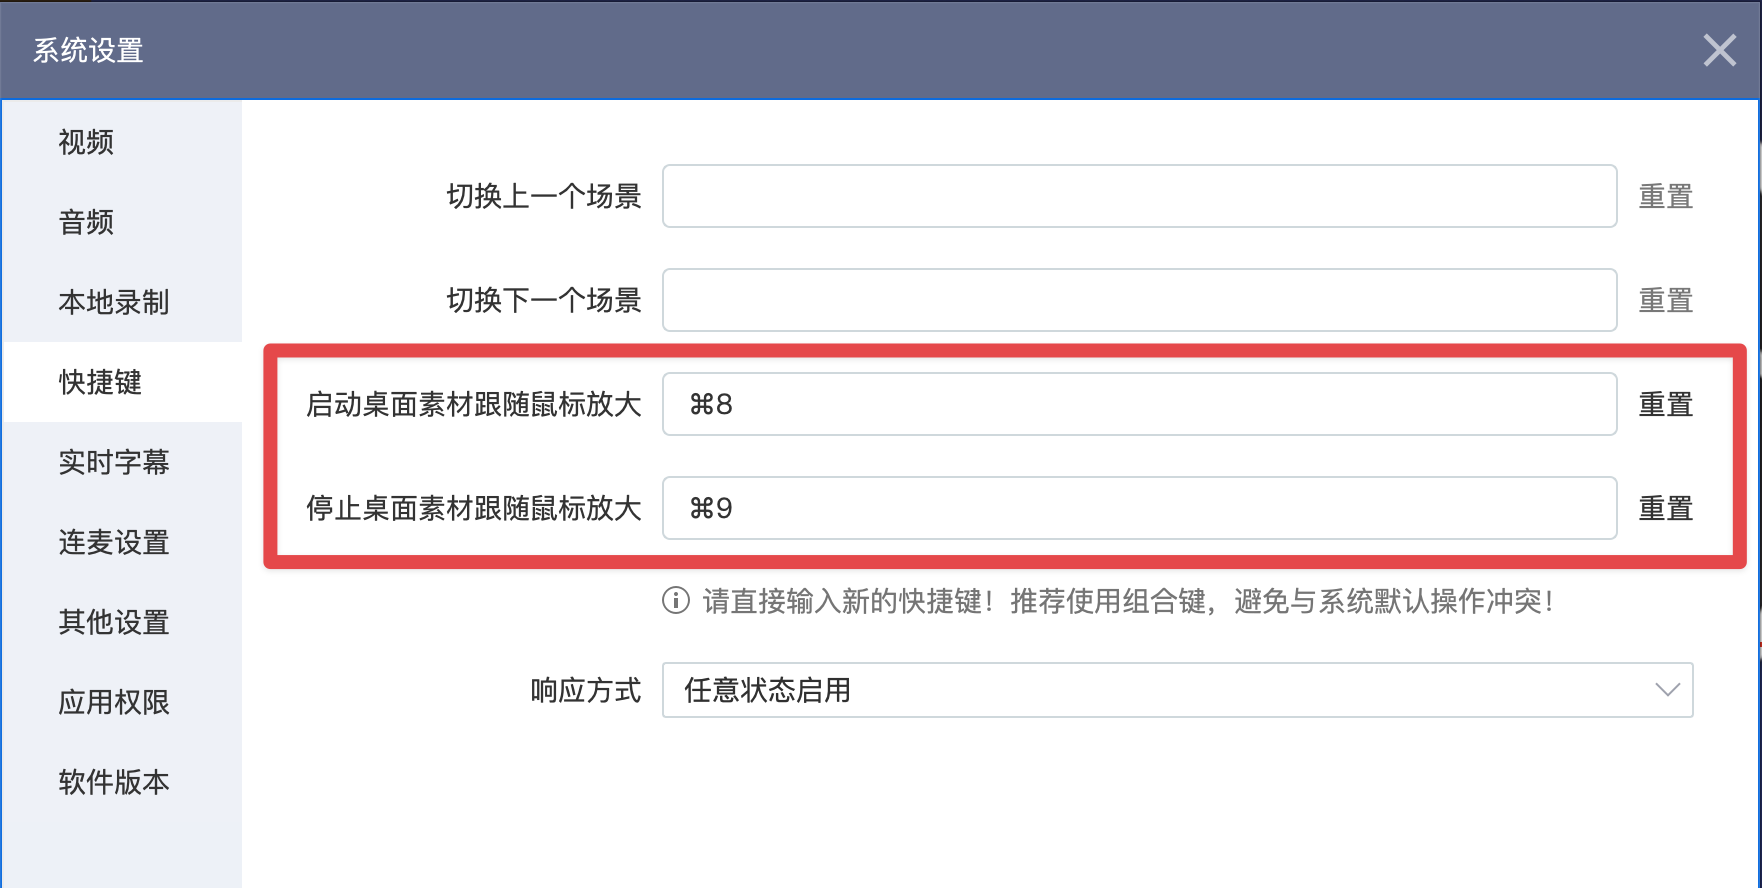
The image uses Command + 8 to start zoom and Command + 9 to stop zoom as an example configuration. Please refer to the actual shortcut key settings in your client.
4. Zoom In on the Currently Shared Desktop Screen
- Share the desktop you want to demonstrate in the live streaming client.
- Move the mouse to the area you need to explain in detail, such as menu options, toolbars, or parameter panels.
- Press the configured [Start Desktop Source Follows Mouse Zoom] shortcut key to enable the zoom effect.
Once enabled, you can move the mouse to adjust the focus area. For example, during 3D software training, if you need to explain a specific material parameter, move the mouse to the corresponding parameter panel so viewers can see the option name and setting value.
5. Restore the Desktop Share Screen
After completing the detailed explanation, press the configured [Stop Desktop Source Follows Mouse Zoom] shortcut key to exit the zoom state and restore the shared desktop screen.
For example, after explaining the parameter settings in 3D software, you can restore the screen and continue demonstrating the overall model effect.
It is recommended to test the zoom and restore shortcut keys before the live stream to ensure smooth switching and check for conflicts with commonly used shortcuts in the teaching software.
