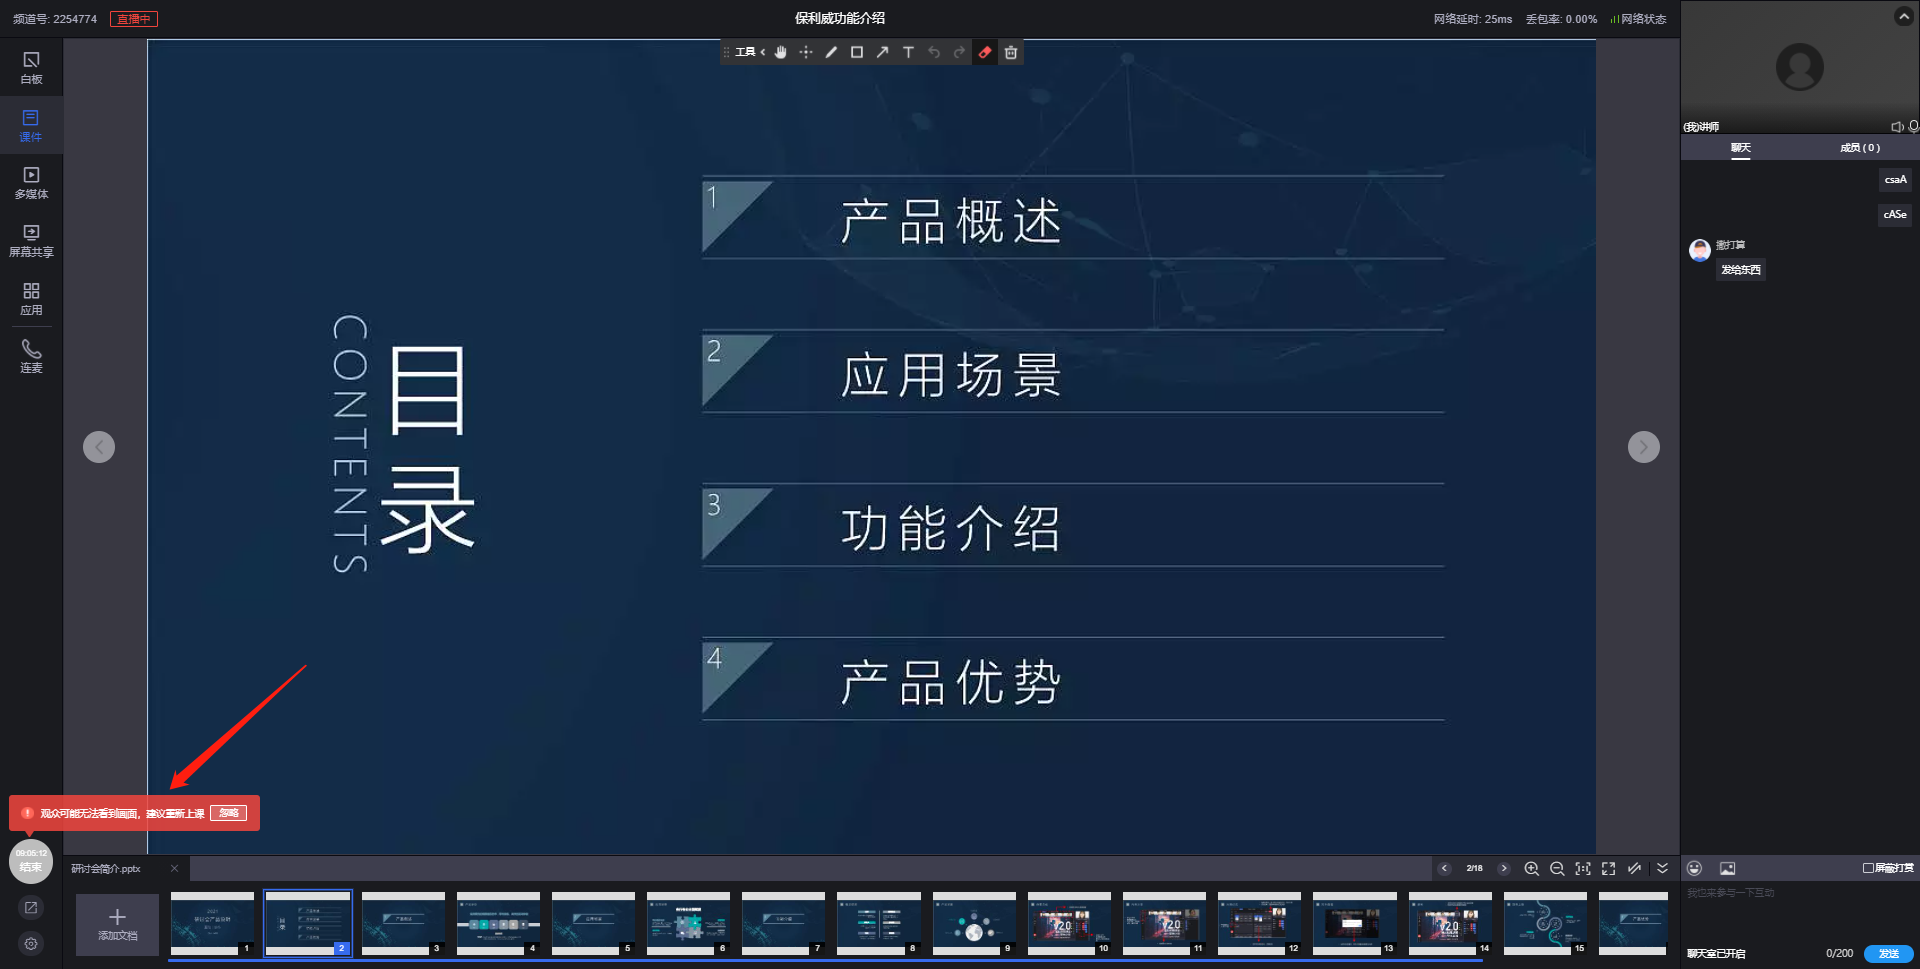
Web-Based Live Streaming Operations
I. Feature Overview
Feature Info |
Description |
|---|---|
| Feature Name | Web-Based Live Streaming |
| Feature Description | Allows the host/teaching assistant/guest to start a live stream via a web page |
| Purpose | Enables different roles to start live streaming without installing a client, improving streaming efficiency |
| Use Case | Example: A host can quickly start a live stream via a web link, suitable for corporate presentations and online teaching, enhancing user experience |
| Feature List | Login, Guest Functions, Shared Content, Interactive Applications, Member Management |
II. Pre-Streaming Preparation
1. Hardware Preparation
- Recommended Computer Hardware Configuration
Configuration Name |
Recommended Configuration |
|---|---|
| System | Windows 10 or above |
| Graphics Card | Dedicated 4GB graphics card or above |
| CPU | i5 or above |
| Memory | 8GB or above |
- Optional Hardware
- Recording: External camera, camera + capture card
- Audio Input: Lavalier microphone, headset microphone, professional microphone
- Audio Output: Headphones, external speakers
- Studio: Green, red, blue screen
- Network: Ethernet cable, 4G network aggregator
2. Network Environment
- Network affects streaming stability; a wired network is recommended.
- If using Wi-Fi or a mobile network, ensure stable signal strength at the streaming location.
- Streaming stability is affected by upload bandwidth. Minimum upload bandwidth is 2Mbps; 4Mbps or higher is recommended.
- You can test your bandwidth at this website (Bandwidth test address: http://www.speedtest.cn). Open the page, select a nearby node (default is fine if already local). Click "Start Test" and wait for the results. Check the "Upload" bandwidth after the test. If upload bandwidth is less than 4Mbps, please switch to a more stable network with higher bandwidth to avoid affecting the live stream.
3. Browser Preparation (Applicable for Web Streaming)
It is recommended to use the latest version of Google Chrome or Chromium-based browsers such as QQ Browser, 360 Speed Browser, etc. Safari, Firefox, and IE are currently not supported for initiating live streams.
4. Prepare Live Channel ID
A channel ID is required for streaming; one channel ID corresponds to one live room. Log in to the Polyv backend, click "Create New Live Stream" and confirm. Open the "Go Live" option to obtain the channel ID and password.
5. Set Live Room Information
In the management backend, you can set the live room name, start time, etc. If you want the content to be accessible only to eligible students, you can set viewing conditions, requiring students to pass verification before entering the live room.
6. Add Course Materials
Before streaming, prepare your course materials. After entering the web streaming page, click "Courseware" in the sidebar menu, add your documents, wait for transcoding to complete, and click "Apply". Supported local document formats include PPT, Word, Excel, PDF, etc.
III. Web Streaming Operations
1. Login
- After the admin creates a live room, a channel ID and password can be provided to the instructor. The host can click Channel Login to enter the live interface with instructor permissions.
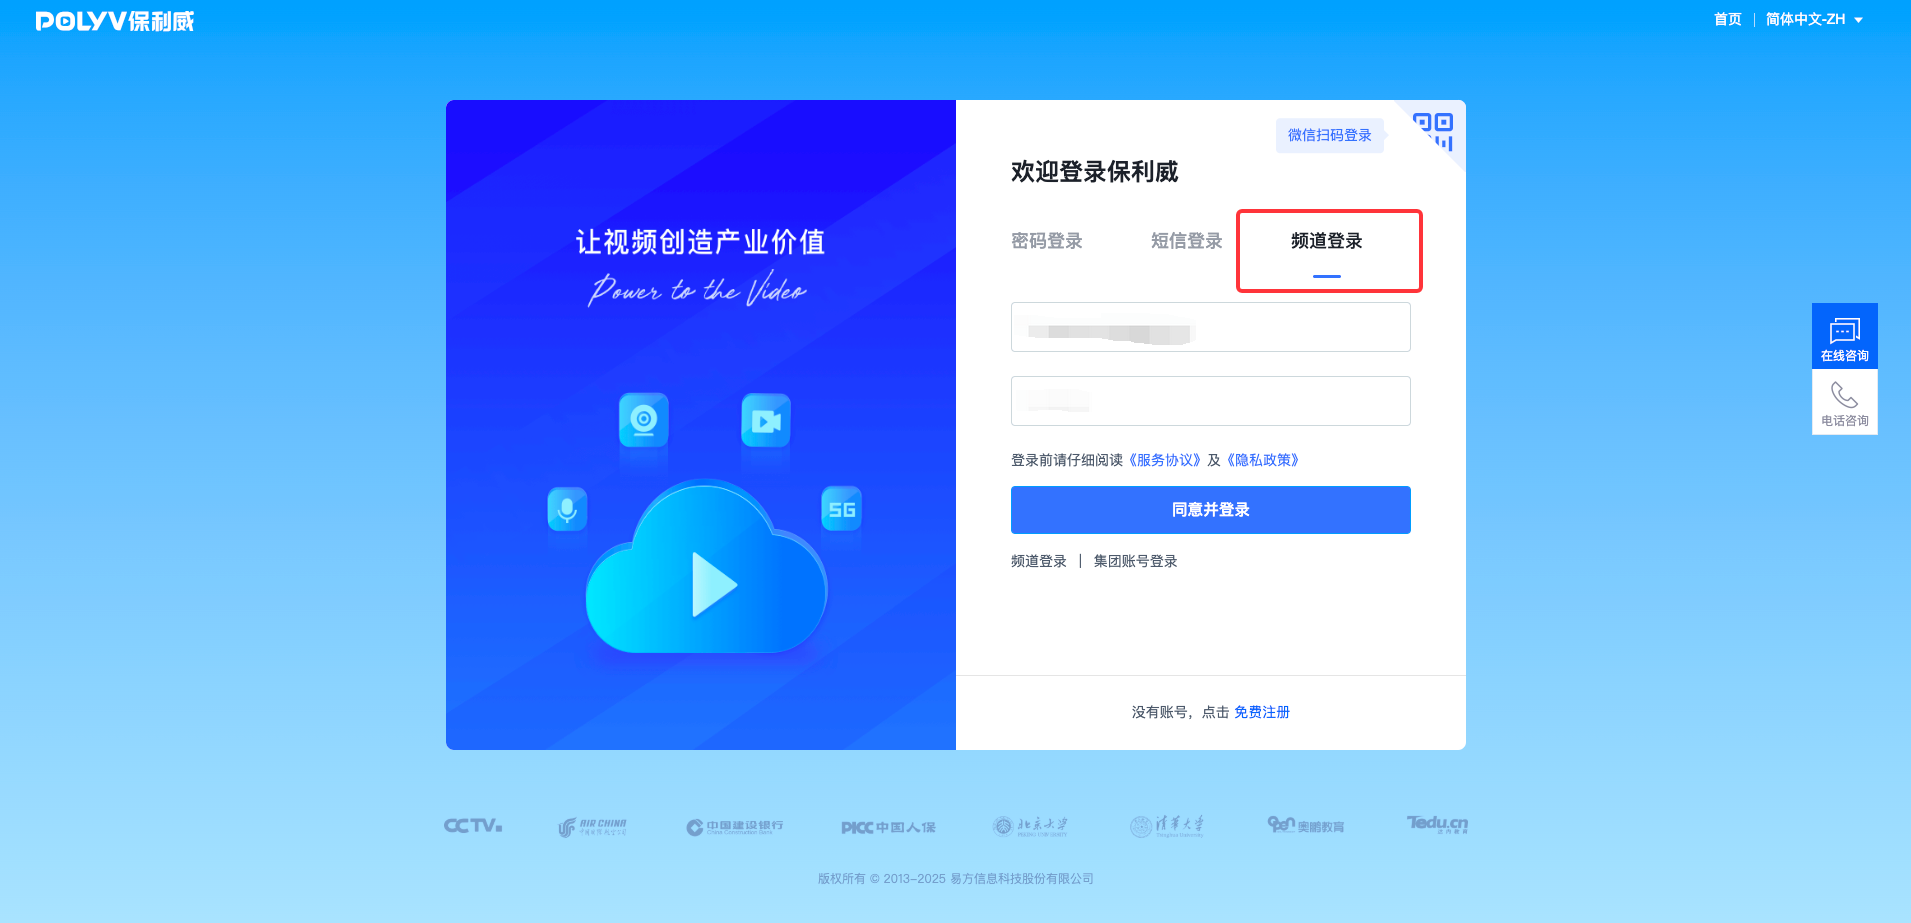
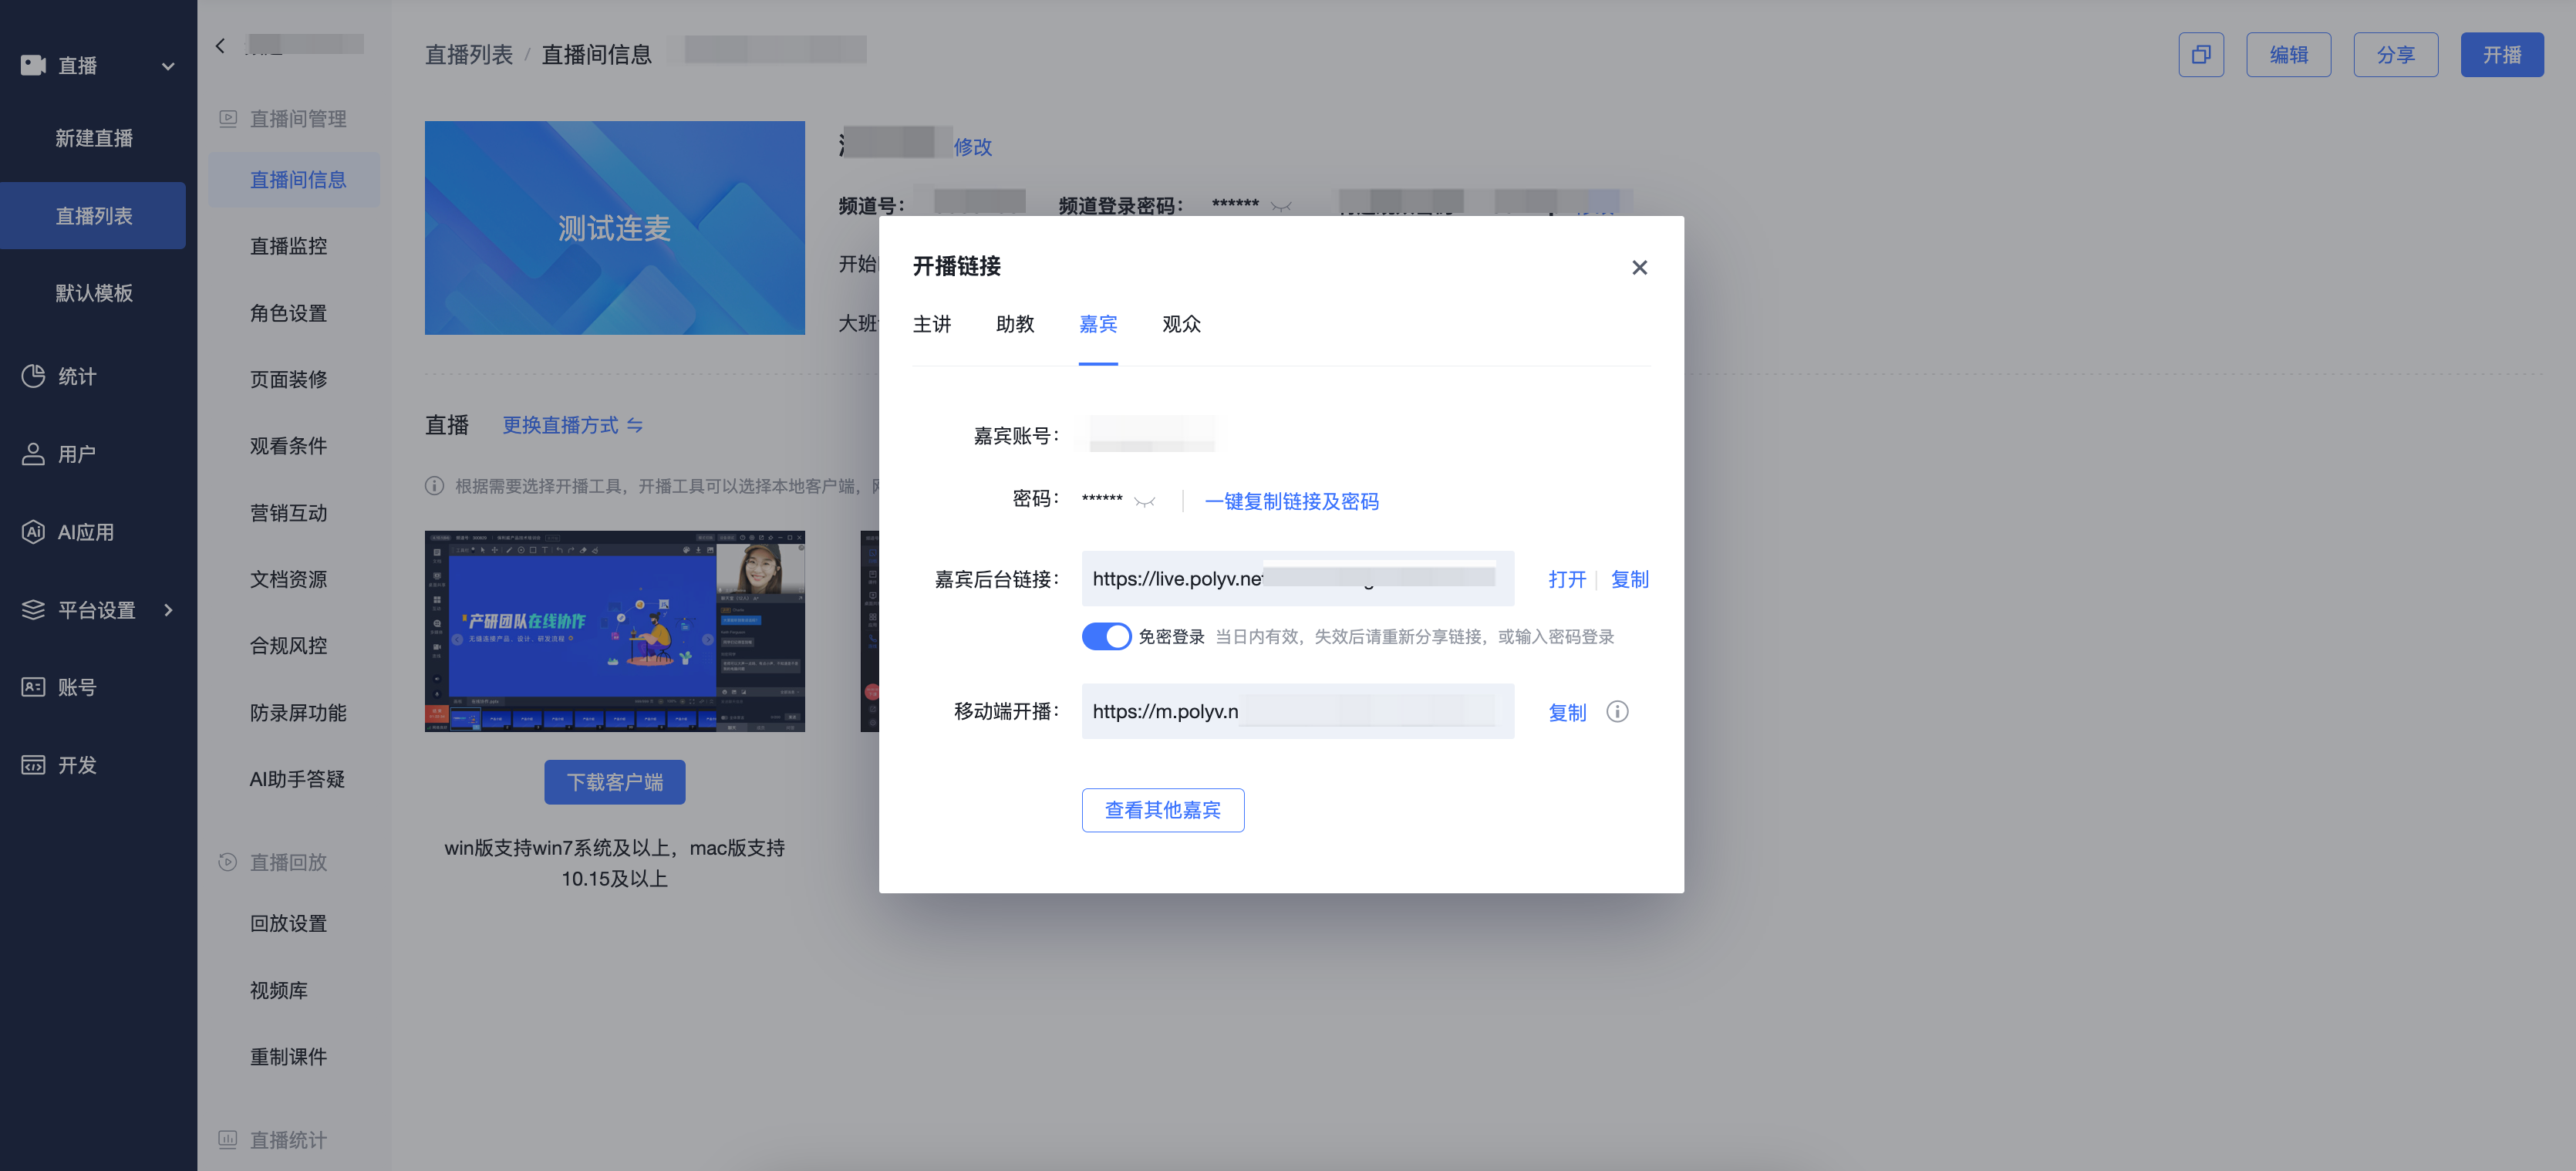
- After logging in to the live stream list/details page, click "Go Live" to enter the live room. The host, teaching assistant, and guest can all log in without a password.
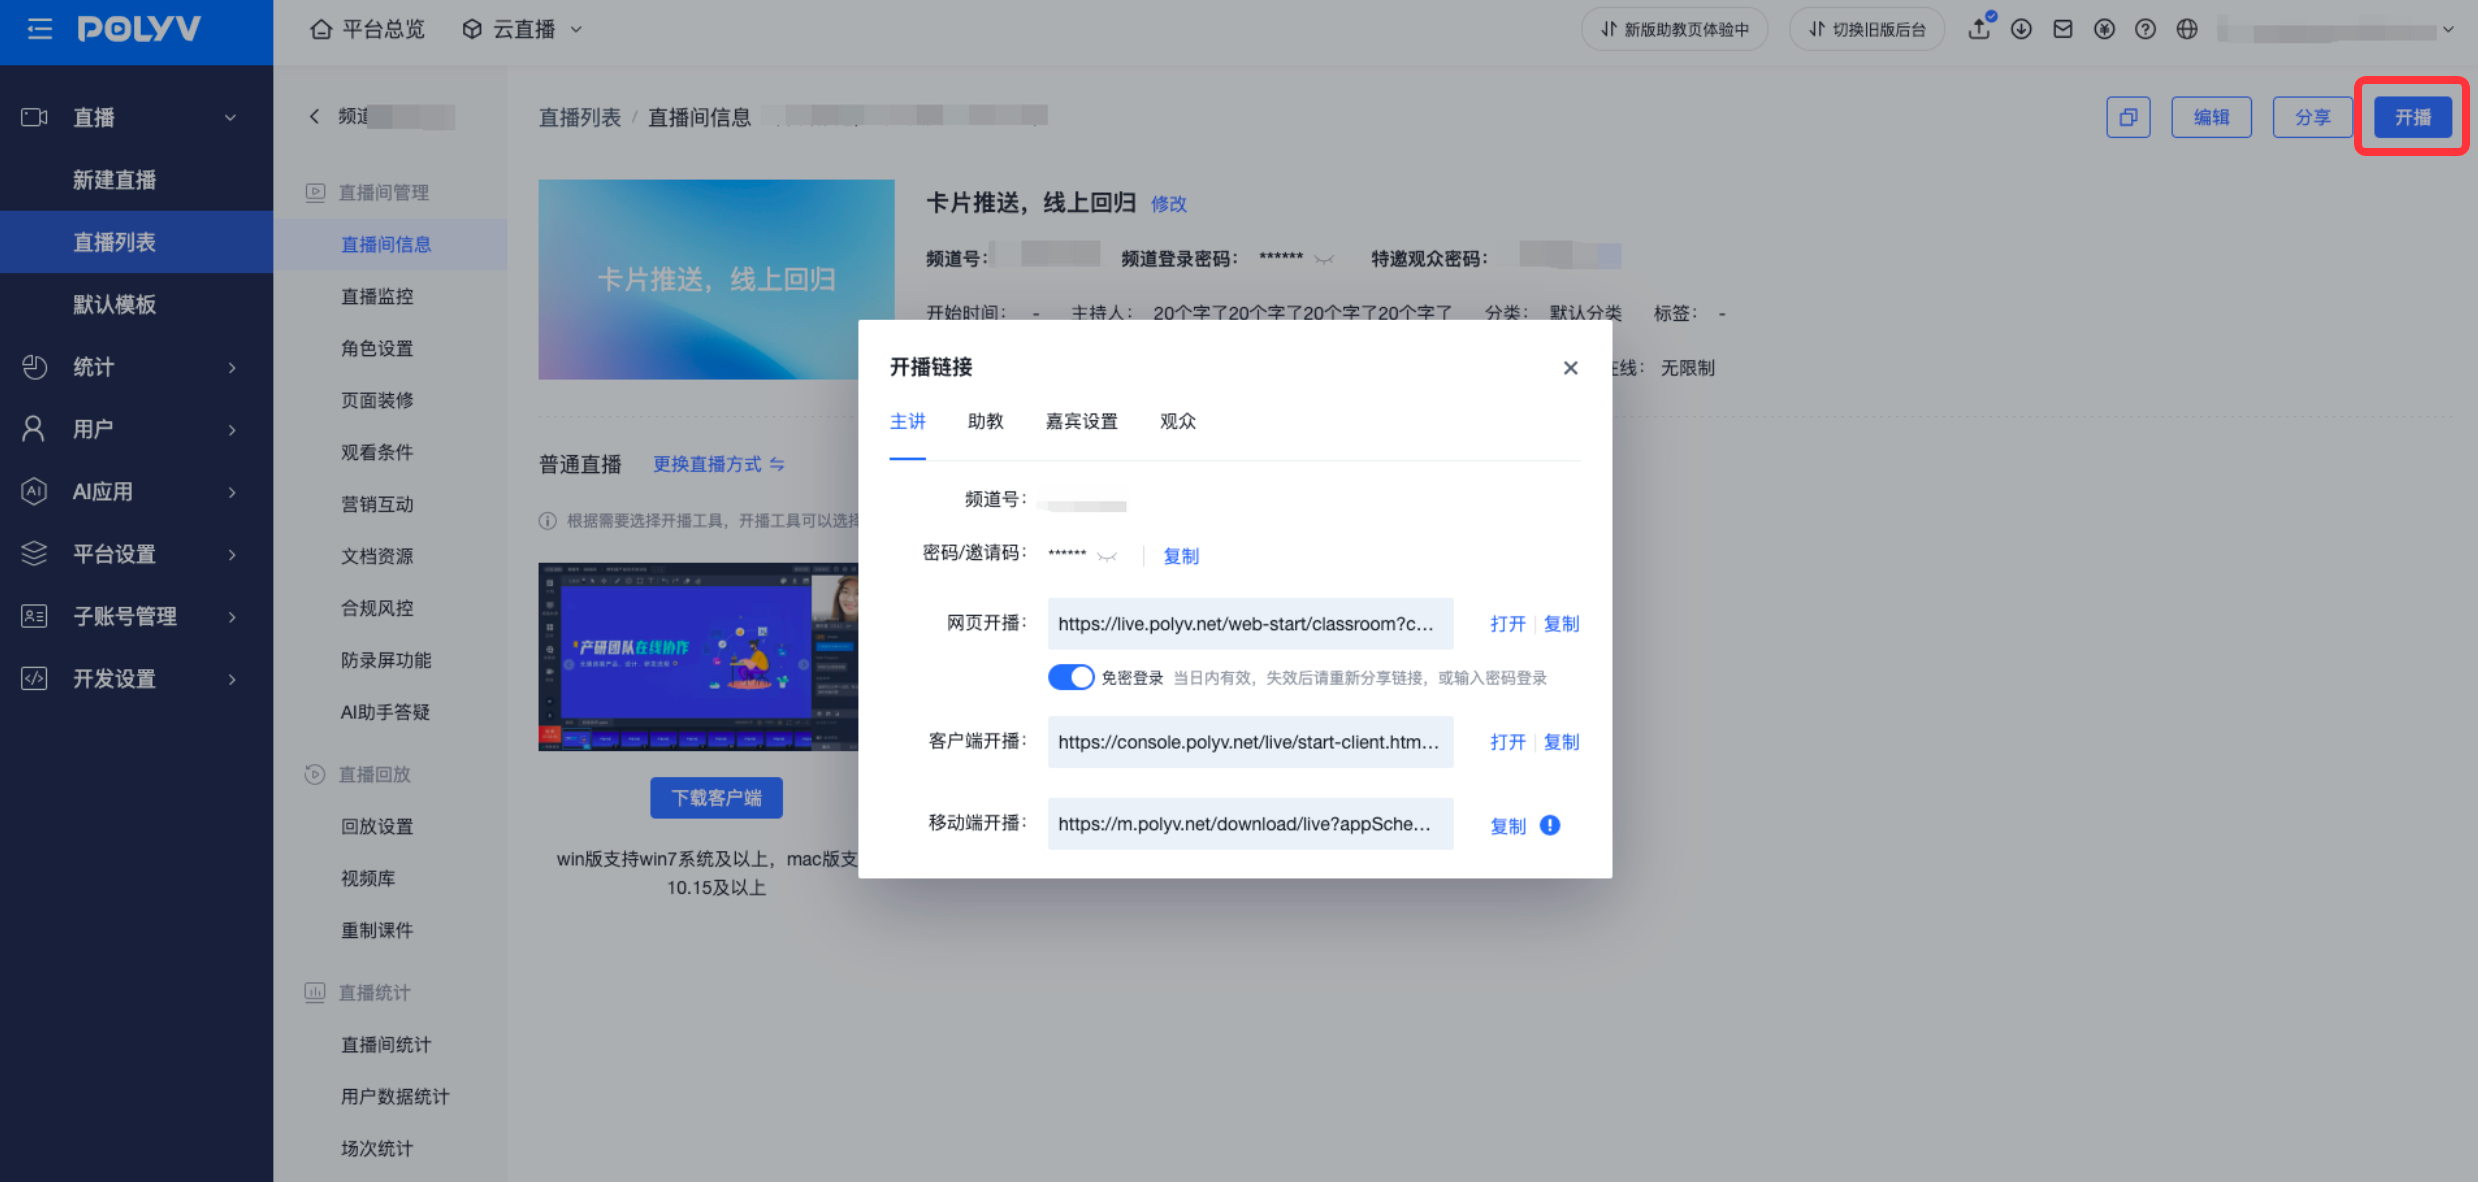
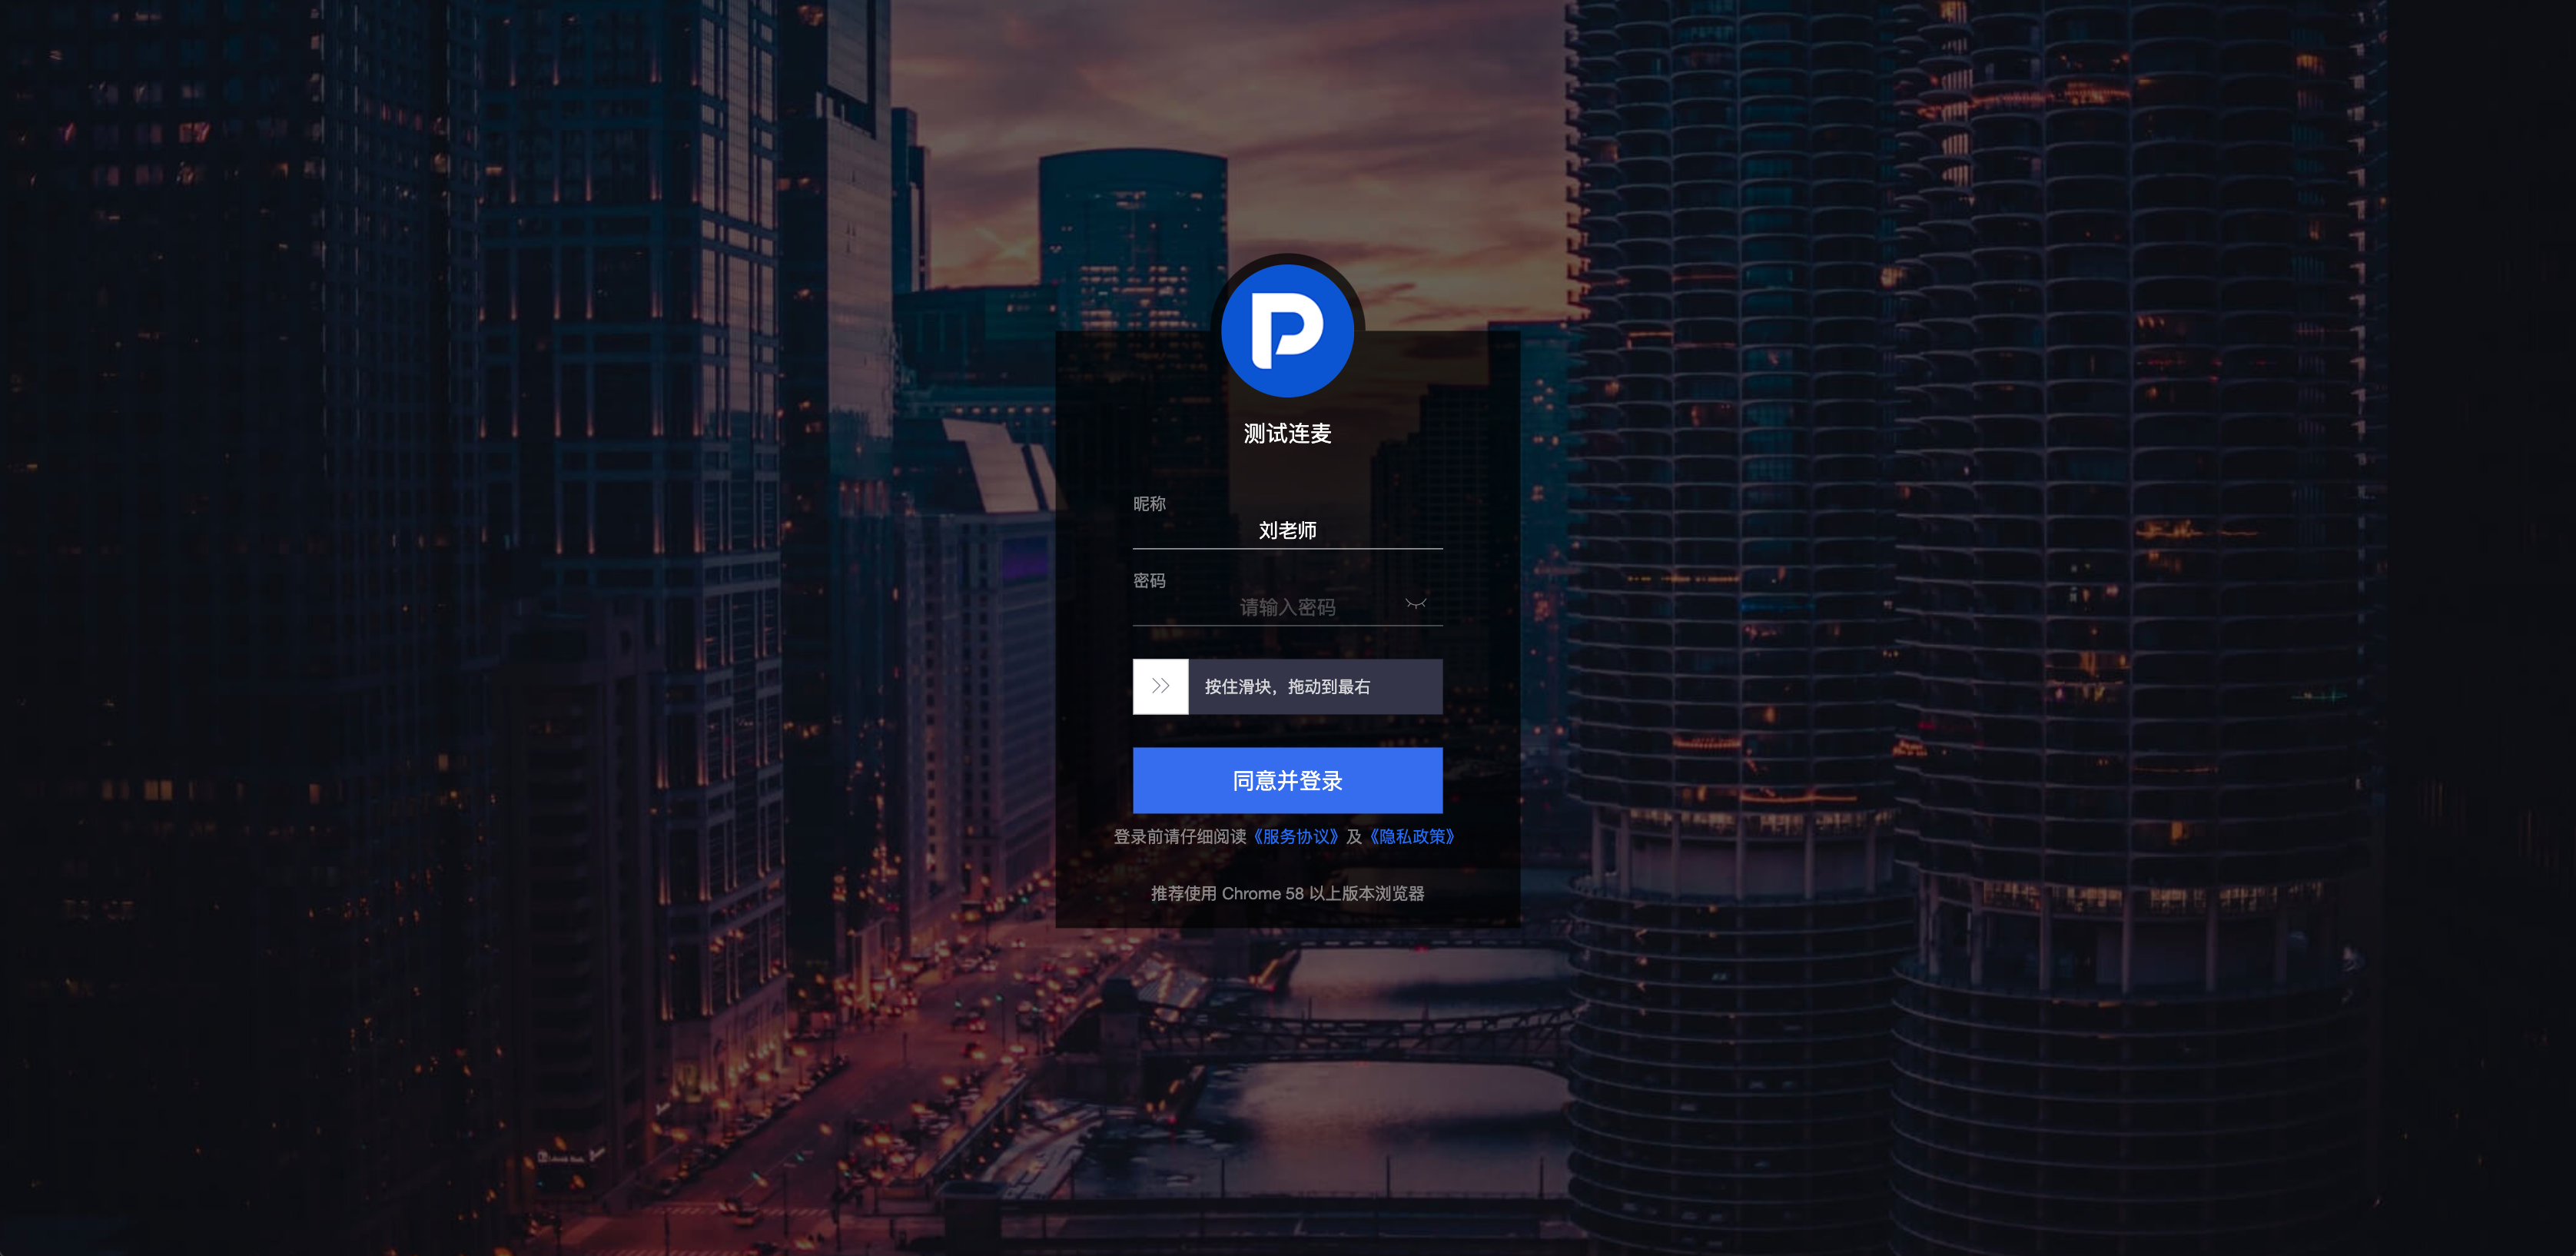
- Host Web Streaming: After selecting web streaming, you will be prompted to enter a nickname (default is "Instructor") and password (this page is not shown for password-free login).
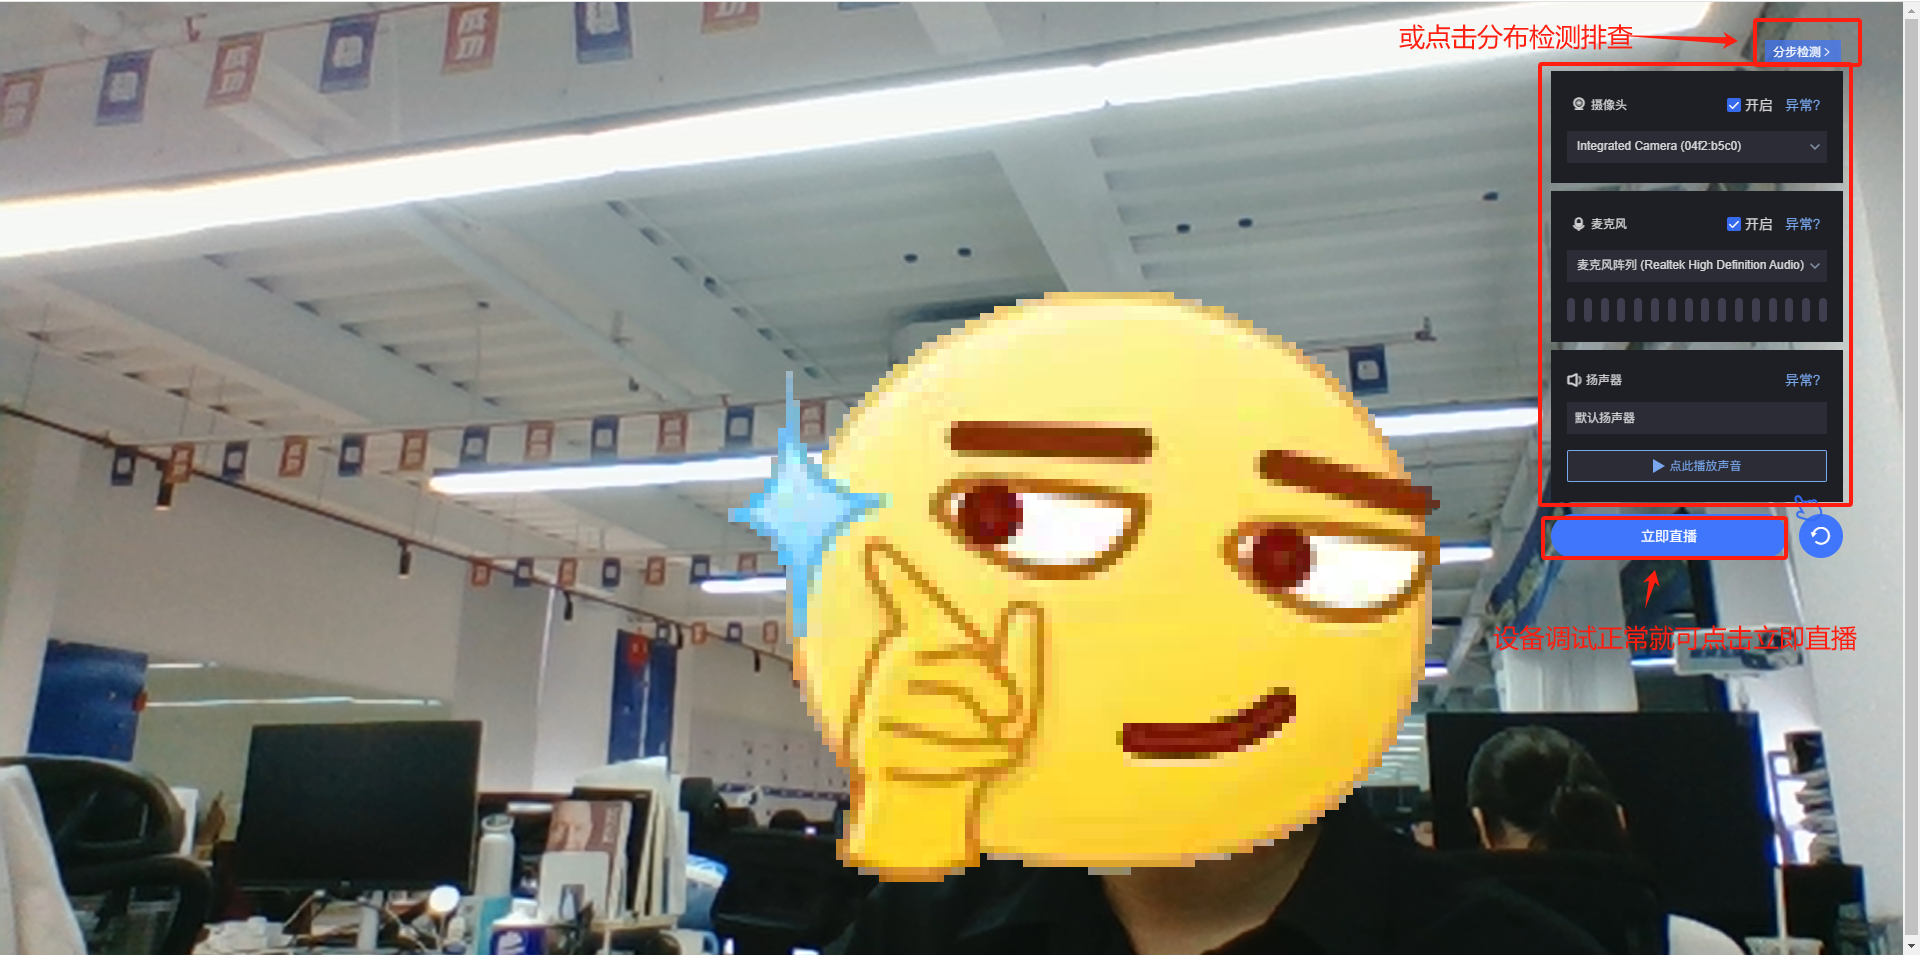
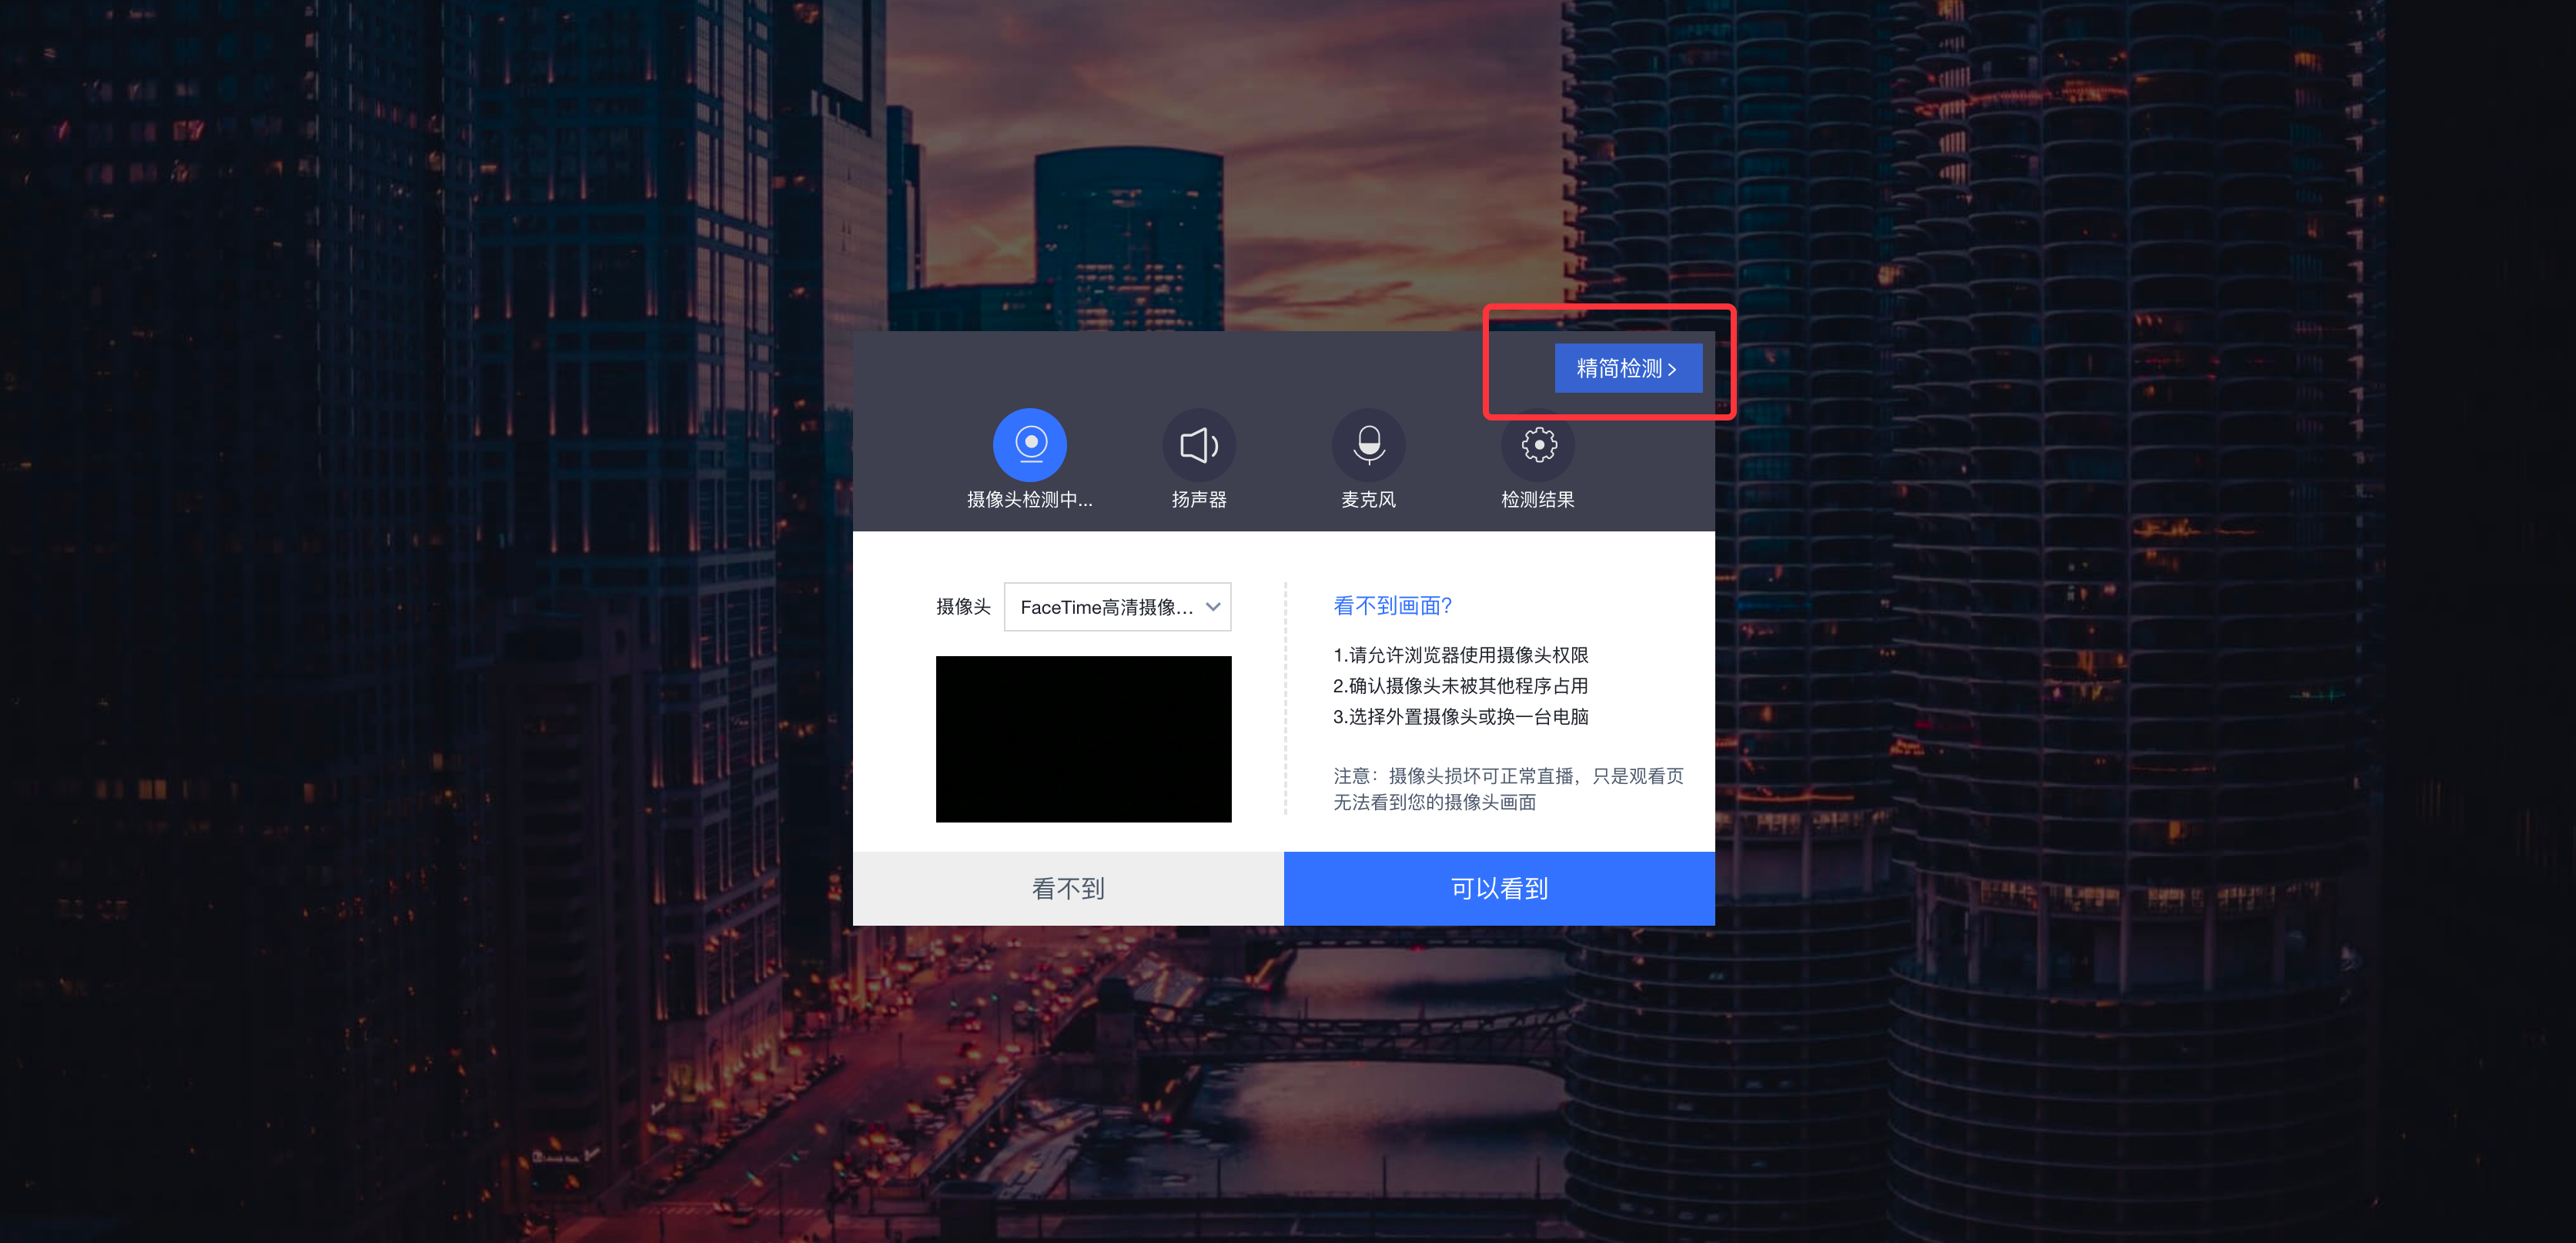
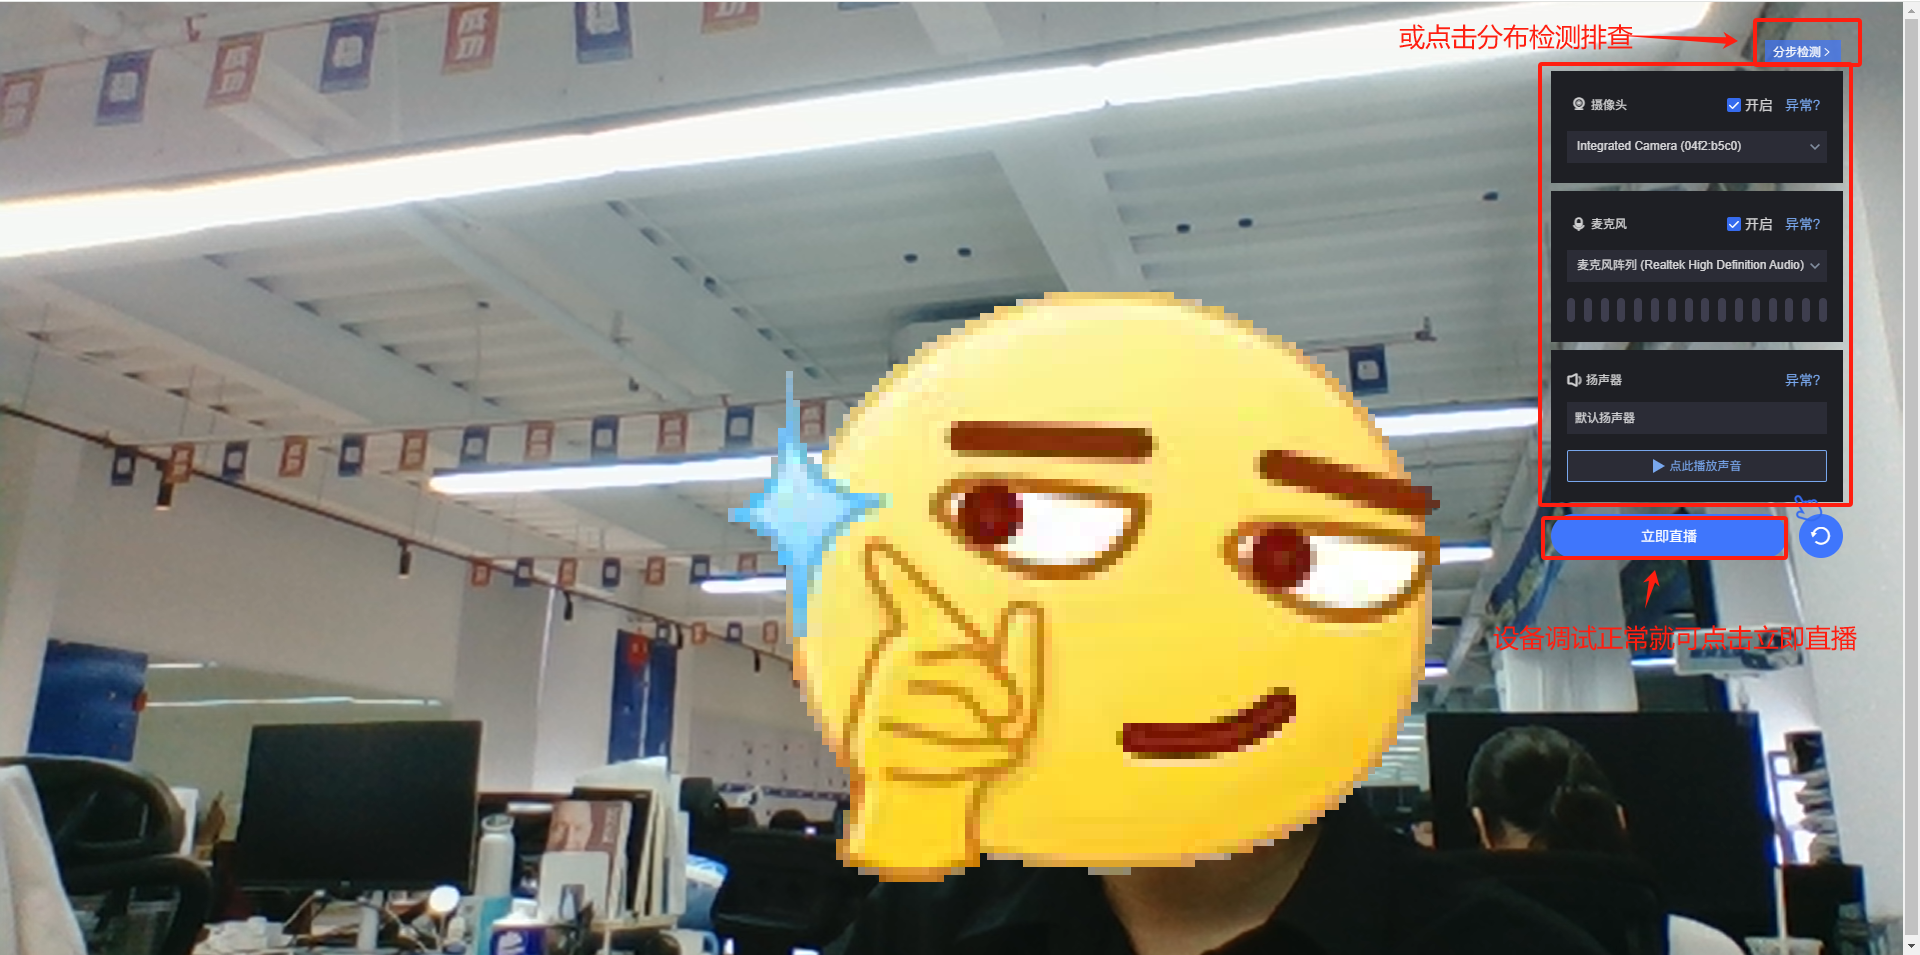
- Upon entry, camera, speaker, and microphone detection is required. If a device is abnormal, click "Step-by-step Detection" to troubleshoot, referring to the help instructions in the blue box.
- If you have logged in before and the browser has cached data, you can choose to skip detection on the top right of the detection popup on subsequent streams.
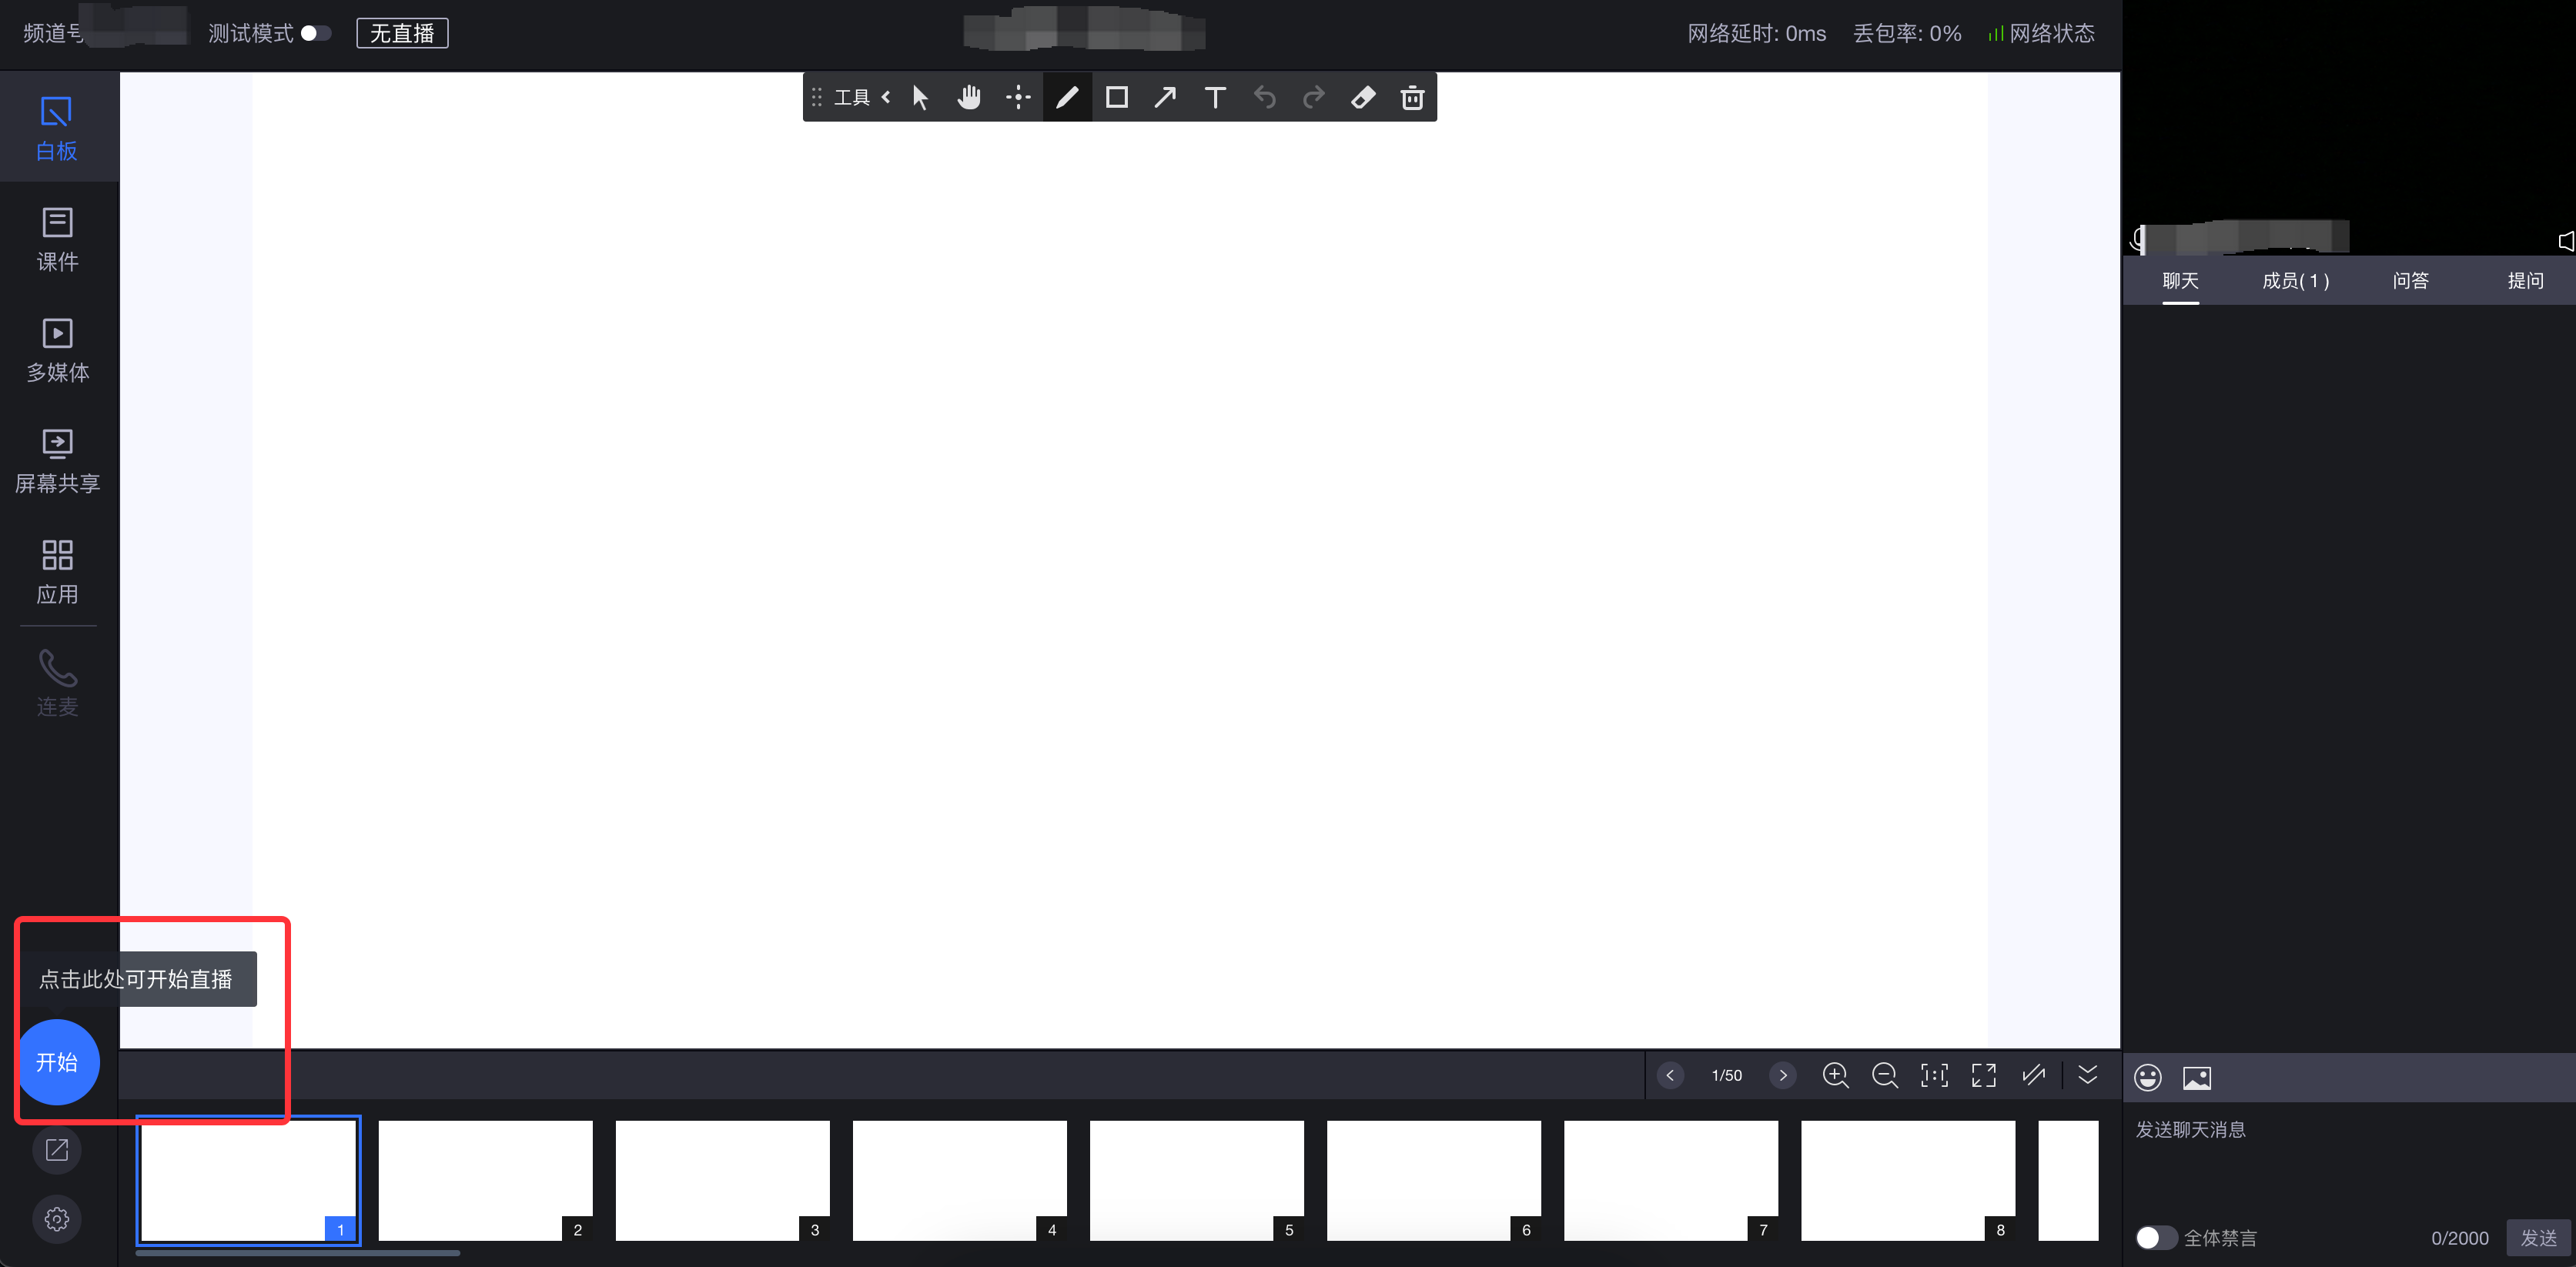
- After entering the streaming page, configure the settings as needed, then click the "Start" button to begin streaming.
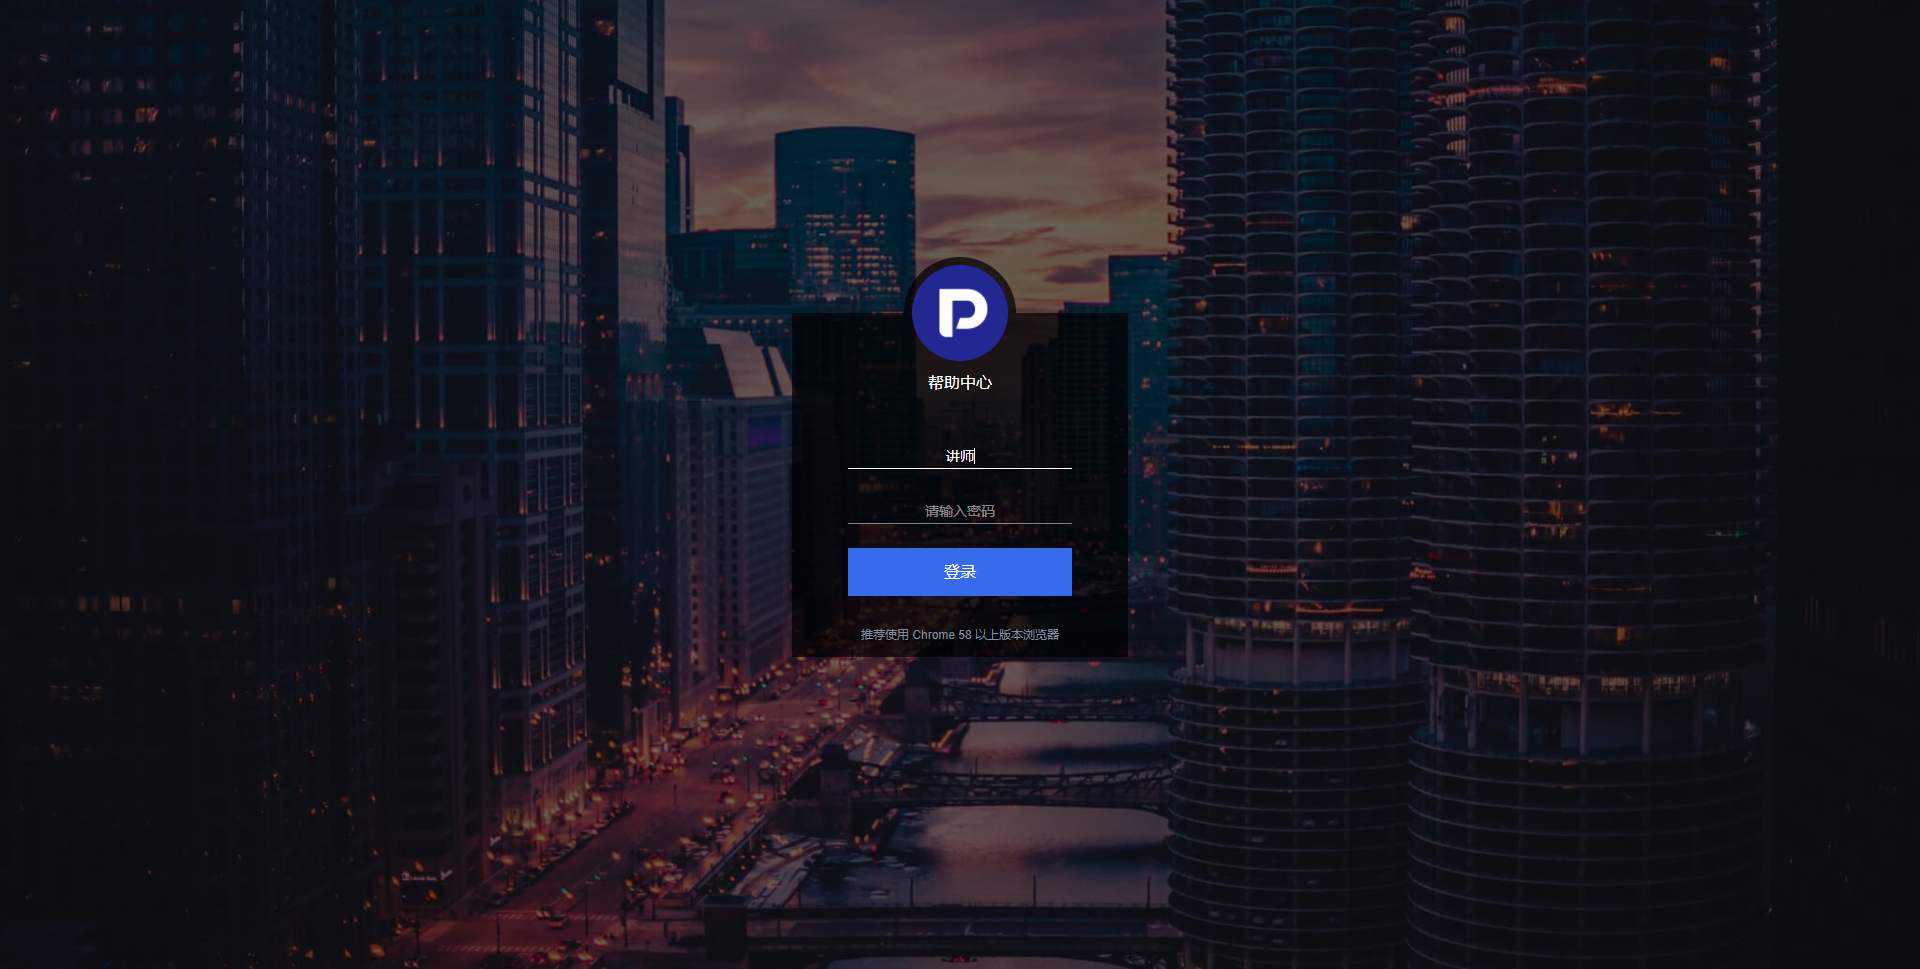
- Teaching Assistant Streaming: Select a guest account to start streaming. If the account in the streaming link popup does not match, click "View Other Teaching Assistants" to select the correct role.
- After logging in, you will be prompted to enter a nickname (default is "Teaching Assistant Nickname") and password (this page is not shown for password-free login).
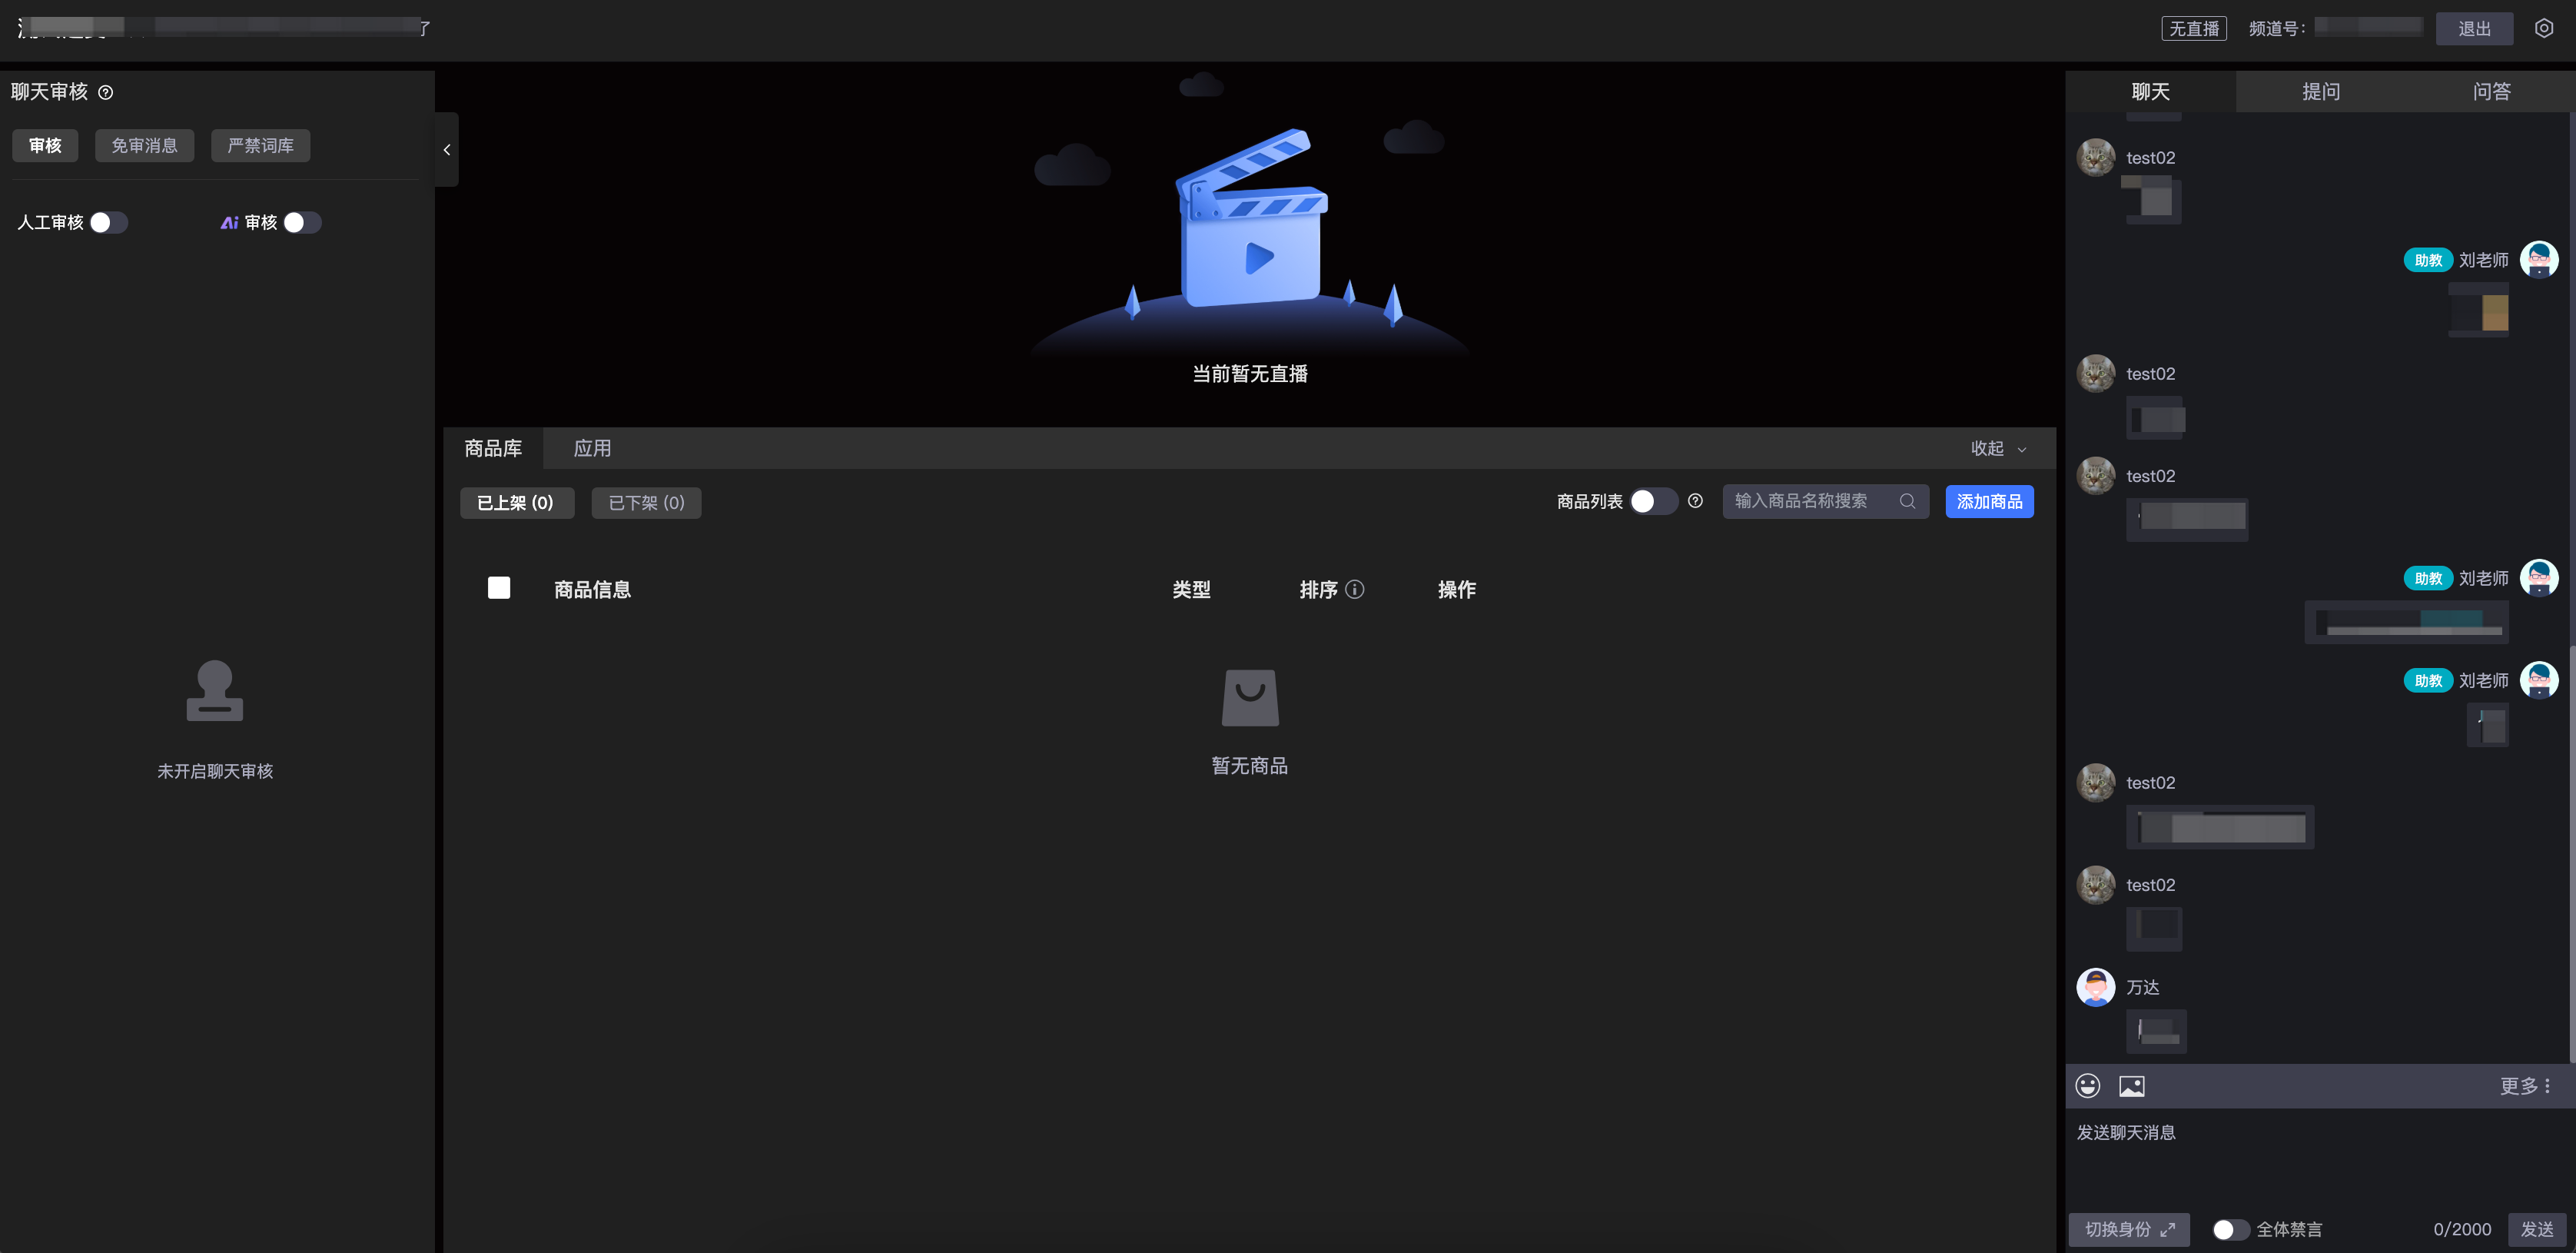
- Upon successful login, you will automatically enter the teaching assistant page to start streaming.
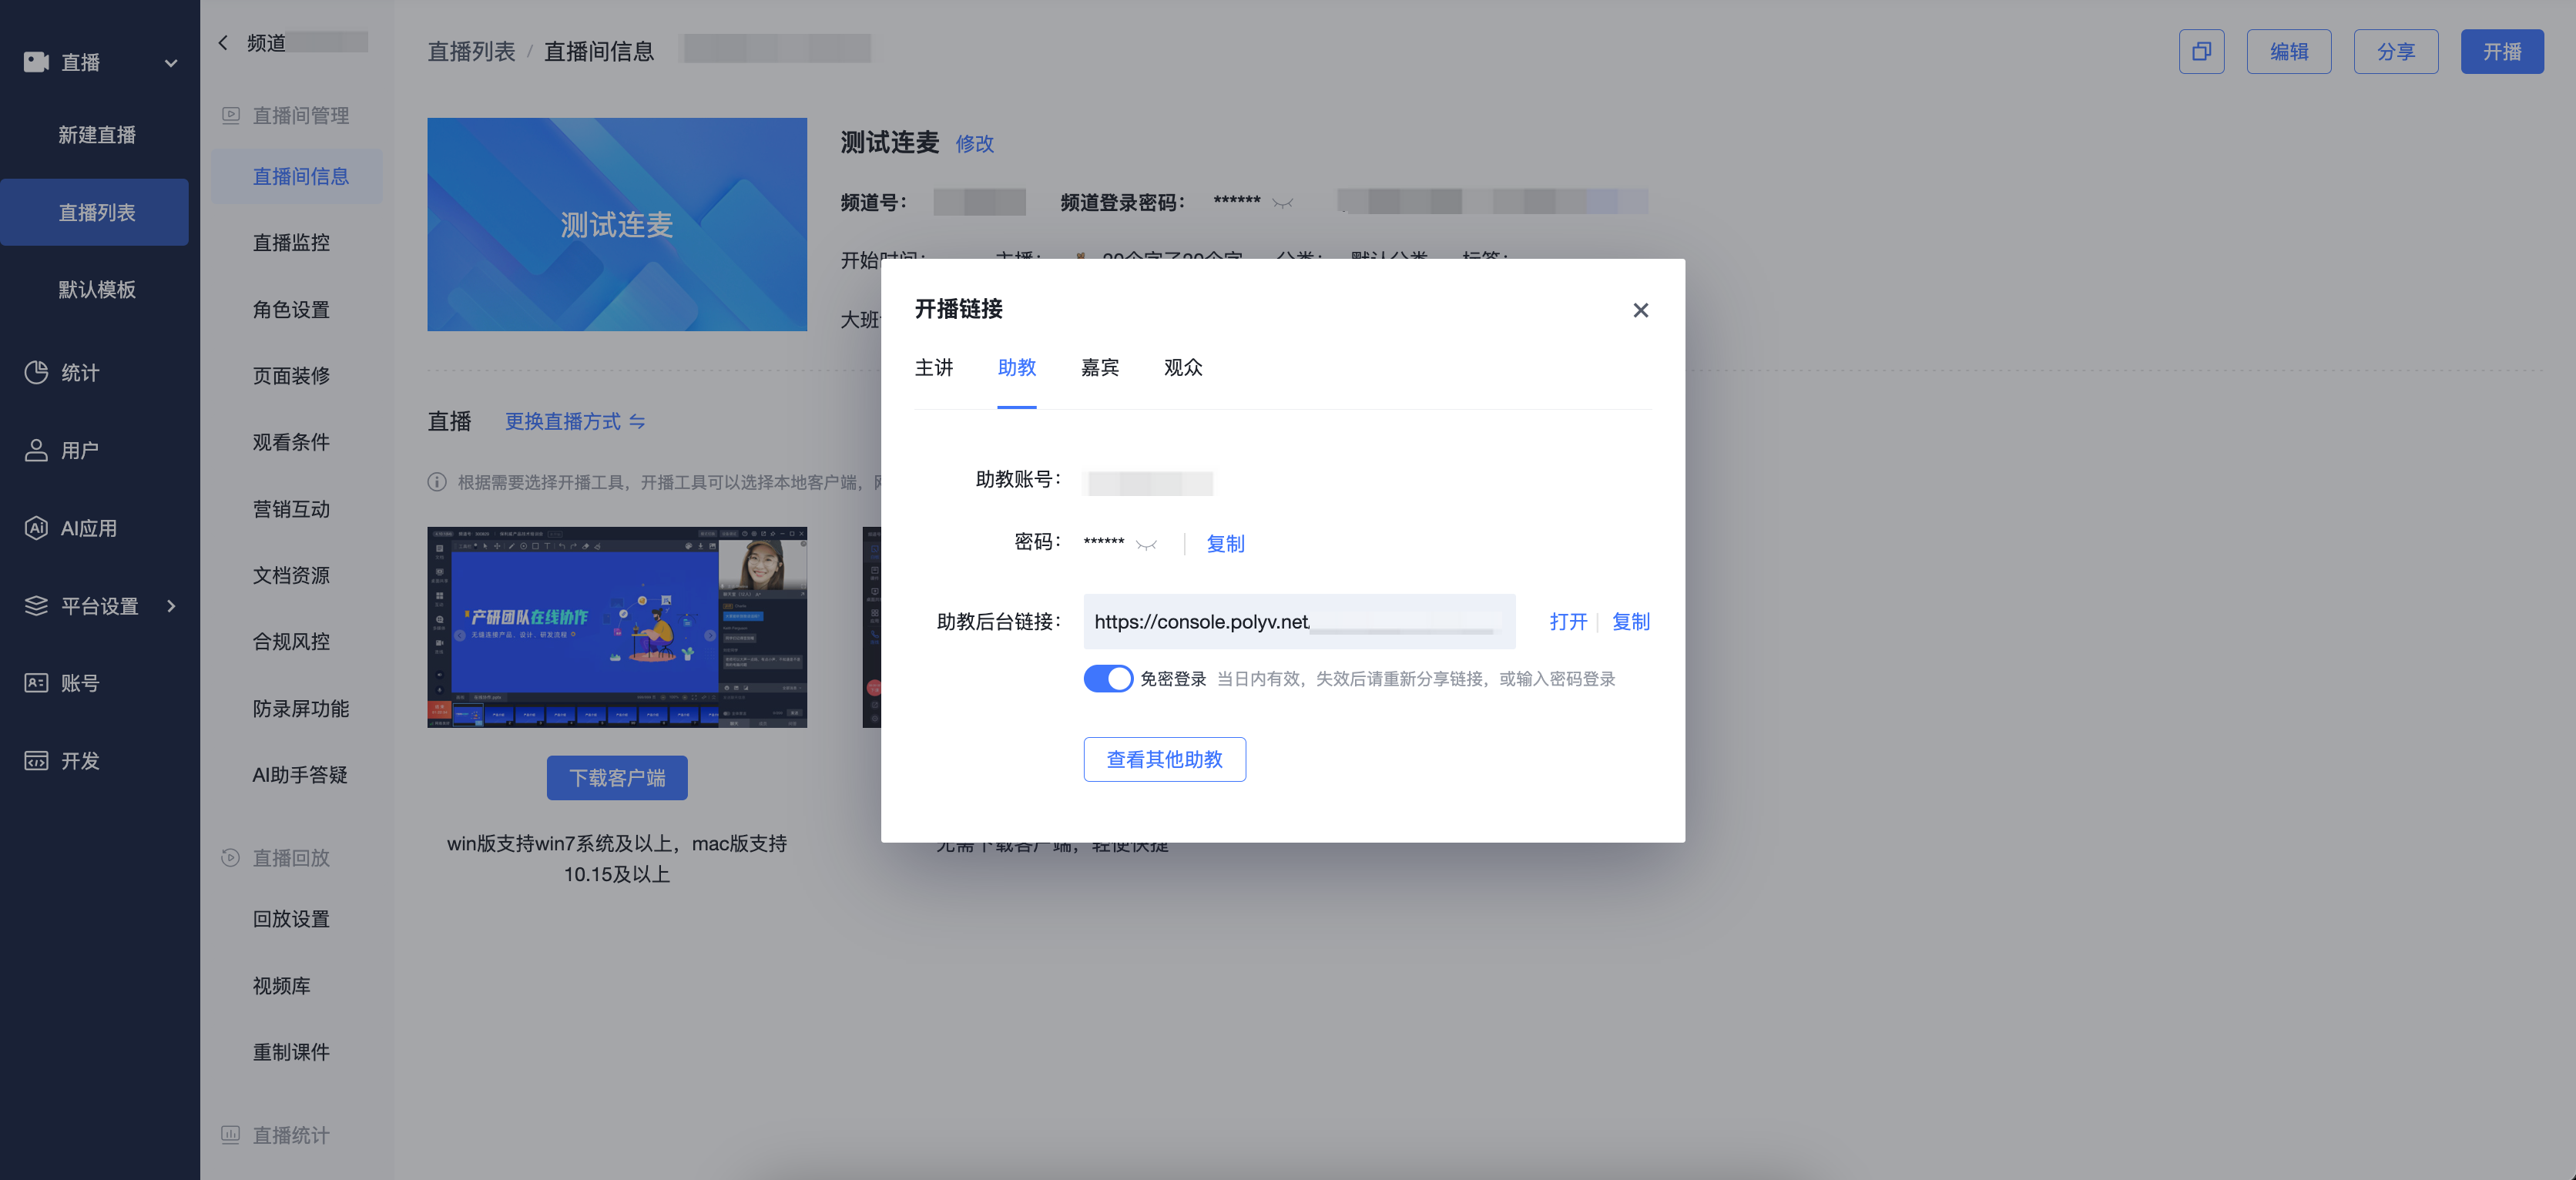
- Guest Streaming: Select a guest account to start streaming. If the account in the streaming link popup does not match, click "View Other Guests" to select the correct role.
- After logging in, you will be prompted to enter a nickname (default is "Guest Nickname") and password (this page is not shown for password-free login).
- Upon successful login, you will automatically enter the guest streaming page to start streaming.
IV. Web Streaming Guest Functions
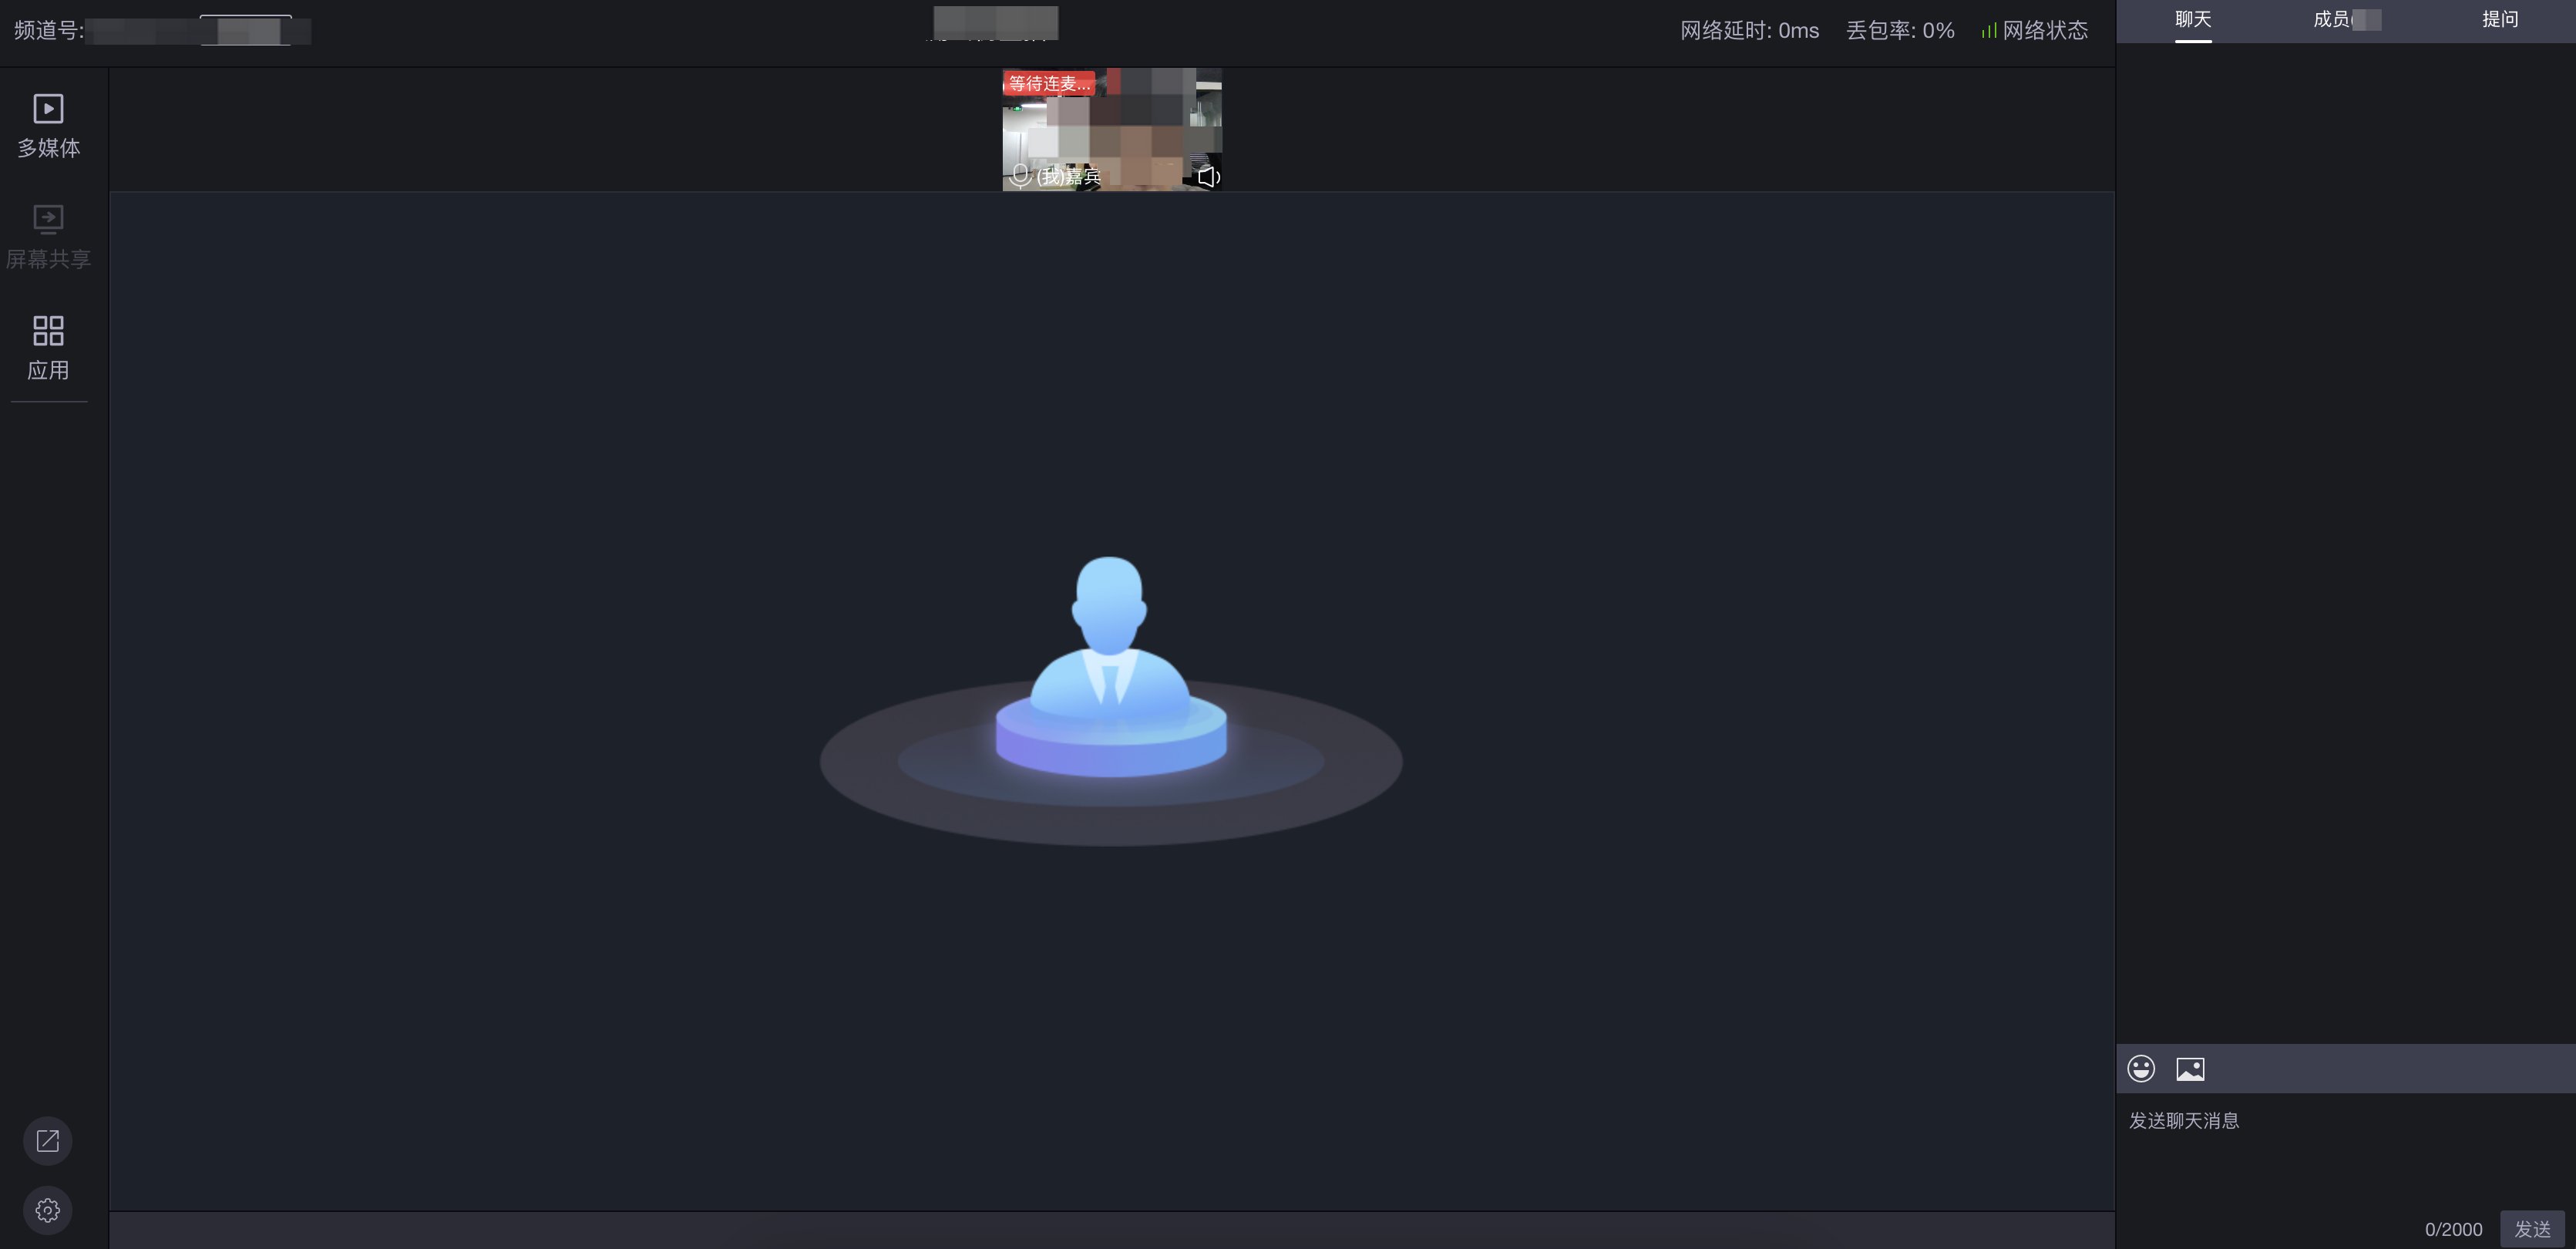
Suitable for co-teaching with a host or small meetings, supporting multi-person connections, PPT page turning, and pen tools for interaction.
- Fill in streaming information, log in, and detect devices to enter the live room.
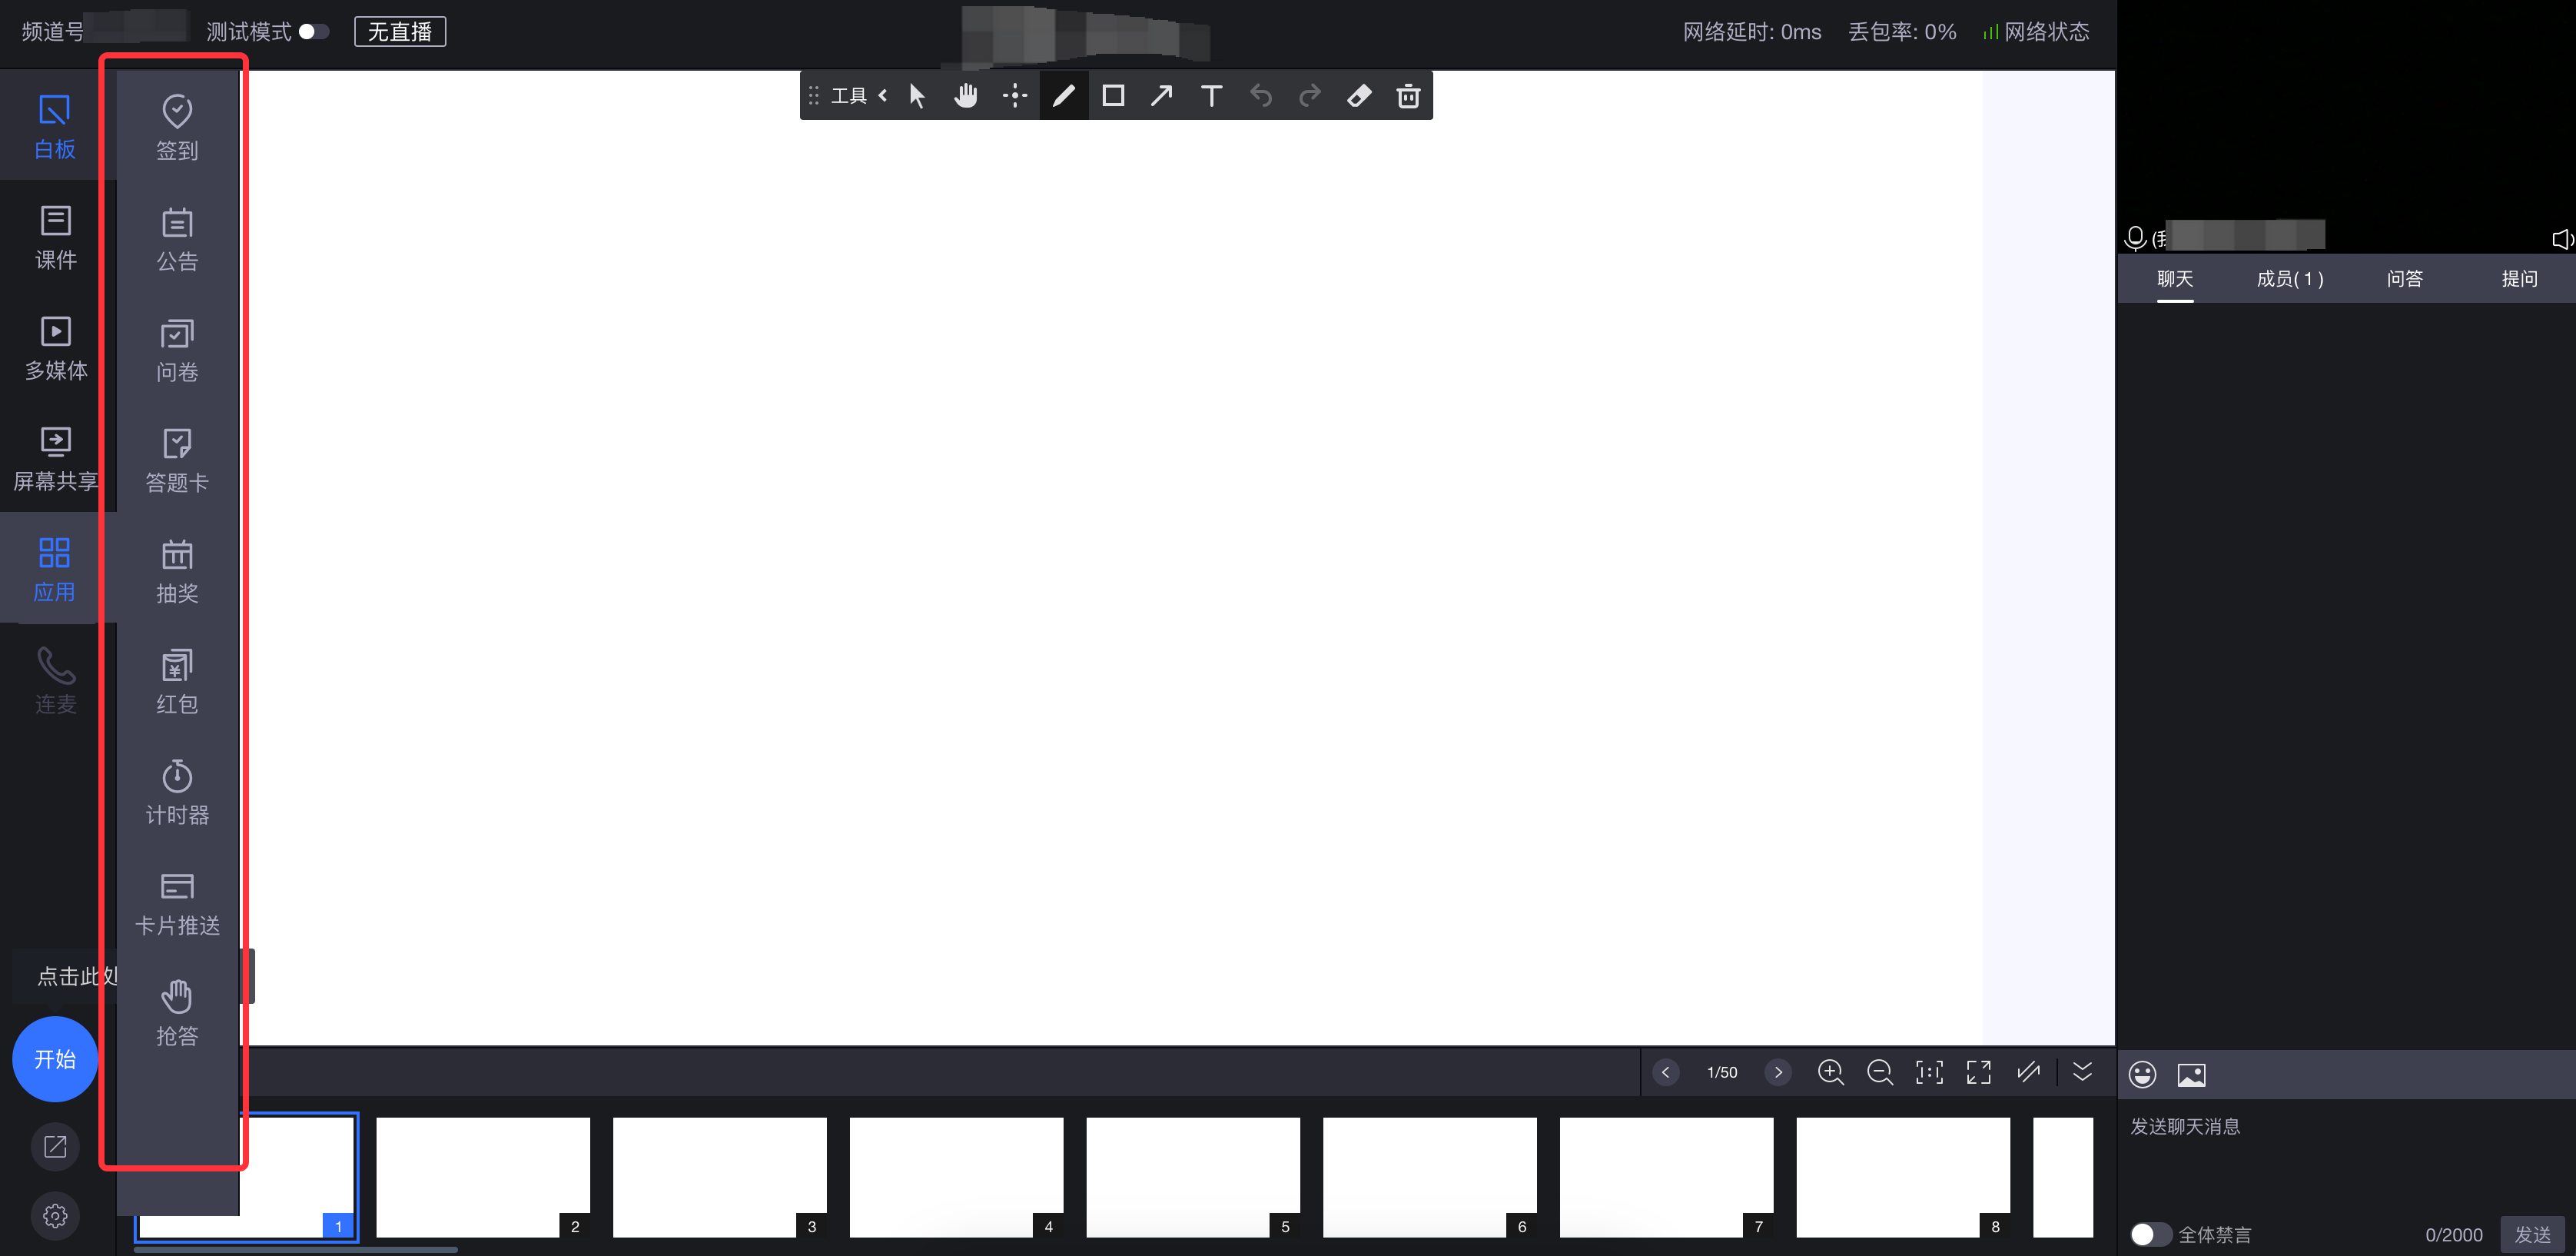
- Guests can share their screen, initiate interactions such as check-ins, announcements, surveys, quizzes, and lucky draws.
- After being granted permissions, the guest's avatar will appear on the main screen. They can upload courseware, use PPT page turning, whiteboard, and pen tools for teaching.
- Guests can also be granted only the first screen or only the pen tool, depending on the host's authorization.
- Click the share button in the bottom left corner to share the live stream address with students via a link or QR code.
V. Shared Content
Content sharing displays various types of courseware (text, images, audio, video) to the audience. Polyv provides whiteboard, courseware, multimedia, and screen sharing functions to help you share information freely during video conferences.
1. Whiteboard
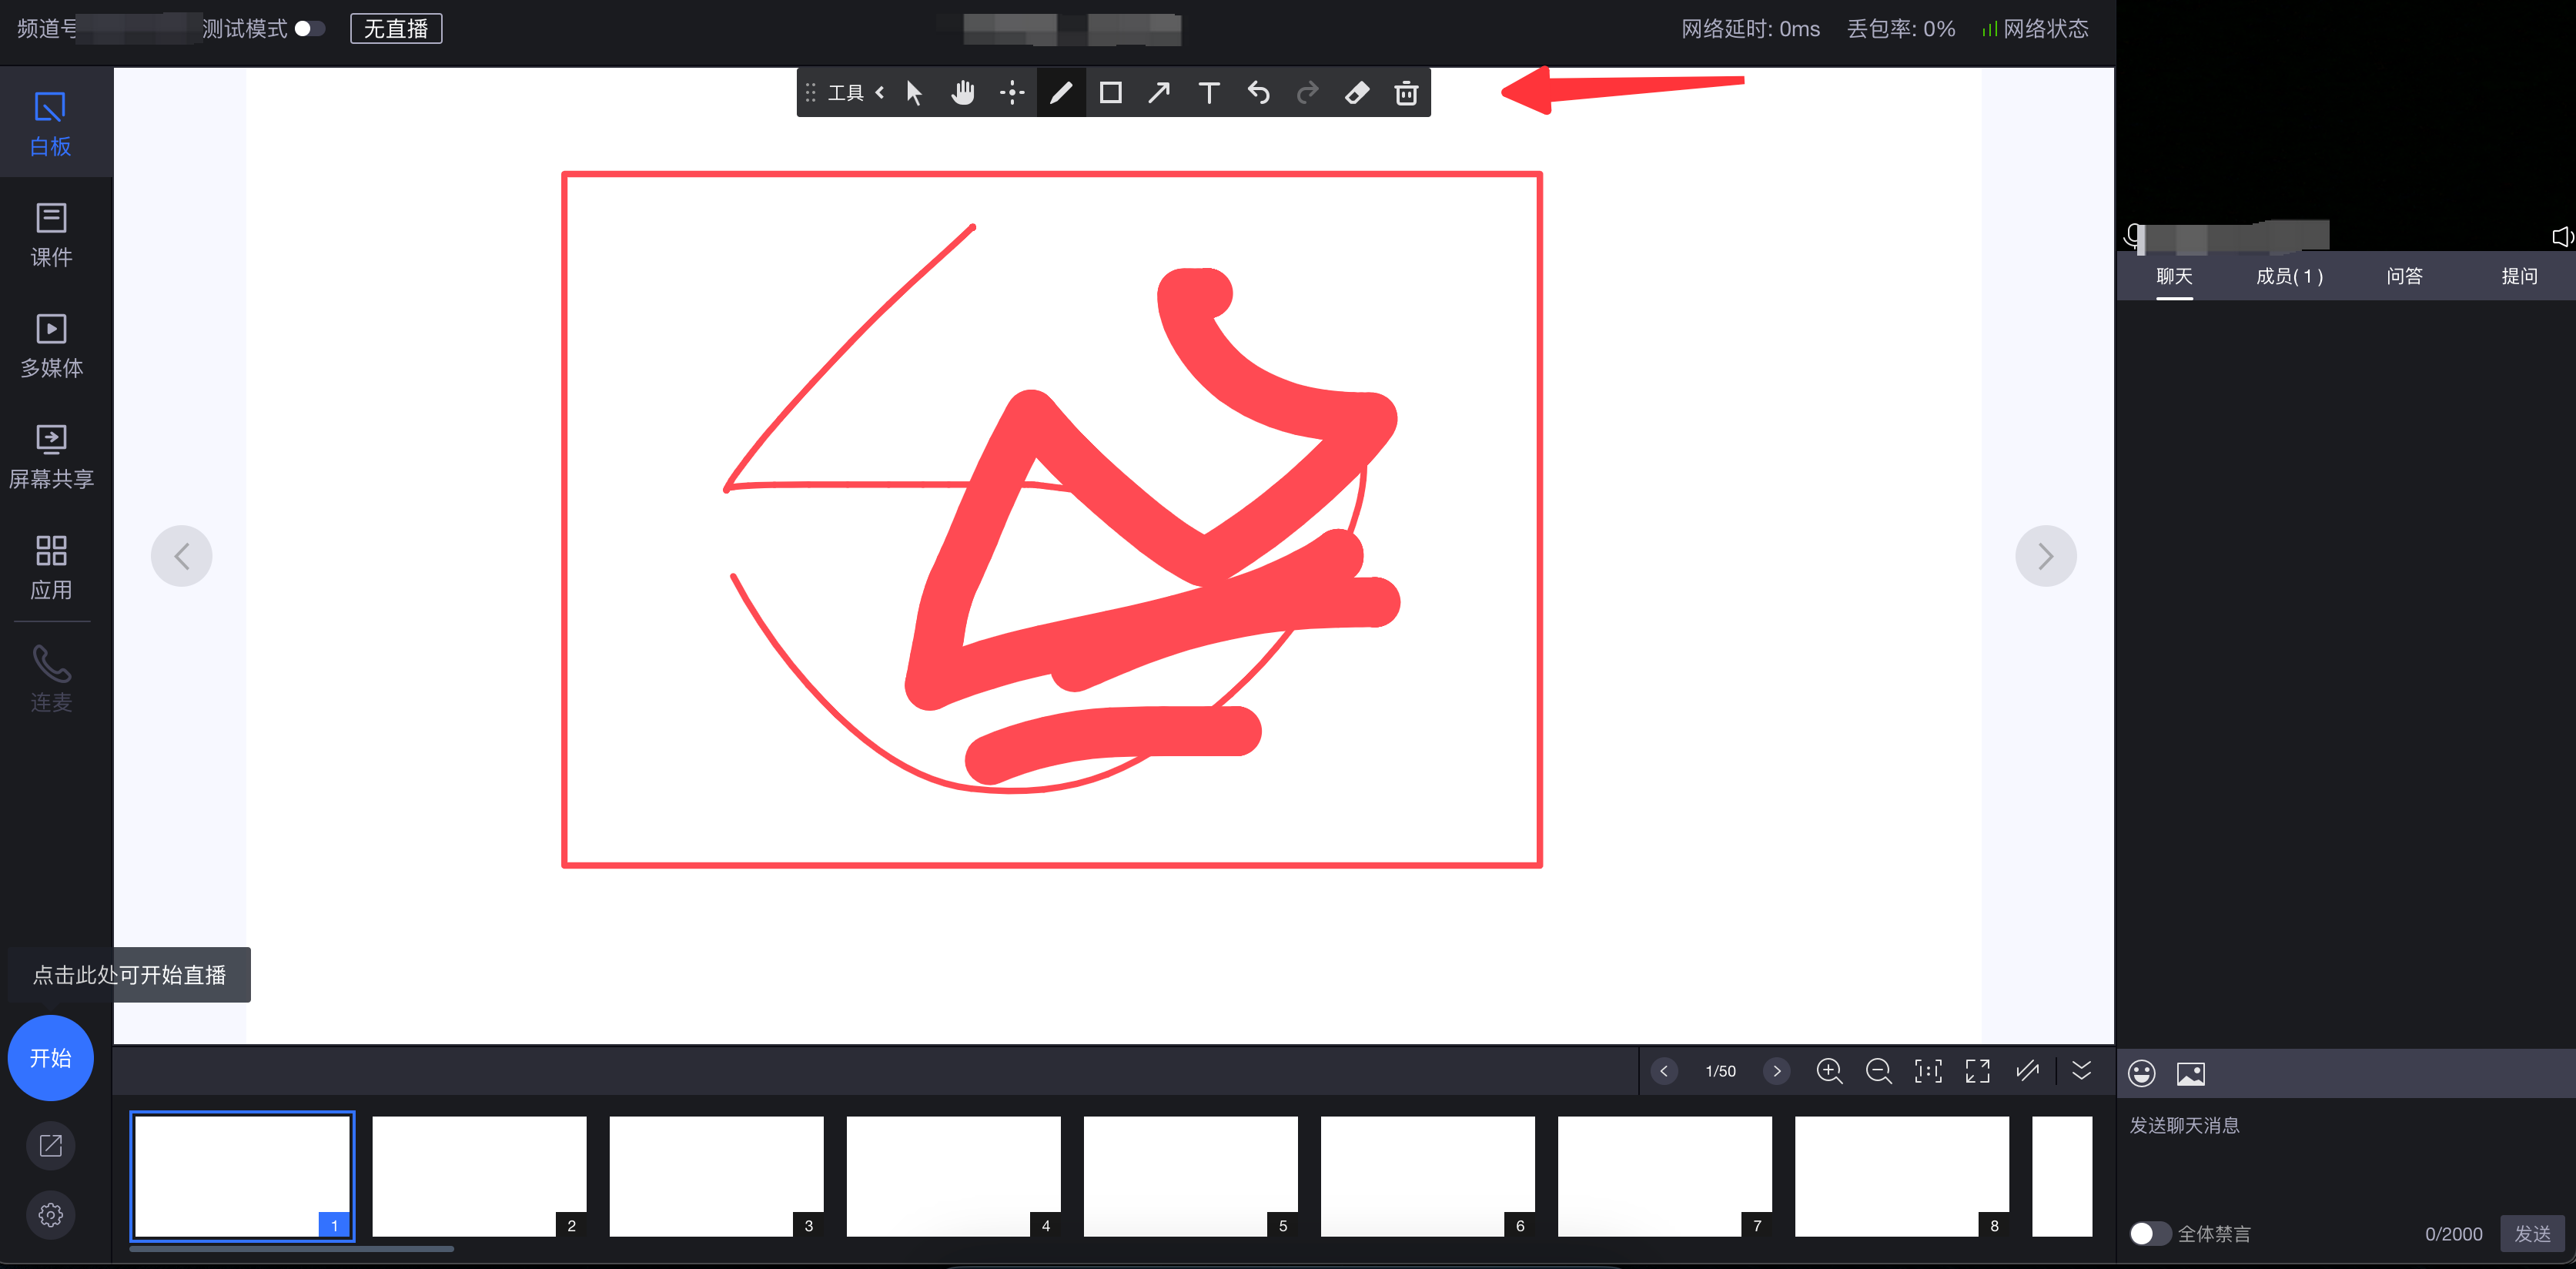
The whiteboard provides basic annotation and drawing functions, allowing the presenter to visually express their ideas through drawing.
- The host clicks "Whiteboard" to open the whiteboard editing function.
- Pen tool and color presets: Preset pen type, pen color, and stroke thickness. Color presets affect the color of the pen, text, and shape borders.
- Line toolbar: Modify line color, thickness, line type, arrow settings, add text, etc., from the top toolbar.
- Text: Add text content to the canvas. Press Enter for a new line. Click on an empty area of the canvas to finish input. Double-click to edit. Text color follows the current pen preset color.
- A pen toolbar is located at the top of the whiteboard.
- Click the eraser tool icon to delete a single pen stroke.
- Click the delete icon to clear all pen data on the current page.
- The pen toolbar at the top of the whiteboard allows you to click icons for pen, rectangle/circle drawing, arrows, text, etc., to annotate and draw on the whiteboard area.
- Whiteboard content is synchronized to all viewers and guests in the live room.
- The pen toolbar supports collapse/expand, repositioning, and modification/deletion.
2. Courseware Documents
The courseware function allows you to upload documents (e.g., PPT, PDF) from your computer to the live channel for sharing with the audience.
- Click "Courseware" in the left operation panel, then click "Add Document" in the interface to upload courseware.
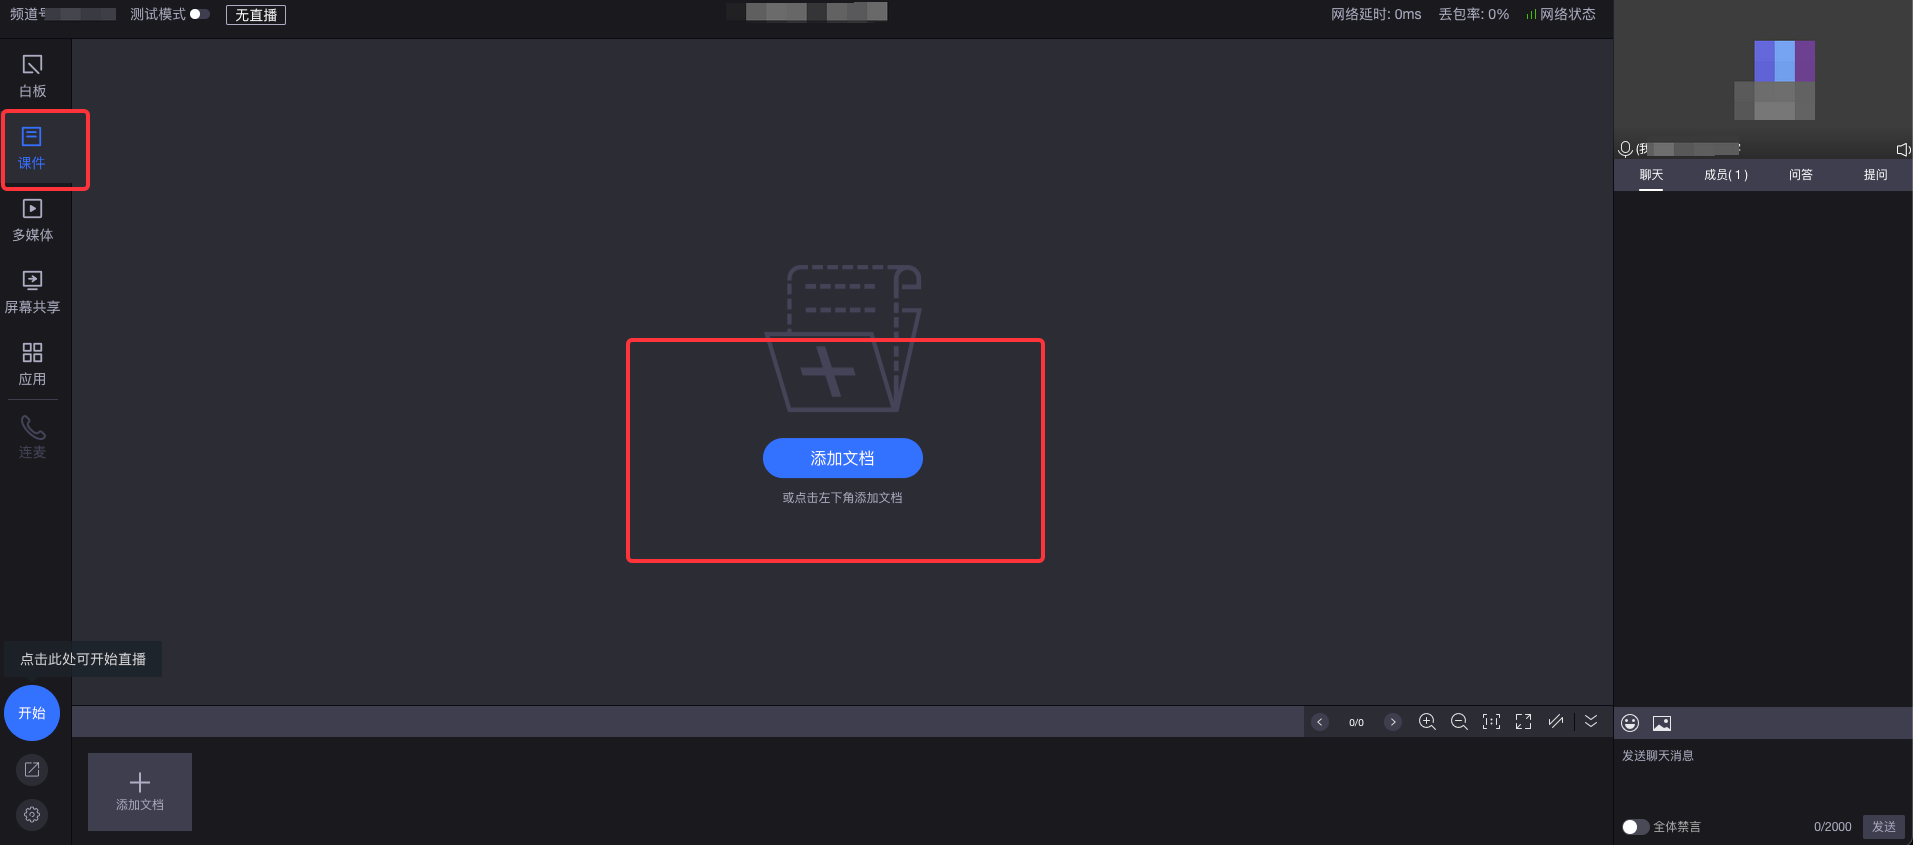
- Click the courseware button on the left, then click the "Add Document" button in the document area to open the courseware window.
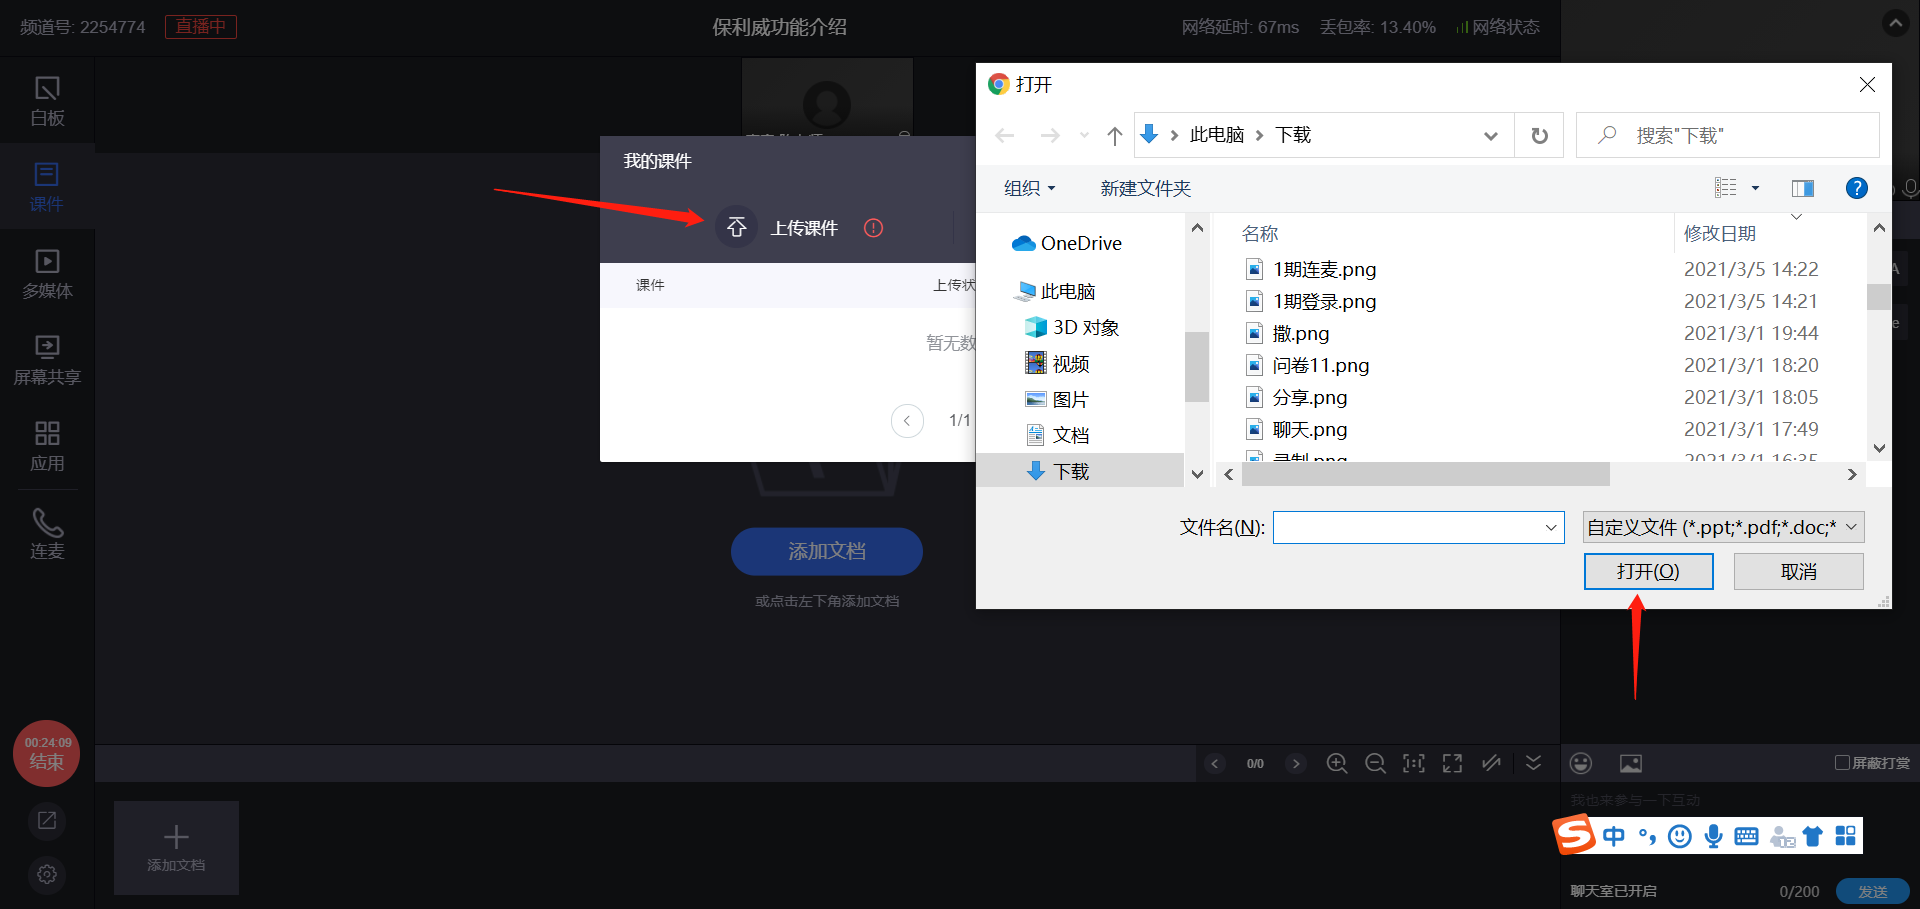
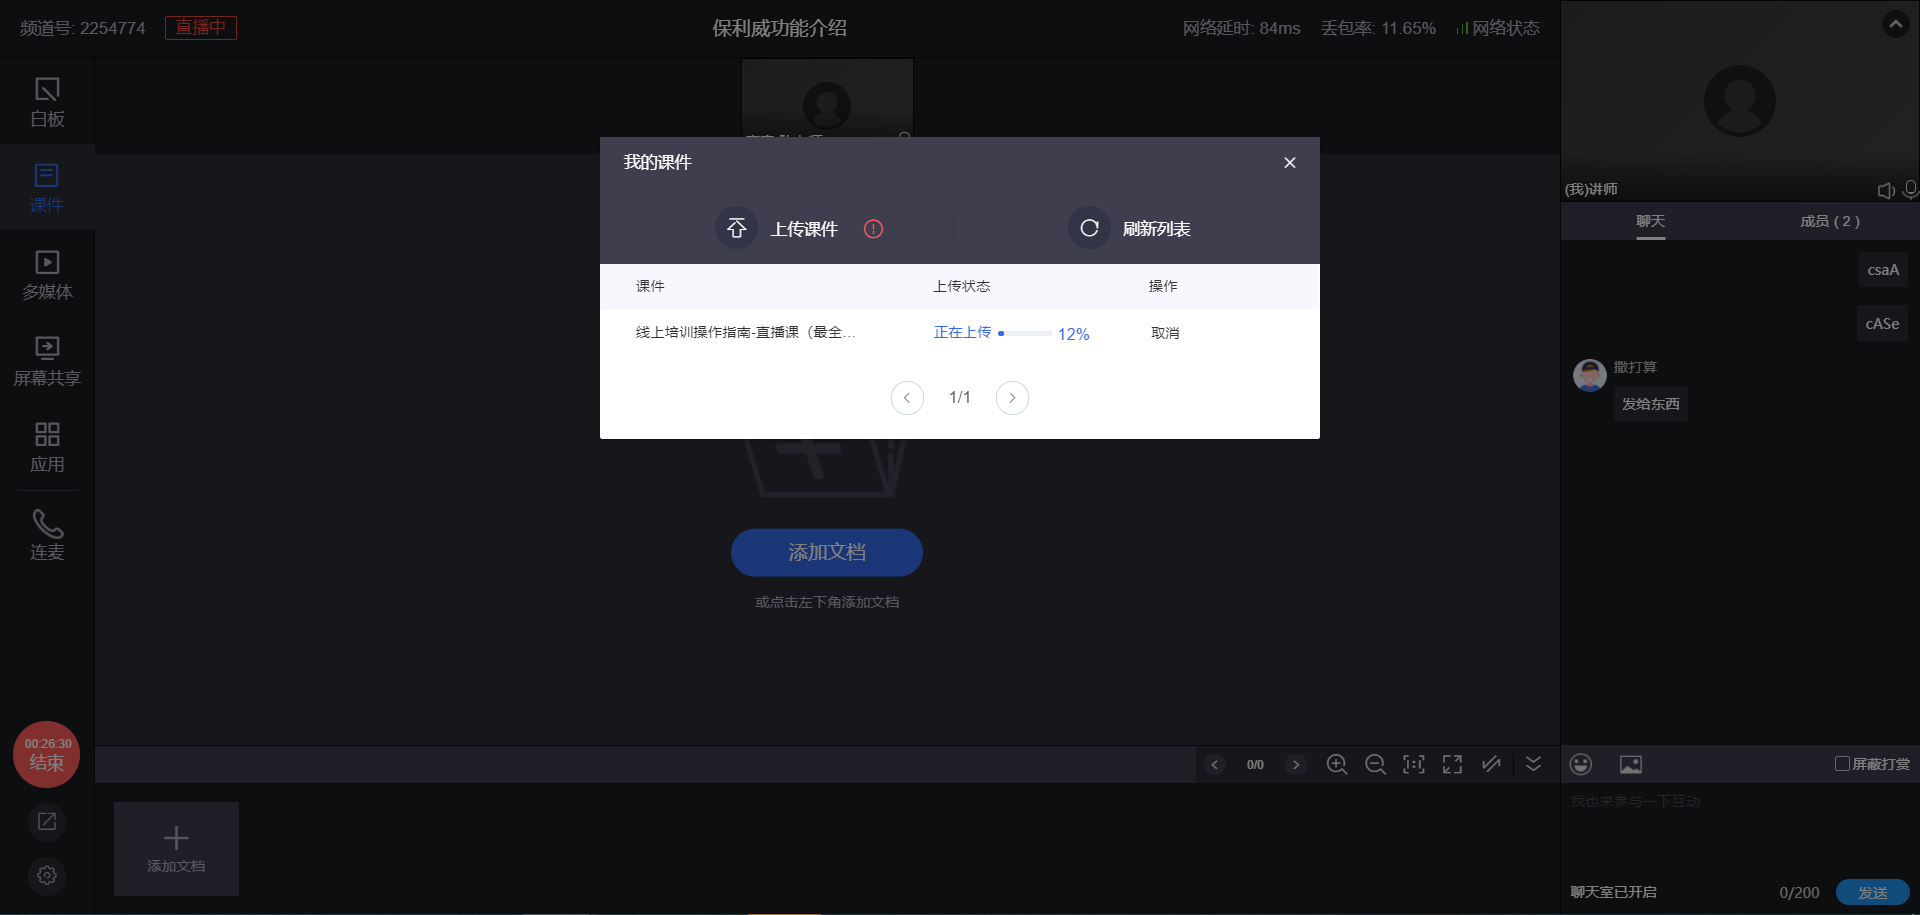
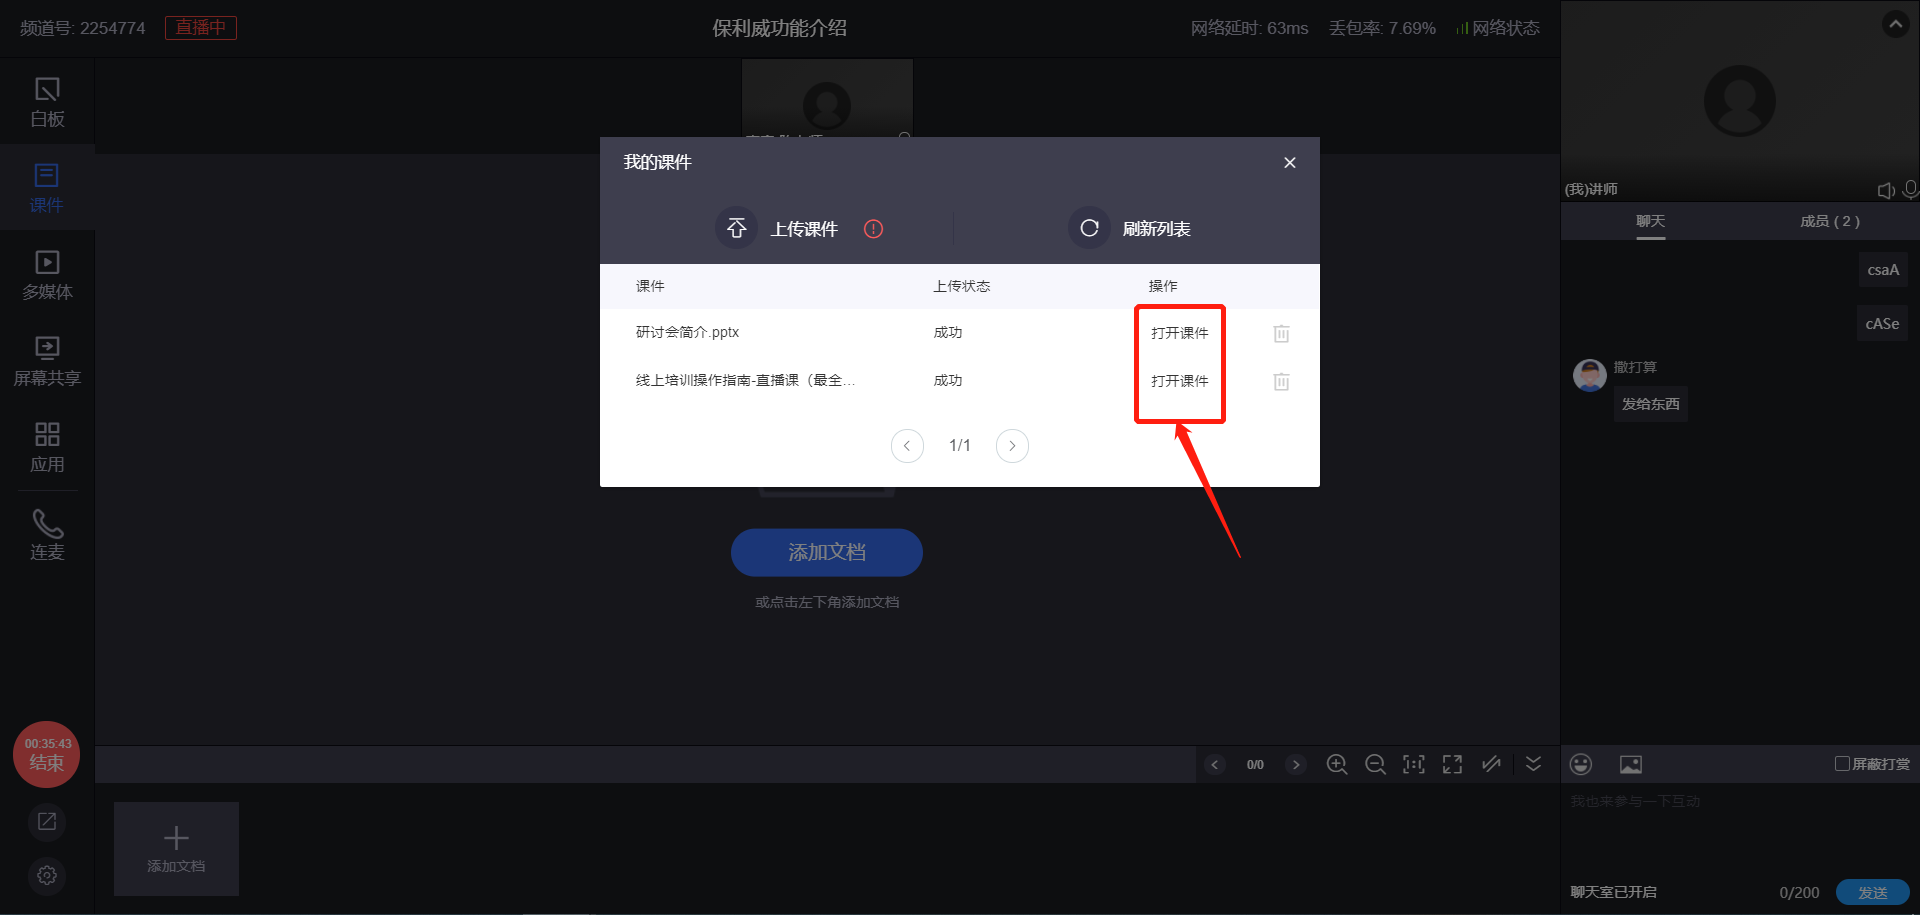
- In the courseware window, click the upload button to select a file from your computer. The file will be added to the upload queue and show progress. Once transcoding is complete, click to open it.
- File upload and transcoding time depends on file size and network conditions. File format and size are limited; check before uploading. If adjustments are not possible, use screen sharing.
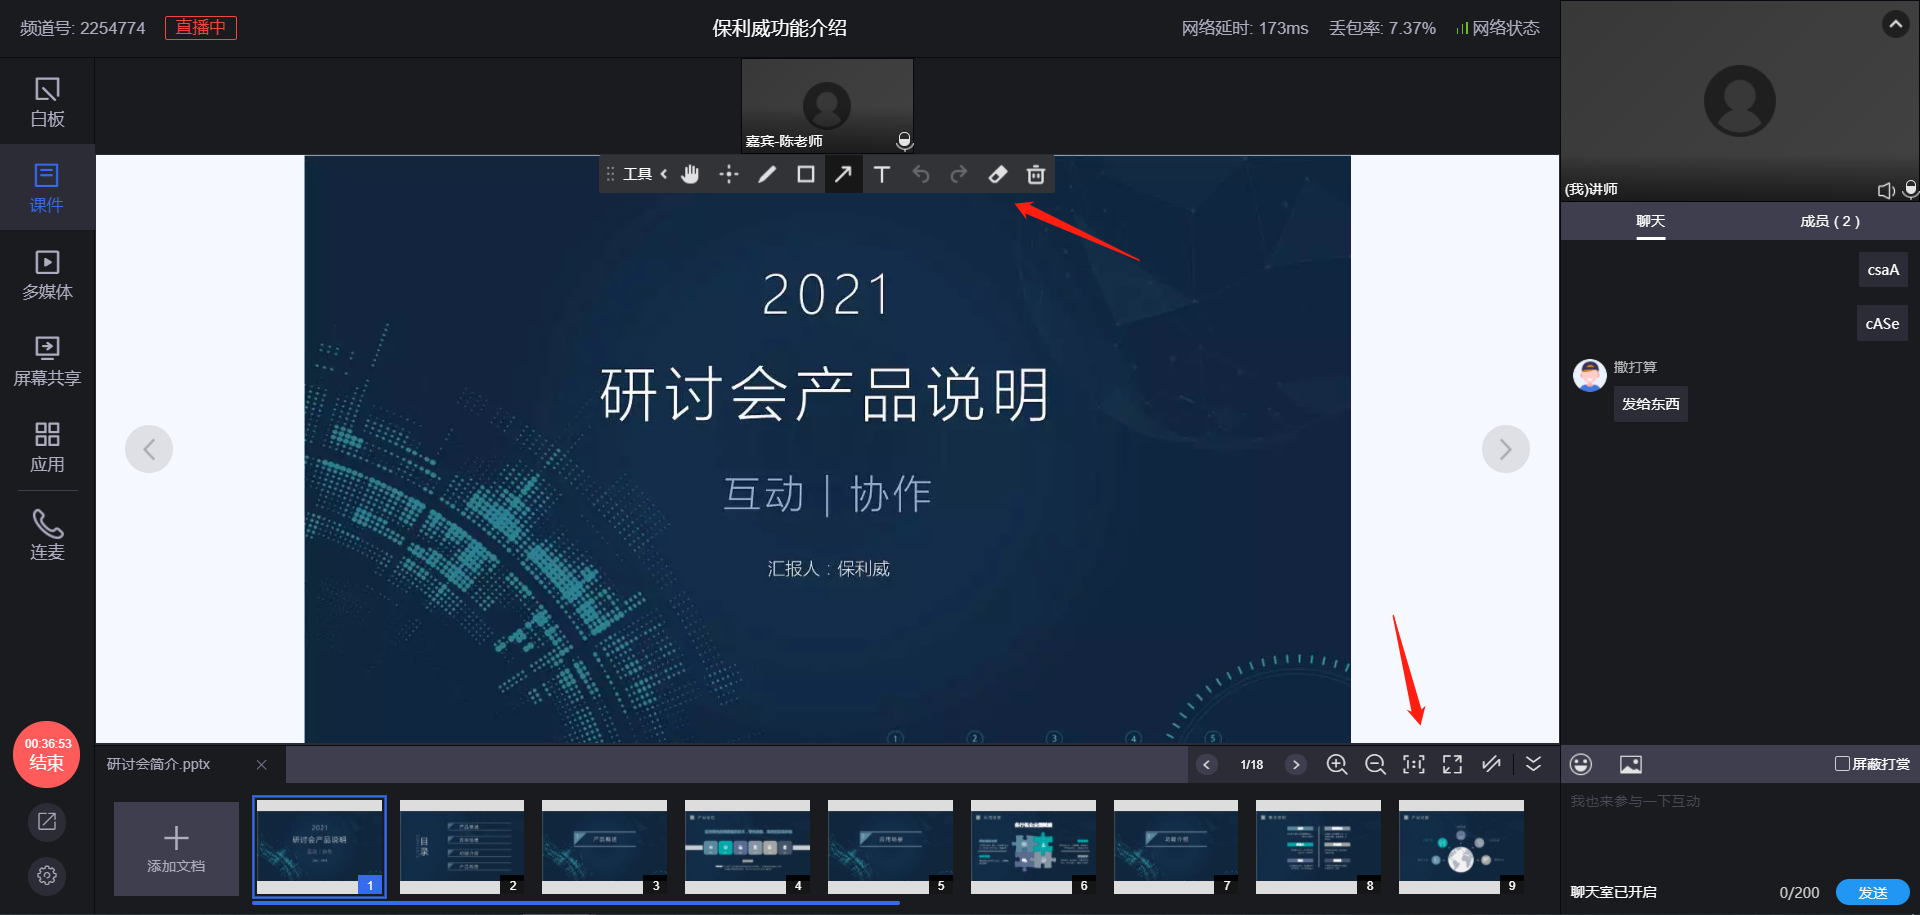
- In the courseware window, click the "Open Courseware" button to display the courseware content in the courseware area. You can annotate with the pen tool, turn pages, zoom, and preview for the best sharing effect.
3. Screen Sharing
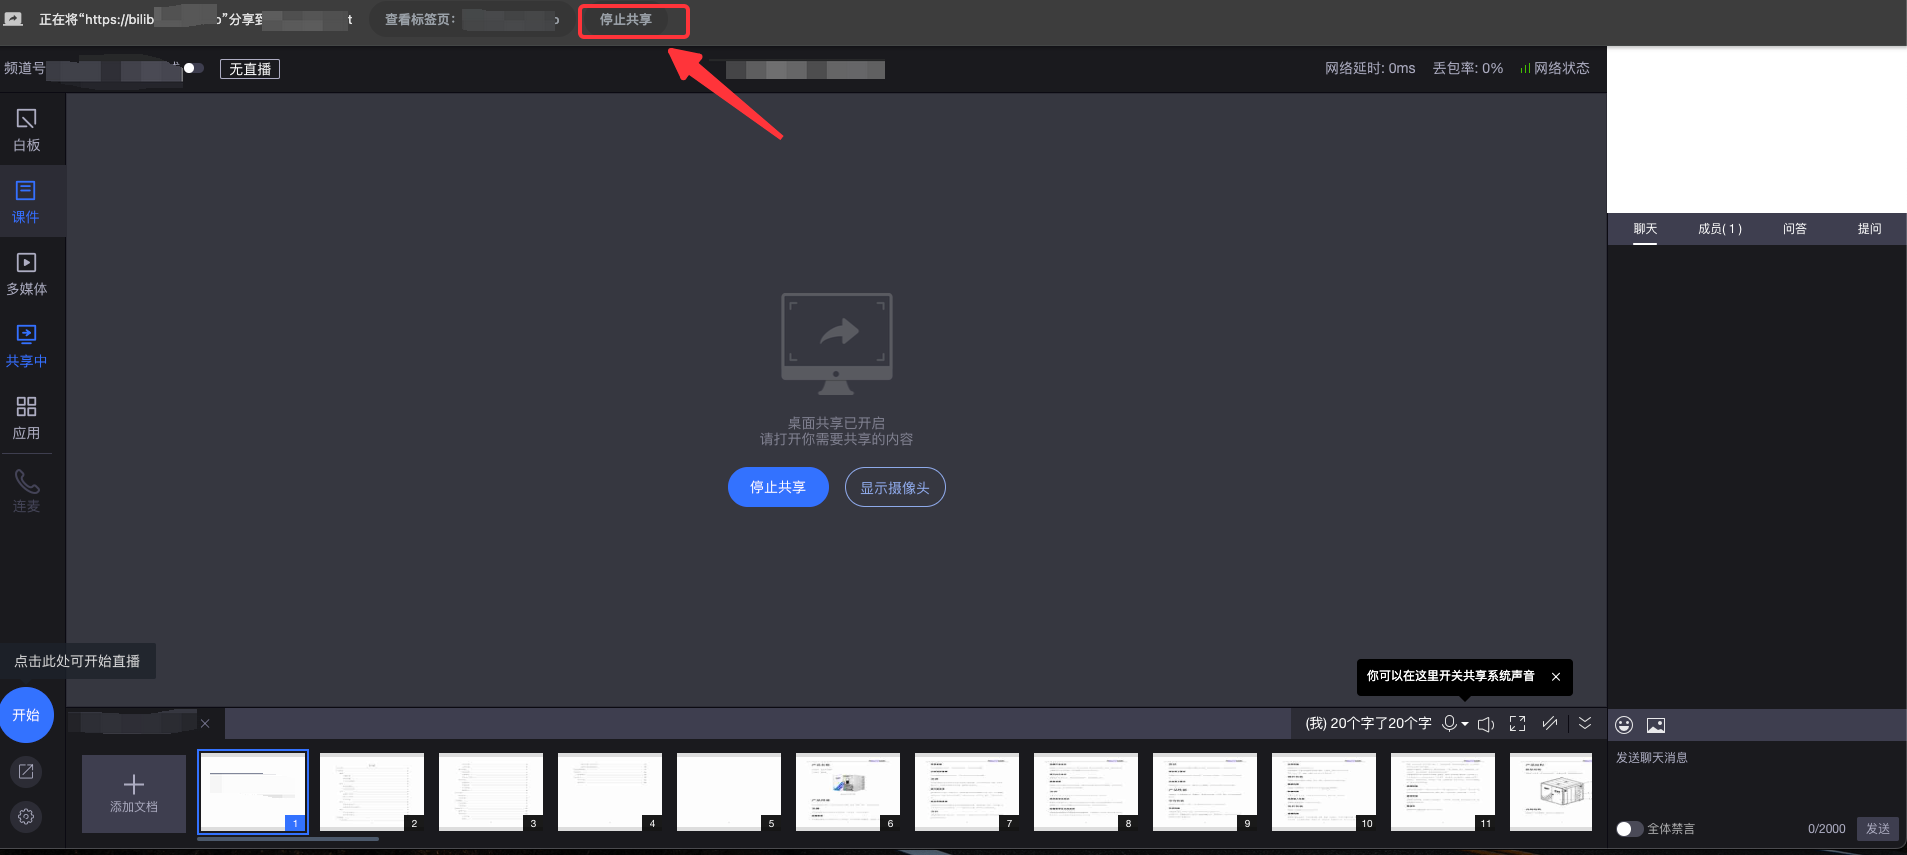
- Click the screen sharing button on the left to choose to share your screen, an application window, or a browser tab. Enable the "Share Audio" switch to share your computer's audio with the audience.
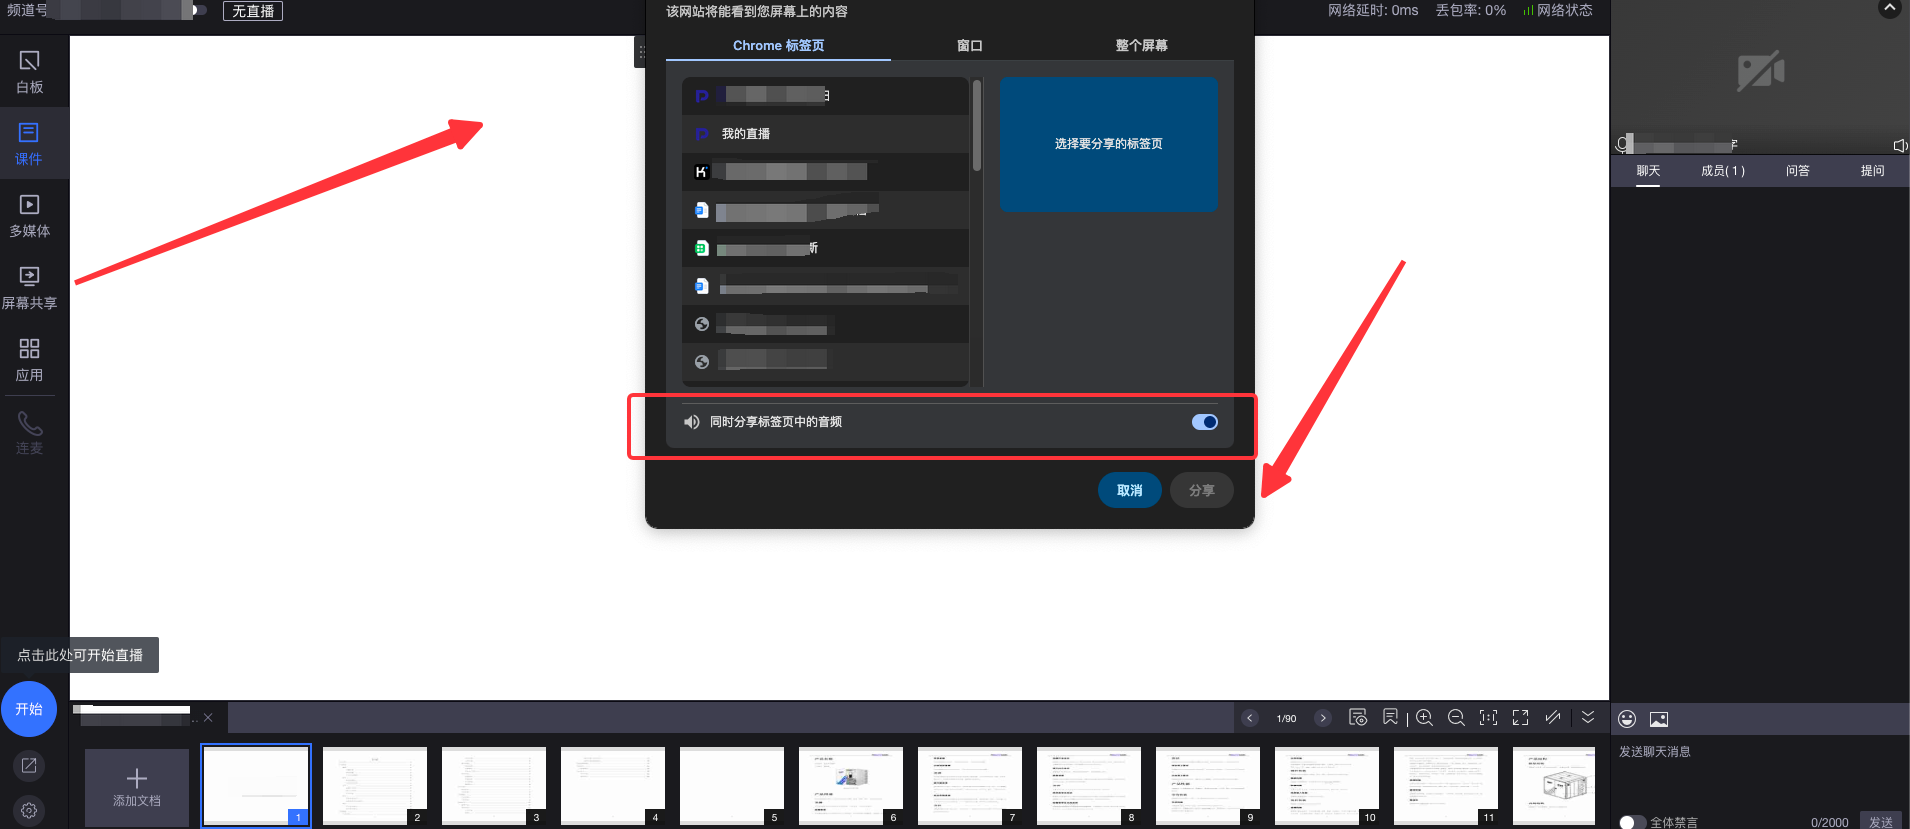
- During sharing, click the "Stop Sharing" button to end the screen share.
VI. Interactive Applications
To enhance interaction between the instructor and students during the live stream, you can use functions such as check-ins, announcements, surveys, quizzes, and lucky draws.
VII. Member Management
- To maintain a good chat interaction environment in the live room, the host and admin can mute, kick, and manage co-streaming permissions for viewers.
- Mute: The instructor can mute viewers who post inappropriate comments. Click "Mute" to implement, click "Unmute" to restore permissions.
- Kick: During the live stream, if a user violates chat room rules and affects the stream, they can be kicked out. They can only re-enter after the admin removes the restriction from the backend.
- Co-streaming Permission Management: The instructor can approve viewers who request to co-stream, granting actions like "Grant First Screen", "Mute Microphone", "Turn Off Camera", "Remove from Co-stream".
VIII. Web Streaming FAQ
If you encounter a network disconnection or other network anomalies during the live stream, the "Go Live" button on the left will become grayed out, and a prompt will appear. Viewers will no longer see the live video. Please check your network status. Once it is normal, refresh the page and restart the live stream.
Note: The live stream may be interrupted, but the chat room might still be usable, and you may still be able to communicate with guests via co-streaming. Use these methods to get in touch and determine the resolution.