WeChat Official Account Customization (New)
I. Feature Overview
- Bind a verified Service Account to authorize user login via your own official account.
- To use payment-related features such as red packets, you must first bind a Service Account before binding a Merchant Account.
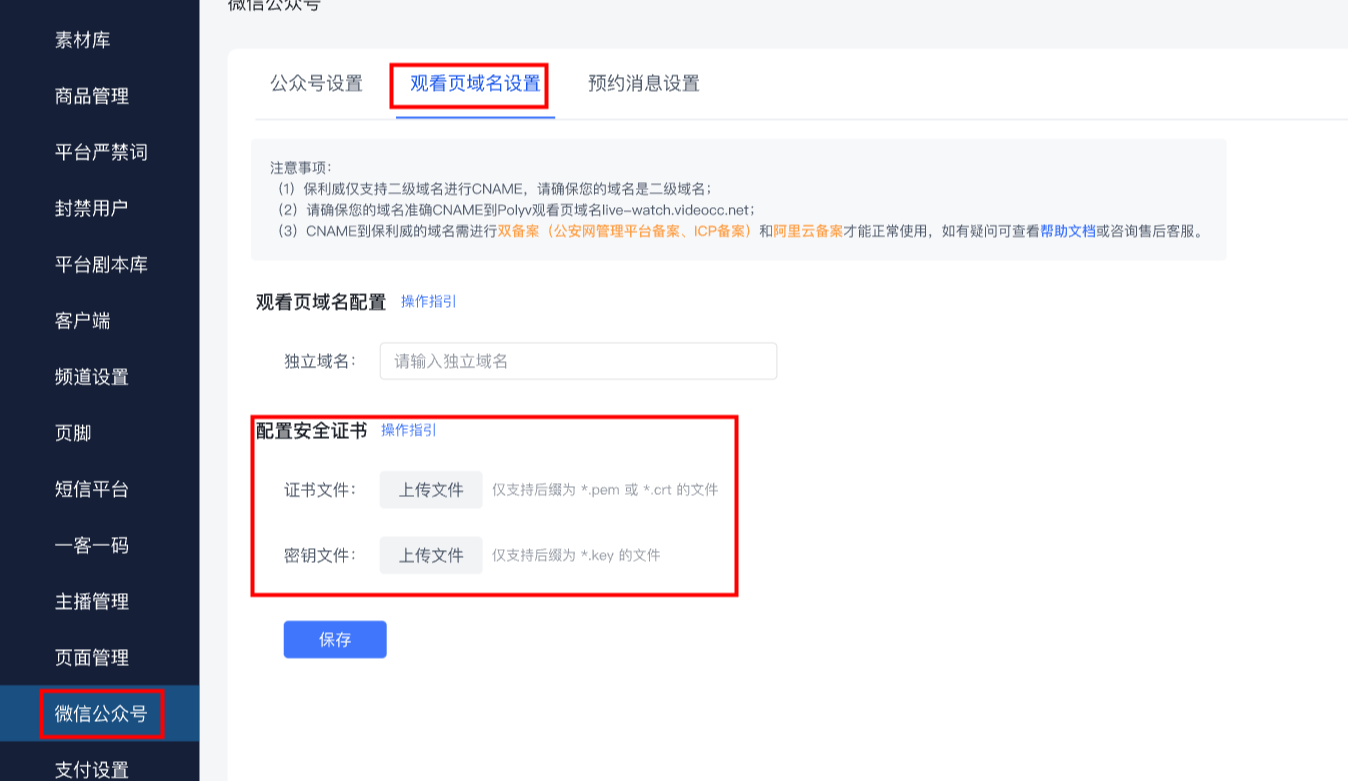
- Configure a custom viewing page domain to create an enterprise-specific viewing page domain, enhancing your corporate brand image.
- Use your own official account for appointment reminders and live stream start notifications, promptly notifying followers to participate in live streams, thereby increasing engagement and interaction rates.
II. Information Required
| Required Information | Function | Remarks |
|---|---|---|
| Official Account Name, AppID, AppSecret, TXT file for web page authorization | Authorize WeChat login to your official account | Required |
| CNAME domain, SSL certificate | The viewing page and shared links will display the configured domain | Optional |
| WeChat notification template ID, replacement text for "Polyv Live" platform, replacement text for "Long press QR code to follow Polyv Live", follow QR code | Customize appointment notification templates for your bound official account | Optional |
Notes:
- The official account must be a Service Account, not a Subscription Account.
- Personal accounts and unverified official accounts are not supported.
- One Polyv account can only bind one official account. To change the official account, please unbind the current one first.
III. Setup Process
1. Configure Service Account Information
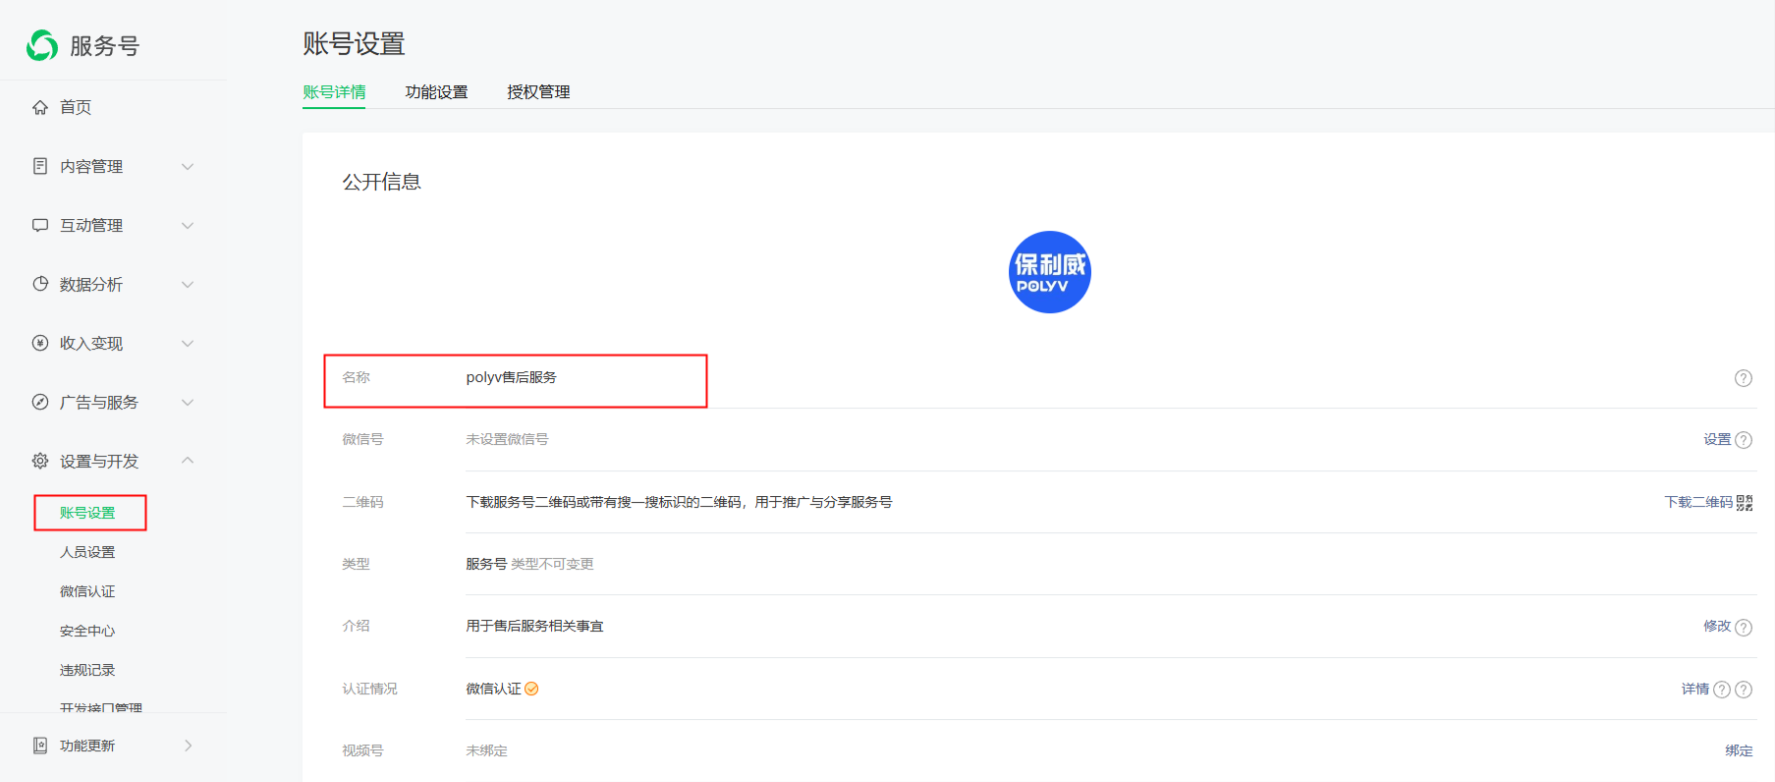
(1) Obtain the Official Account Name
Enter the obtained WeChat Official Account name into the Polyv backend.
Reference path: WeChat Official Account Platform --> Settings & Development --> Account Settings --> Account Details.
(2) Obtain the Official Account AppID and AppSecret
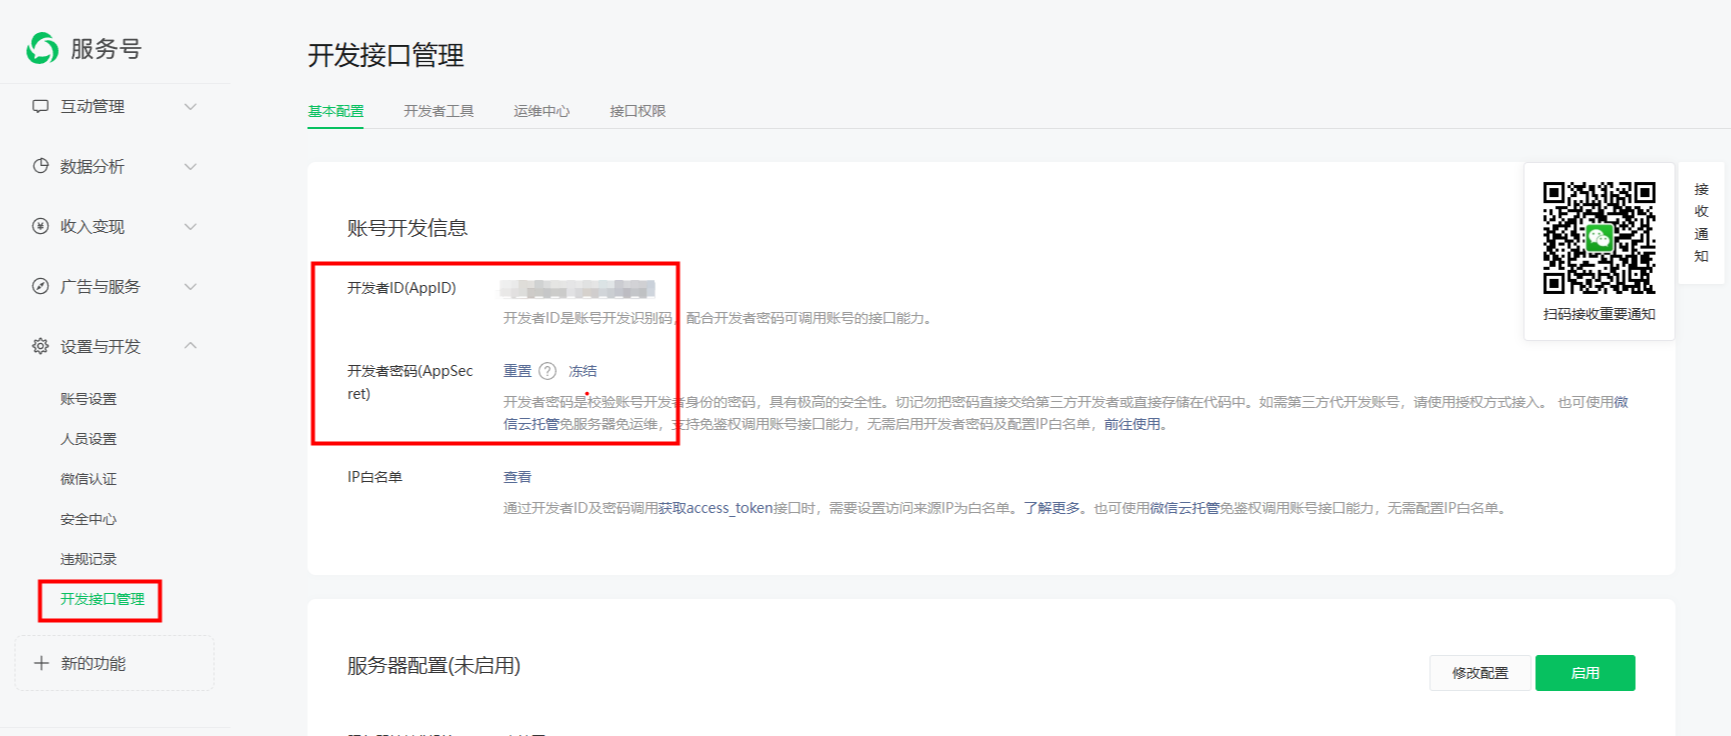
Enter the obtained WeChat Official Account AppID and AppSecret into the Polyv backend.
Reference path: WeChat Official Account Platform --> Settings & Development --> Development Interface Management --> Basic Configuration.
2. Service Account Authorization Verification
(1) Obtain the Service Account Verification File
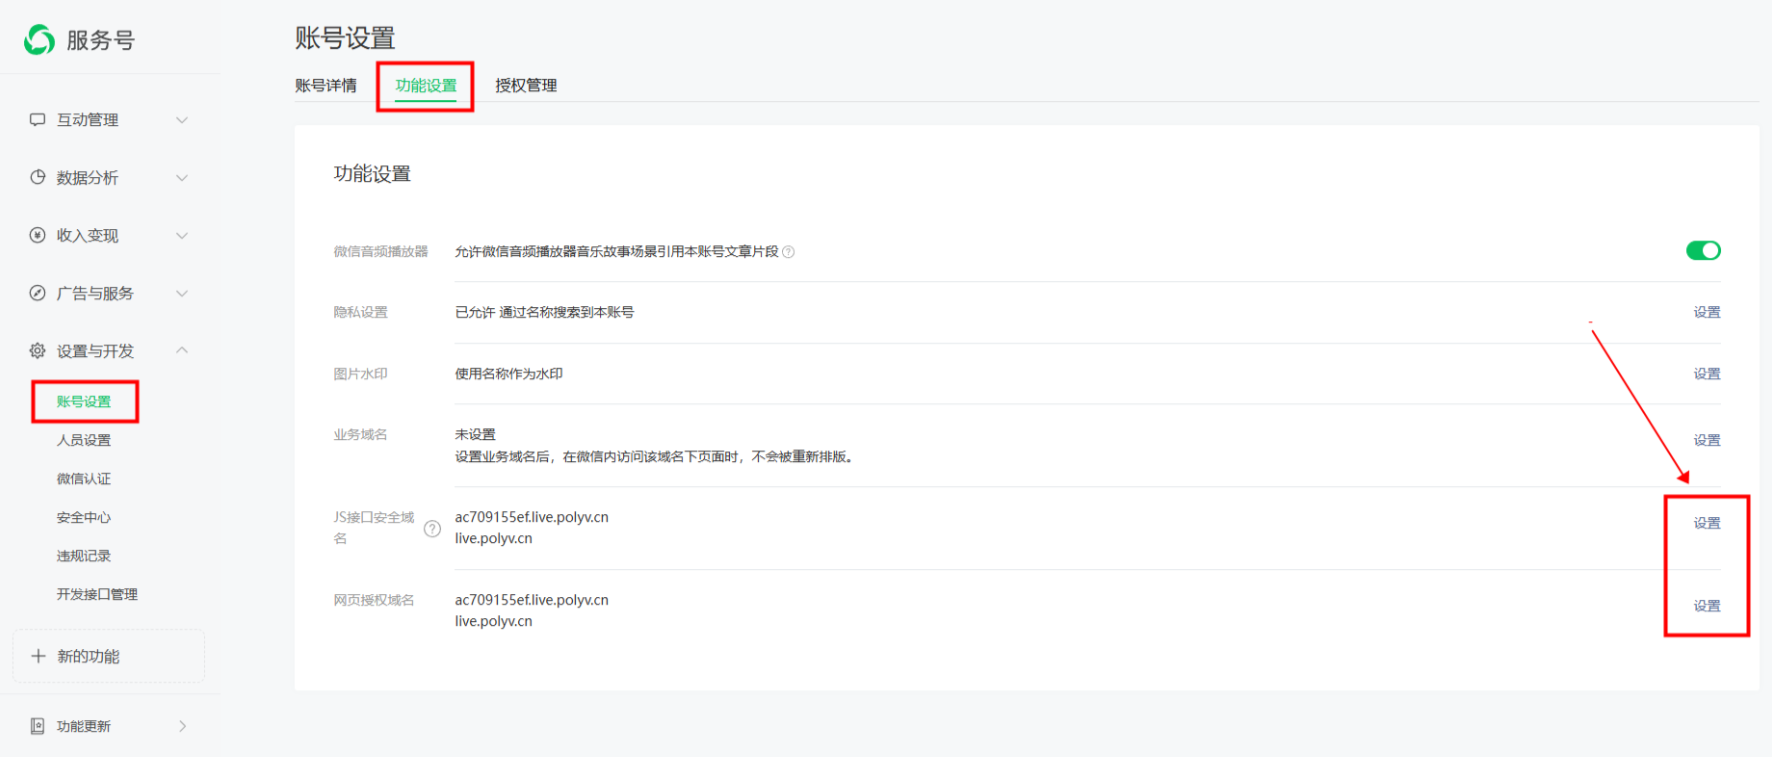
Reference path: WeChat Official Account Platform --> Settings & Development --> Account Settings --> Function Settings --> JS Interface Security Domain or Web Page Authorization Domain Settings --> Download the file and save it locally.
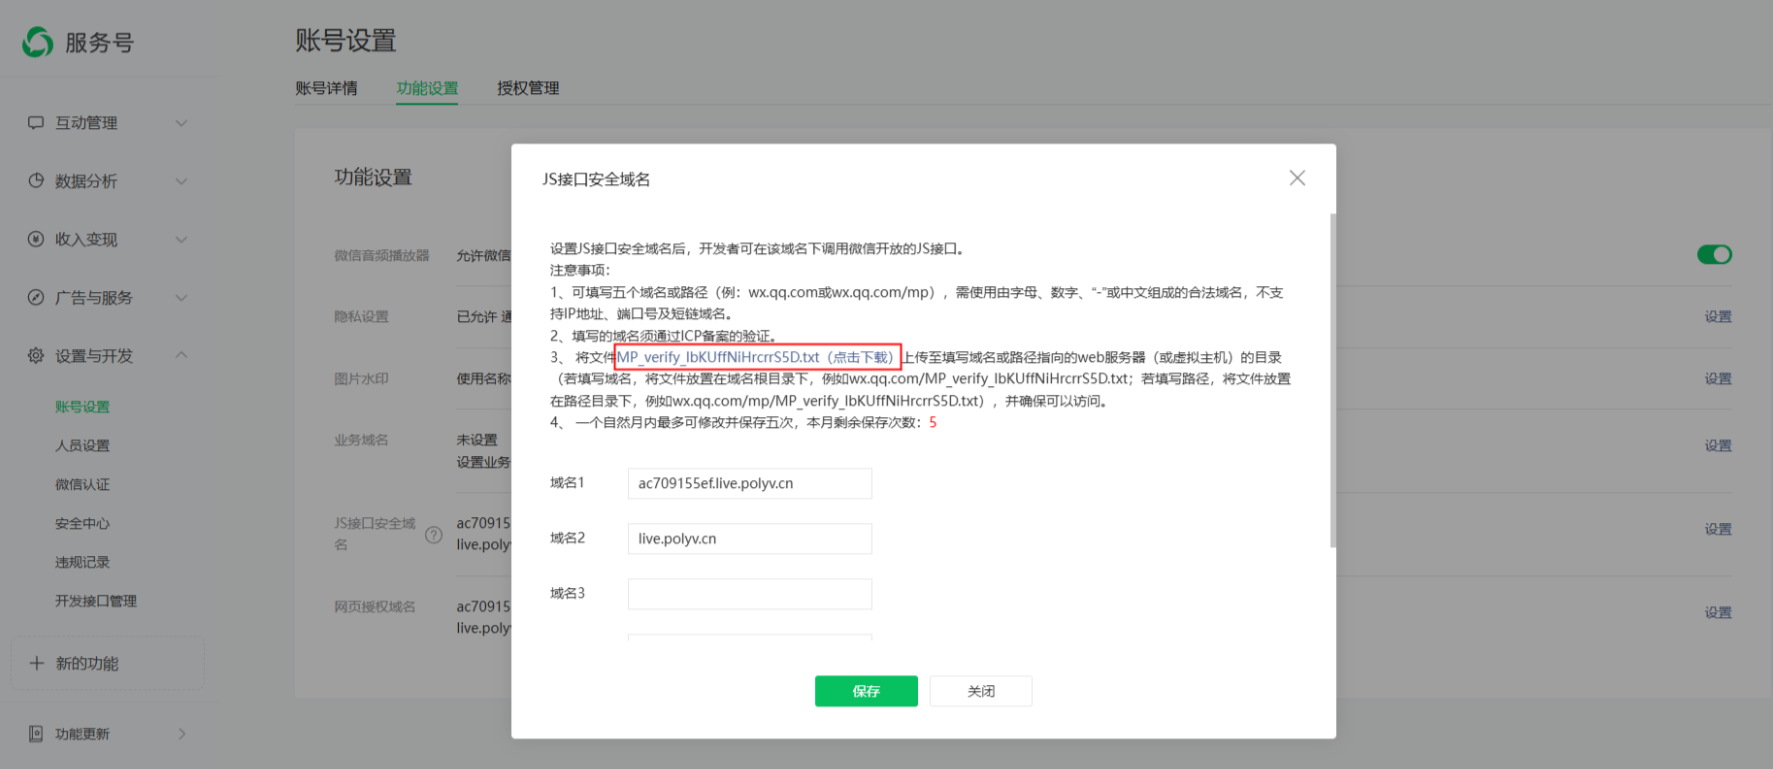
(2) Upload the Service Account Verification File
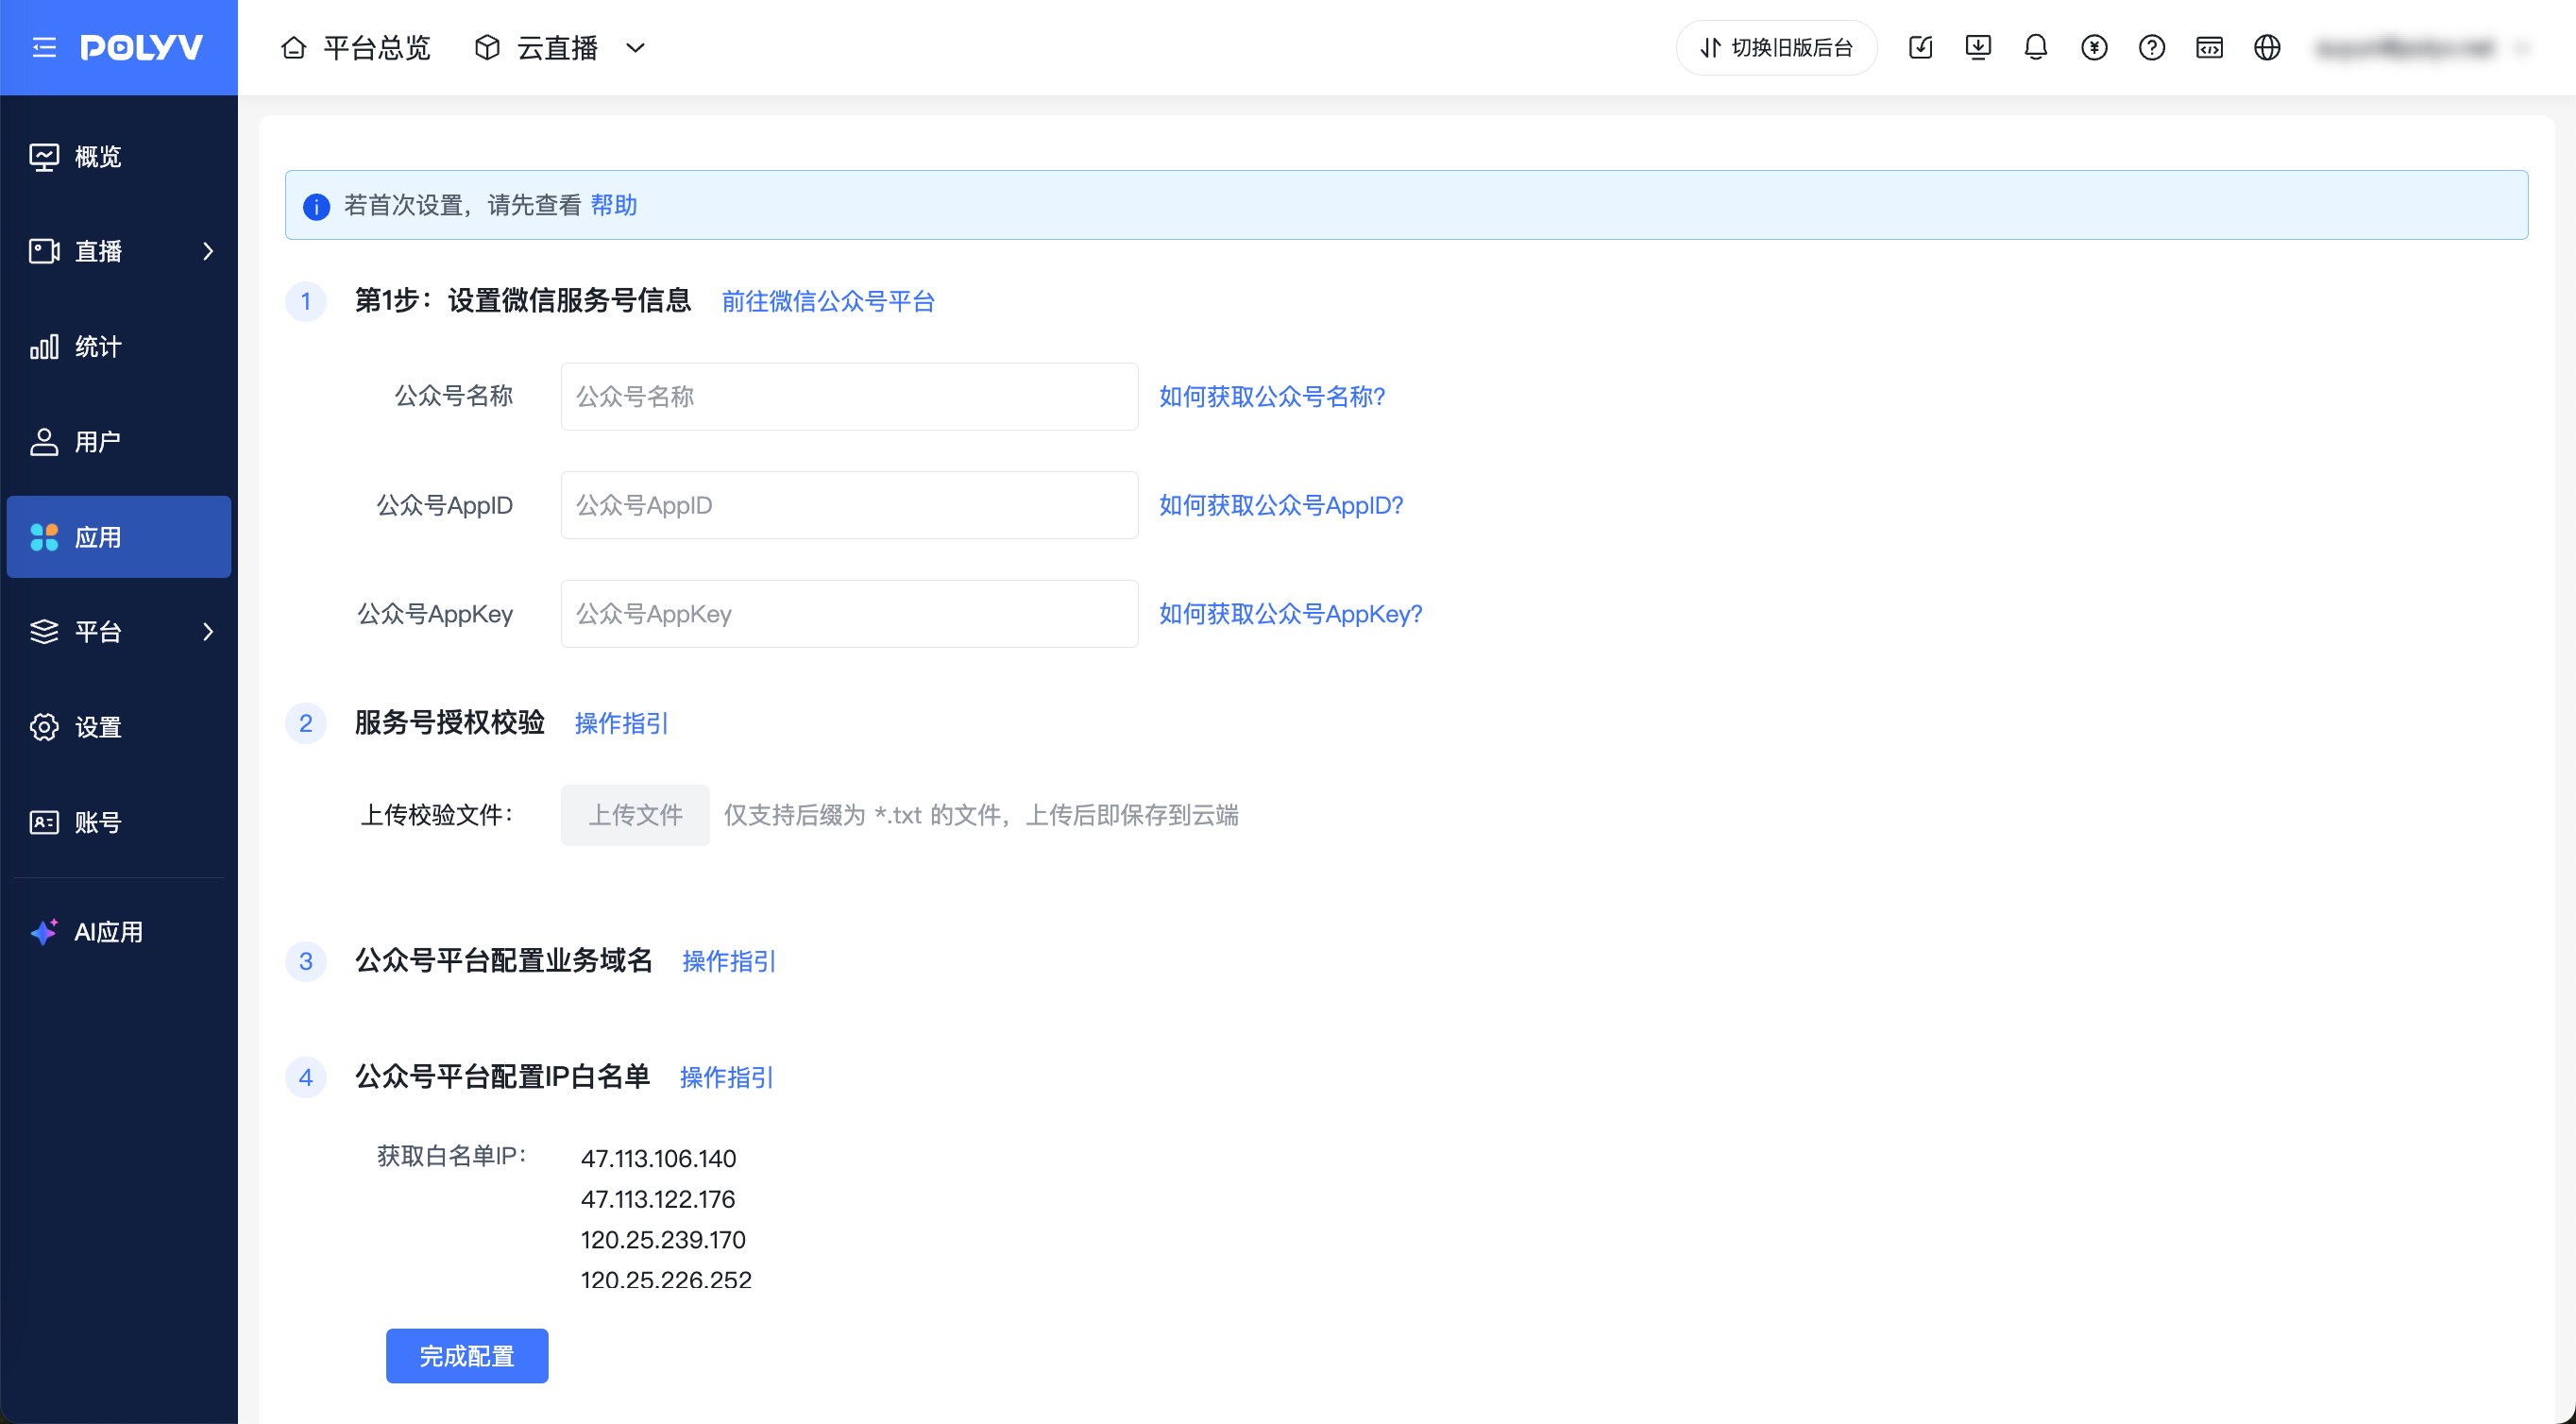
Upload the locally downloaded verification file to the Polyv backend. After uploading, proceed to Step 3 to configure the business domain.
File upload path: Polyv Backend --> Platform Settings --> Official Account Settings --> Step 2: Upload file. Once uploaded, it will be saved to the server.
3. Configure Business Domain
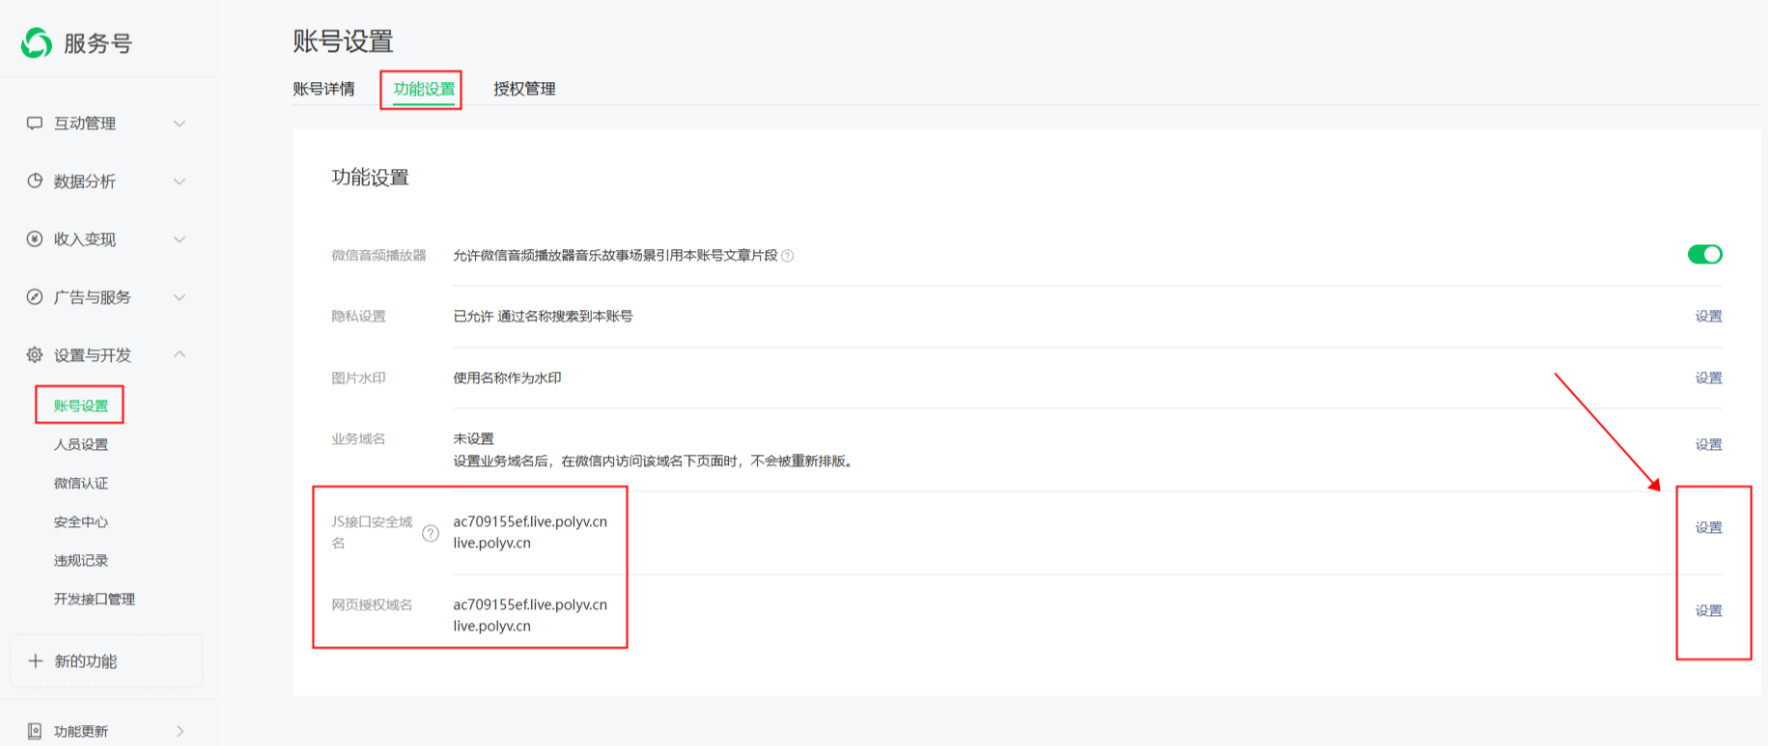
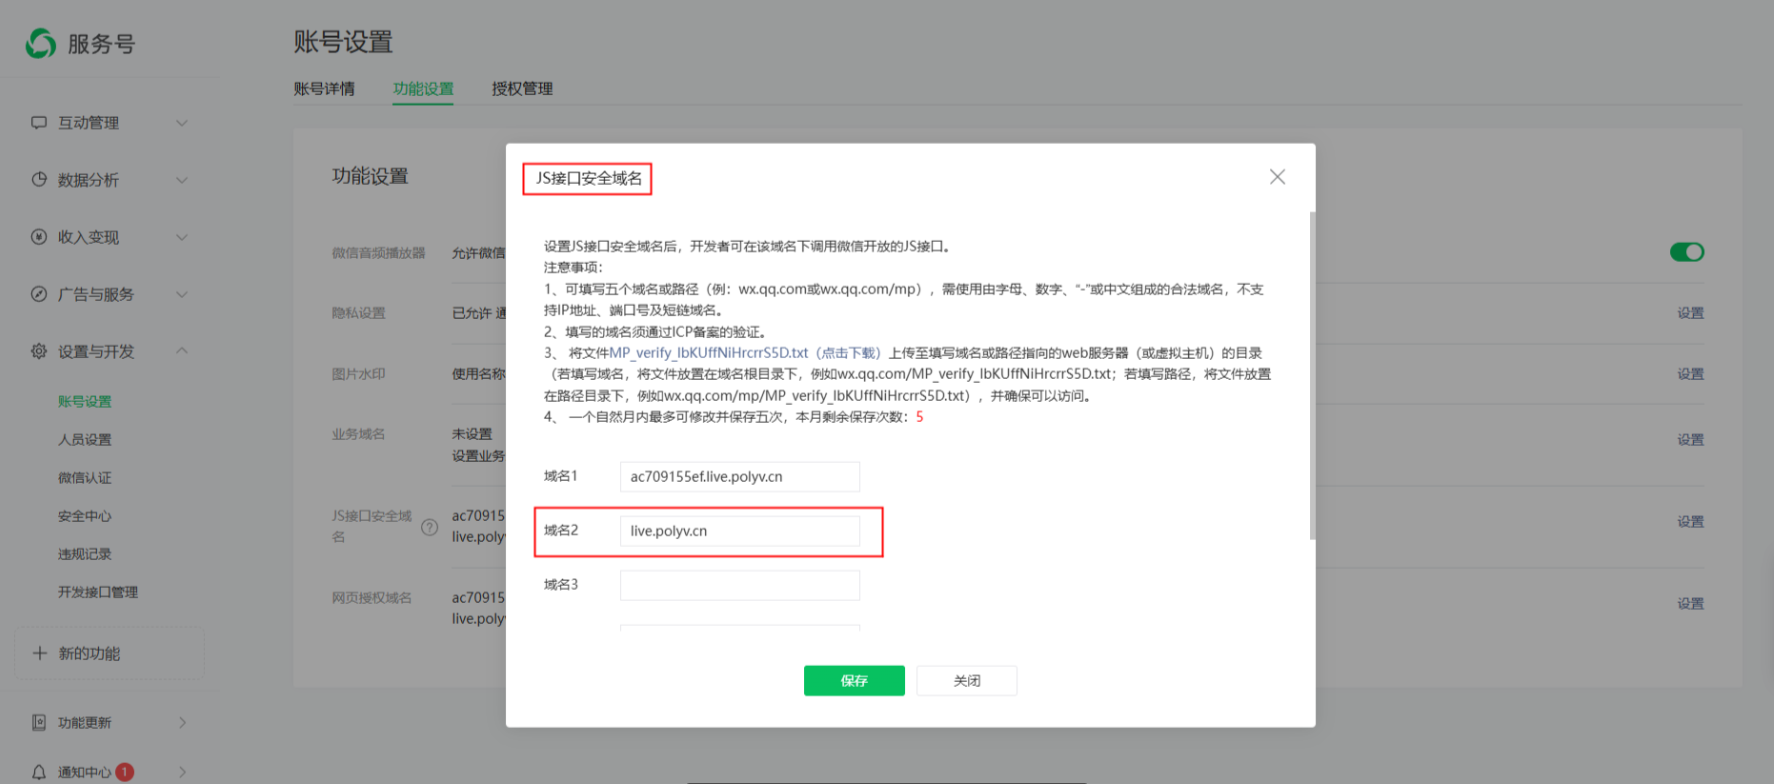
This step mainly involves setting the JS Interface Security Domain and the Web Page Authorization Domain. This can only be done after completing Step 2 of the official account settings. Click "Settings" and configure the Polyv viewing page domains in the popup: userid.live.polyv.cn and live.polyv.cn. If you have configured a custom domain, please enter it here.
Parameter setting path: WeChat Official Account Platform --> Settings & Development --> Account Settings --> Function Settings --> JS Interface Security Domain or Web Page Authorization Domain.
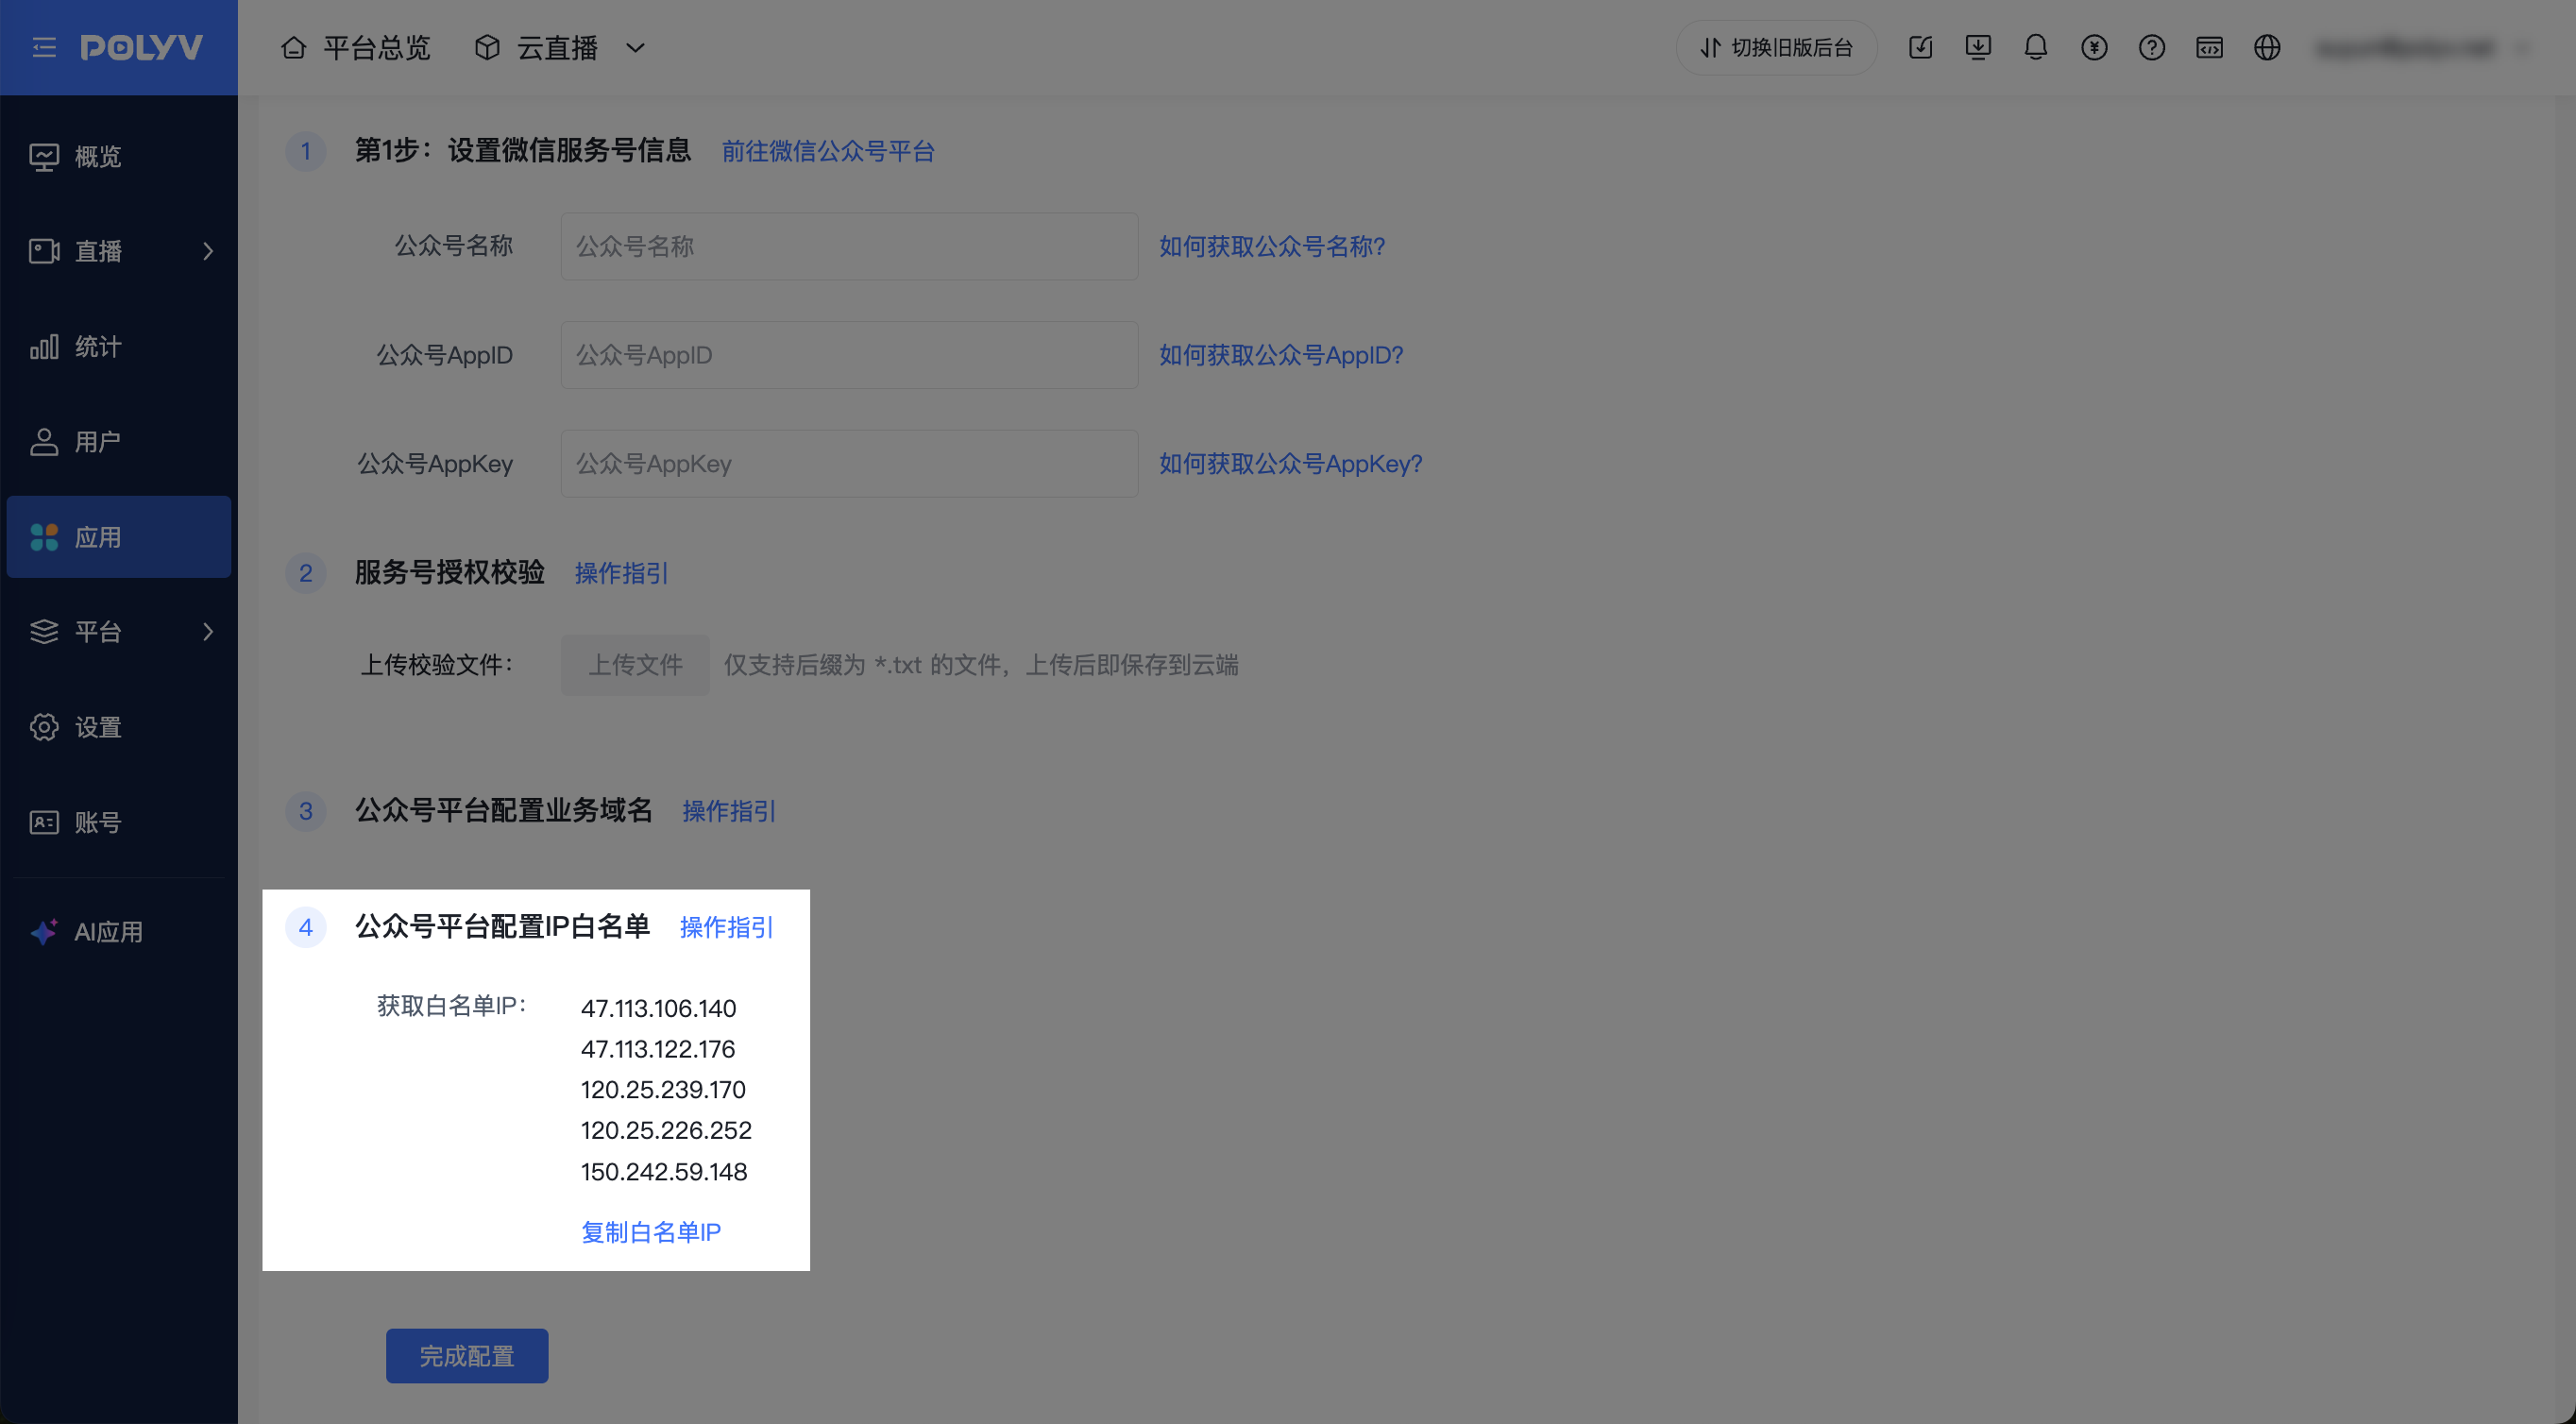
4. Configure IP Whitelist
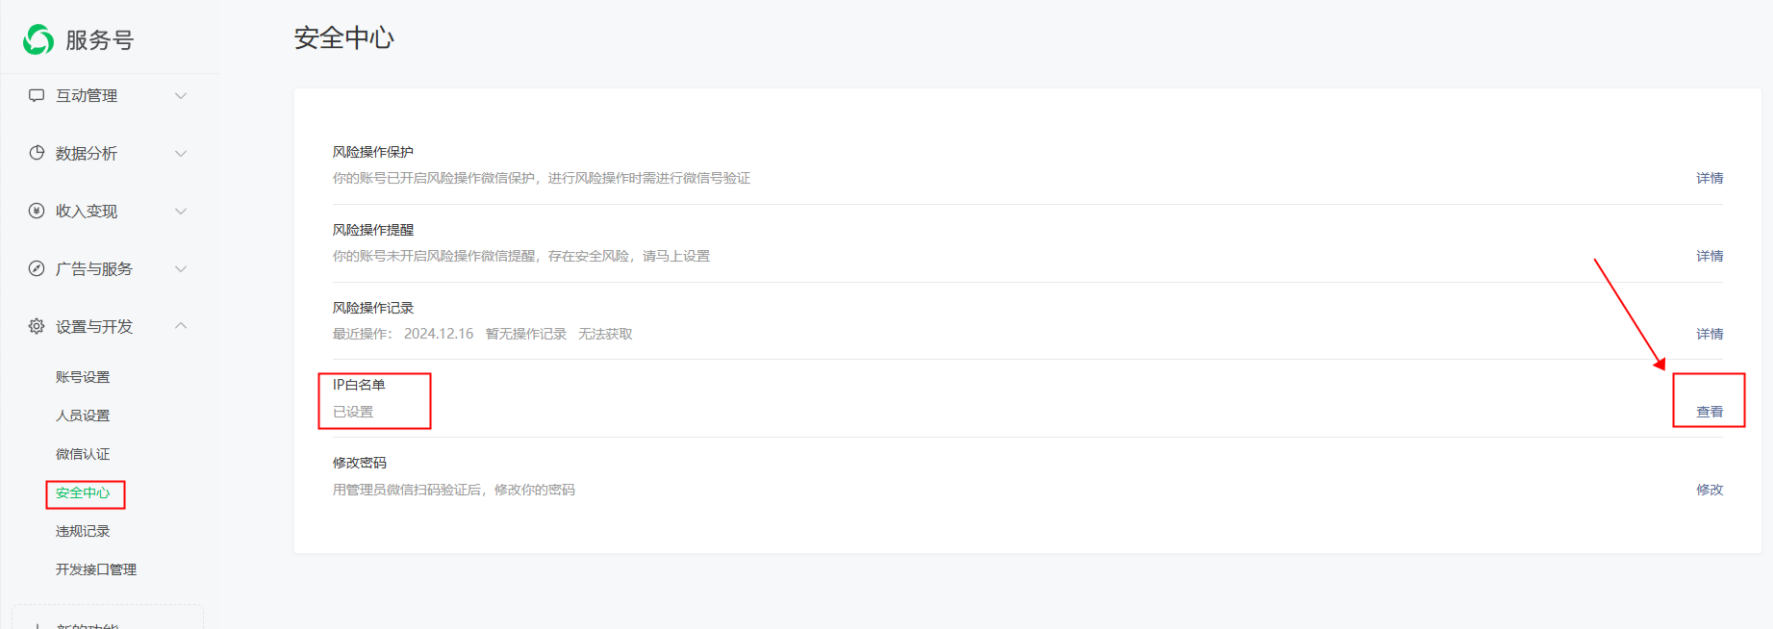
First, copy the IP whitelist used for configuration from the Polyv backend. Then, configure it in the WeChat Official Account Platform. After completing Step 4 (configuring the IP whitelist) in order, click the "Complete Configuration" button to finish and save the official account settings.
Parameter setting path: WeChat Official Account Platform --> Settings & Development --> Security Center --> IP Whitelist, add the copied whitelist.
IV. Viewing Page Domain Settings
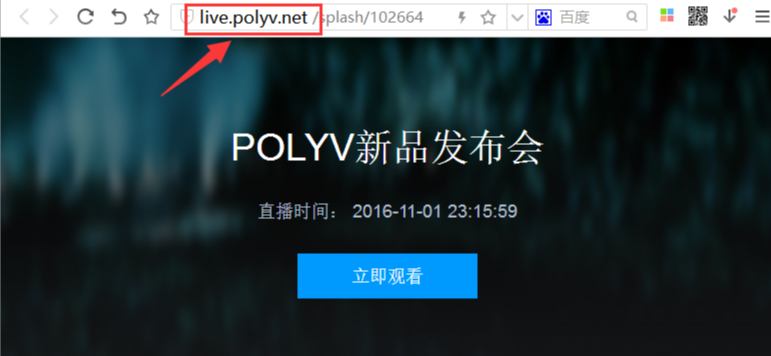
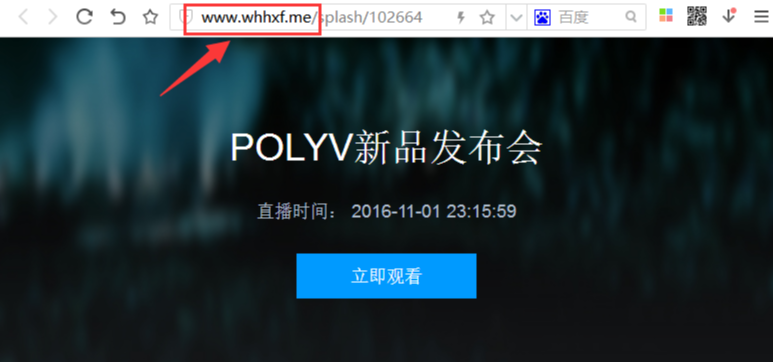
If you want the viewing page domain to display as your corporate domain, you can configure the viewing page domain (CNAME). After configuration, the Polyv viewing page domain will display as the enterprise domain you set in the backend, enhancing your corporate brand image.
Effect without CNAME configuration:
Effect after CNAME configuration:
Notes:
(1) For information on what CNAME is, please refer to the CNAME Usage Guide.
(2) Polyv only supports CNAME for second-level domains. Please ensure your domain is a second-level domain.
(3) Ensure your domain accurately CNAMEs to the Polyv viewing page domain: live-watch.videocc.net.
(4) Domains CNAME'd to Polyv require dual registration (Public Security Network Management Platform Registration, ICP Registration) and Alibaba Cloud Registration to function properly. If you have questions, please refer to the help documentation or consult after-sales staff.
1. How to Set Up CNAME
If your domain service provider is Alibaba Cloud and your domain is registered, you can follow the steps below to set up CNAME:
1.1. Log in to the Alibaba Cloud console, select [Domain Services] -> [Domain List], choose the corresponding domain, and click the [Resolve] button.
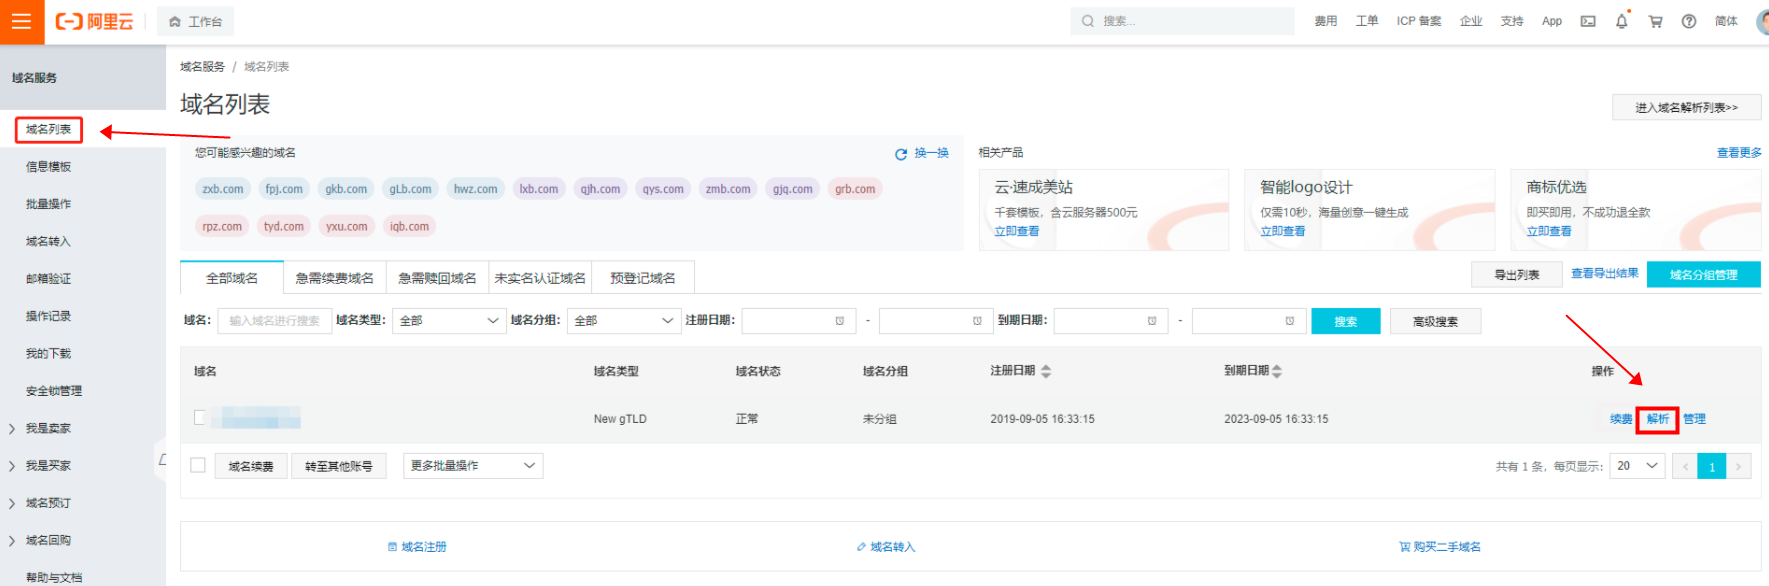
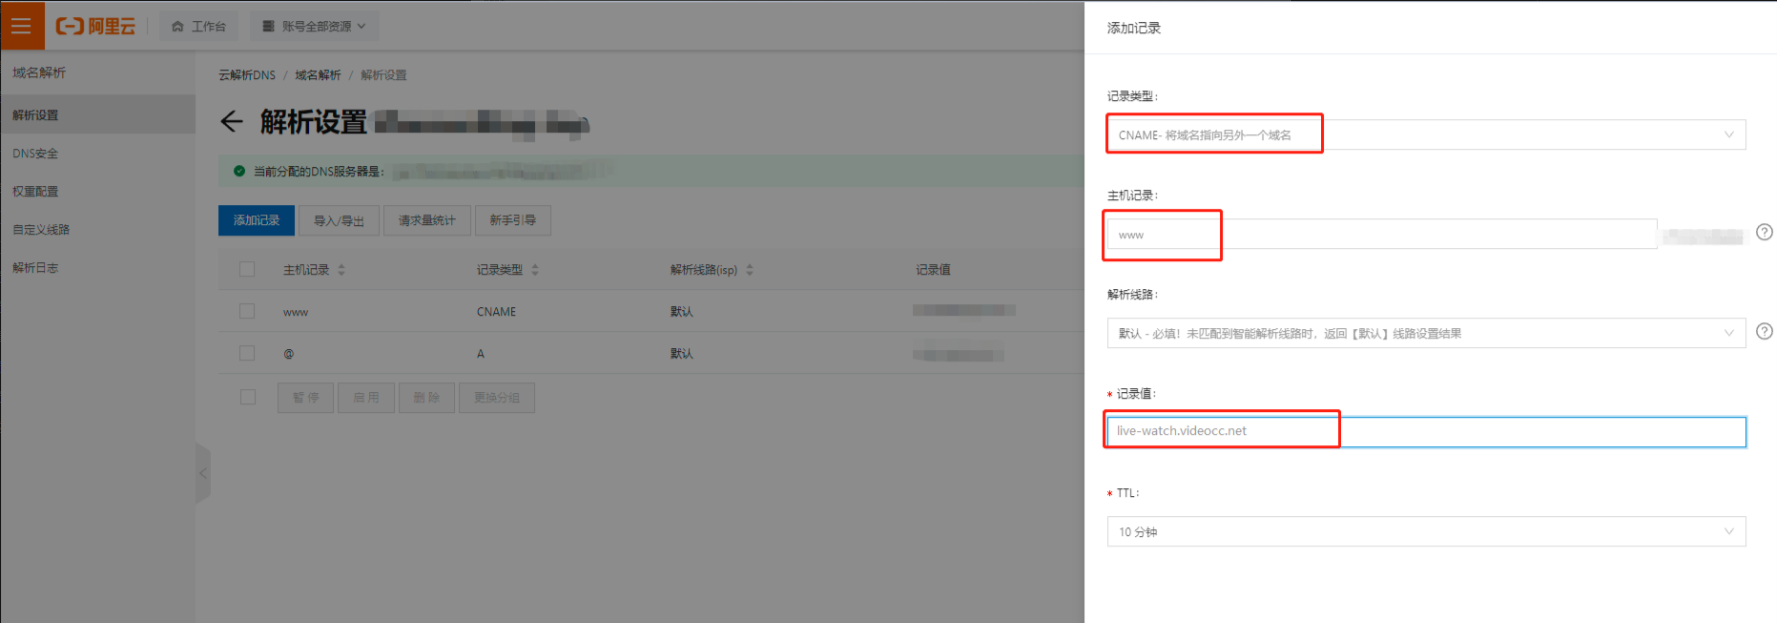
1.2. Navigate to the domain resolution page for the specified domain and click [Add Record].
1.3. Enter the domain prefix (e.g., www) in the [Host Record] field and set the [Record Type] to CNAME.
1.4. Fill in the [Record Value]. Copy the Polyv viewing page CNAME address live-watch.videocc.net into the [Record Value] field. After filling, save the settings. The CNAME record is now added.
2. Configure SSL Security Certificate
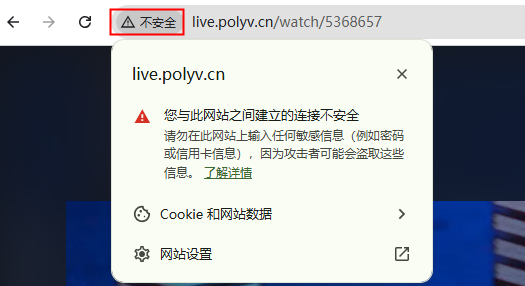
When customizing the viewing page domain, if you do not upload and configure an SSL security certificate for the CNAME domain, the viewing page will display a "Your connection is not private" warning. Additionally, live stream co-hosting interaction and low-latency streaming will not function. Therefore, configuring an SSL security certificate is required when setting up the viewing page domain.
How to Obtain an SSL Certificate from Alibaba Cloud
If your domain service provider is Alibaba Cloud, you need to apply for an SSL certificate first. The specific process is as follows:
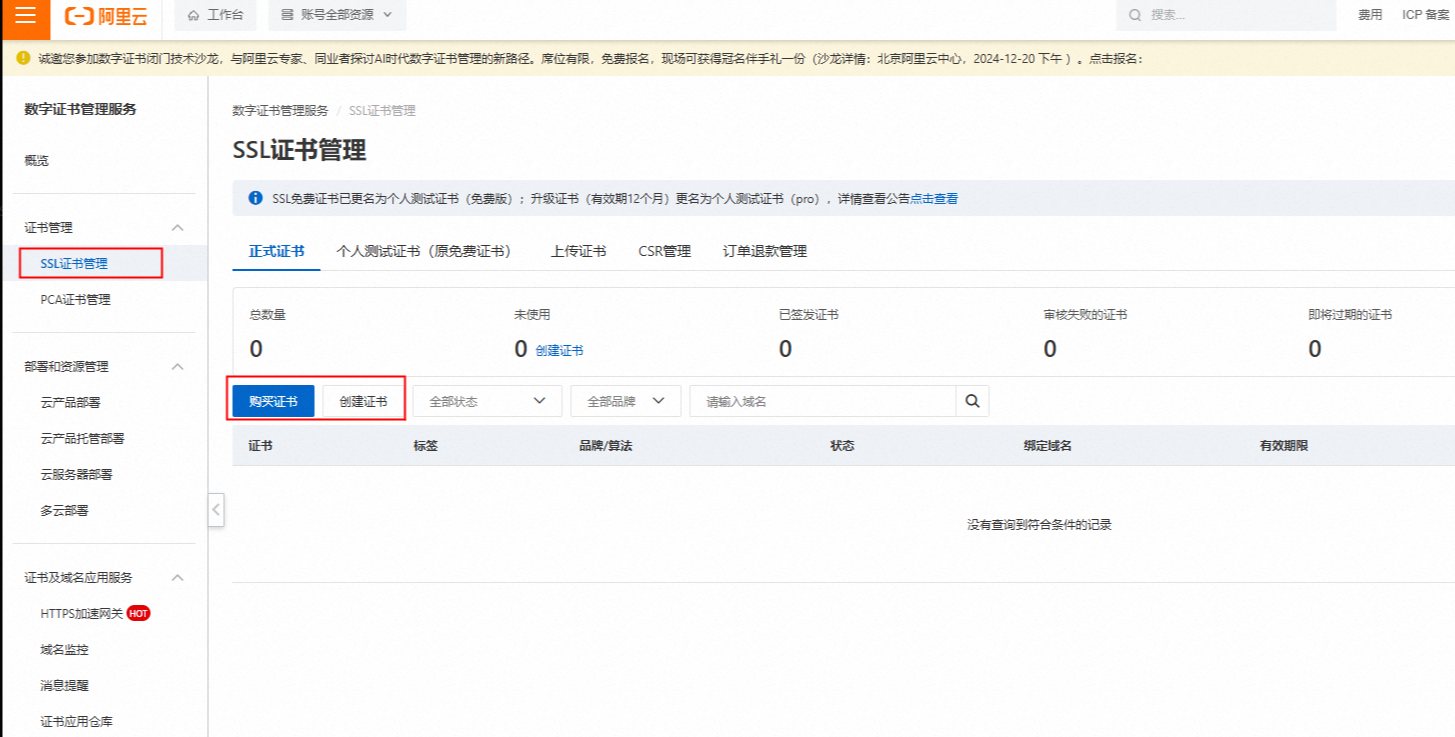
2.1. Log in to the Alibaba Cloud console, select [Digital Certificate Management Service] -> [Certificate Management] -> [SSL Certificate Management].
2.2. Select a formal certificate, create a certificate, and submit the application. After approval, an SSL certificate will be generated in [SSL Certificate Management].
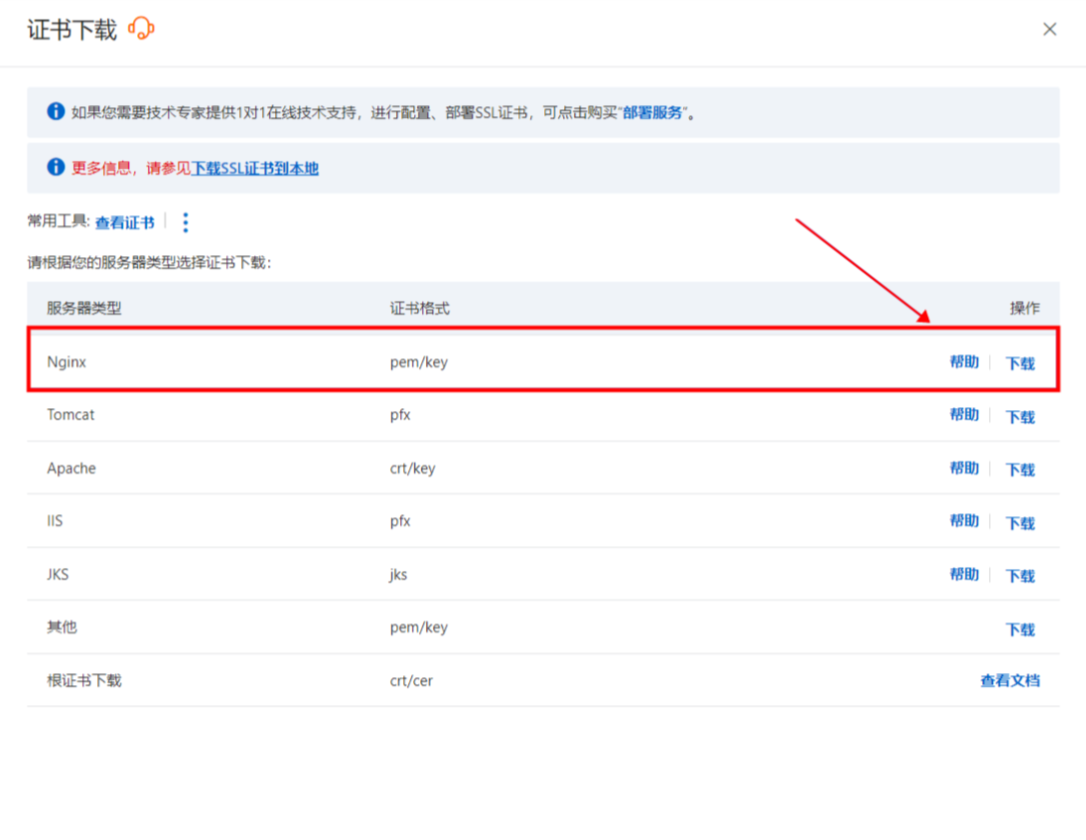
2.3. The generated SSL certificate can be downloaded directly. When downloading, select the server type as Nginx. After downloading the certificate to your local machine and unzipping it, you will get certificate files in .key and .pem formats.
2.4. Go to the Polyv backend [Viewing Page Domain Settings], upload the corresponding unzipped certificate files, and click "Save" to complete the viewing page domain configuration.