


How to Set Rounded Corners and Shadows in the Live Streaming Client for a More Polished Look
In live streaming scenarios such as training sessions and product demonstrations, you can apply rounded corners and shadows to materials via the live streaming client. Rounded corners soften the edges of the screen, while shadows help distinguish materials from the background, making them ideal for layouts combining the main courseware screen, instructor camera window, and background.
1. Applicable Scope
- Rounded Corners: From client V4.27.0 onwards, both Pure Video and Large Class scenarios support adjusting material rounded corners, with the option to switch to circular materials.
- Shadows: From client V4.32.0 onwards, Pure Video scenarios support material shadow effects, which can be saved in cloud templates.
If you cannot find the corresponding settings, please first verify your client version and current live streaming scenario.
2. How to Set Rounded Corners?
Select the material you want to adjust on the live screen, then click the rounded corners button (located second to the left of the shadow button) in the bottom toolbar. Adjust the rounded corner effect according to your layout needs. For courseware or desktop sharing screens, use smaller rounded corners; for the camera window, choose rounded corners or a circular effect based on the overall style.
After adjustment, check the four corners of the screen to ensure that courseware text, icons, or other important content is not cropped.
3. How to Enable Shadows?
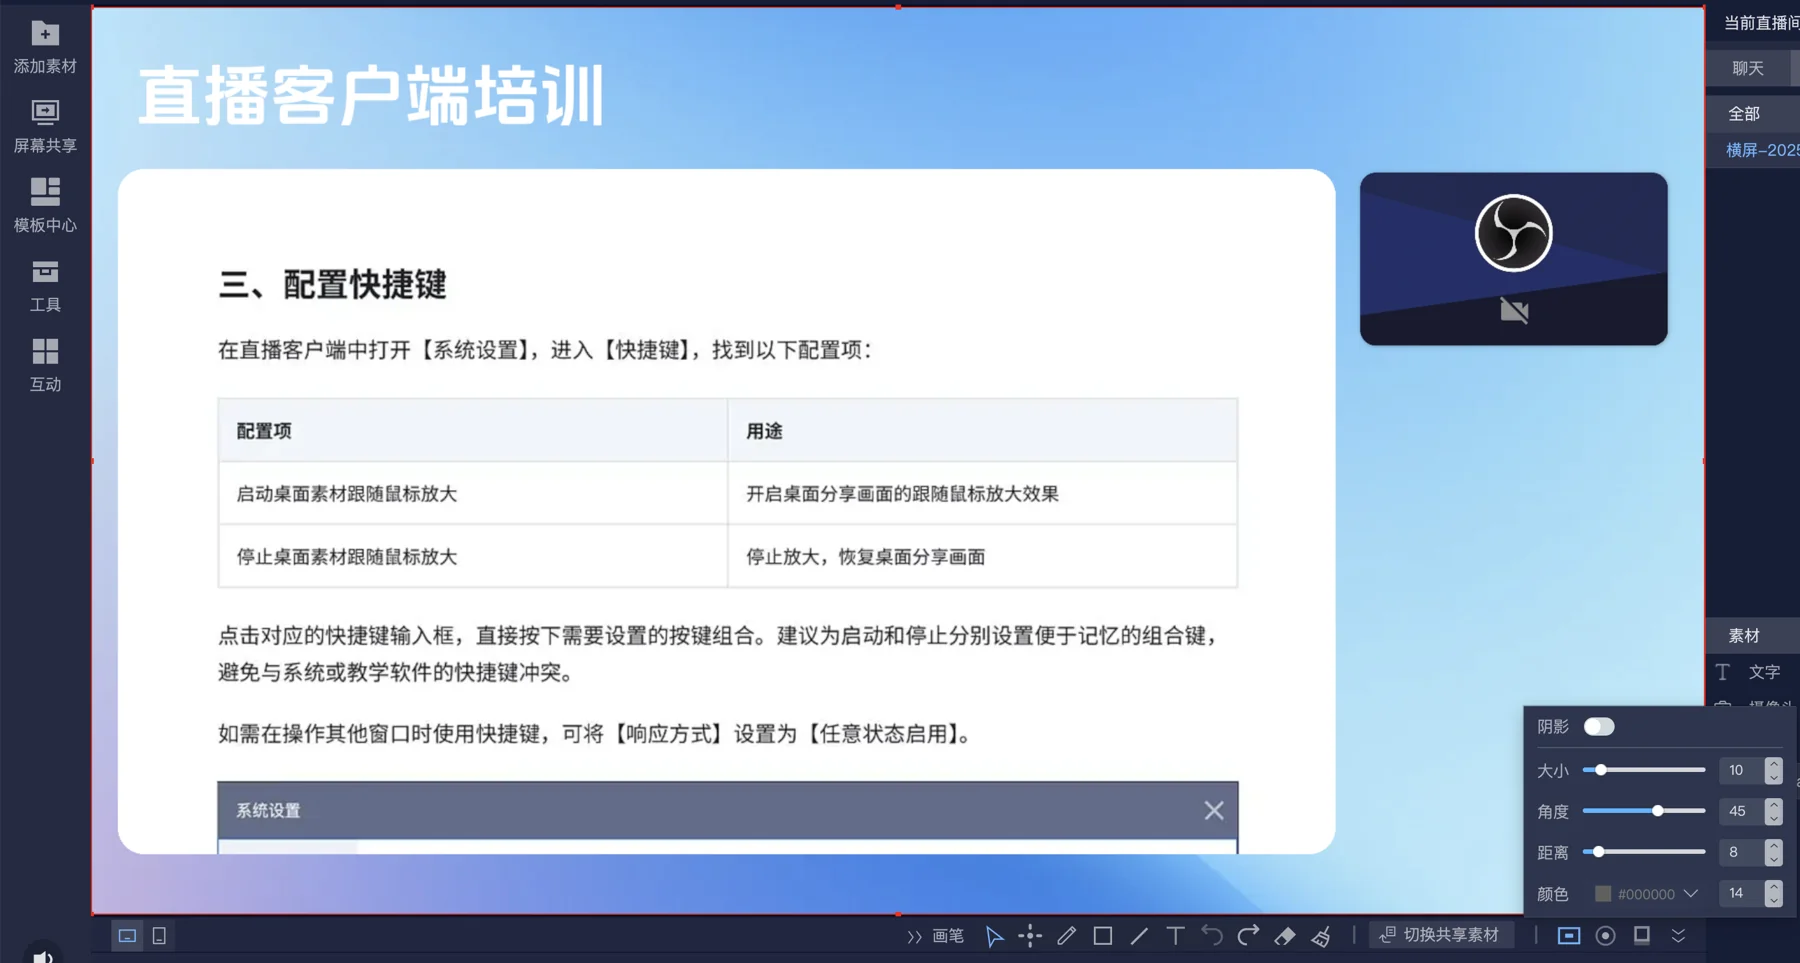
Select the material you want to adjust, click the shadow button in the bottom toolbar, open the settings panel, and enable Shadow. Then adjust the parameters based on the preview effect.
| Setting | Purpose |
|---|---|
| Size | Adjust the size of the shadow |
| Angle | Adjust the direction of the shadow |
| Distance | Adjust the offset distance between the shadow and the material |
| Color | Choose a shadow color that coordinates with the background |
It is recommended to start with a lighter shadow effect and gradually adjust it against the background to avoid the shadow being too heavy and affecting readability. The values in the screenshot are examples only and are not fixed recommended parameters.
The image below shows the location of the shadow settings panel and the adjustable parameters:
4. How to Combine for a Better Look?
- Courseware first, camera second: Set coordinated rounded corners for the main screen and camera window to maintain a consistent layout style.
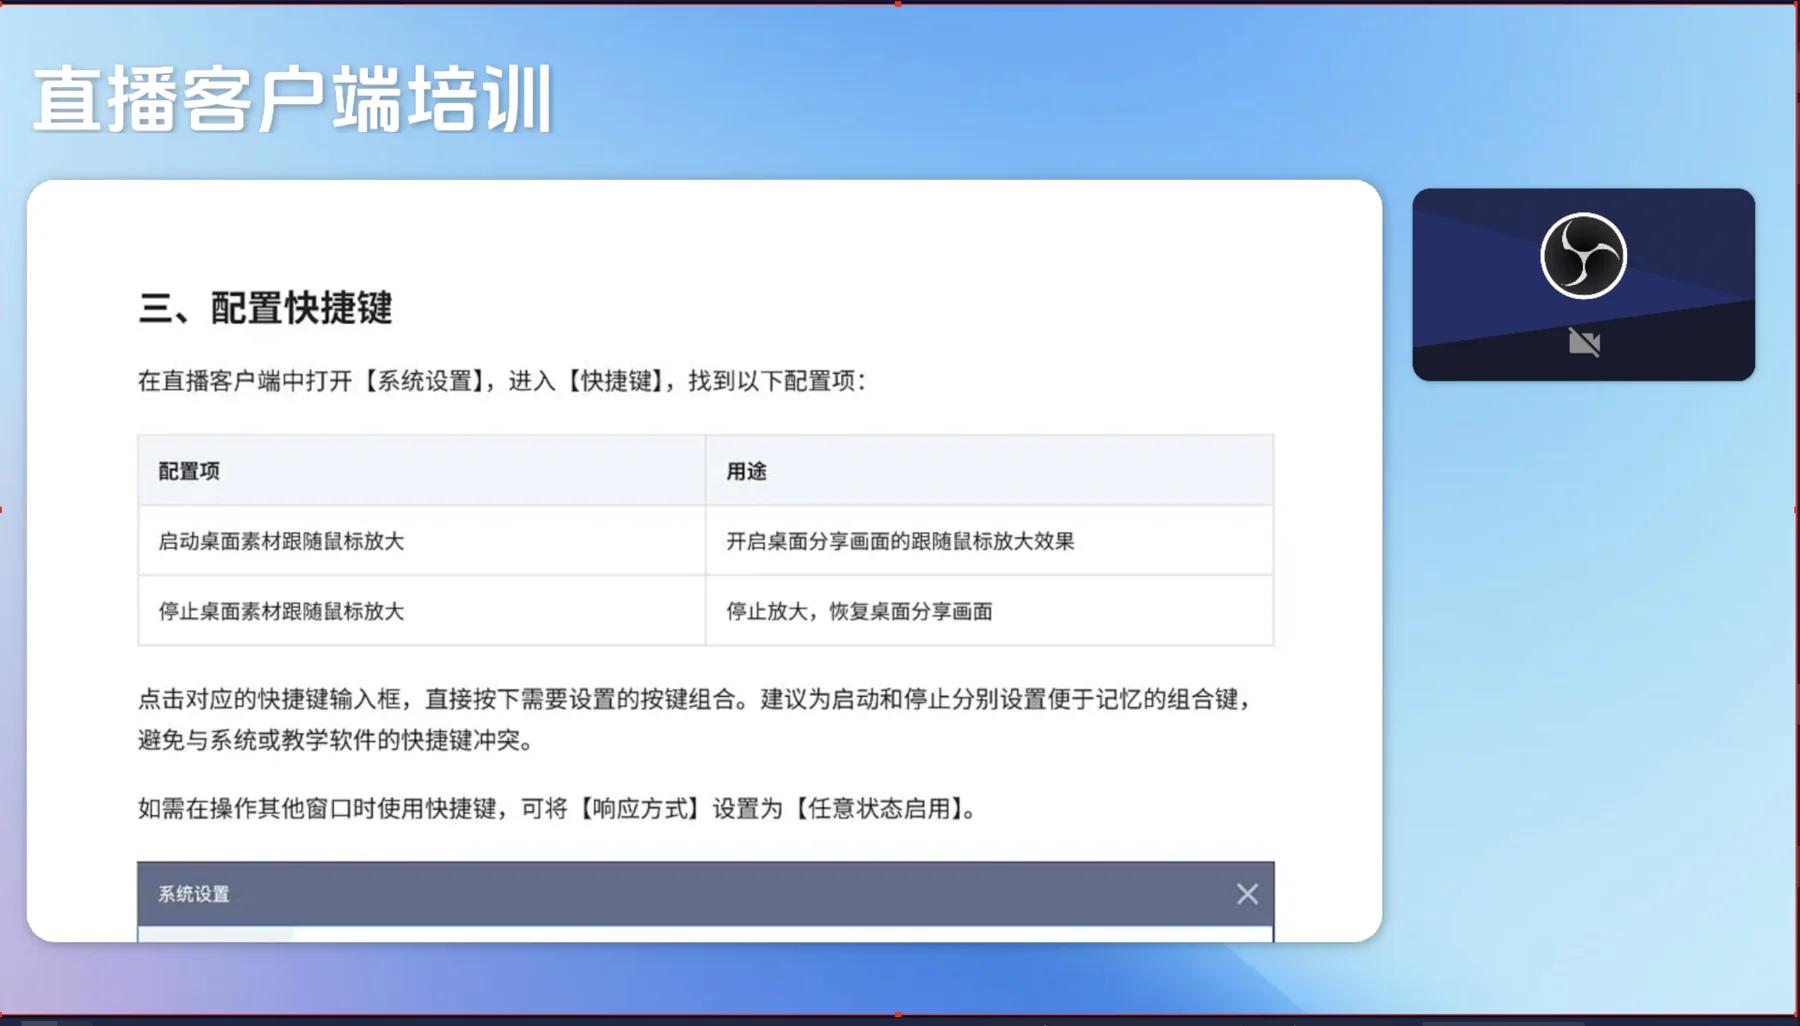
- Light content with light background: Add appropriate shadows to make the edges of the courseware easier to distinguish from the background.
- Maintain spacing between materials: Allow enough space for shadows to display, avoiding materials being too close to the canvas edge or overlapping each other.
- Prioritize content clarity: Rounded corners and shadows are meant to assist presentation; they should not obscure text or distract the audience.
After completing the settings, check the overall effect in the client preview, and confirm the actual screen from the viewer's perspective before going live.
The following image illustrates the combined effect of rounded corners and shadows, showing the edge treatment of the main screen and camera window:
5. How to Restore the Original Effect?
If you no longer need shadows, turn off the Shadow switch; if you no longer need rounded corners, restore the material to a right-angle effect. After adjustment, recheck the material edges and layout.
