


Aggregation Page
View video tutorial: https://course.polyv.net/course/306000
1. Feature Overview
Feature Info |
Description |
|---|---|
| Feature Name | Aggregation Page |
| Feature Description | An Aggregation Page is a comprehensive page created by simply dragging and dropping custom components, designed for live streaming operations. It allows users to quickly build personalized live streaming display pages through visual operations, meeting diverse operational needs. The Aggregation Page supports various components, including but not limited to: carousels, navigation bars, live streaming windows, replay lists, image-text modules, interactive components, etc. |
| Purpose | Flexible Page Customization: Freely combine components based on different live streaming scenarios and operational needs to create personalized aggregation page styles and functions. |
| Use Cases | Live Event Page: Used for promoting and displaying live events, combining live streaming and replay functions. Promotional Page: Combines carousel and navigation components to display promotions and products. Information Display Page: Used to display various types of information, such as news, announcements, etc., facilitating user browsing via navigation components. |
| Feature List | Carousel, Image-Text Navigation, Text Navigation, Bottom Navigation, Live List, Live Category, Video List, Live Preview, Coupon |
2. Operation Process
1. Access the Management Console
Access and log in to the Polyv backend.
2. Create an Aggregation Page
1) Navigate to Aggregation Page Management
After logging in, find "Platform" in the left menu and click "Page Management".
2) Create a New Aggregation Page
Click the "New Page" button.
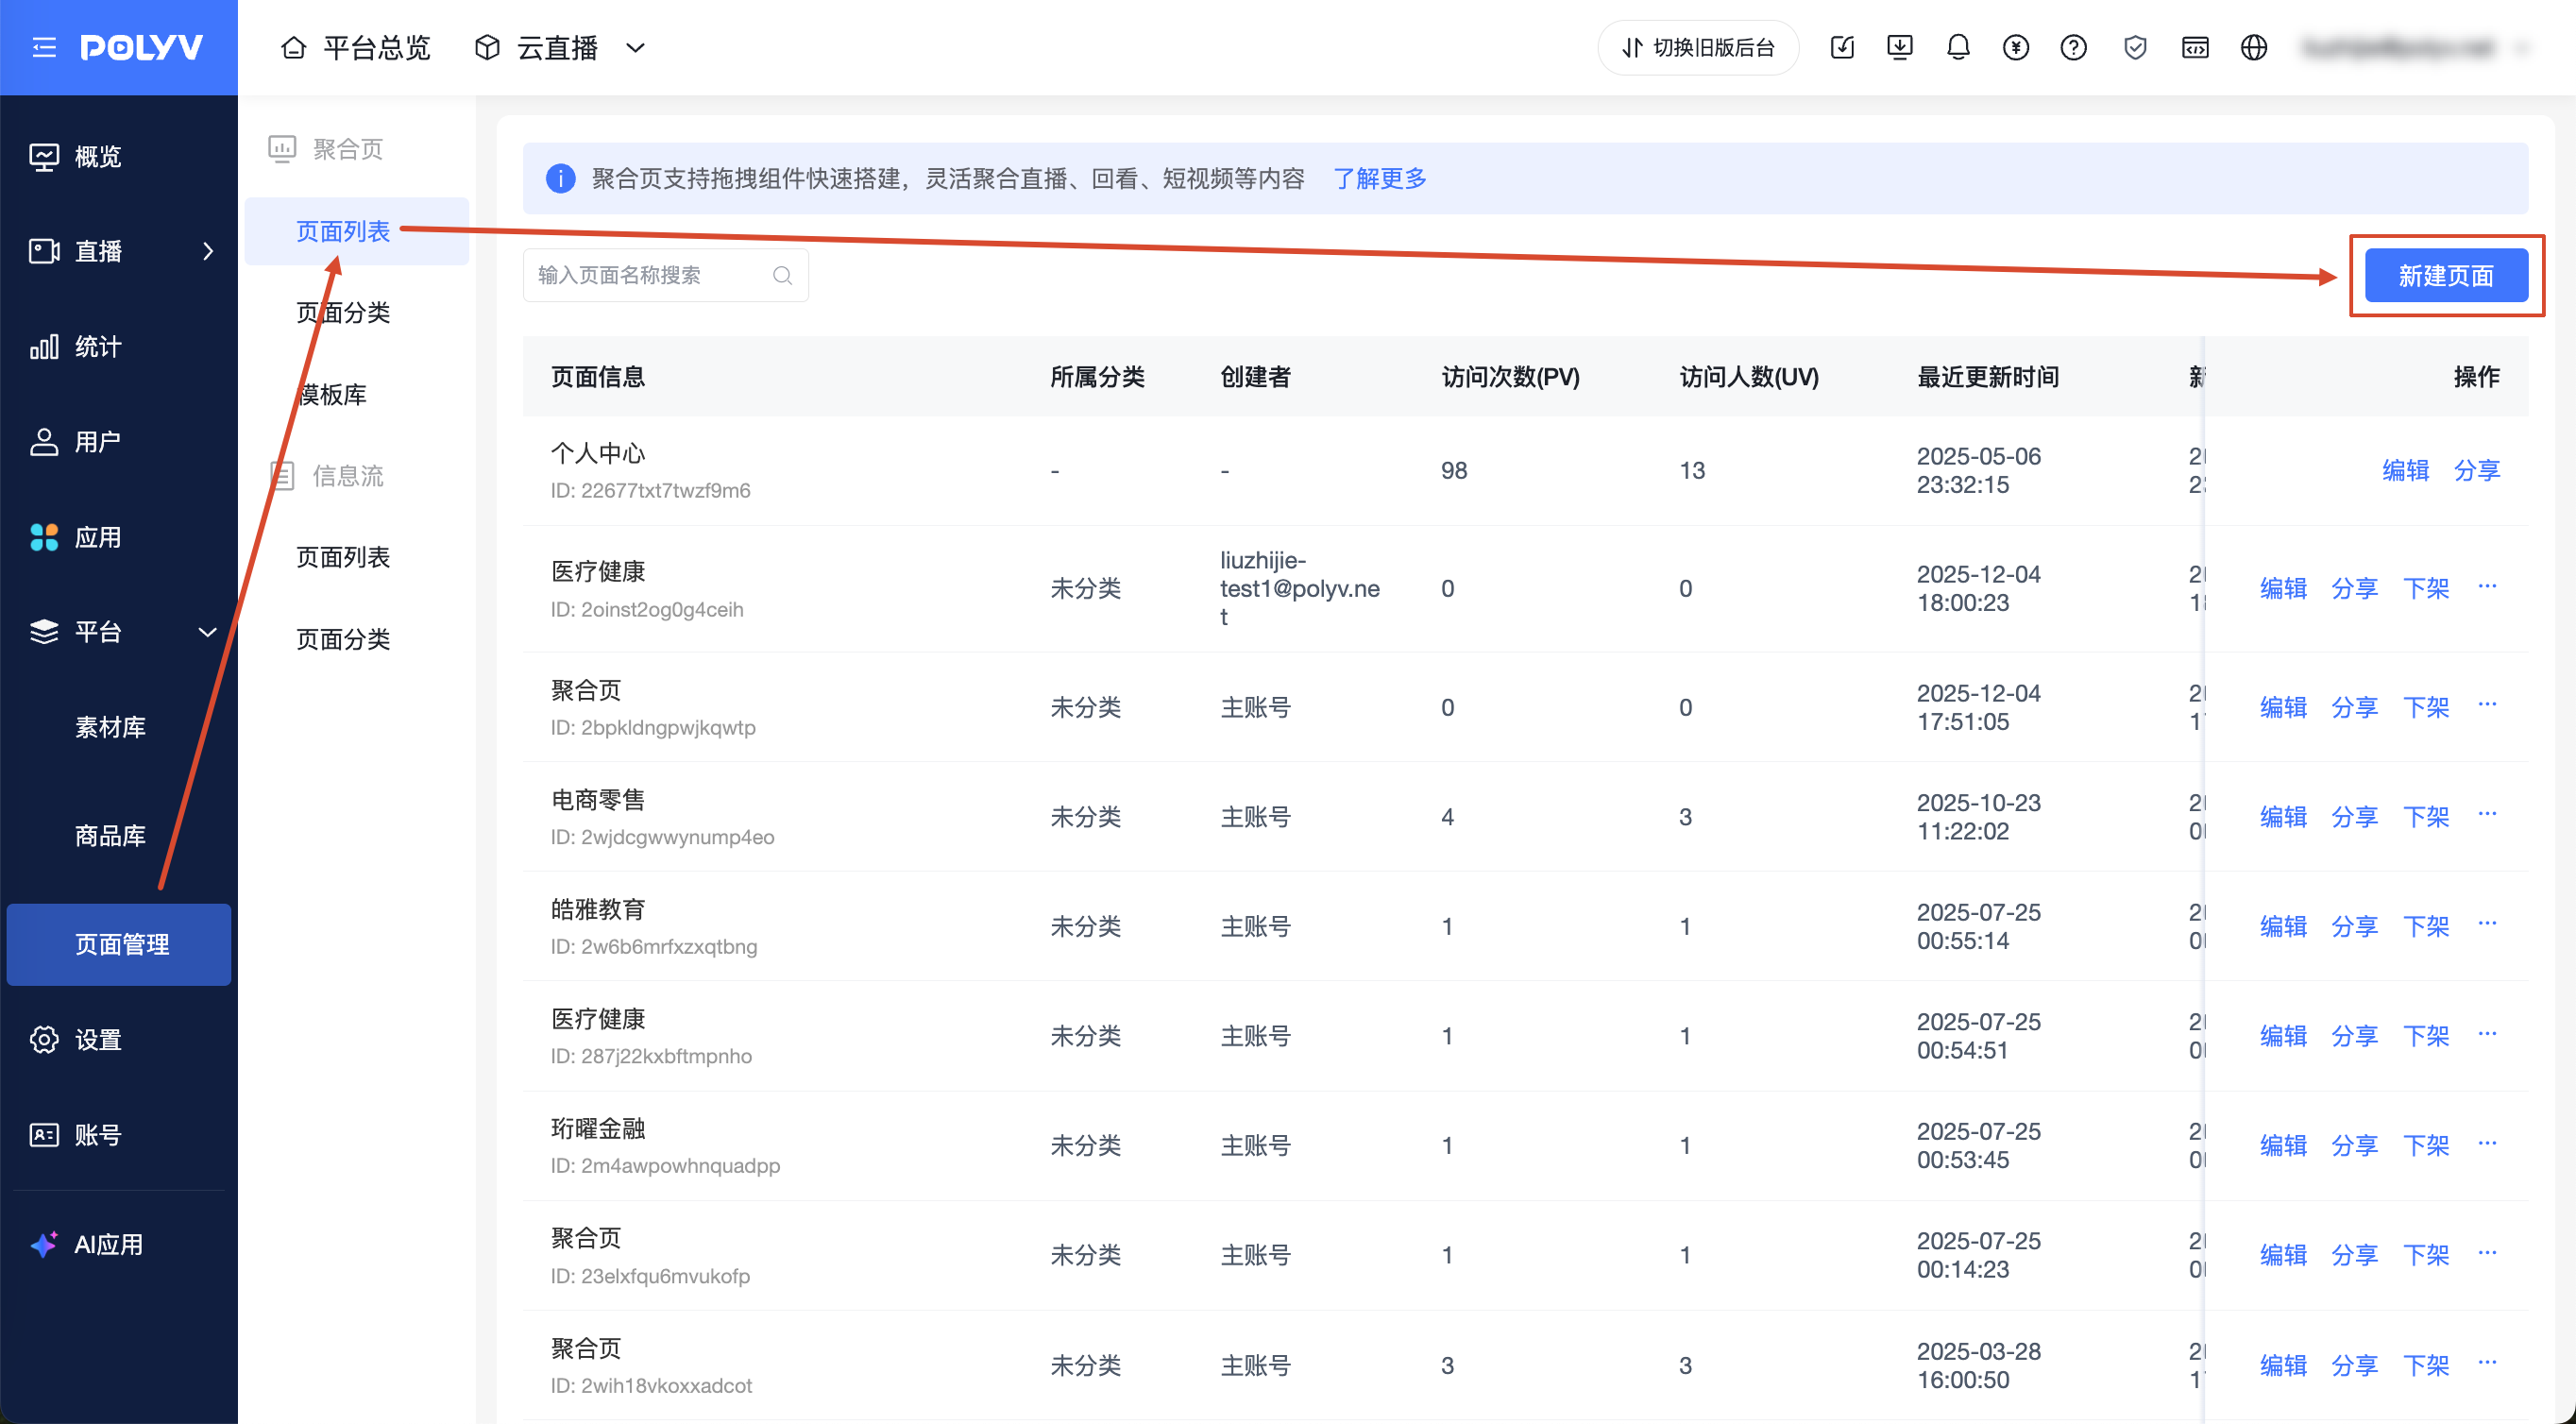
Click "Create Page" or select "Use Template".
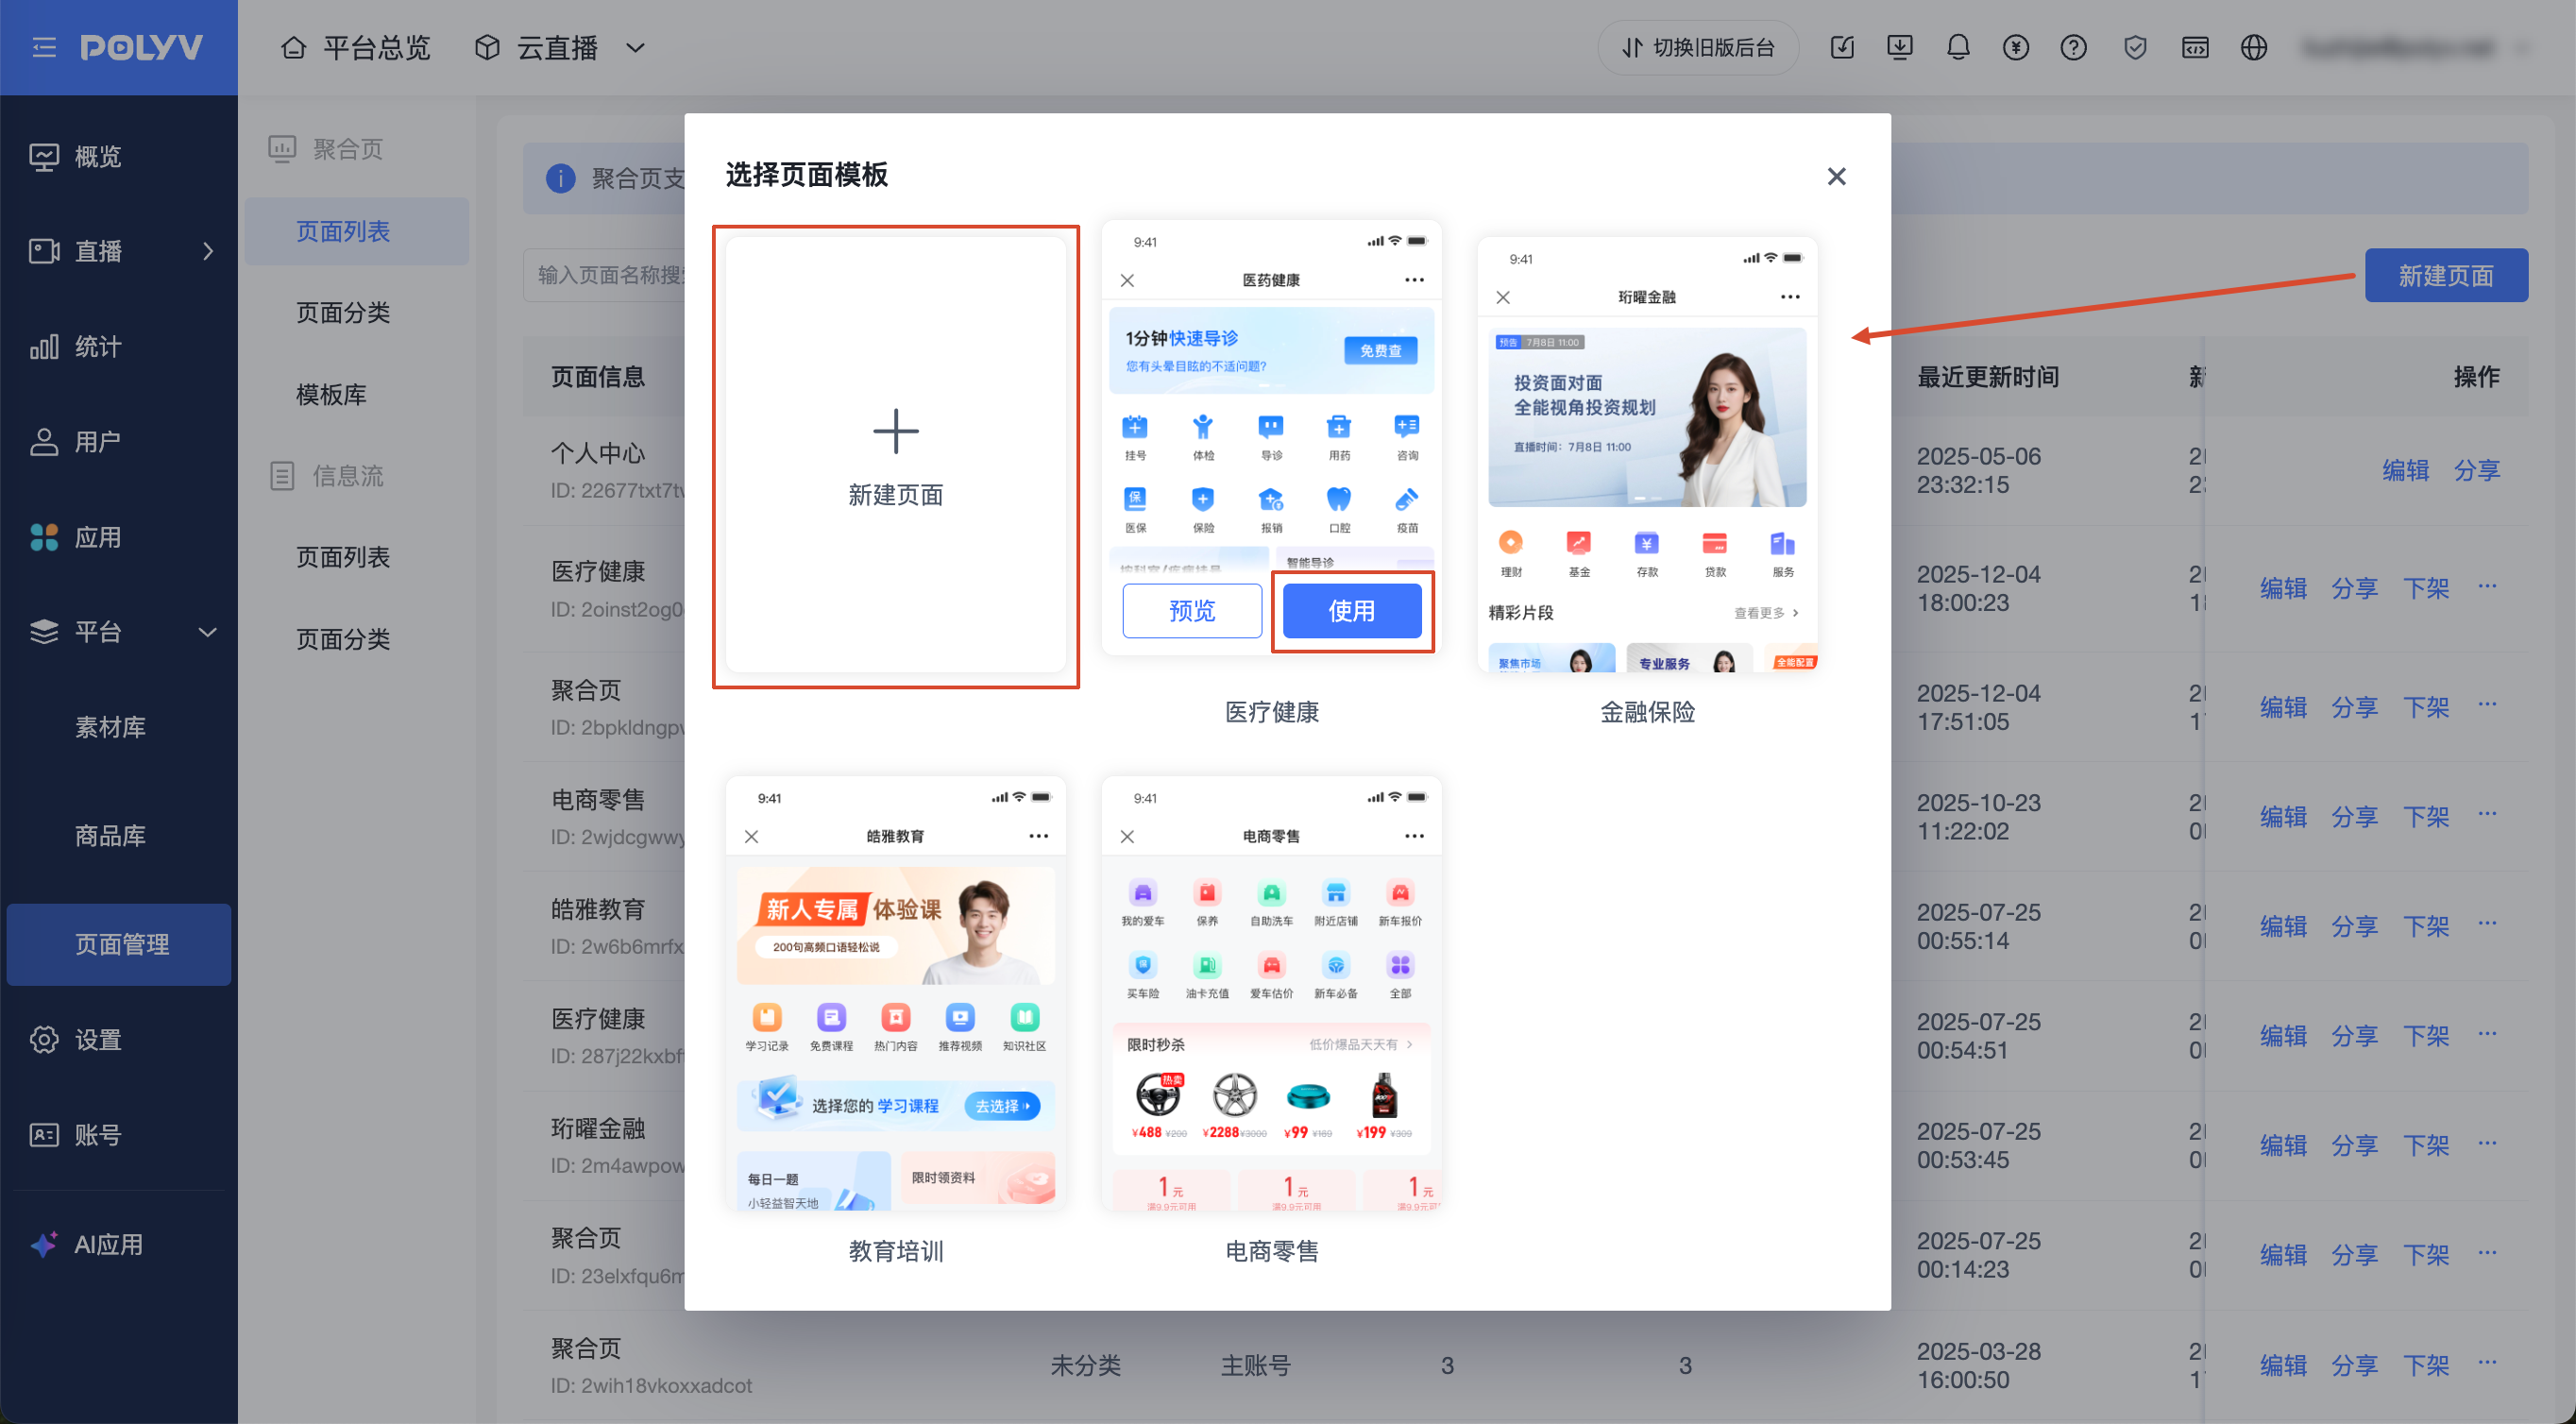
3. Add and Configure Components
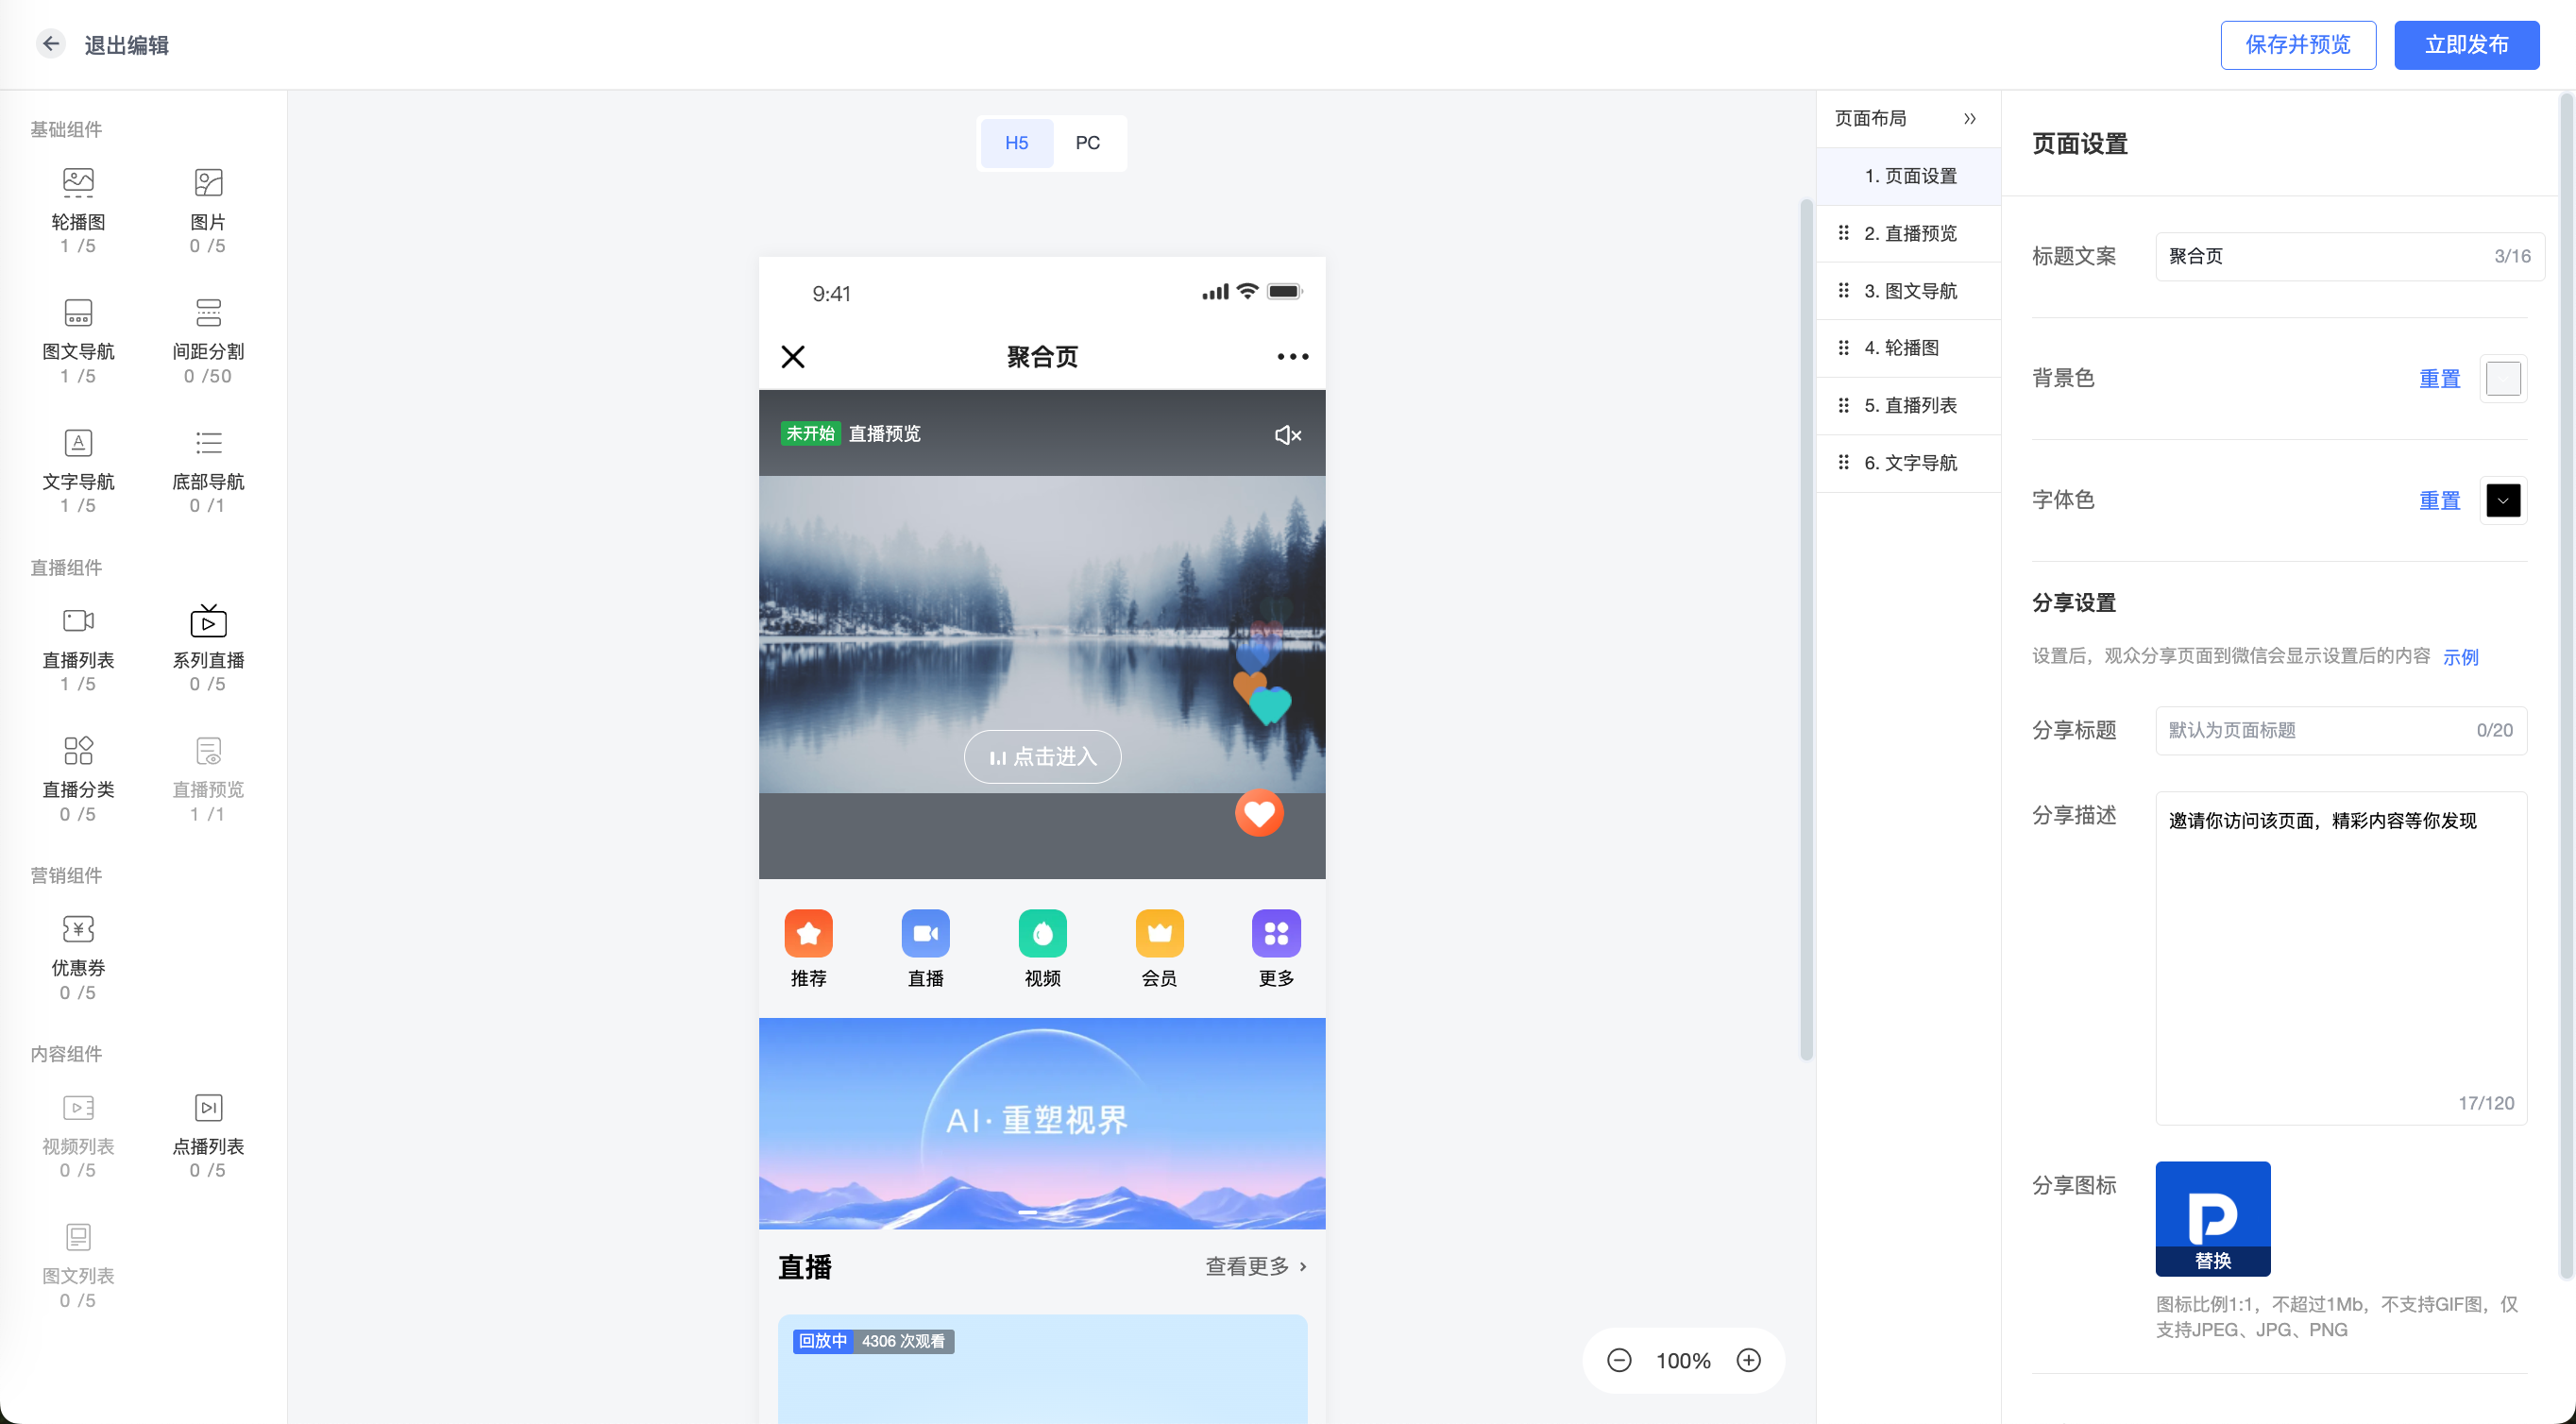
After creating an Aggregation Page, you can add various components by clicking/dragging to build the page.
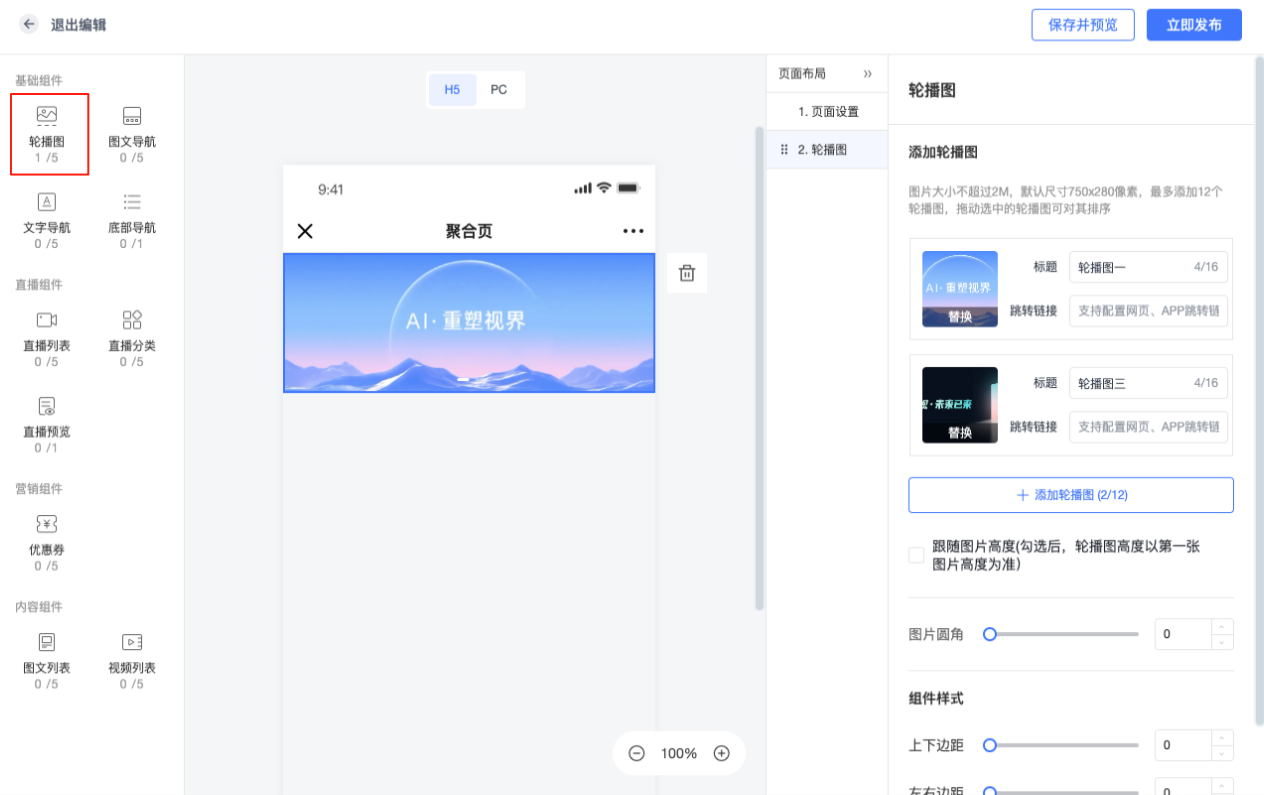
1) Add a Carousel
• Drag the "Carousel" component from the component list to the page editing area. Click the carousel component to enter the configuration interface.
• Upload carousel images. The default image size is 750x280px. You can check the "Follow Image Height" option. When checked, the carousel height will be based on the height of the first image.
• Click "Save" to complete the configuration.
2) Add an Image
• Drag the "Image" component from the component list to the page editing area. Click the image component to enter the configuration interface.
• Upload images (max size 2MB). Except for the "one per row" layout which can display up to 12 images, other layouts only display the corresponding number of images. Drag to adjust the order.
• Click "Save" to complete the configuration.
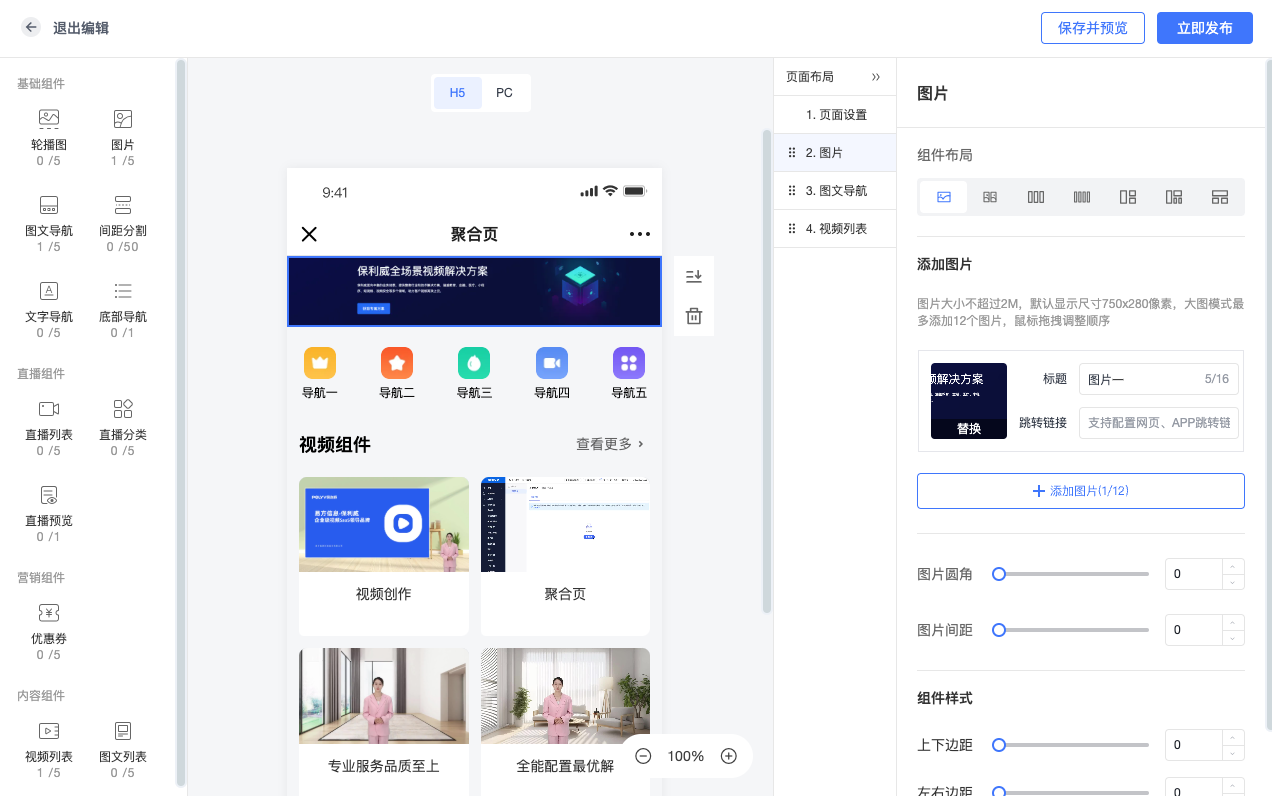
• Component Layouts: One per row, Two per row, Three per row, Four per row, One left two right, One left three right, One top two bottom.
• You can set image border radius, padding, and margin. Click "Save" to complete the configuration.
3) Add Navigation
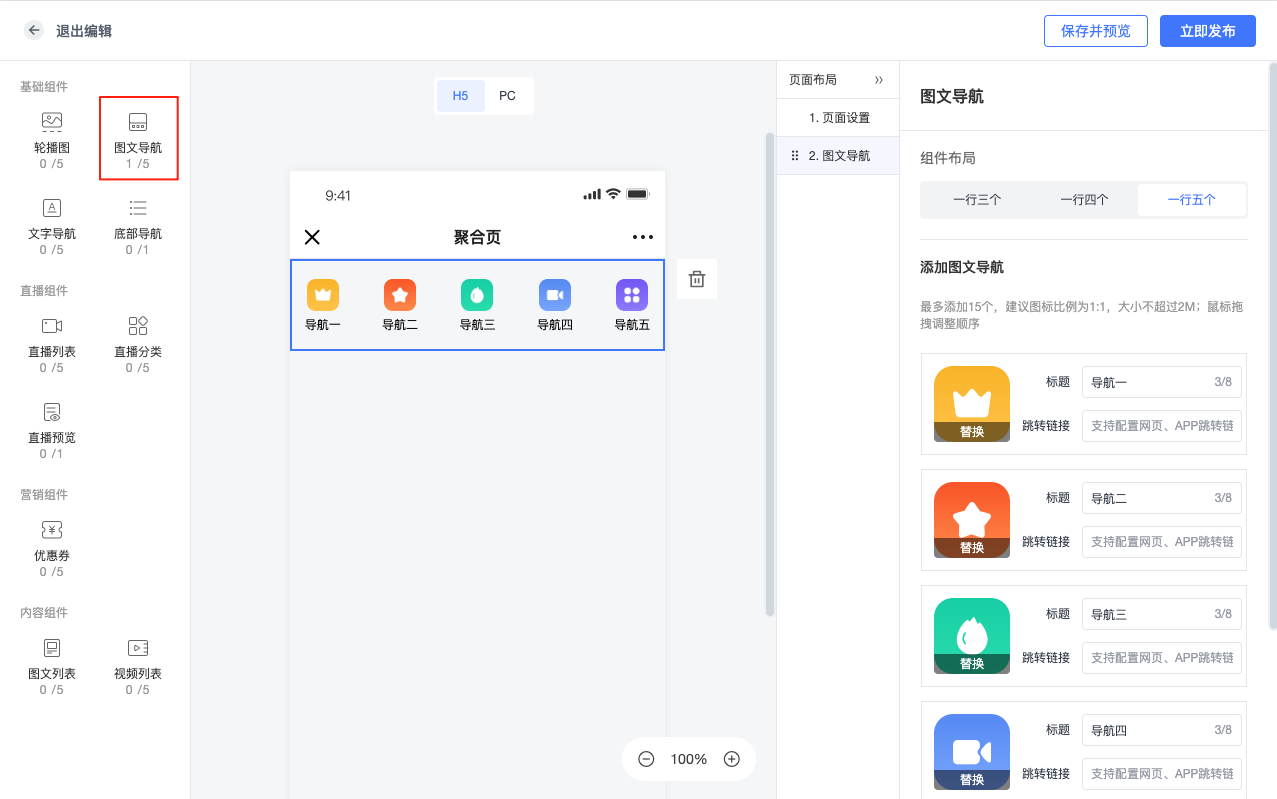
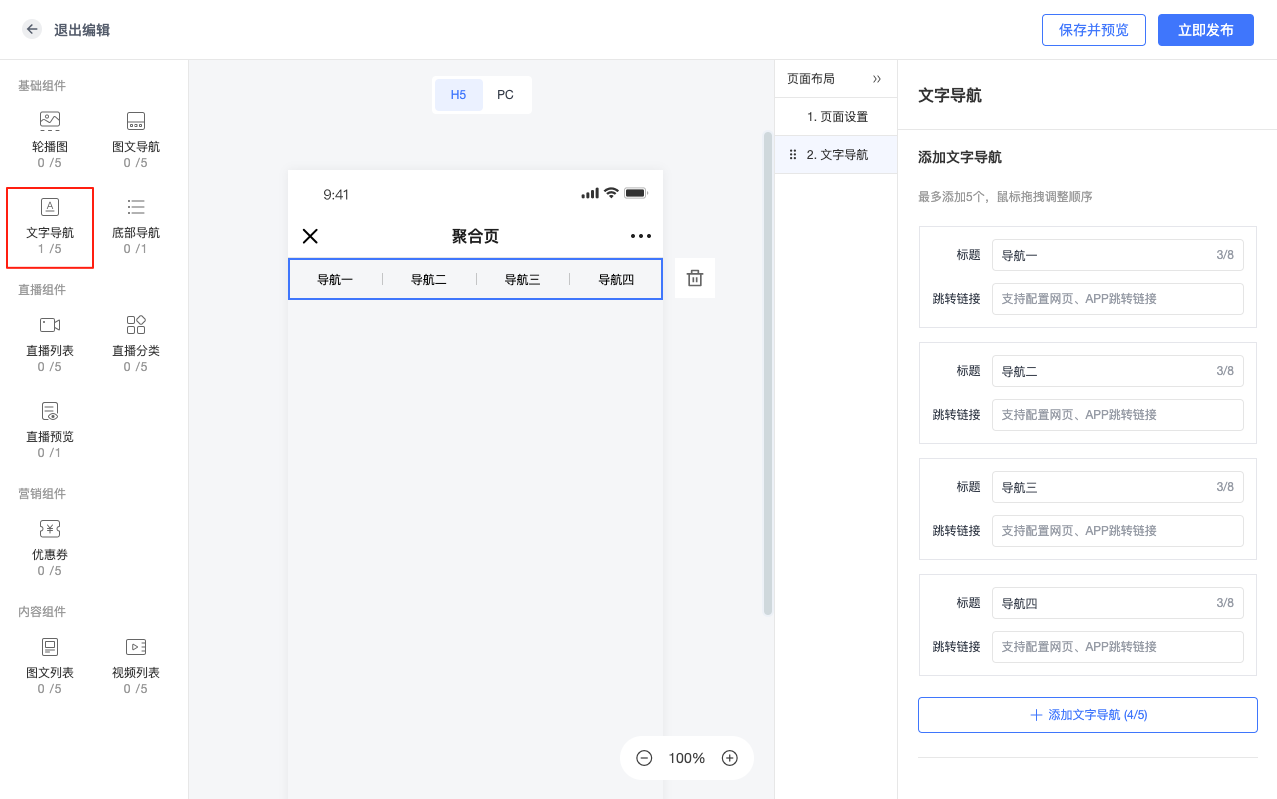
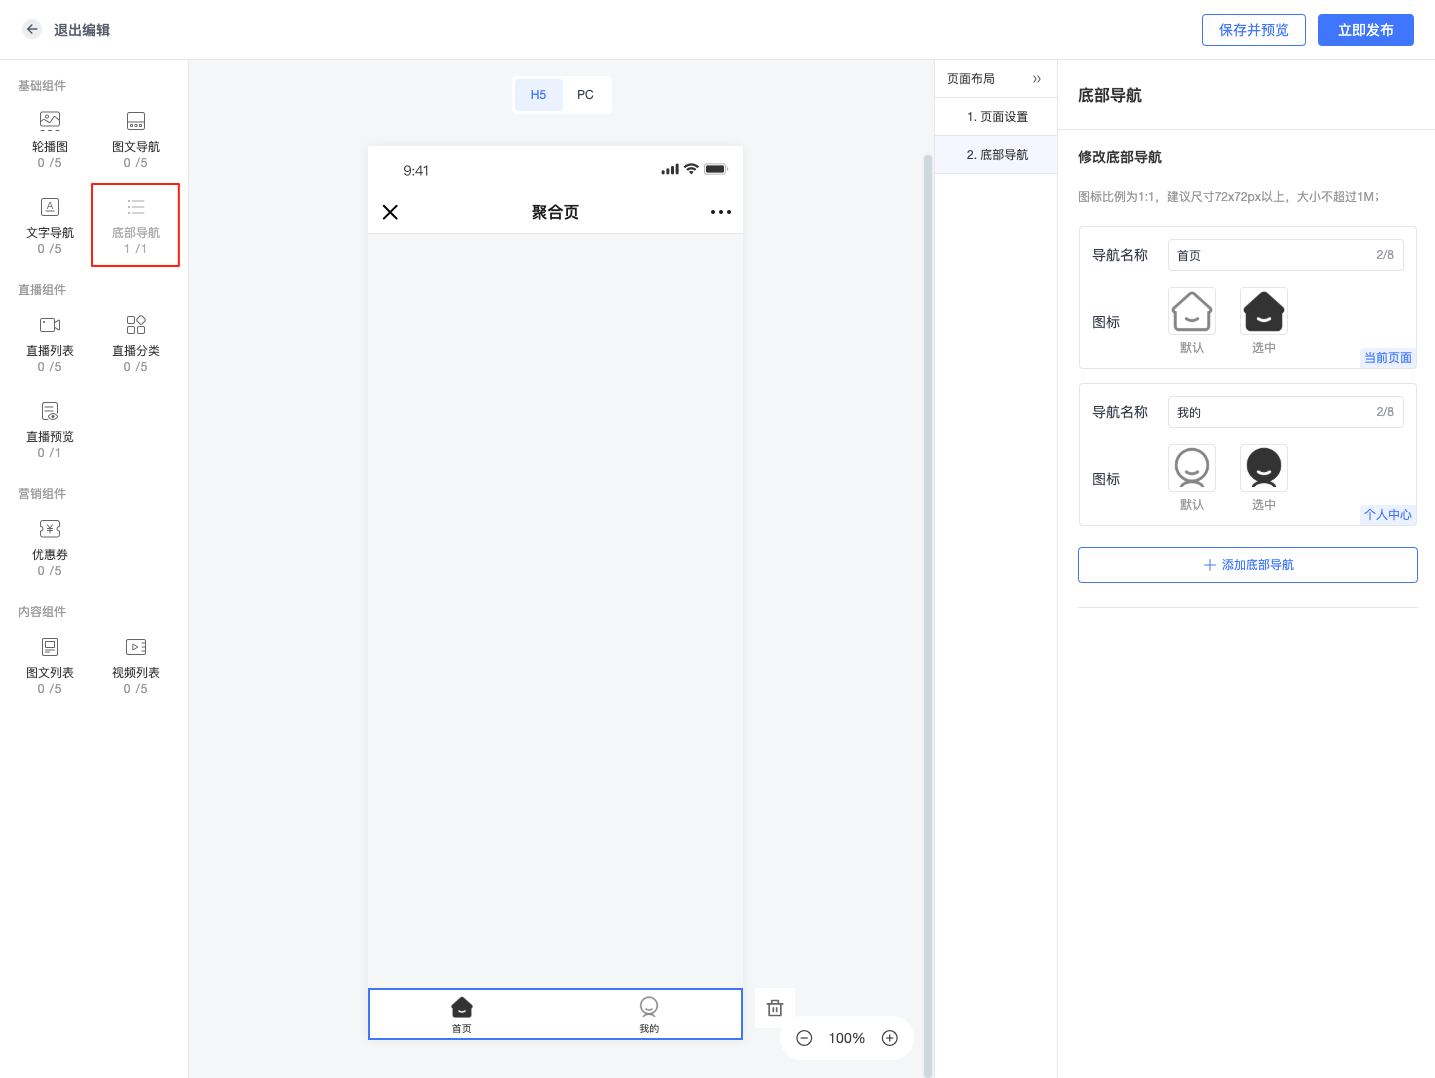
• Navigation includes Image-Text Navigation, Text Navigation, and Bottom Navigation. Drag the corresponding "Navigation" component from the component list to the page editing area. Click the navigation component to enter the configuration interface.
• Image-Text Navigation: Add navigation items, including links, icons, and text. Supports custom navigation styles and layouts.
• Text Navigation: Includes links and text.
• Bottom Navigation: Includes icons and text (configurable with information feed).
Information Feed Usage: https://help.polyv.net/index.html#/live/product/live_bgm/live_bgm_feed_page_new
• Click "Save" to complete the configuration.
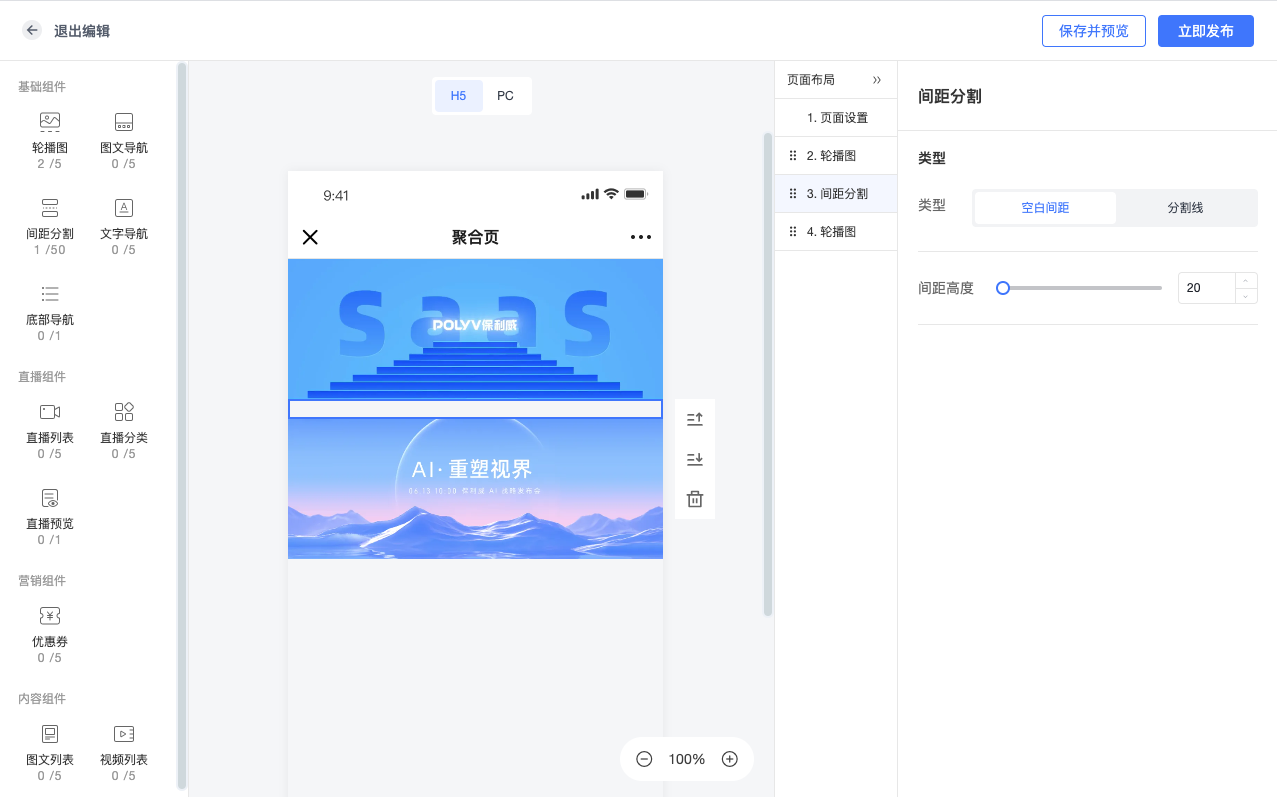
4) Add Spacing/Separators
• Includes: Blank Spacing, Separator Line.
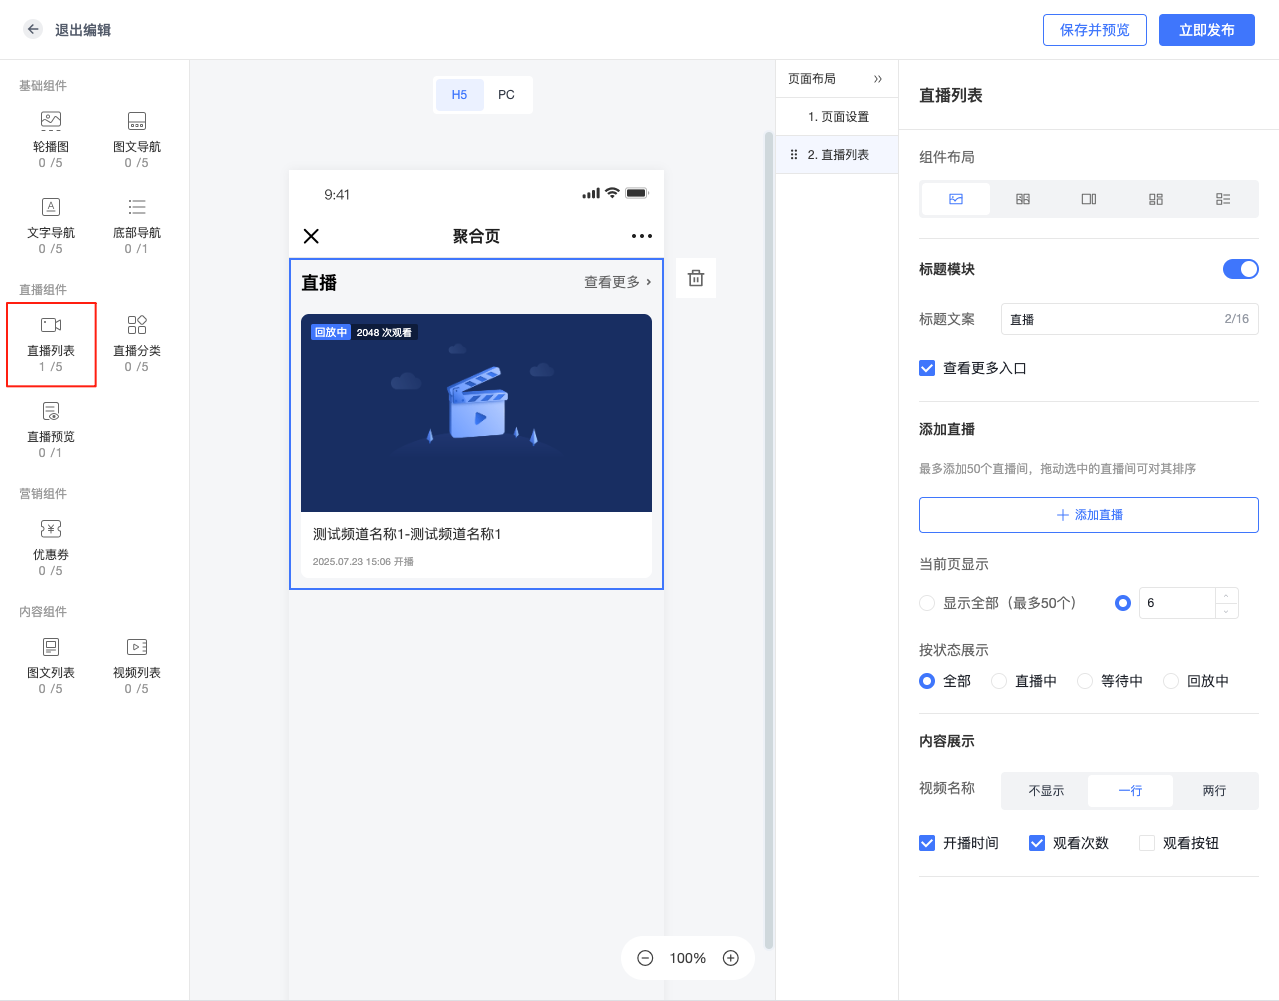
5) Add Live Streaming or Replay
• Drag the "Live List" component from the component list to the page editing area. Click the live component to enter the configuration interface.
• Select a live channel, set the live title, layout style, content display, etc.
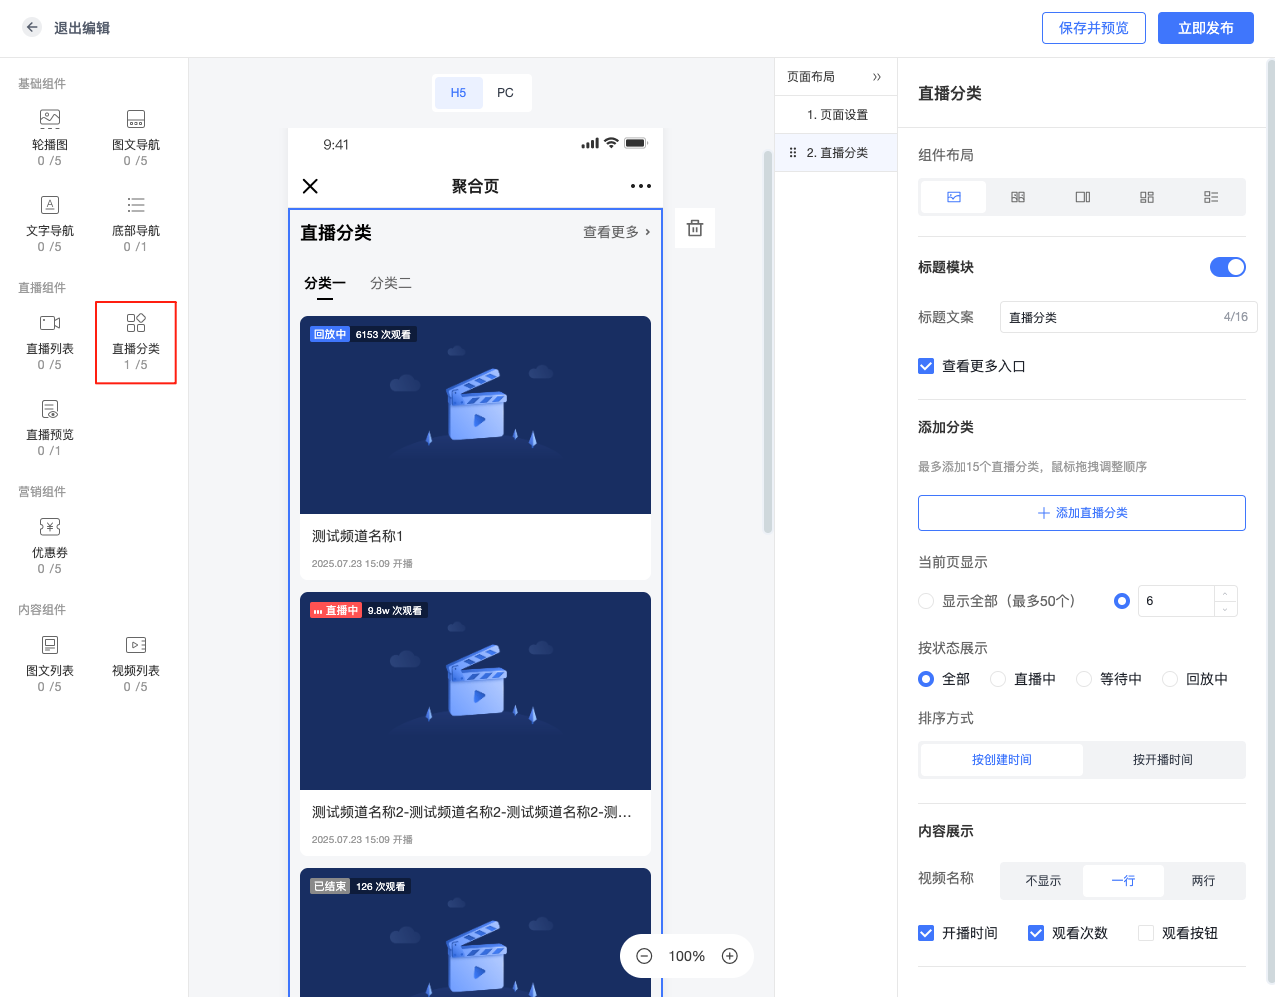
6) Add Live Category
• Drag the "Live Category" component from the component list to the page editing area. Click the live category component to enter the configuration interface.
• Select a category, set the title, layout style, content display, etc.
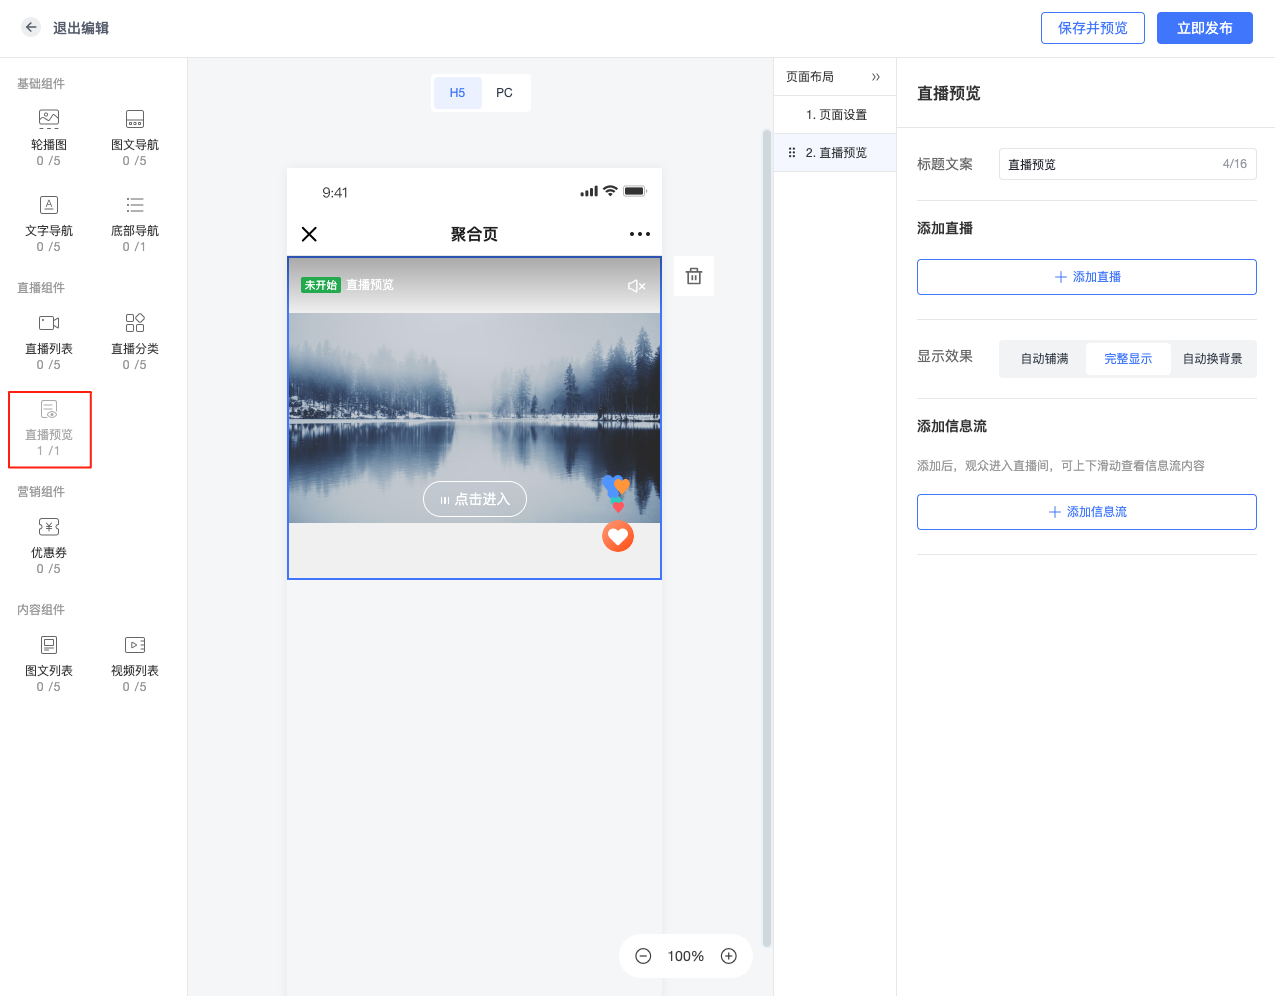
7) Add Live Preview
• Drag the "Live Preview" component from the component list to the page editing area. Click the live preview component to enter the configuration interface.
• Select a live channel, set the title. Supports adding an information feed (after adding an information feed, entering from the live preview component allows browsing more live room content up and down).
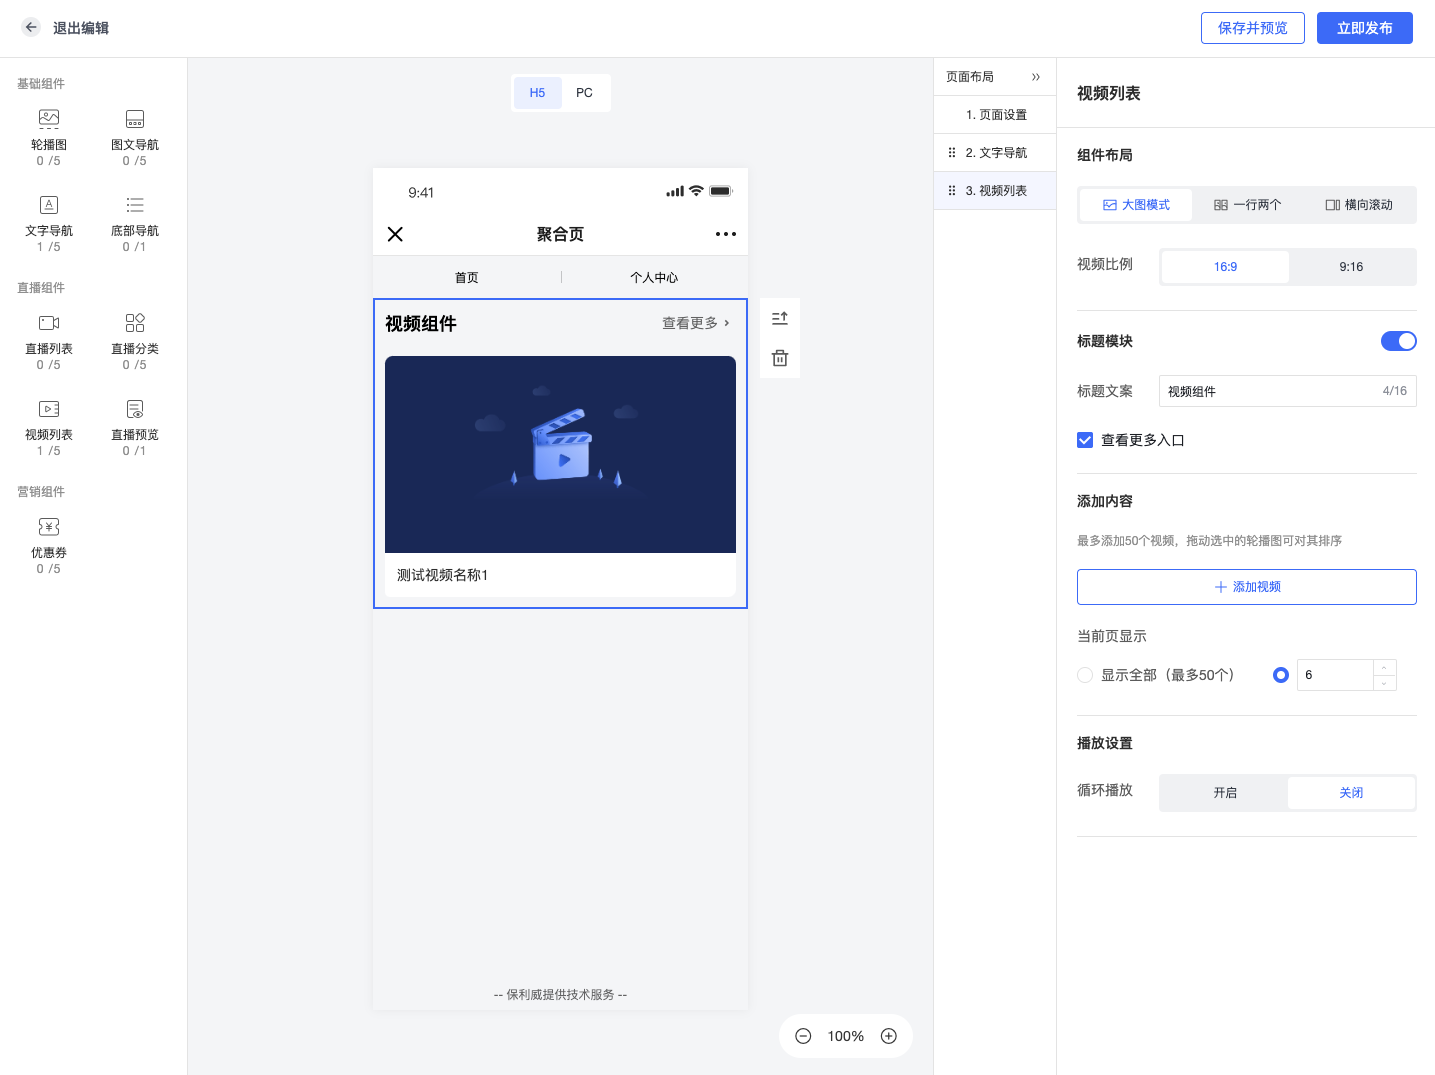
8) Add Video
• Drag the "Video List" component from the component list to the page editing area. Click the video list component to enter the configuration interface.
• Select videos, set the title, component layout.
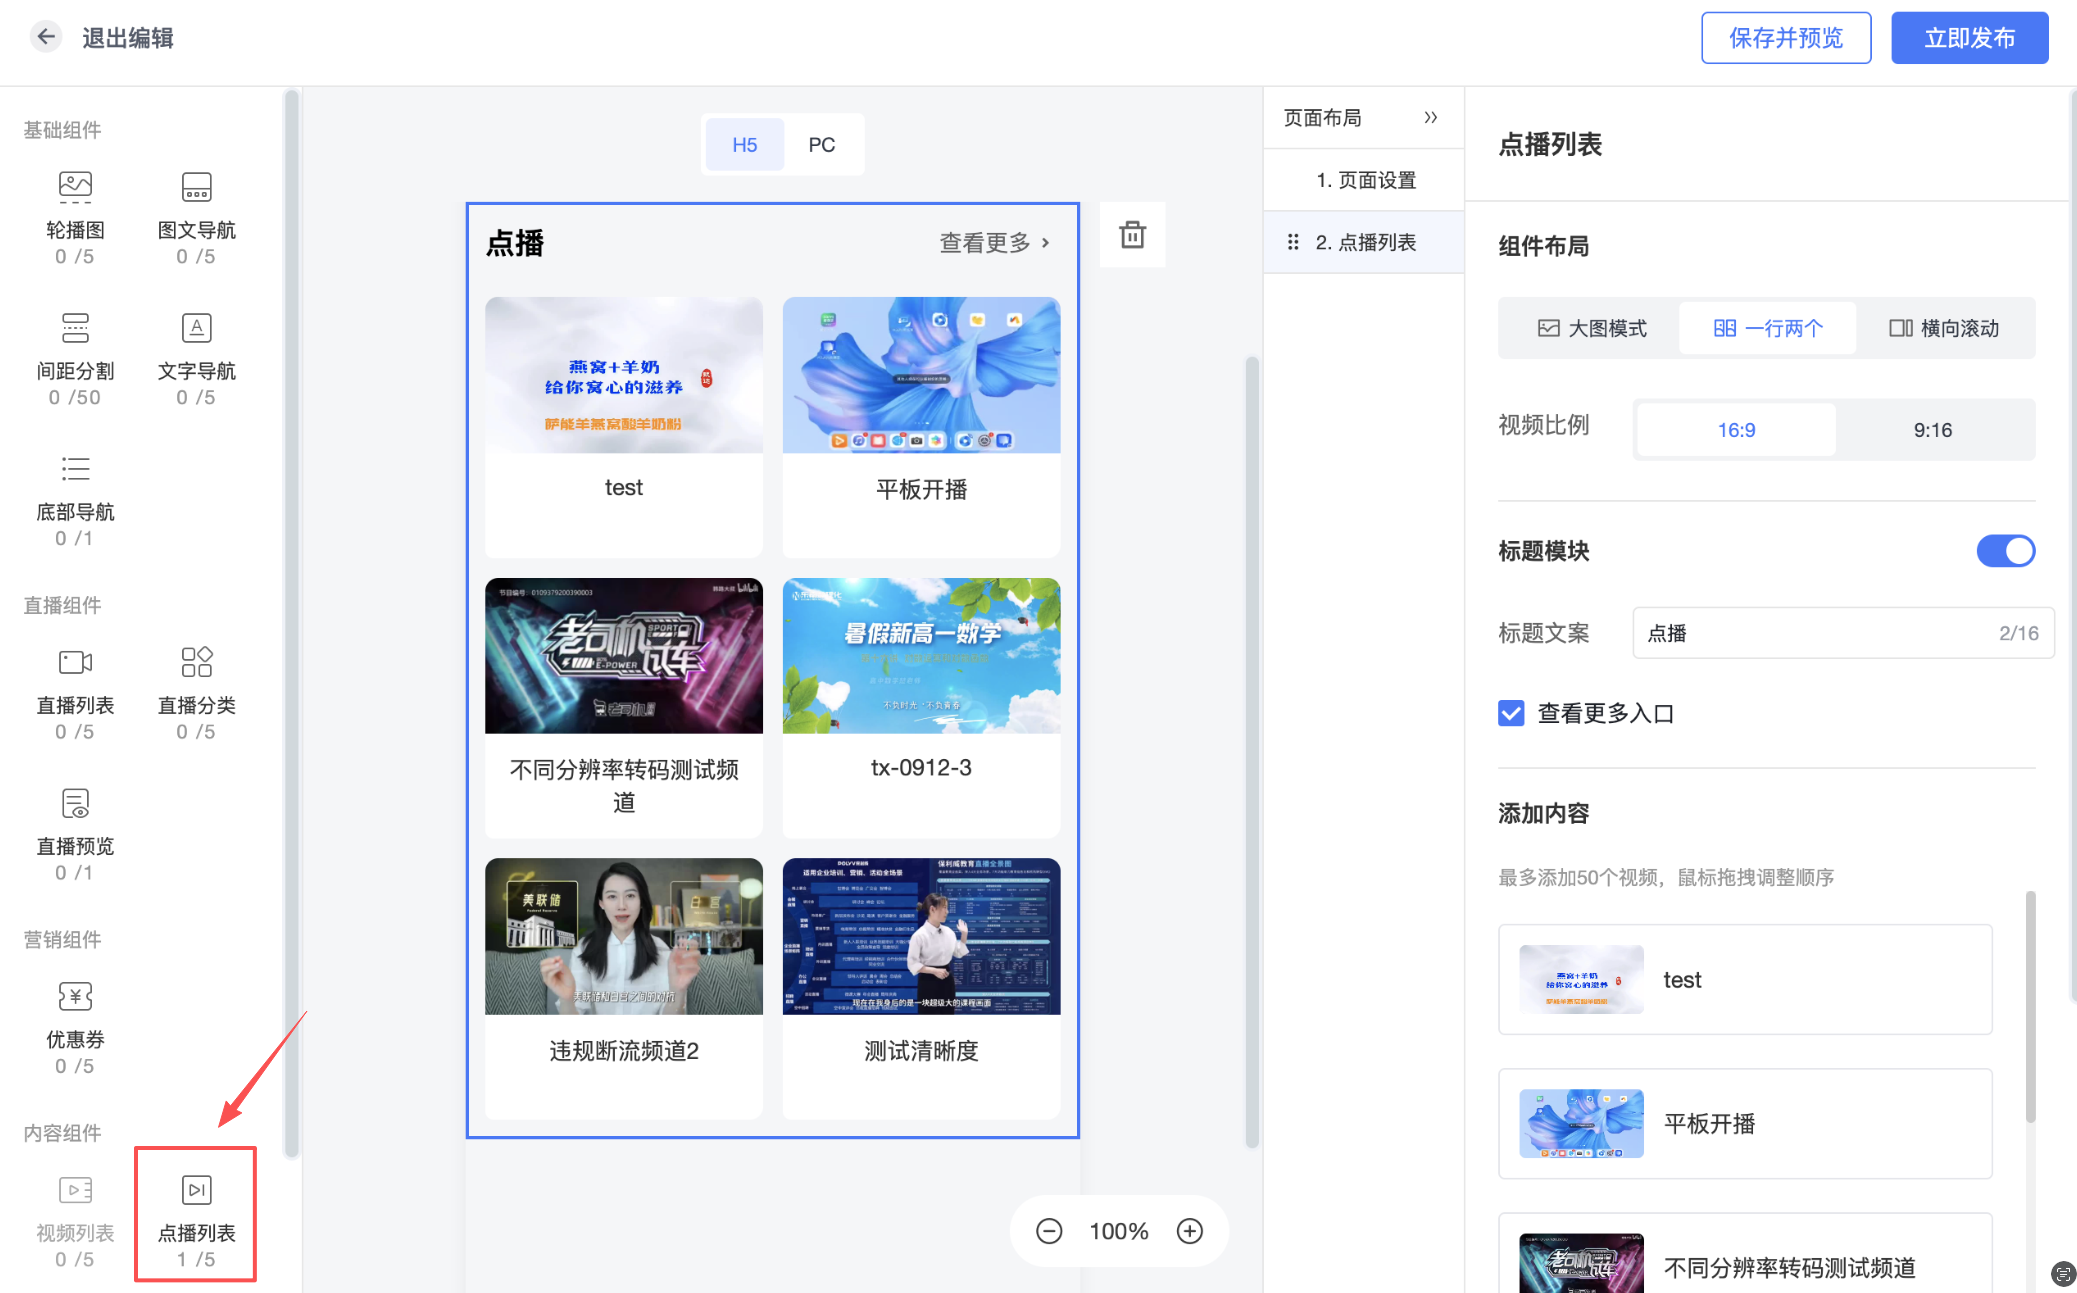
9) Add VOD
• The VOD list component is only visible on the Aggregation Page if the VOD package has not expired. Drag the "VOD List" component from the component list to the page editing area. Click the VOD list component to enter the configuration interface.
• Select videos, set the title, component layout.
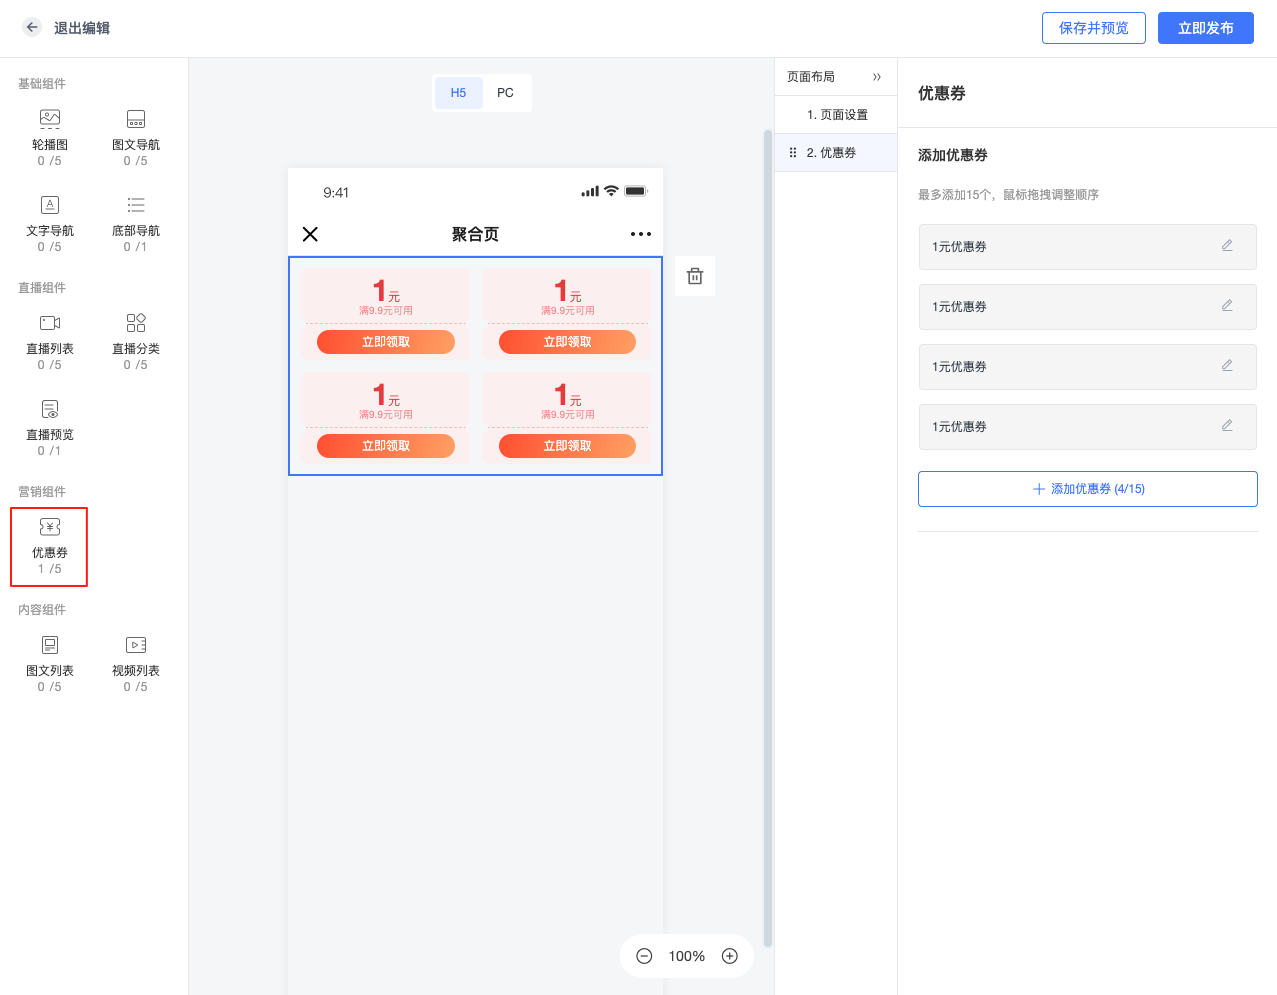
10) Add Coupon
• Drag the "Coupon" component from the component list to the page editing area. Click the coupon component to enter the configuration interface.
• Add coupons, set coupon information.
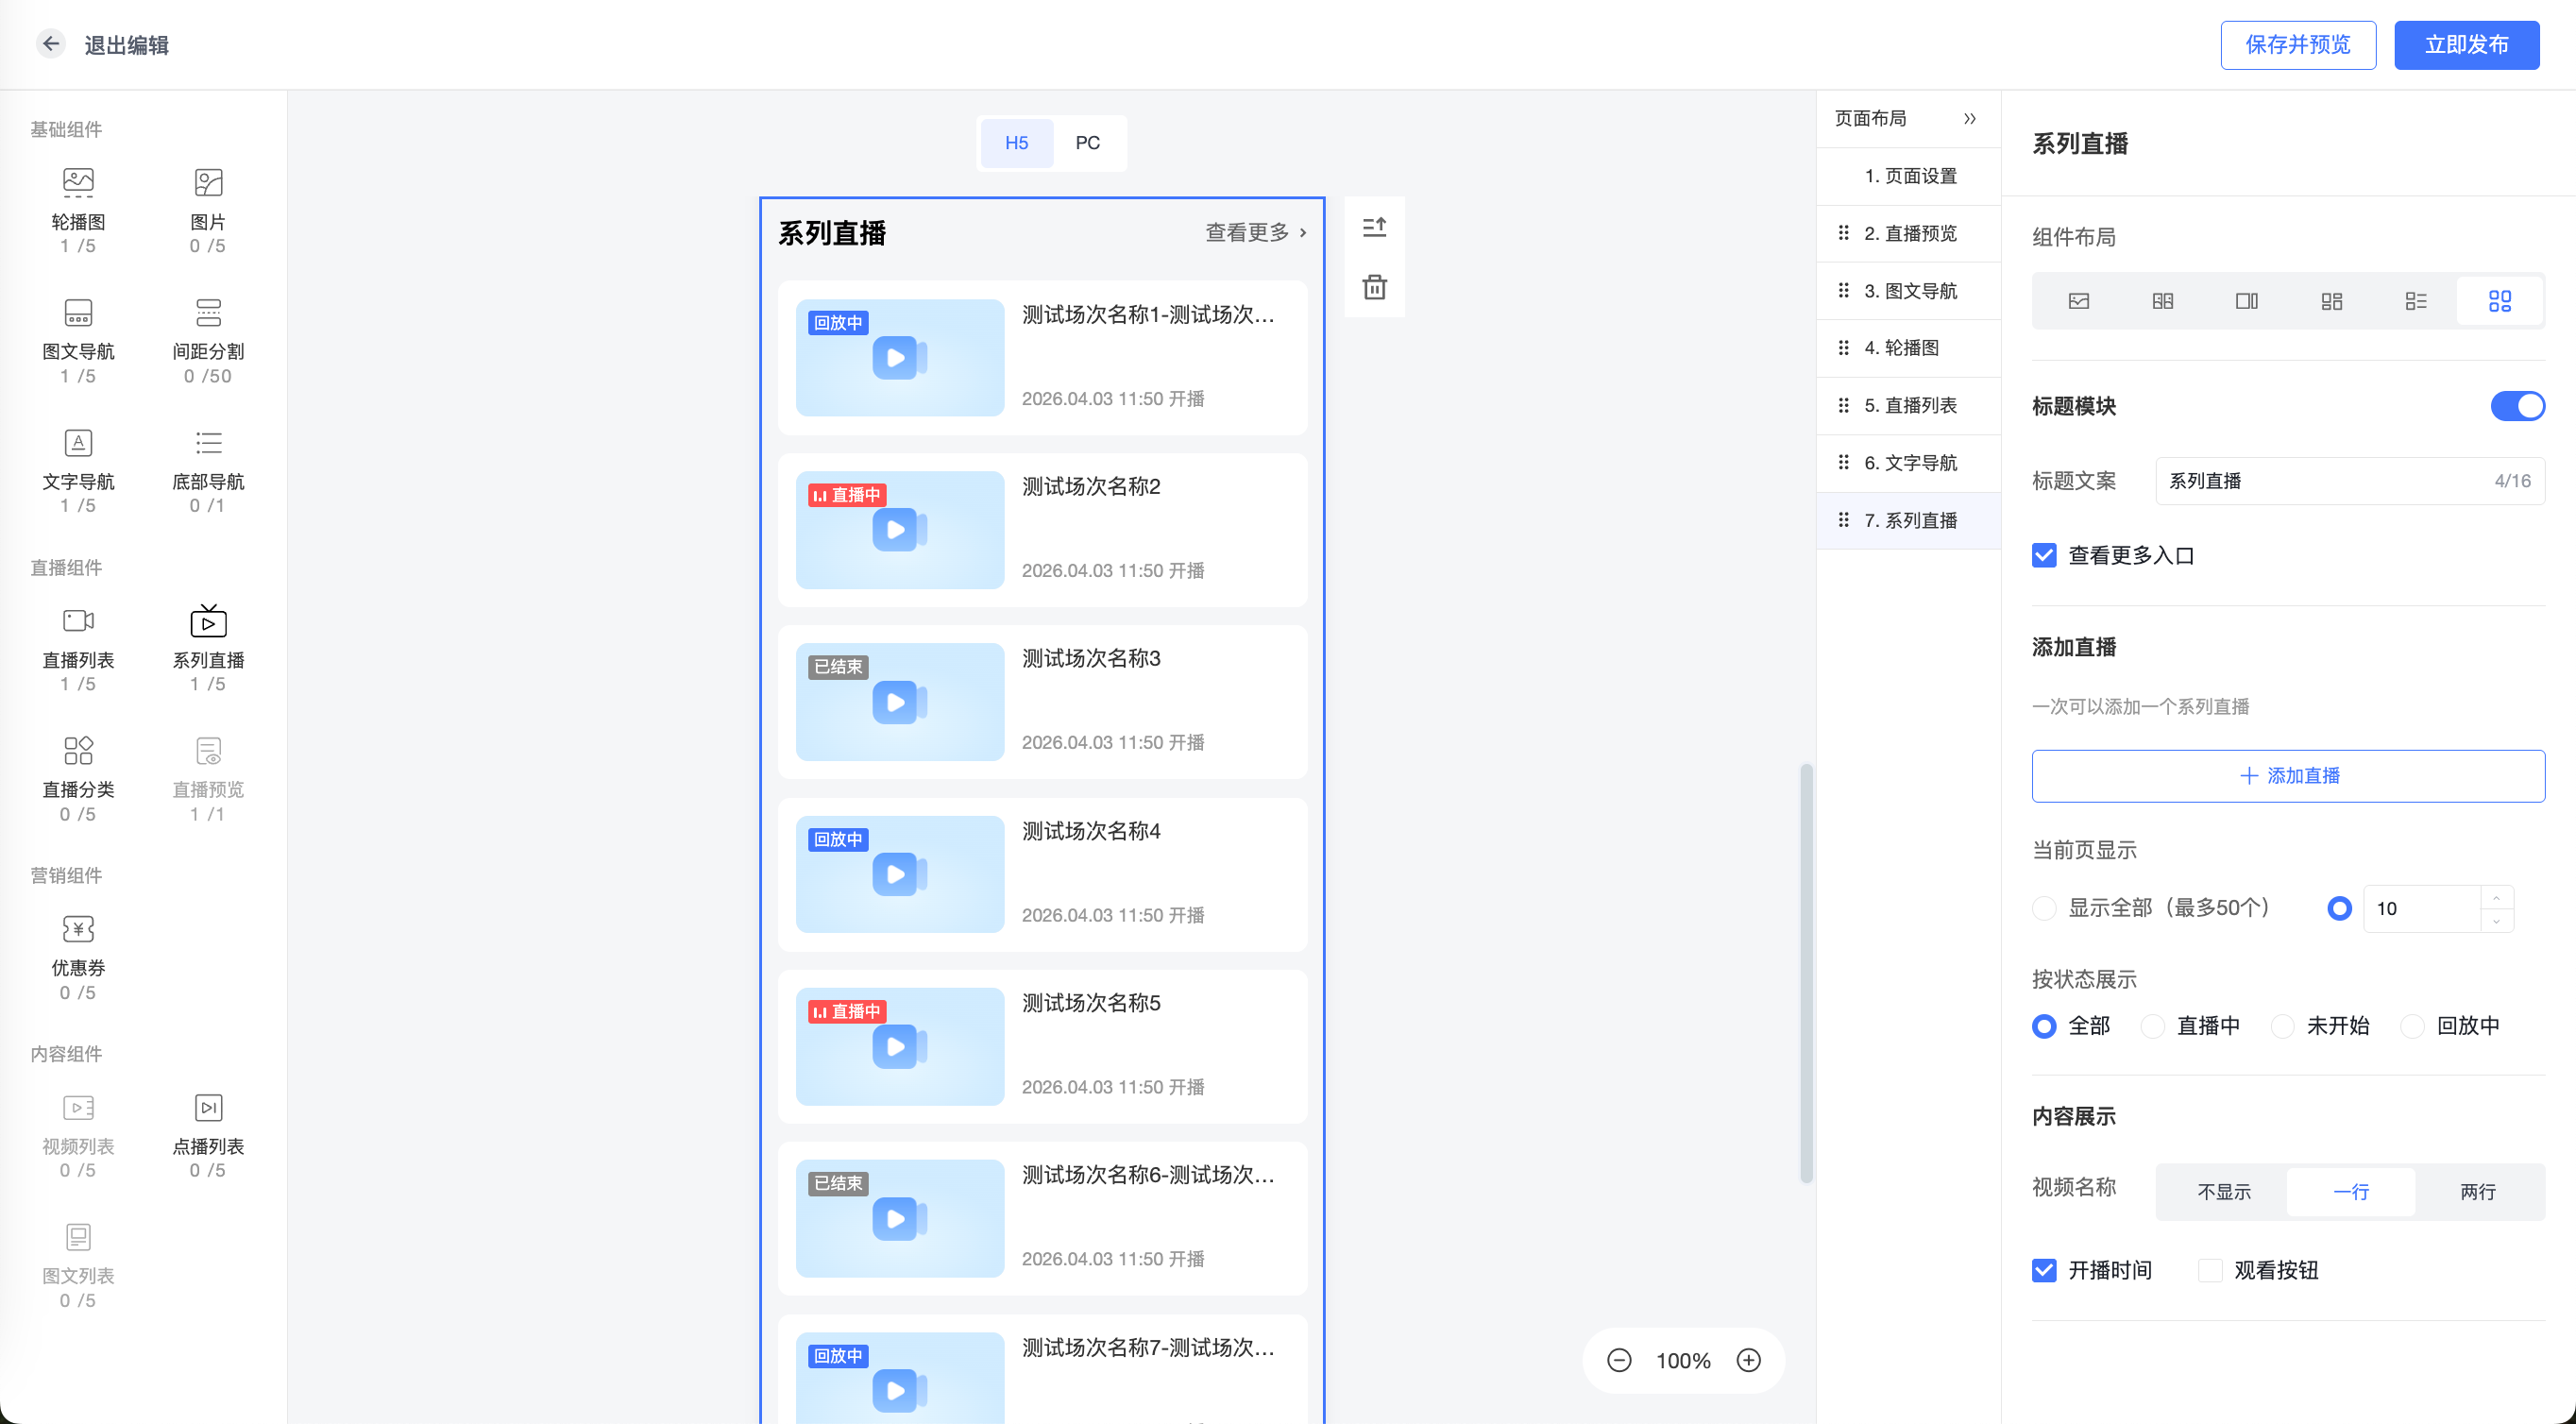
11) Add Series Live
• Drag the "Series Live" component from the component list to the page editing area. Click the component to enter the configuration interface.
• Select a live channel, set the live title, layout style, content display, etc.
12) Add Image-Text
• Drag the "Image-Text List" component from the component list to the page editing area. Click the component to enter the configuration interface.
• Select image-text from the material library, set the component title, etc.
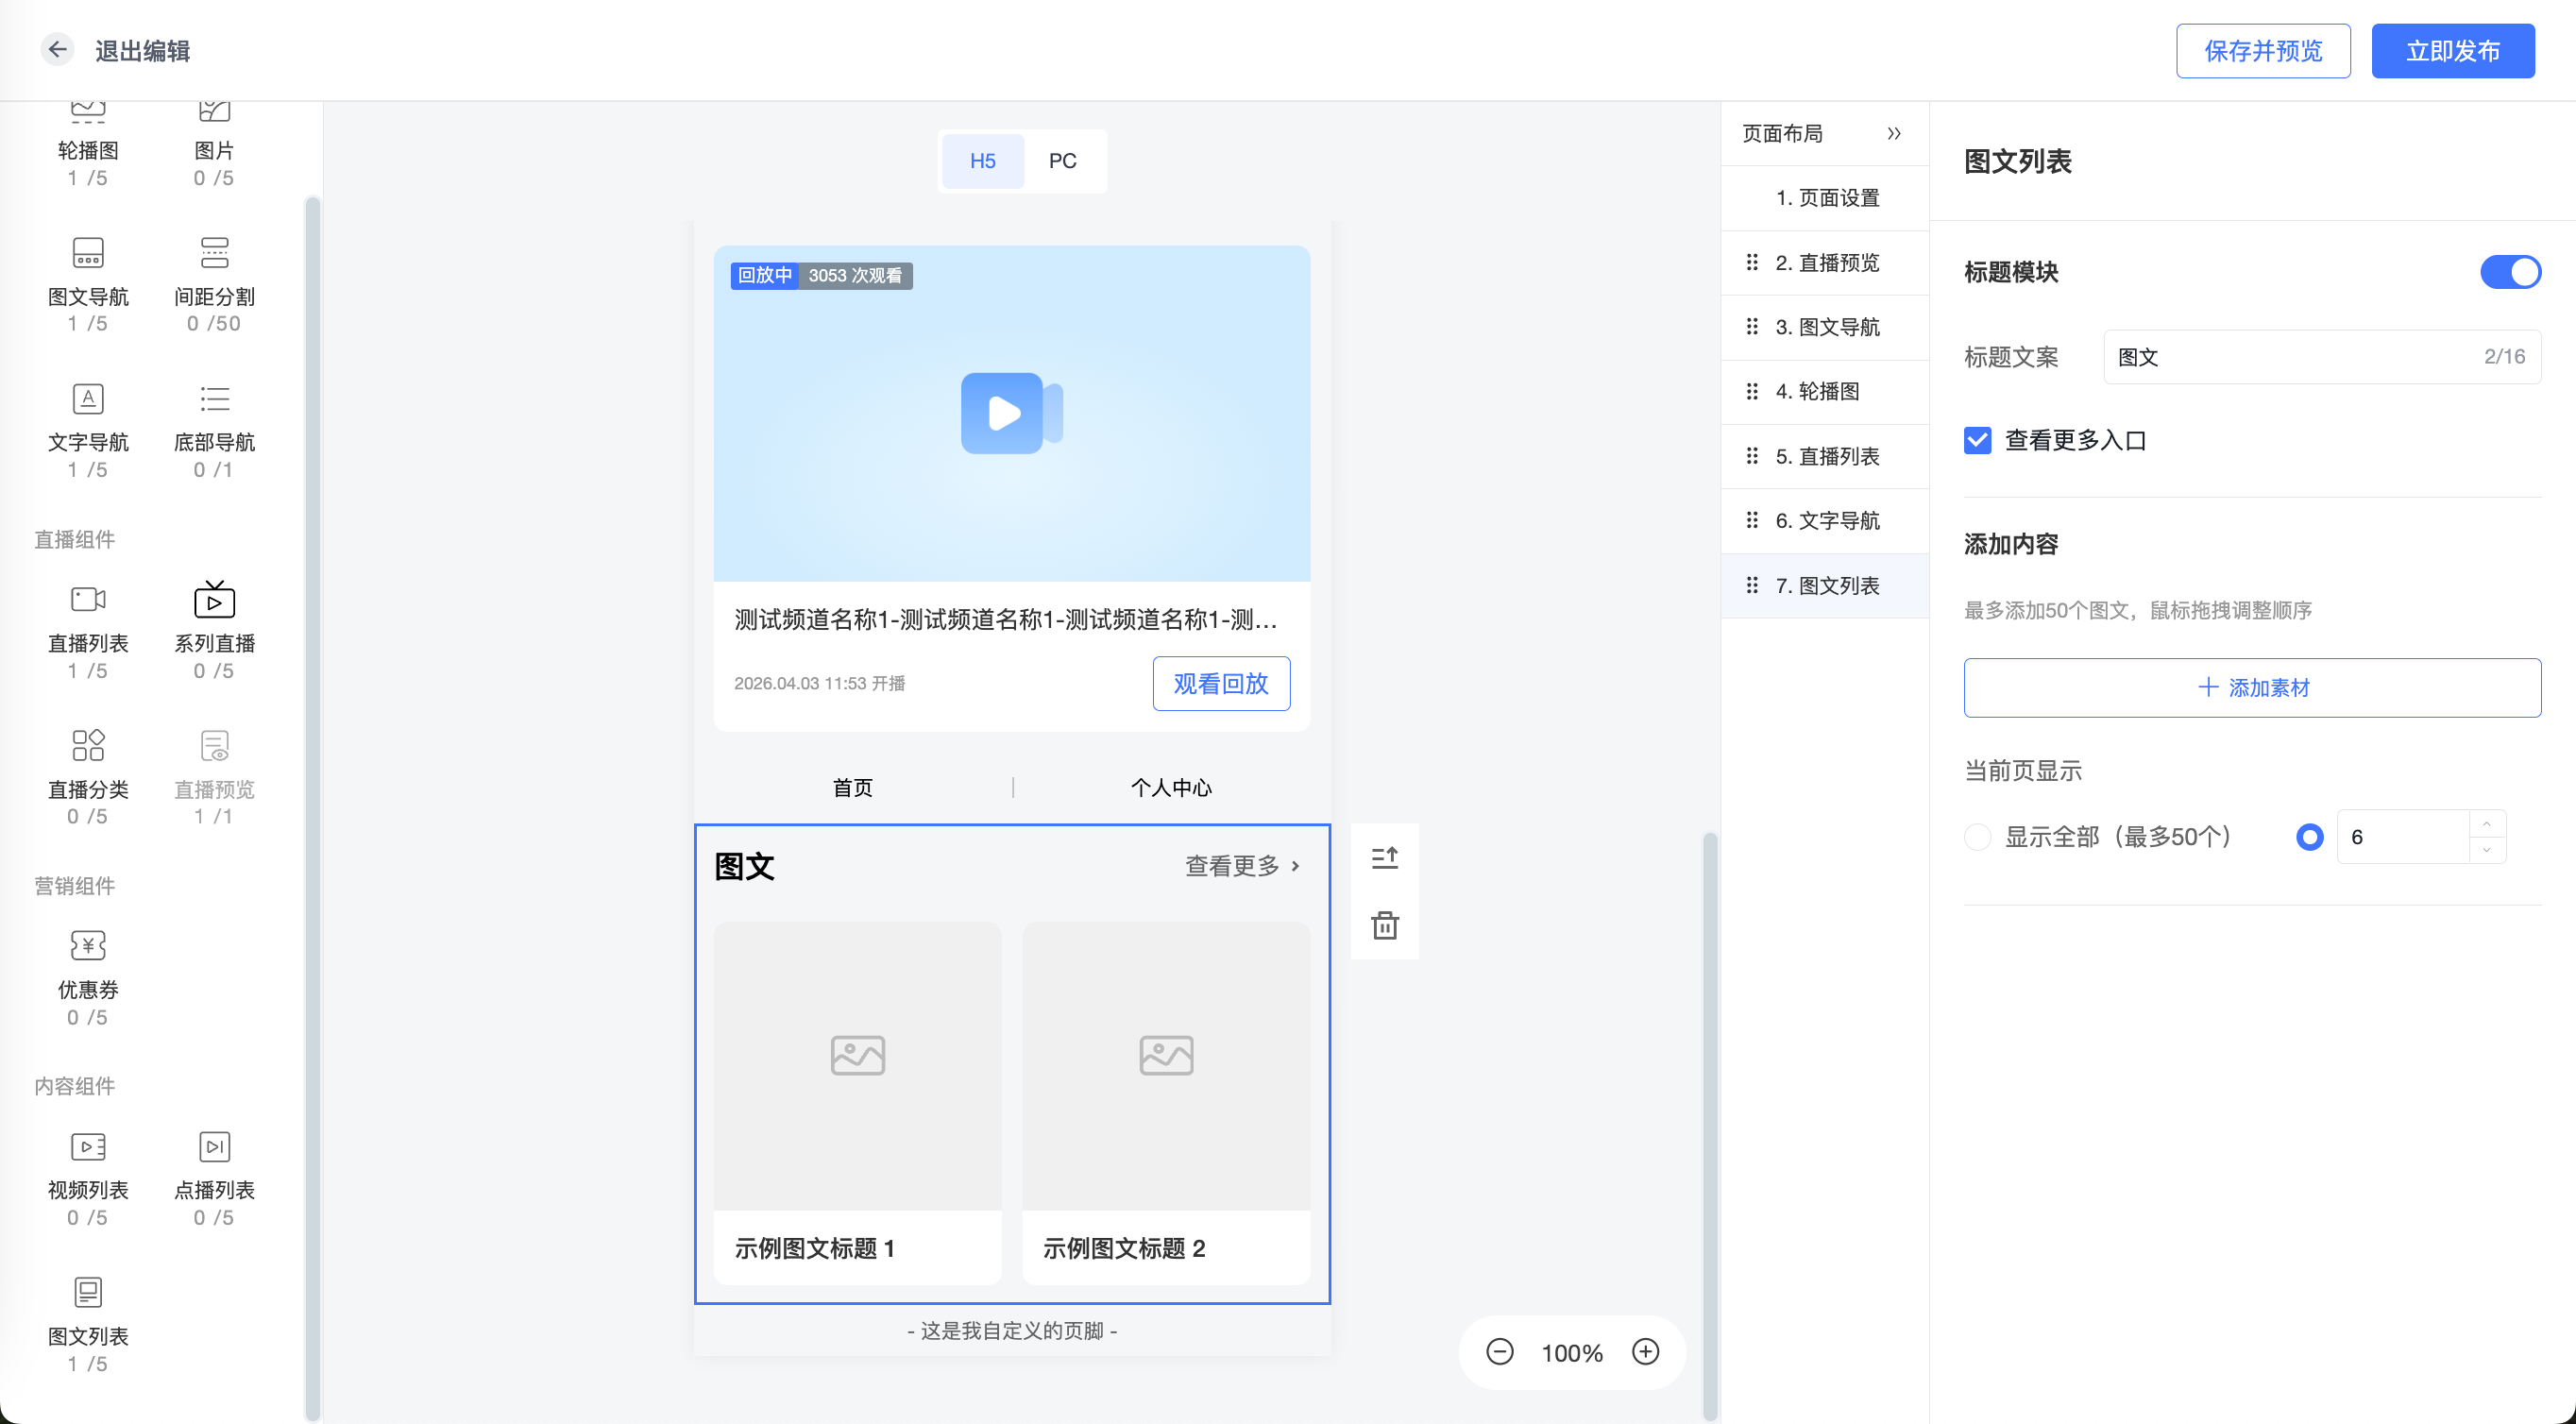
4. Edit and Manage Components
1) Edit a Component
• Click any component to enter its configuration interface for editing and modification.
• Click "Save" after editing.
2) Delete a Component
• Select the component to delete and click the delete button in its top right corner.
3) Adjust Component Order
• Click and drag a component to adjust its position on the page.
5. Real-time Preview and Publish
1) Real-time Preview
• Click the "Preview" button at the top of the editing interface to view the Aggregation Page effect in real-time, ensuring the page layout and content are correct.
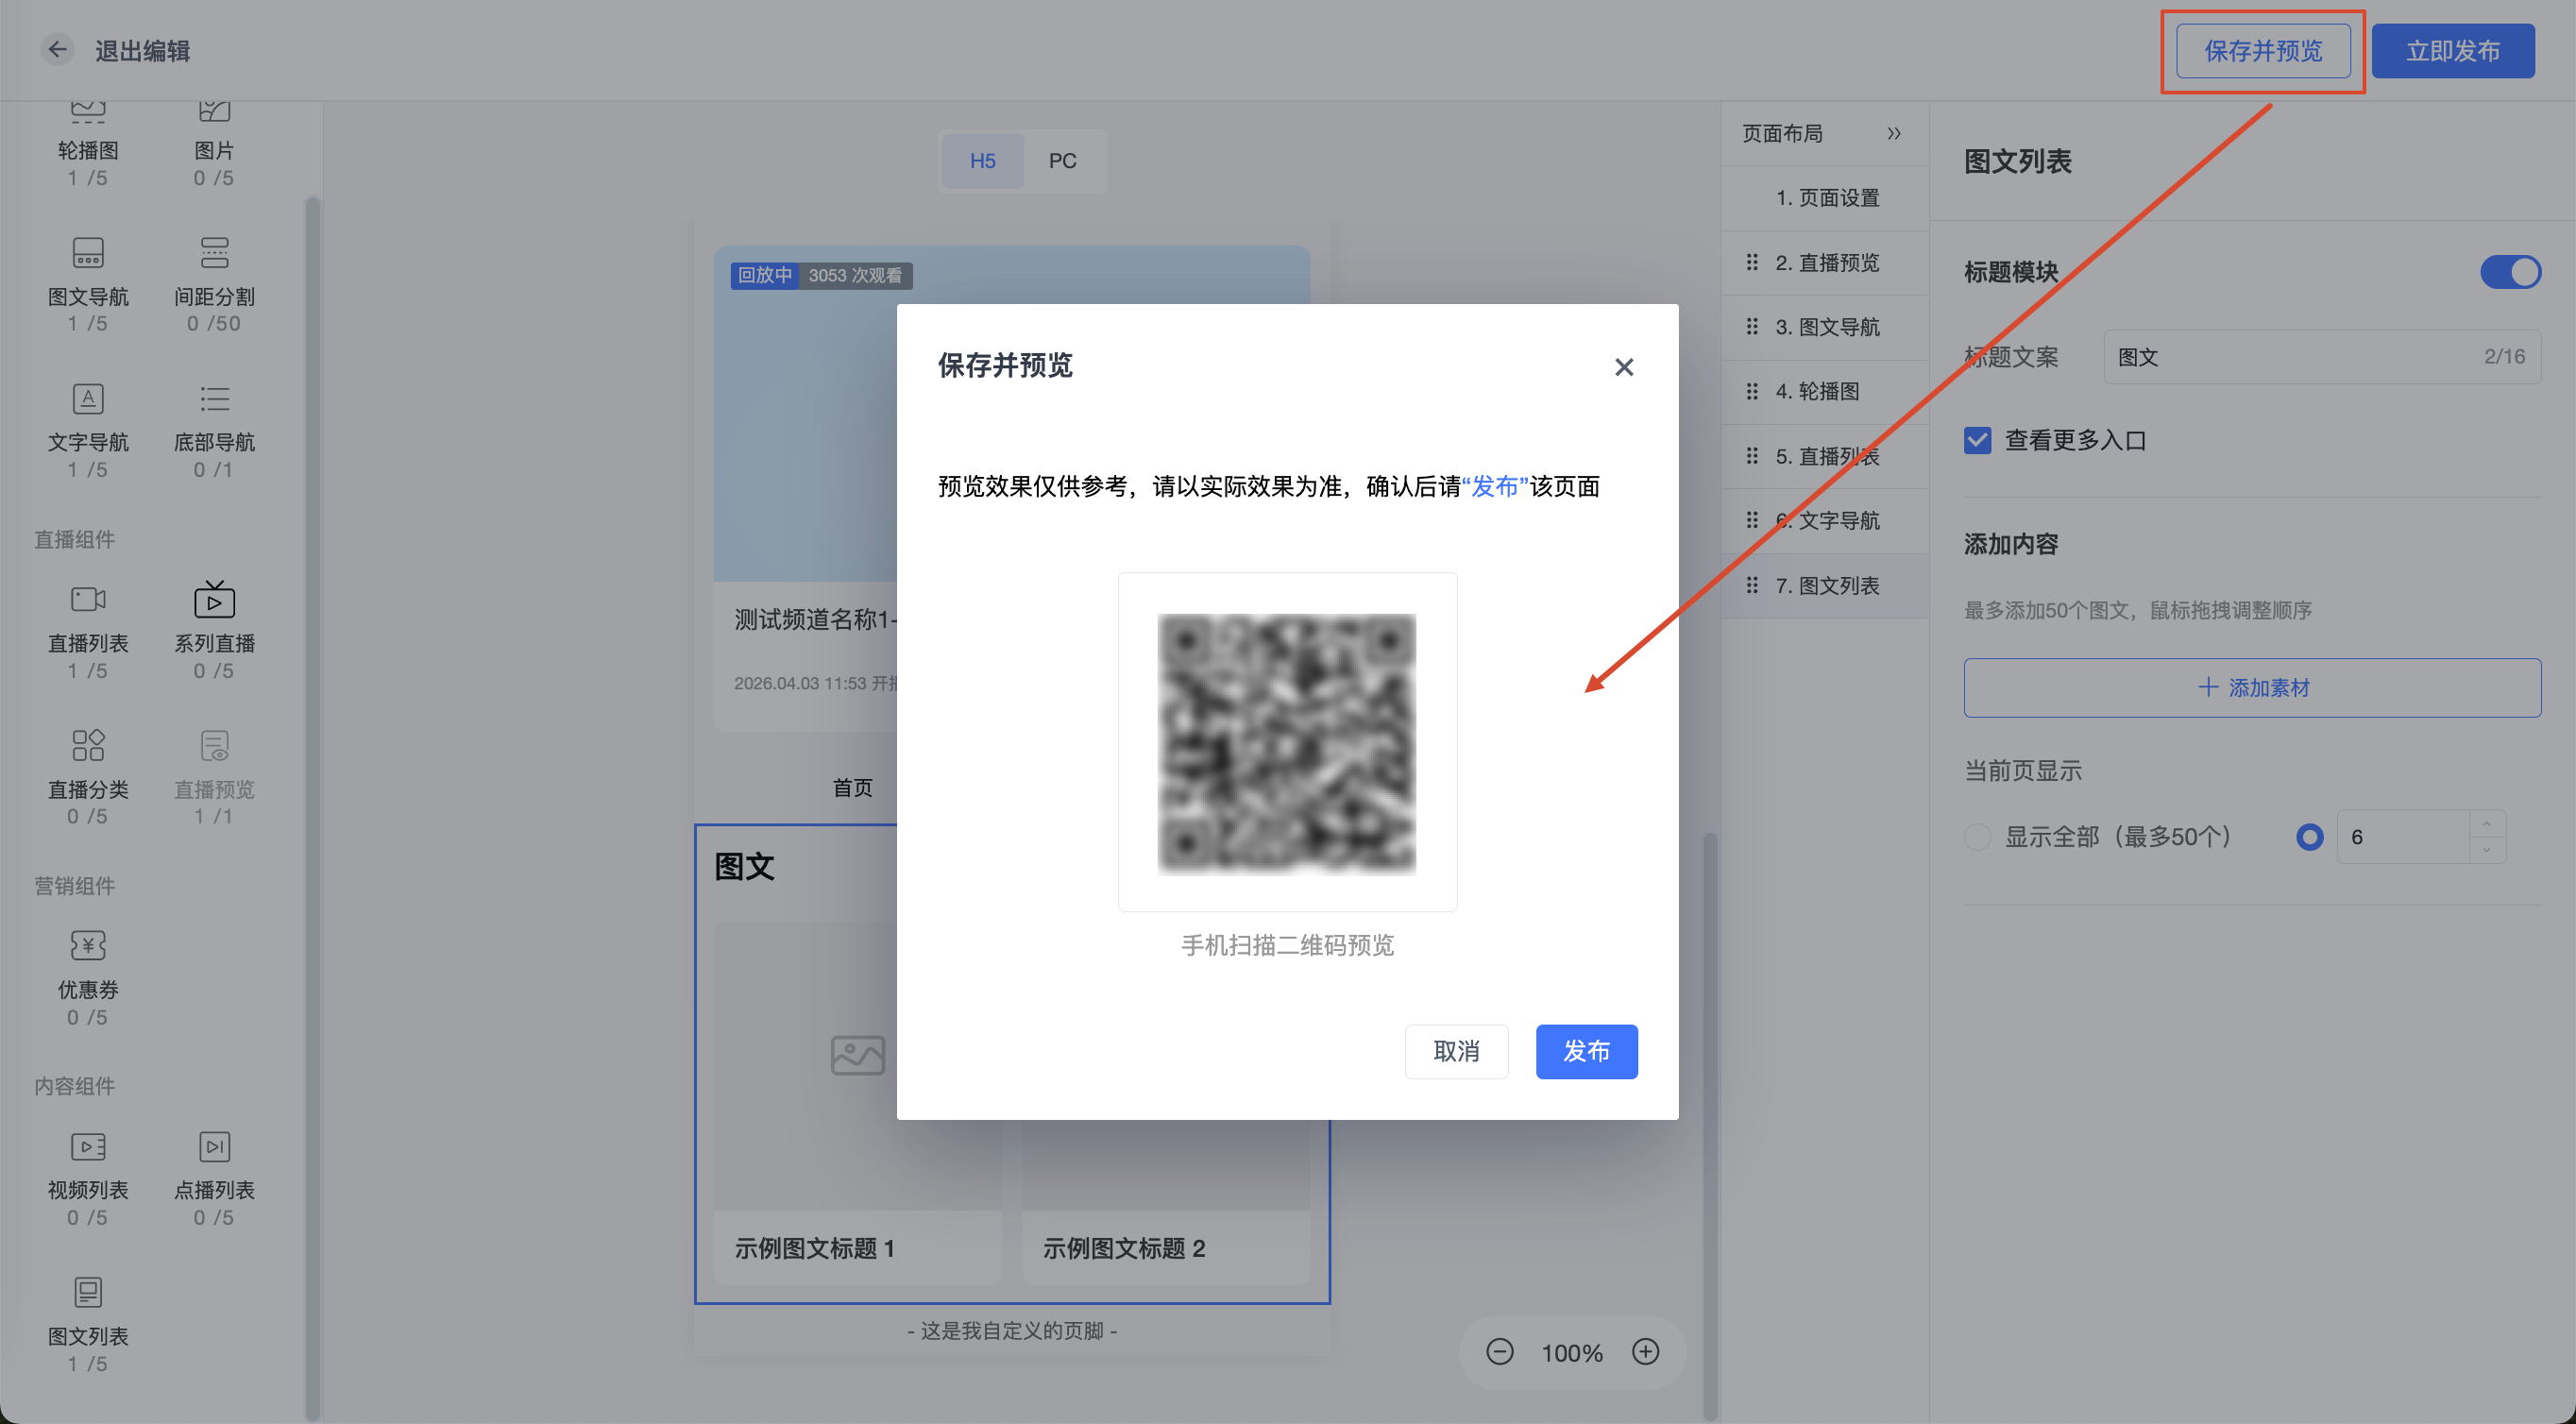
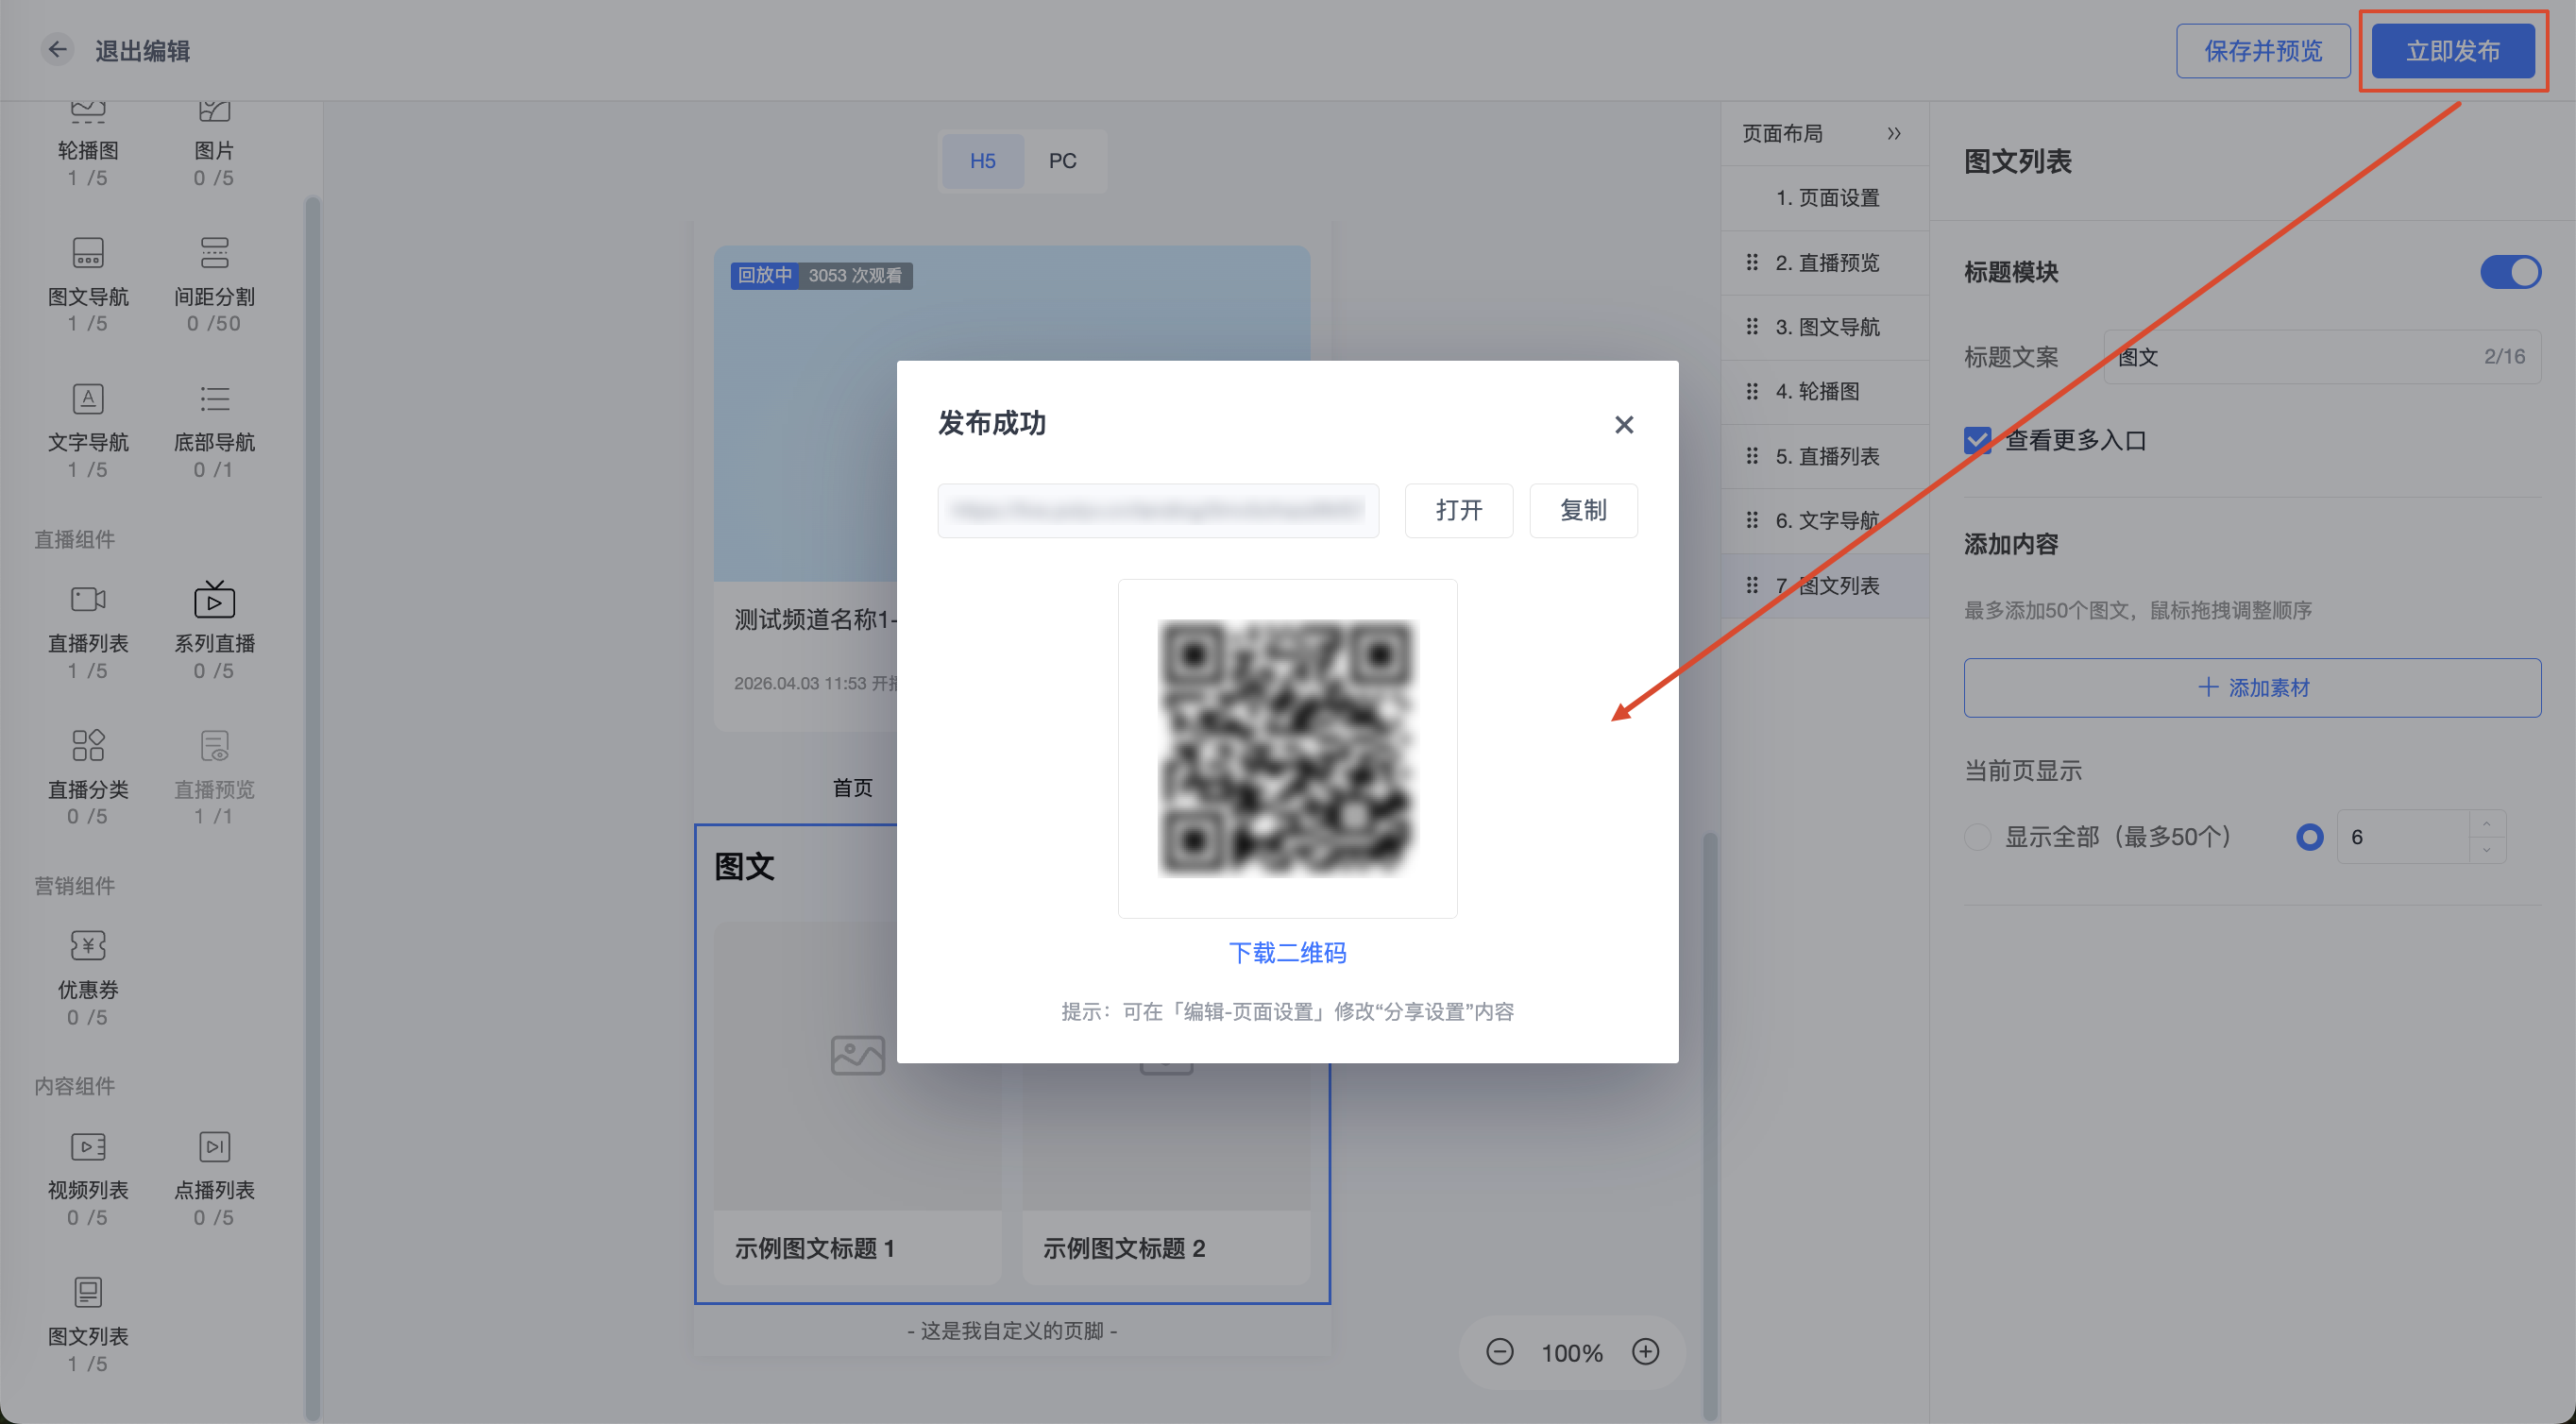
2) Publish the Aggregation Page
• After confirming the page content is correct, click the "Publish" button.
• Once published, the Aggregation Page will take effect immediately, and viewers can access it via the corresponding link.
6. Update and Modify an Aggregation Page
1) Edit a Published Aggregation Page
• Find the Aggregation Page to modify in the management list and click its title to enter the editing interface.
• Make necessary modifications and adjustments. After completion, click "Save" and then "Publish".
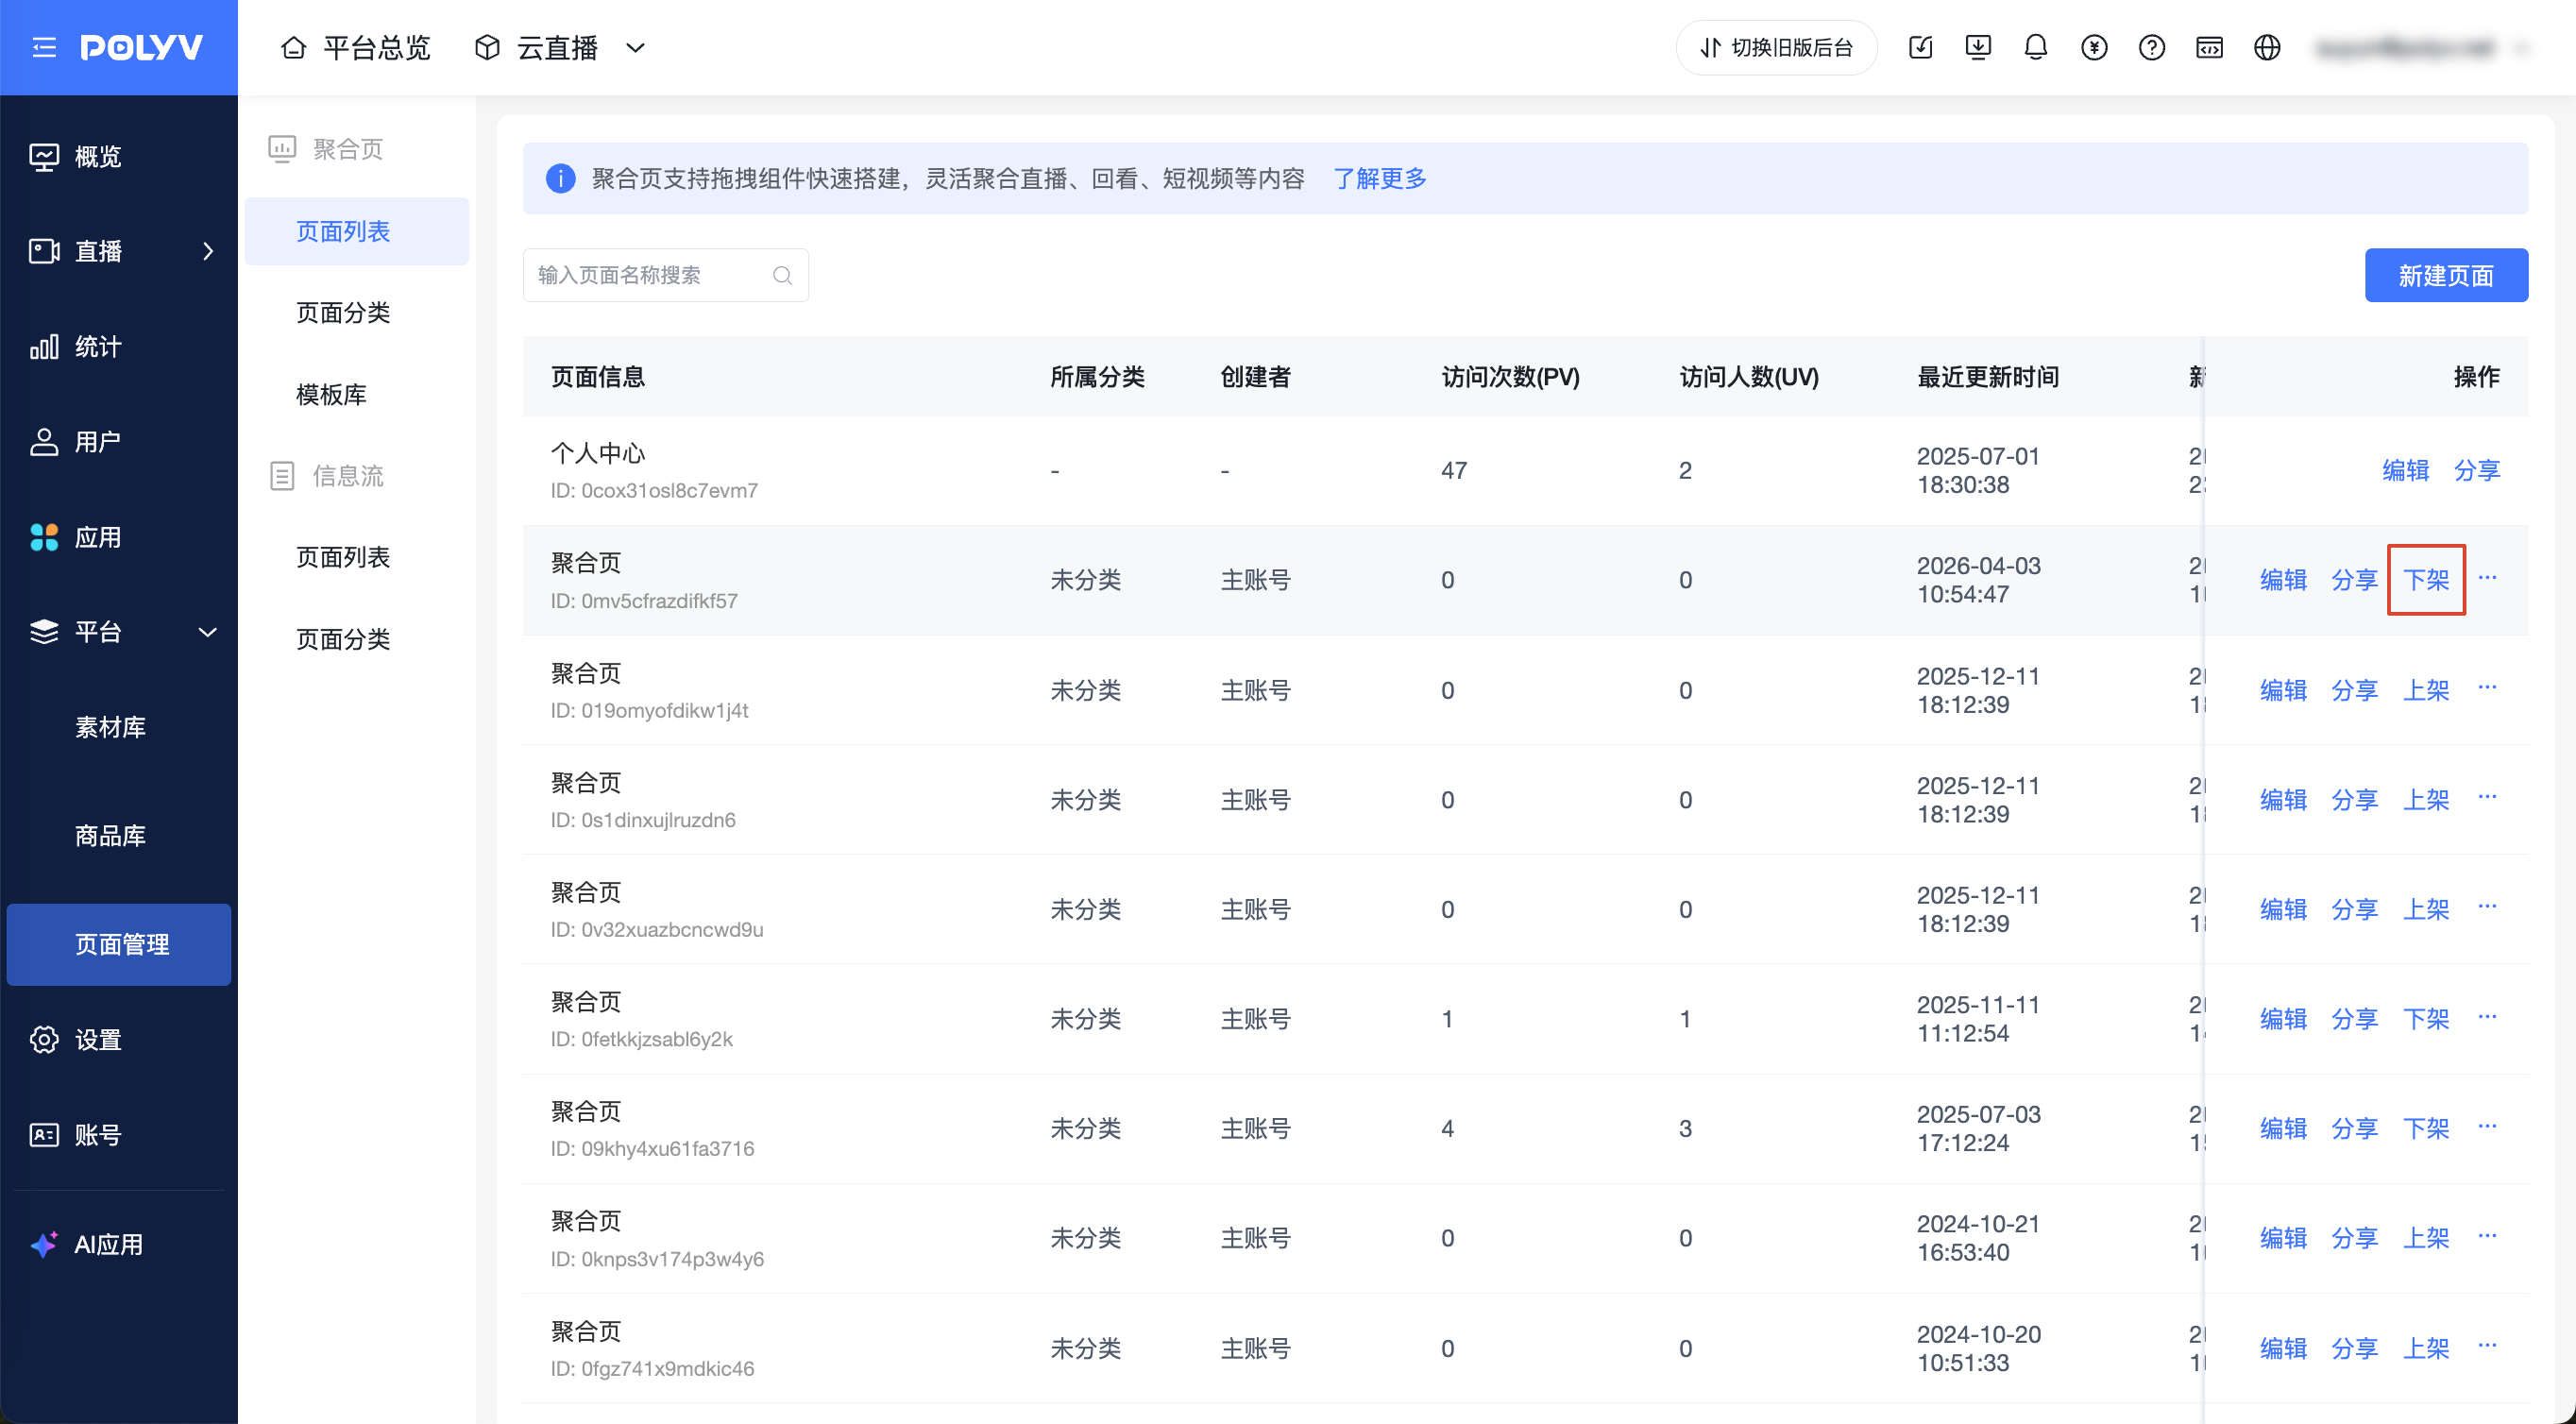
2) Unpublish
If you need to temporarily take an Aggregation Page offline, click the "Unpublish" button in the management list.
3. Frequently Asked Questions
Q1) Component cannot be dragged:
• Ensure you are logged in and have editing permissions. If not logged in, please log back into the backend.
• Ensure your browser supports drag-and-drop operations (recommended to use the latest versions of Chrome, Firefox, Edge, etc.).
Q2) Content modifications are not taking effect:
• Ensure you have clicked "Save" and "Publish".
• Clear your browser cache and revisit the page.
Q3) Replay video cannot be played:
• Ensure the video link is valid and the format is supported.
• Check your network connection and the video source server status.
