


**Light Director Client User Manual (V1)**
This document is for version 1.2.0 of the Light Director Client. It may not be updated in time; please refer to the latest client version.
User Manual Video Link: http://go.plvideo.cn/album/index.html?albumId=446b606e
1. Channel Login
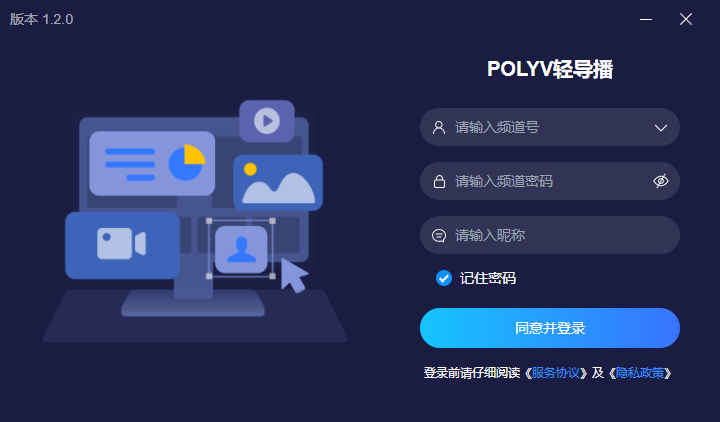
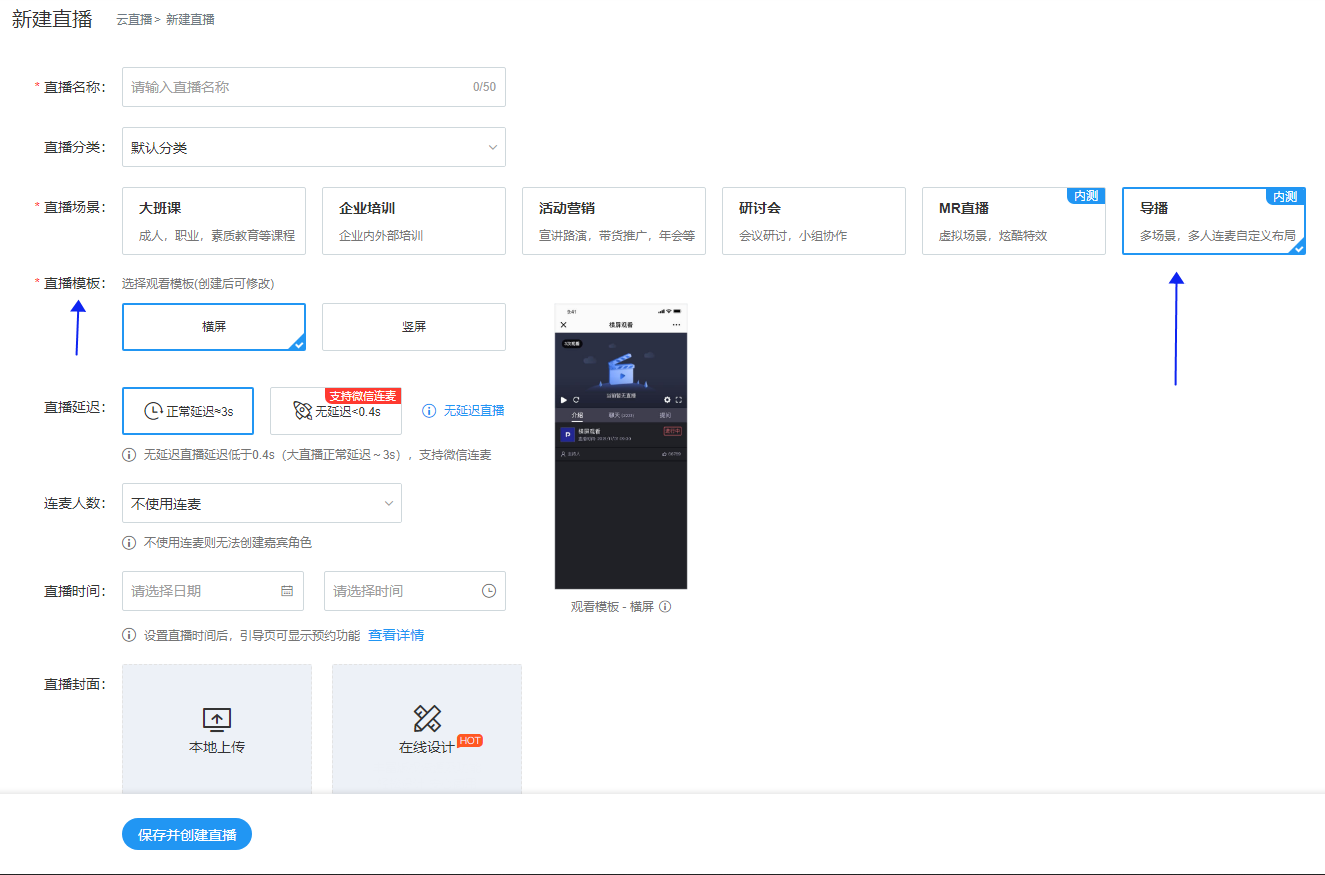
- Log in directly using the channel number. The channel type is currently limited to [Director] and must be created through the management backend.
Check "Remember Password" to log in; the password will be remembered by default on next launch.
You must agree to the Service Agreement and Privacy Policy to log in. Clicking "Log In" constitutes agreement.
The current client version number can be viewed in the top-left corner of the software.
2. Main Interface Buttons
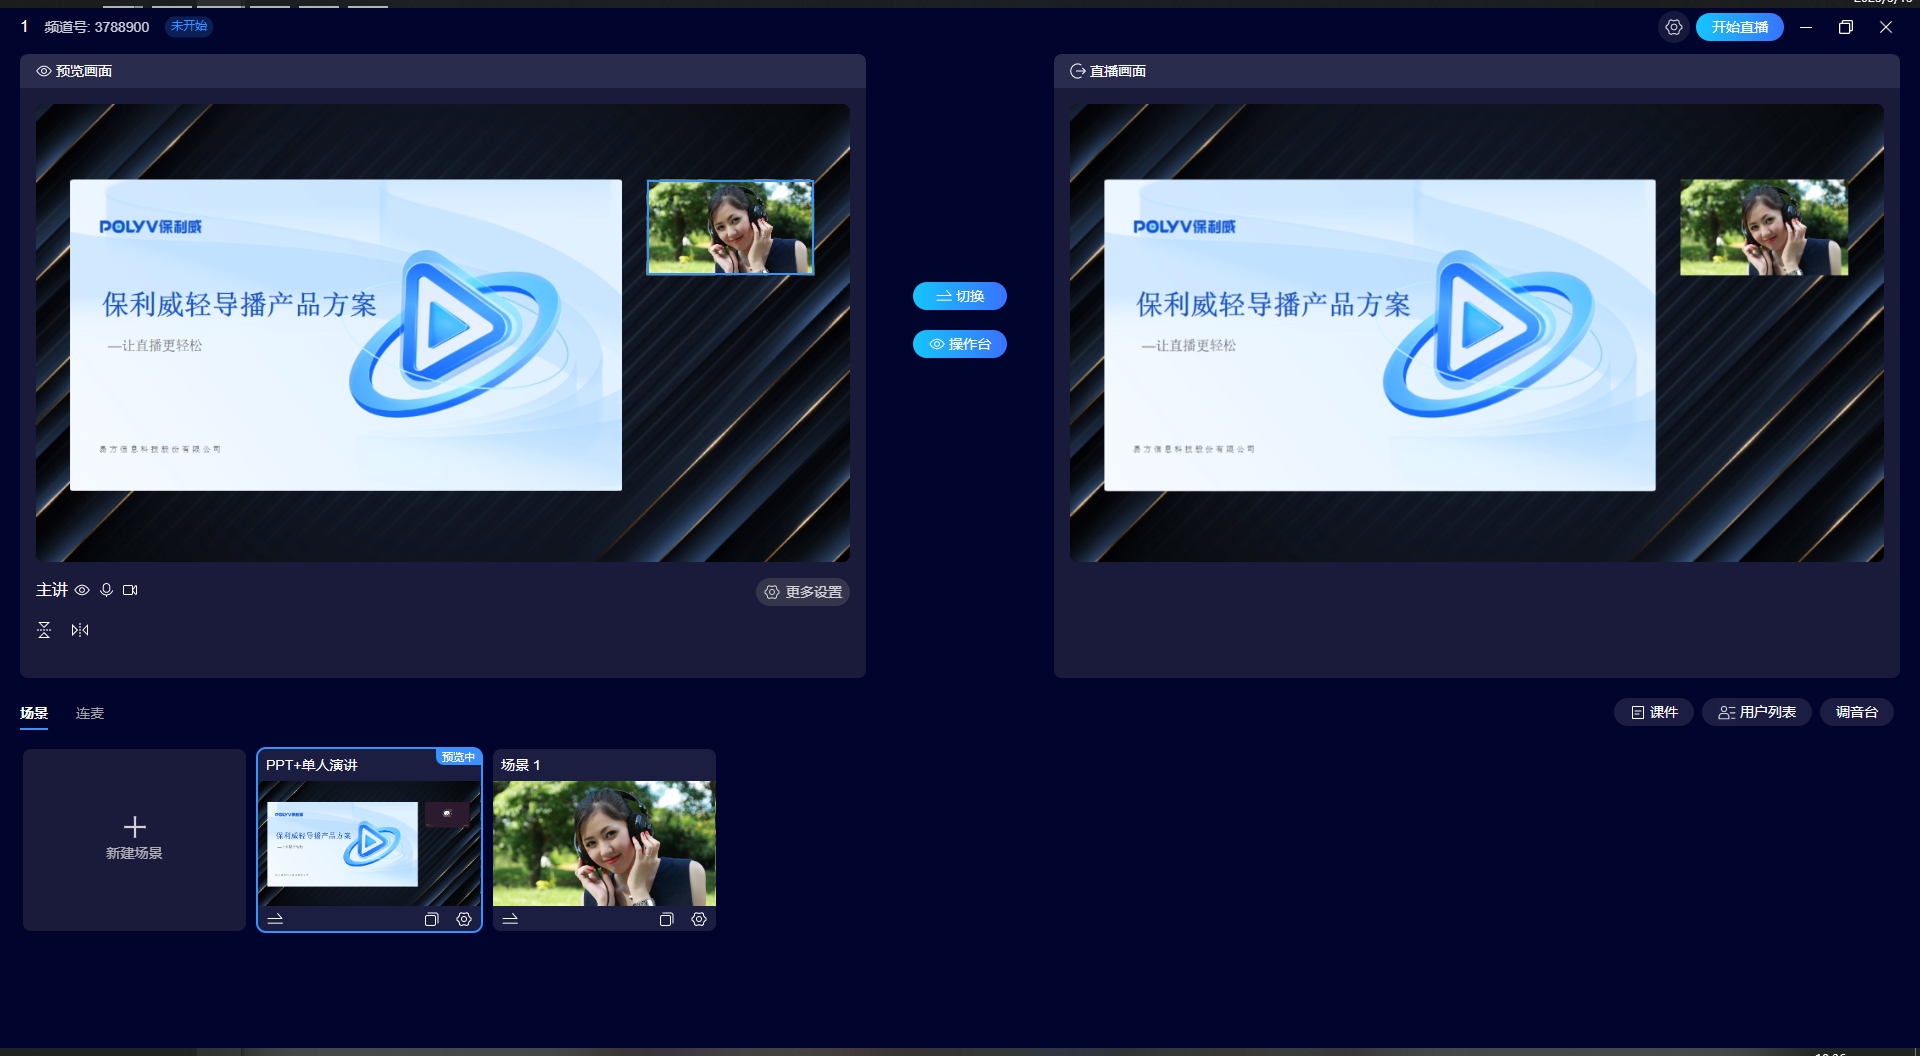 Order from left to right

| Channel Name | Channel Number | Live Status | Settings | Go Live Button | Software Window Resize |
|---|
3. Device Settings
3.1 Video Settings (Local)
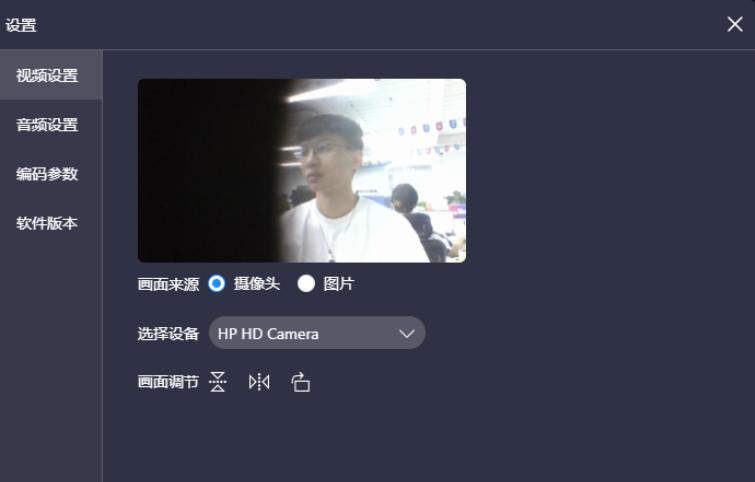
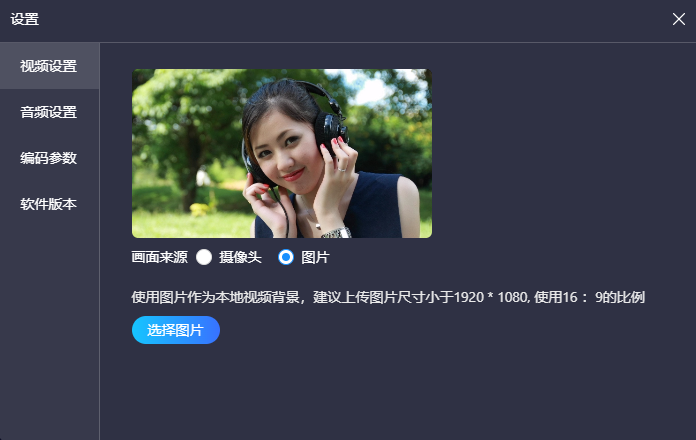
Video Source: Select Camera or Image.
Select Device: Choose the corresponding camera device; external cameras are supported.
Image Adjustment: Supports 360° rotation, horizontal flip, and vertical flip.
When the video source is set to Image, the image will replace the camera feed for broadcast.
Audio Settings
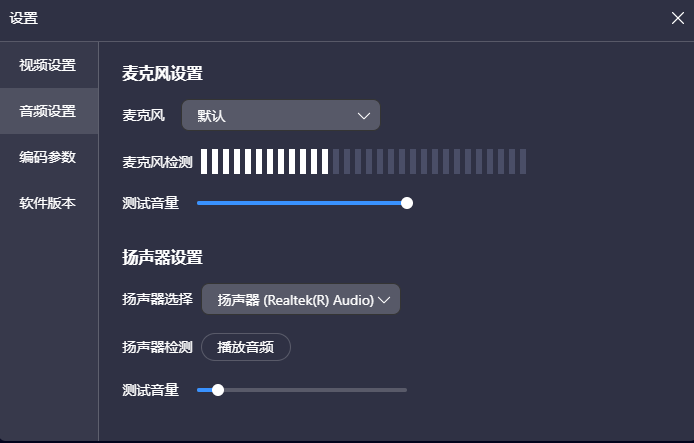
Microphone Settings
Select the microphone device and monitor microphone volume; external devices are supported. For more advanced settings, use the Audio Mixer function.
The following are co-stream settings (audio between the director and guests), enabled by default and cannot be disabled.
Microphone Noise Reduction: When enabled, it extracts vocals and reduces background noise.
Automatic Microphone Volume Adjustment: When enabled, the received microphone volume is fixed within an appropriate range before being sent out, preventing sudden volume changes.
Speaker Settings
Speaker Selection: Select the local speaker device for the director console.
Speaker Test: Test if the current speaker is working; clicking it will play a test audio.
Encoding Parameters
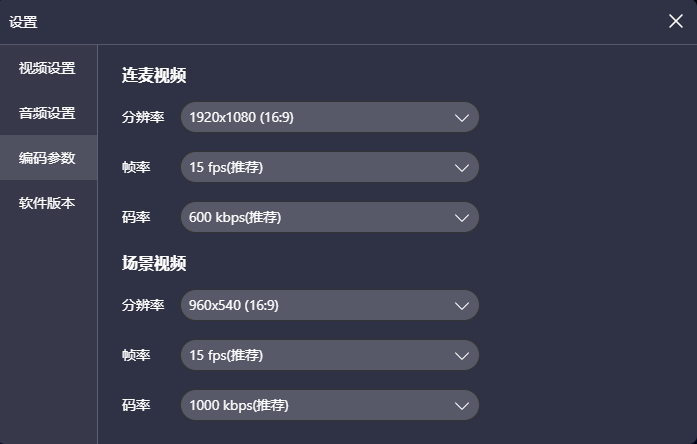
- Co-stream Video
Co-stream video is the local director camera feed used for external co-streaming.
- Scene Video
Scene video is the director console feed broadcast live to the audience.
——————————————————————
Resolution: Image clarity; higher values mean sharper images.
Frame Rate: Number of images displayed per second; higher values mean smoother video.
Bitrate: Higher bitrates provide more detailed image description, resulting in less quality loss.
All three parameters above place demands on the device. Higher values increase device load. Adjust according to your device.
Refer to the last section of this document, [Device Performance Requirements].
3.2 Software Version
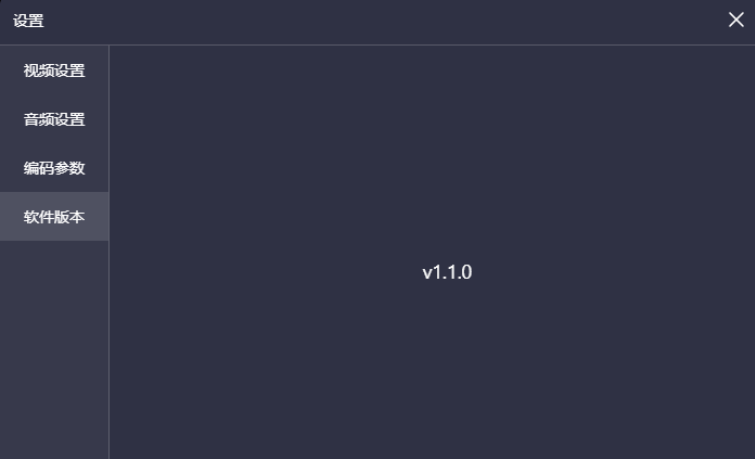
View the current client version number.
4. Scenes
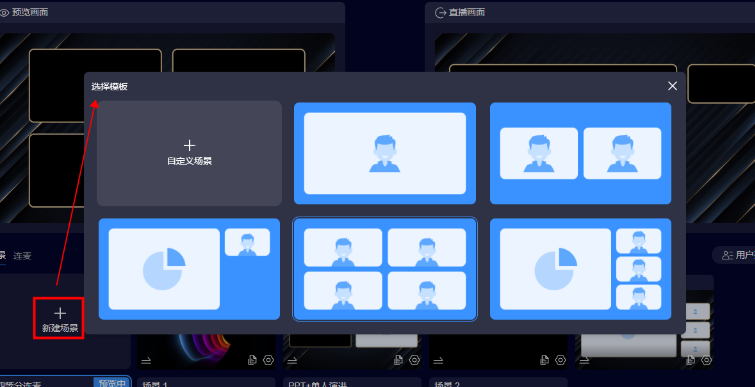
4.1 Create New Scene
Click "Create New Scene" to open the template selection. Currently, five templates and a custom template (blank template) are available.
4.2 Scene Layout
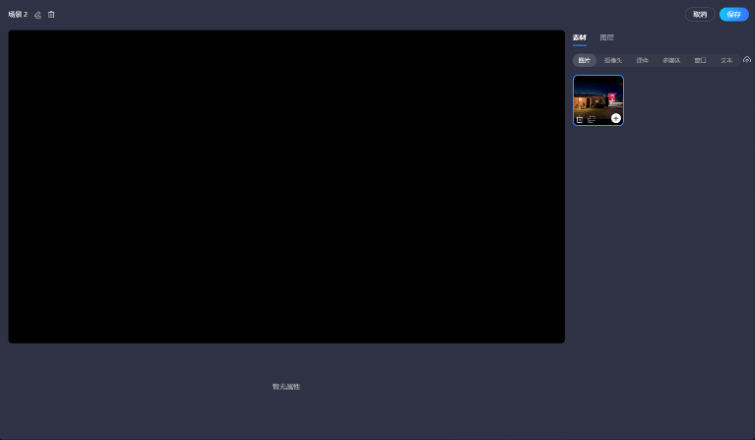
1) Scene Layout Popup

Includes: Rename current scene, Delete current scene.
2) Material Area
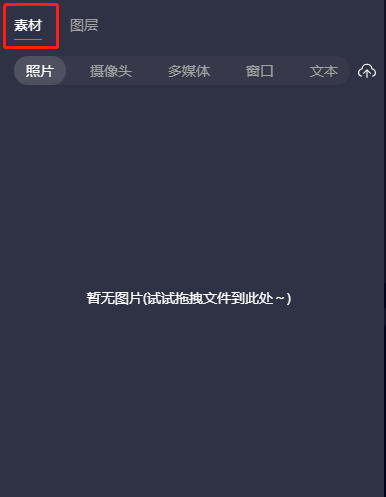
The material area includes [Image], [Camera], [Media], [Window], and [Text] material types.
Note: Version 1.2.0 will add a [Name Tag] function under the Text tab (expected location; refer to version 1.2.0 for exact placement).
[Image] Supports uploading images in multiple formats. 
[Camera] Select the local director camera, co-stream guest camera, or co-stream audience camera.
[Media] Upload video or audio files. 
[Window] Select the director console's desktop or a software window.
[Text] Edit and input various text and adjust colors.
3) Layer Area
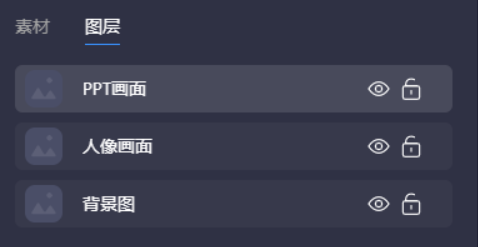
Adjust the layer order, position lock, and show/hide for different materials.
4) Scene Layout Area
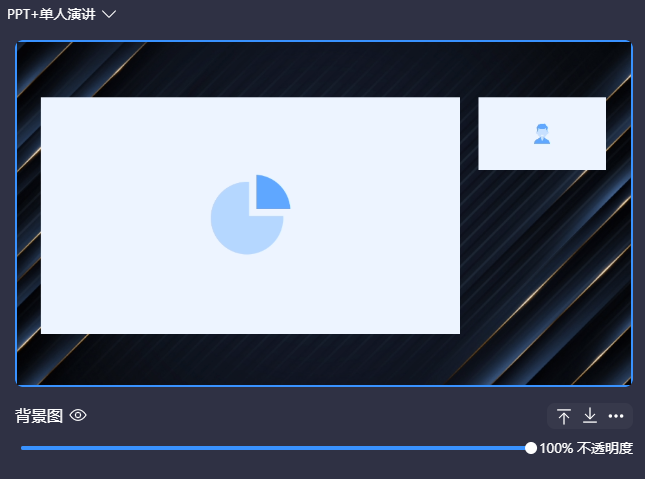
① This area is used to adjust the position, size, and layer of materials added to the scene.
② Clicking different material types triggers different function options; detailed explanations are not provided here.
5) Template Usage
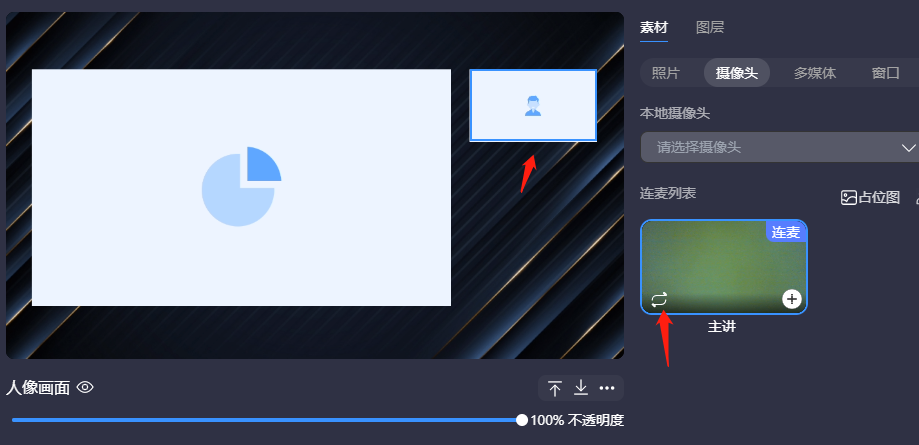
① Select the material to be replaced in the scene, then click a material with the [Swap] button in the right-side material area. The material will be replaced according to the position and size of the original material in the scene, eliminating the need for manual layout.
② Currently, all materials except text support quick replacement. Additionally, a [Placeholder Image] option is available in the camera area. You can place an image in advance and replace it with the guest's camera feed once they come online, without waiting for them to go online before layout.
5. Preview and Live Stream Management
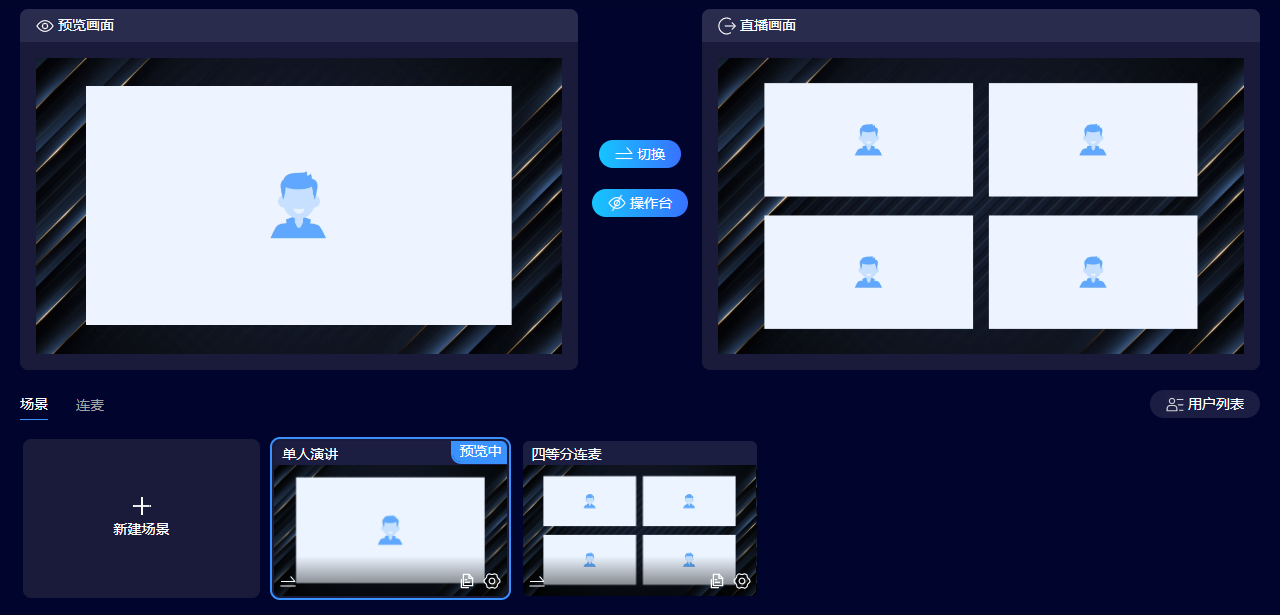
5.1 Preview Screen
① Clicking a scene in the scene area displays it in the preview area. This is a local preview. You can open the control panel to quickly edit the current scene's materials, including showing/hiding images, playing/pausing audio/video, and turning camera feeds and audio on/off.
② Click the switch button in the center of the preview screen to replace the preview screen with the live stream screen.
5.2 Live Stream Screen
This screen shows what the audience sees. Quick operations on the screen, unlike the preview screen, are not available.
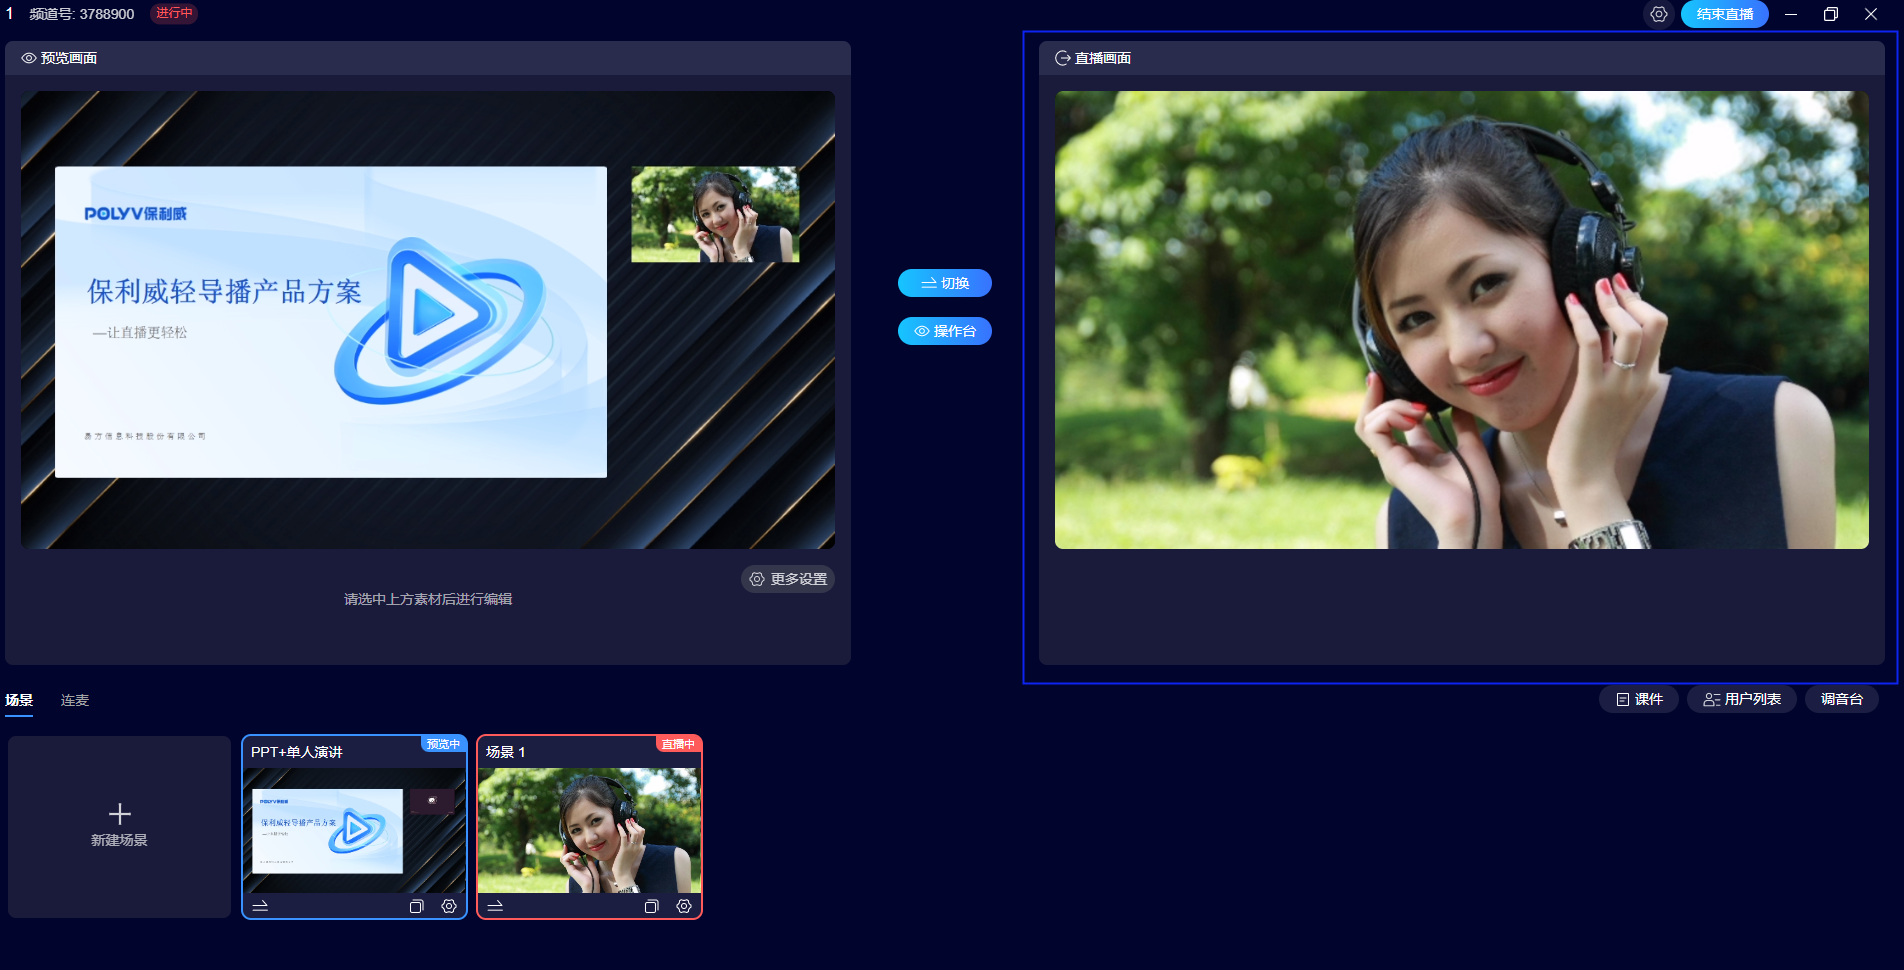
Select a pre-configured scene. The functions in this area are as follows:
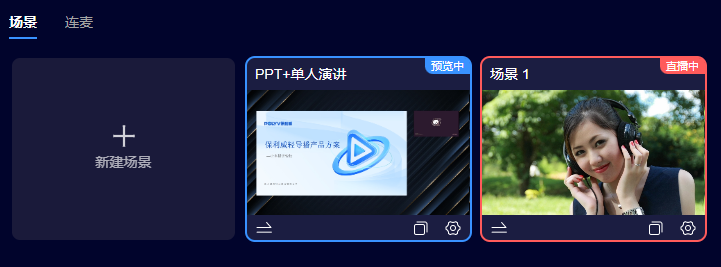
① Displays markers for the scene currently being previewed and streamed.
② Quickly switch a scene to the live stream scene (double-click the bottom-left corner of the scene).
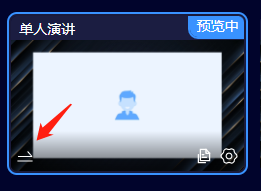
③ Quickly copy the current scene.
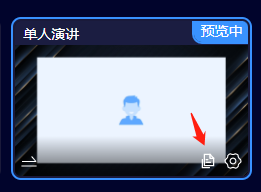
④ Modify the current scene.
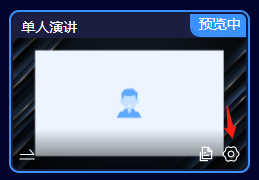
Special Cases: If the current scene is being previewed or is not being previewed, modifications take effect normally. If the current scene is being streamed live, modifications do not take effect until the scene is switched again.
5.3 Co-stream
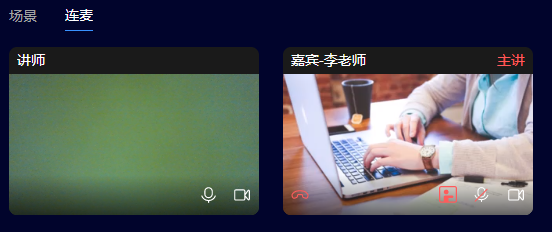
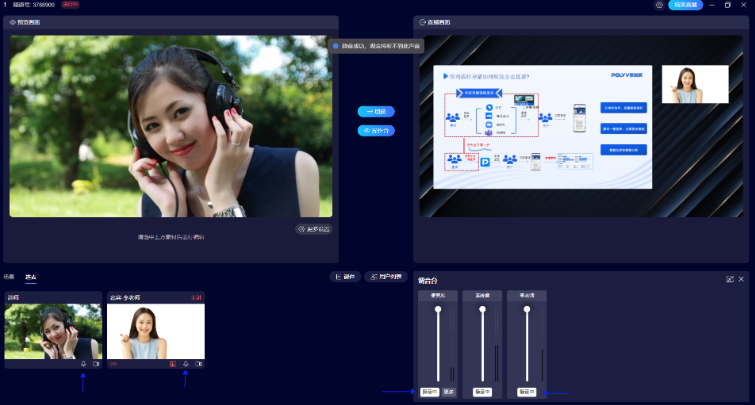
Co-stream Introduction
① This area displays all co-stream participants. The director can turn their cameras and microphones on or off. Guests and audience members can be displayed.
② If a guest is authorized as the main speaker, a special indicator will be shown.
③ Guests and audience members can be invited to the stage.
④ In the current version, the director (lecturer) role can speak directly without being added as a material. Both guests and the audience will hear the audio. If this is not desired, mute the director in the co-stream area.
⑤ Internal Communication Feature: In the Audio Mixer function, mute the corresponding guest's audio and the local microphone. This enables internal communication among co-stream participants only; the audience will not hear this audio.
User List
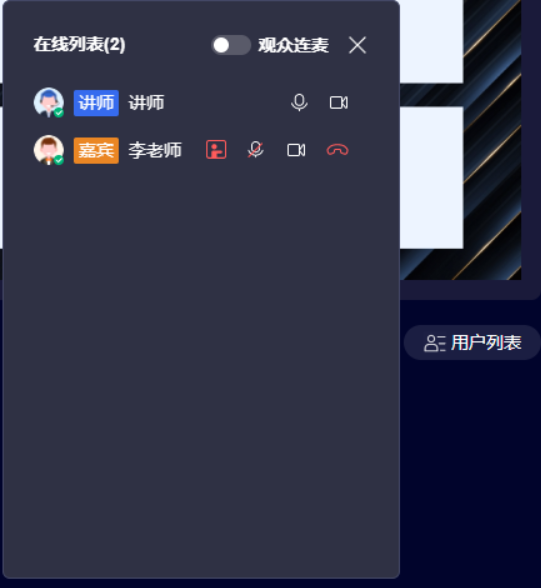
① The user list displays all users currently in the live room.
② After enabling audience co-streaming, you can invite audience members who have actively requested to join the stage.
③ You can directly grant guest main speaker permissions and perform other corresponding operations in this list.
5.4 Courseware
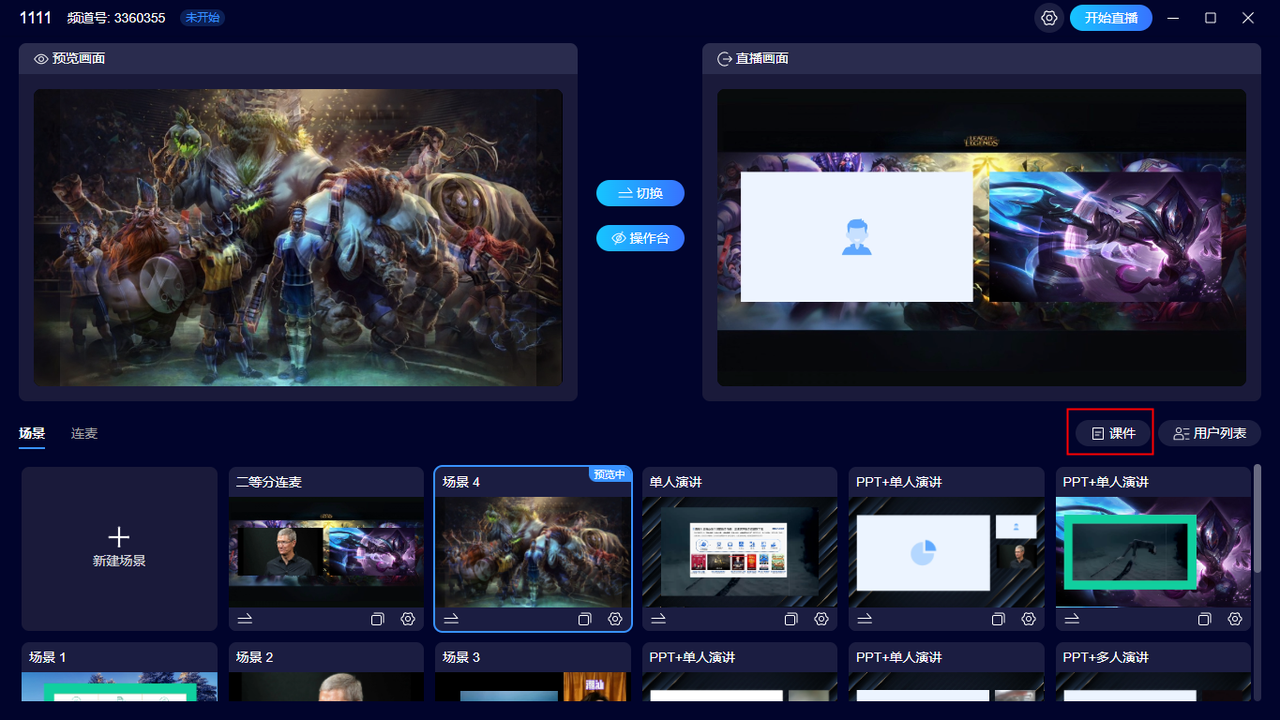
The courseware function is a collective term for documents and whiteboards. Guests can operate courseware directly via the client or web broadcast, and the screen will be synchronously displayed within the courseware.
Courseware Function Introduction
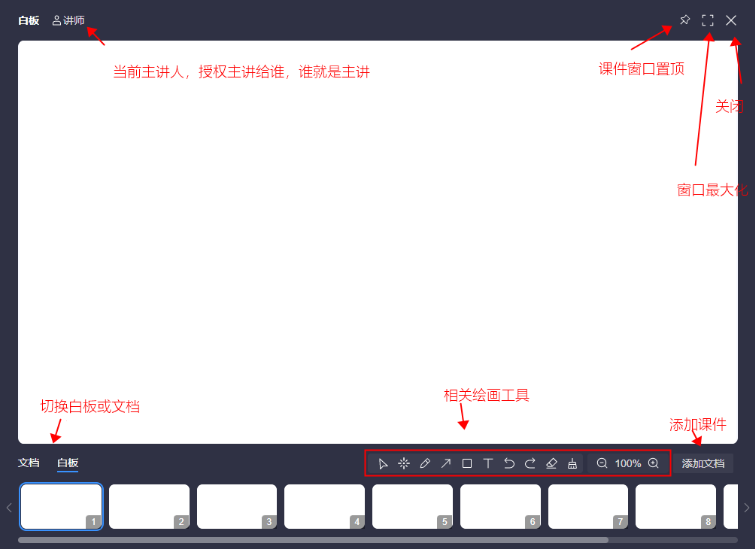
Click [Courseware] on the main interface of the director console to open the courseware interface.
- Add Document
The process for adding courseware is the same as for the Cloud Live Client or Web Live broadcast.
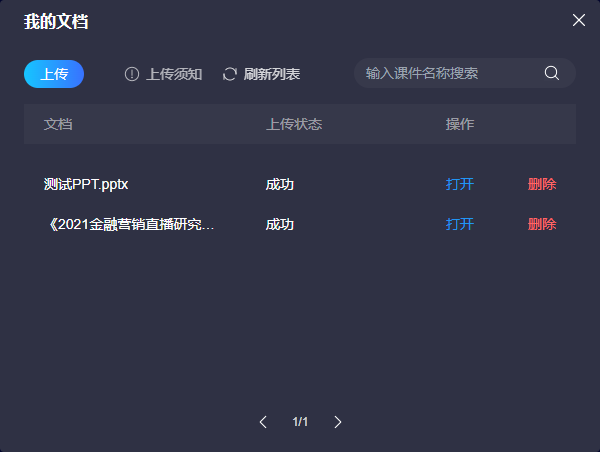
- Courseware Application
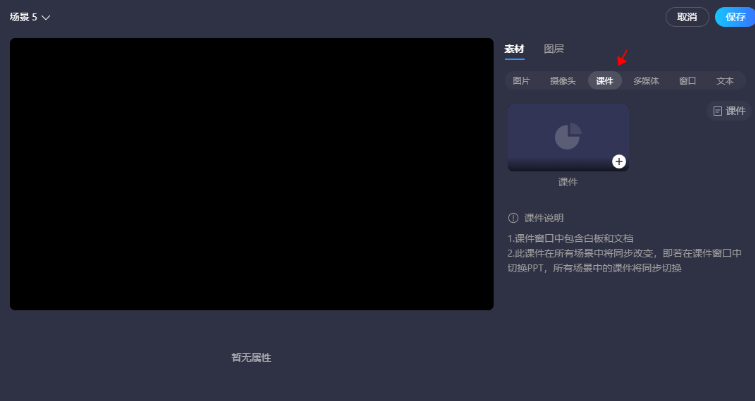
① Select "Courseware" in the material area to add it as a material.
② The courseware material screen will update in real-time based on the current main speaker.
③ When a courseware window is added to a scene, it cannot be closed (note: clicking close actually hides the window behind the Light Director software).
5.5 Audio Mixer
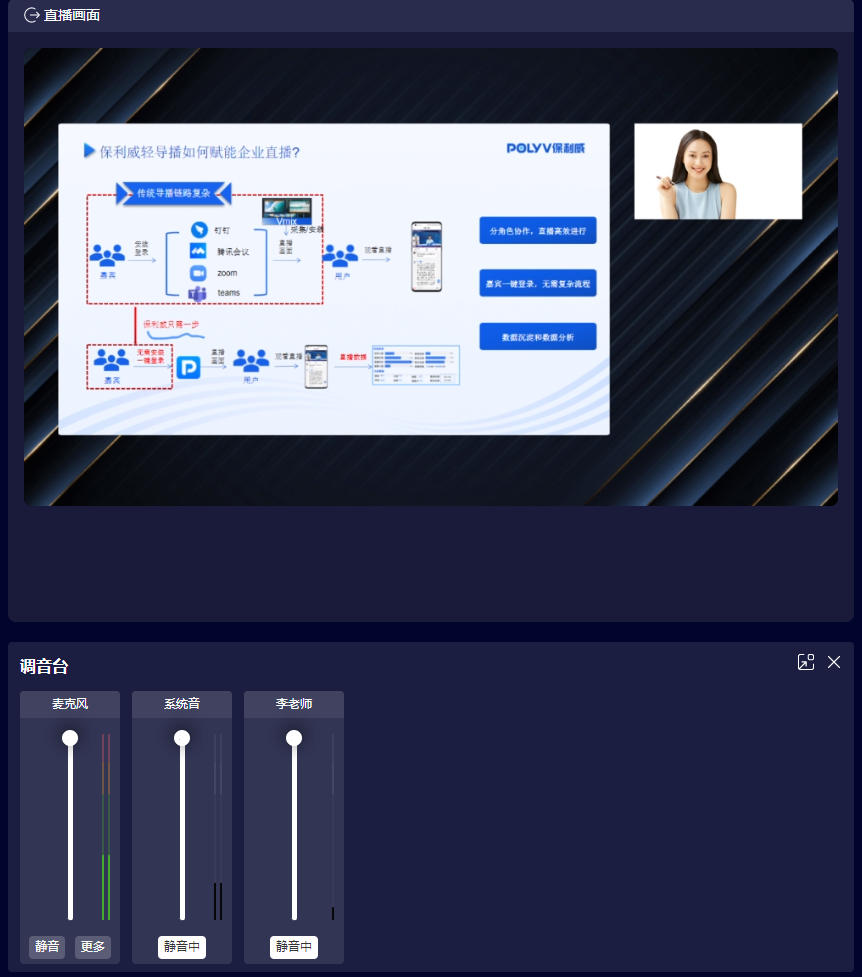
The audio mixer controls the audio of the current live stream screen. You can adjust the volume of materials that can produce sound within the current screen.
- Microphone: The microphone is always displayed. It refers to the local director's microphone hardware device applied in the settings. It is enabled by default.
① Clicking "Mute" will prevent the audience from hearing this microphone's audio.
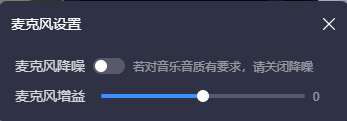
② Clicking "More" reveals [Test] and [Microphone Settings] functions.
The Test function tests the current microphone's audio status. It may cause noise; please close it promptly after testing.
Microphone Settings allows you to adjust the noise reduction and gain effects of the host's microphone for the audience. You can listen to the audio using the Test function and then adjust.
- System Audio: System audio refers to the computer system sound of the device running the Light Director software. It is disabled by default.
When enabled, it will capture the computer's sound. If you need to use it, test it before going live. It is not recommended to use it temporarily during a live broadcast without prior testing, as some computers lack noise reduction, which may cause the software to capture the microphone sound and then output it, resulting in speaker feedback.
- Media File Audio
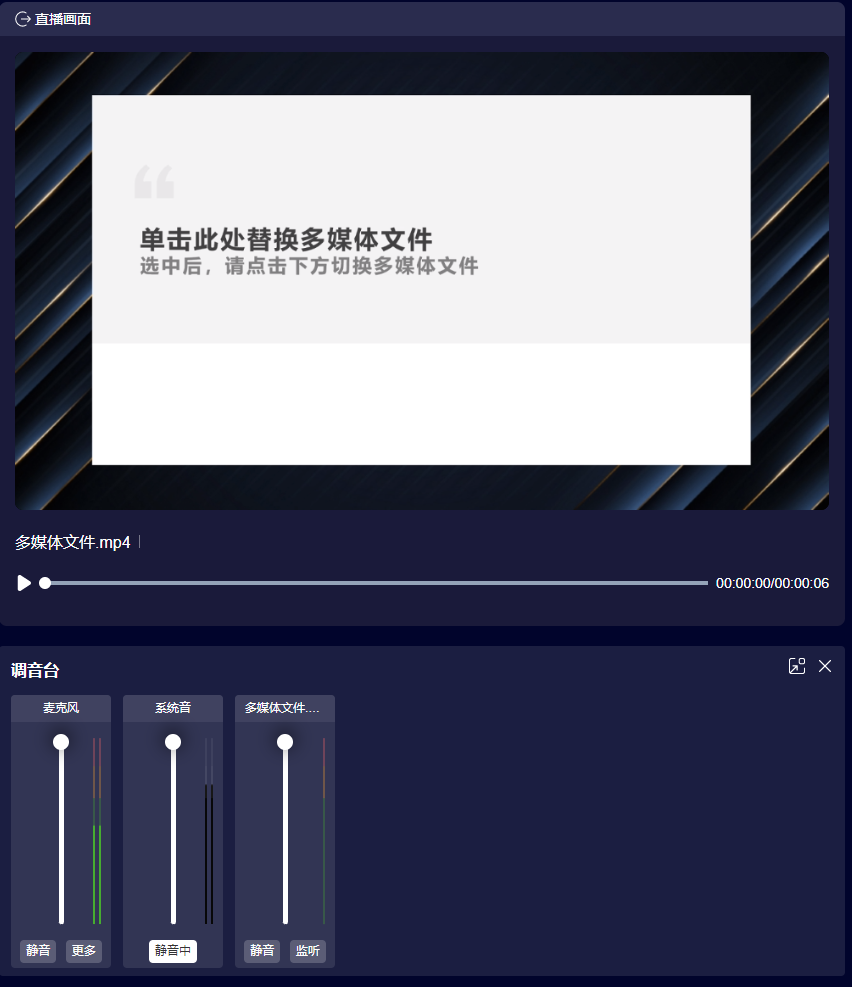
① Media audio is enabled by default. Clicking "Mute" will prevent the audience from hearing this audio.
② Clicking the "Monitor" button will allow the local speaker to hear this audio, consistent with what the audience hears.
6. Device Performance Requirements
Note: The following configurations are based on test information. System requirements vary greatly depending on usage, and there is no precise quantification. The following information is for reference only!
①. Minimum Requirements: (Recommended live stream parameters: Co-stream 360p@15fps-600kbps, Live stream 720p@15fps-1000kbps)
Desktop Platform: CPU: i3-8100, GPU: Integrated Graphics, RAM: 8GB, Storage: SSD, Monitor: 1080p
Mobile Platform: Mainstream Brands: CPU: i5-8250U, GPU: Integrated Graphics, RAM: 8GB, Storage: SSD, Monitor: 1080p
MacBook Air: MacBook Air (M1, 2020), RAM: 8GB
MacBook Pro: MacBook Pro (i5, 2019), RAM: 8GB
Mac Mini: Mac Mini (i5, 2018), RAM: 8GB
iMac: iMac (i5, 2019), RAM: 8GB
Network Uplink: 4Mbps+, Network Downlink: 4Mbps+
②. Recommended: (Recommended live stream parameters: Co-stream 720p@15fps-1000kbps, Live stream 720p@30fps-1500kbps, or 1080p@30fps-3000kbps)
Desktop Platform: CPU: i5-8400, GPU: Integrated Graphics, RAM: 16GB, Storage: SSD, Monitor: 1080p
Mobile Platform: Mainstream Brands: CPU: i7-1165G7, GPU: Integrated Graphics, RAM: 16GB, Storage: SSD, Monitor: 1080p
MacBook Air: Not Recommended
MacBook Pro: No Recommendation
Mac Mini: Mac Mini (i7, 2018), RAM: 16GB
iMac: iMac (i7, 2019), RAM: 16GB
Network Uplink: 8Mbps+, Network Downlink: 10Mbps+
③. High Performance: (Recommended live stream parameters: Co-stream 1080p@30fps-2500kbps, Live stream 1080p@30fps-3000kbps)
Desktop Platform: CPU: i5-9600, GPU: GTX-1050, RAM: 16GB, Storage: SSD, Monitor: 1080p
Network Uplink: 10Mbps+, Network Downlink: 20Mbps+
