Using Third-Party Encoders for Normal or Low-Latency Channels (OBS, VMIX as Examples) #
OBS is a free and open-source software for video recording and live streaming. Compared to Polyv's official streaming client, presenters can use OBS to broadcast using a pure video template.
VMIX is a paid video mixer and switcher that supports multiple video streams for live production. Compared to Polyv's official streaming client, presenters can use VMIX to broadcast using a pure video template.
Note: When using OBS or VMIX for live streaming, co-hosting and interactive room features are not available.
OBS download link: https://obsproject.com/zh-cn/download
VMIX download link: https://www.vmix.com/software/
Steps:
1. Obtain the Stream URL
Log in to the Polyv backend, click on the corresponding channel link, click [Third-Party Streaming], and copy the stream URL.
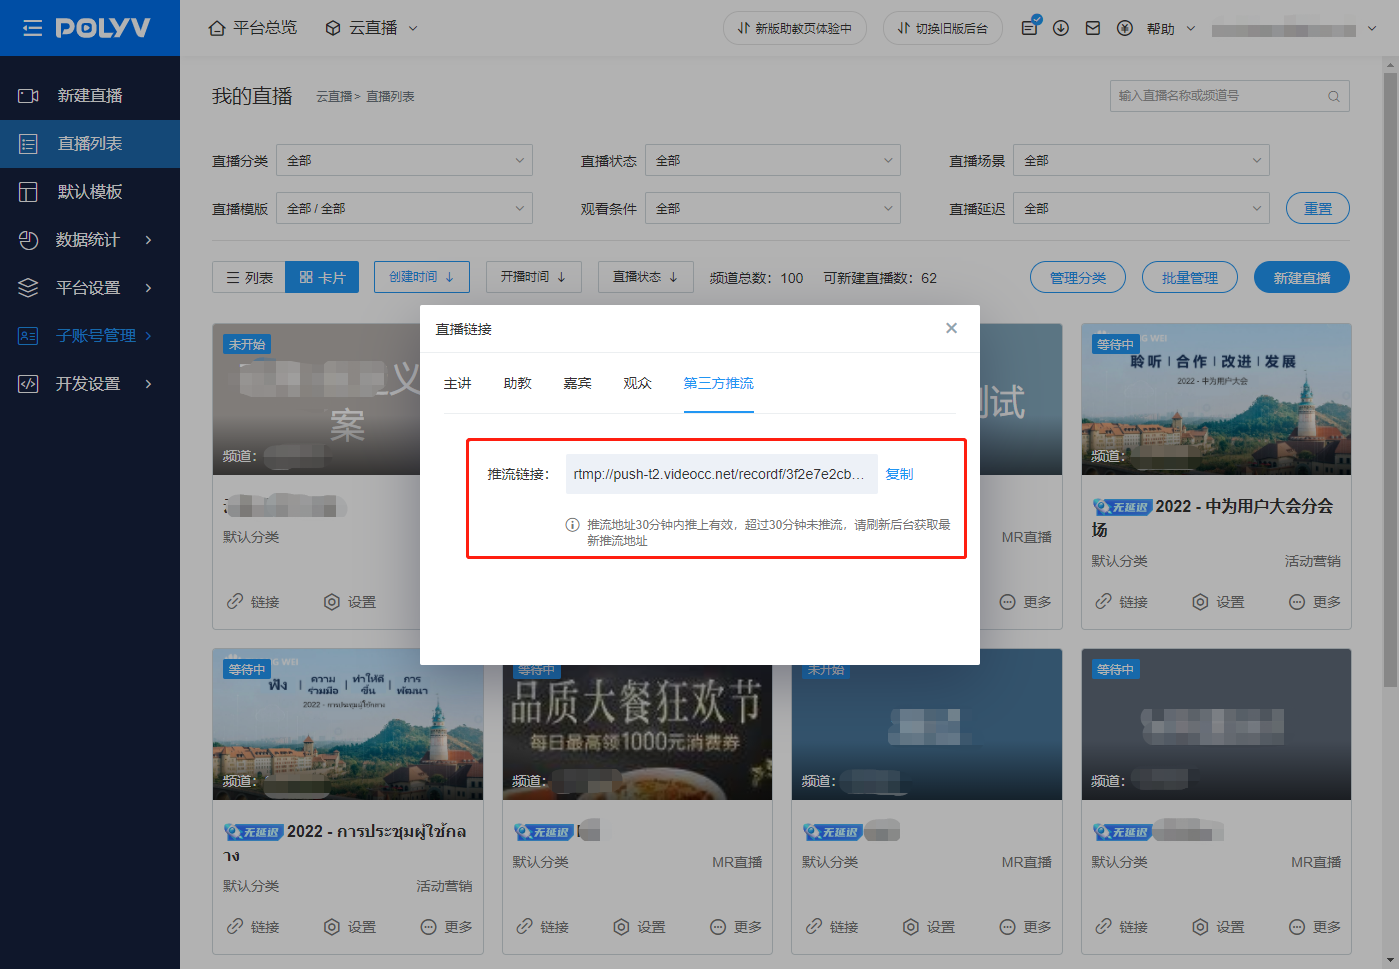
Notes:
- Third-party streaming requires a channel using the [Pure Video] live template.
- Streaming must start within 30 minutes of obtaining the URL; otherwise, it will expire and you will need to re-obtain it from the backend. You can also contact your after-sales representative to get a fixed stream URL for the channel.
2. OBS Instructions
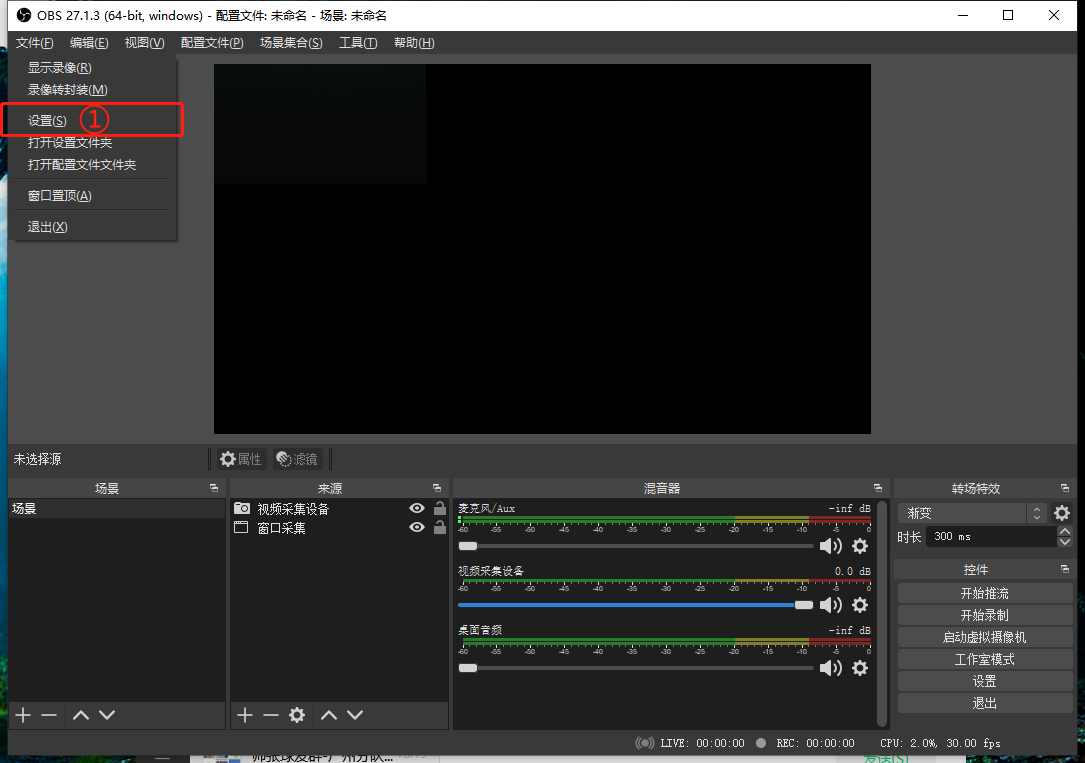
1. Open OBS - Settings
2. Enter the Stream URL
- In the stream settings, select "Custom" for the Service option.
- The stream URL needs to be split and entered separately into the Server and Stream Key fields.
Using the example stream URL below, the full address is:
rtmp://push-pp.vidoab.net/recordf/**3f2e7e2cb3165acx7196c4a8?txSecret=38d274e9bcasd268dd65a9a8d6e&txTime=6364dasq2
It needs to be split at ..net/recordf/. This part goes into the Server field, and the remaining part goes into the Stream Key field.

3. Normal Latency Channel - Stream Settings
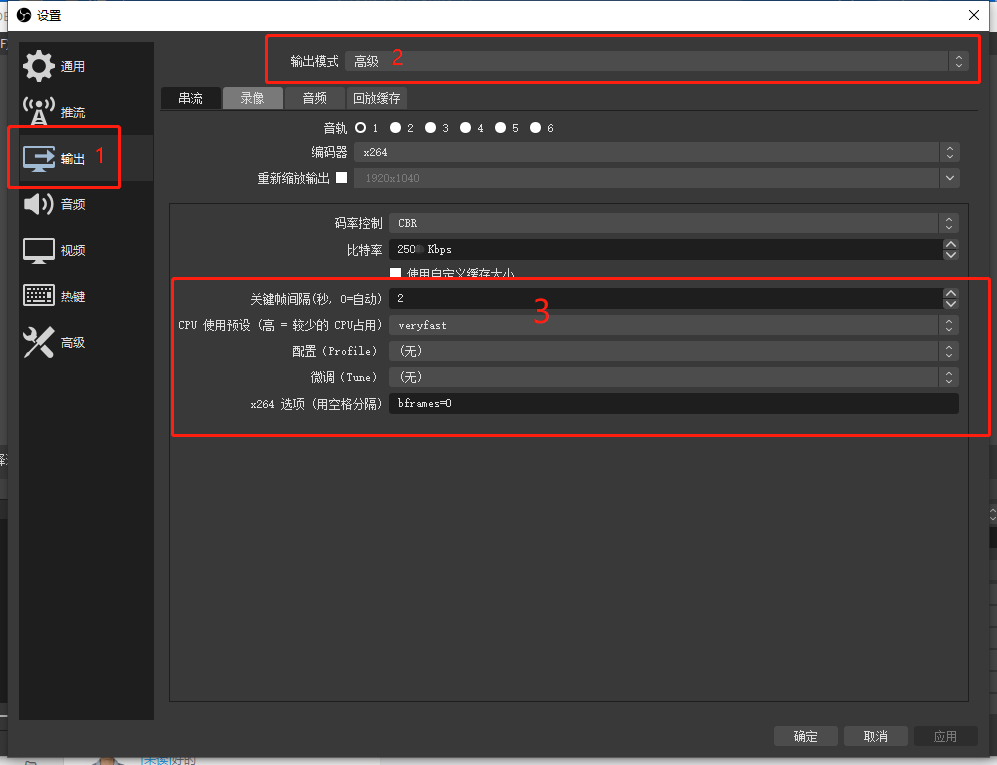
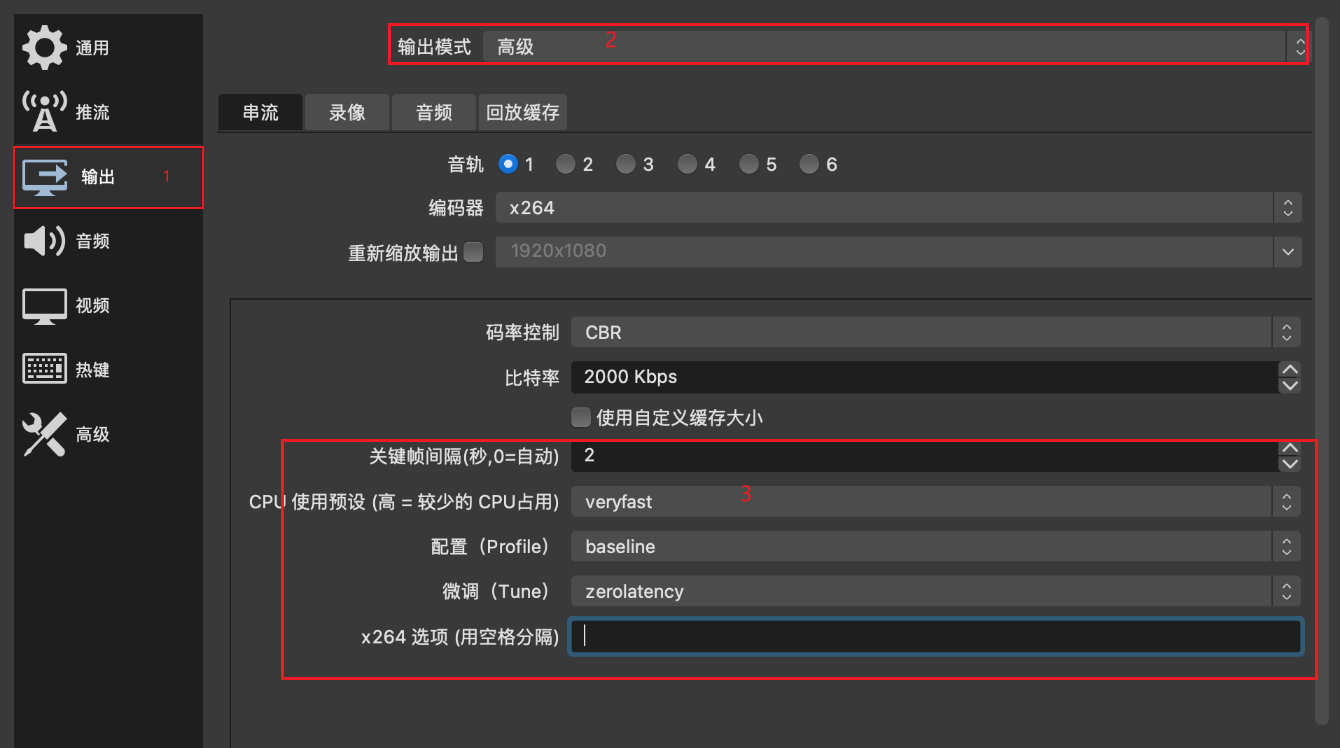
In Settings - Output - Output Mode, select Advanced. The following items need adjustment:
- Keyframe Interval: 2
- x264 Options: bframes=0, as shown below
4. Low-Latency Channel - Stream Settings
In Settings - Output - Output Mode, select Advanced. The following items need adjustment:
- Keyframe Interval: 2
- Profile: baseline
- x264 Options: bframes=0, as shown below
5. Start Streaming
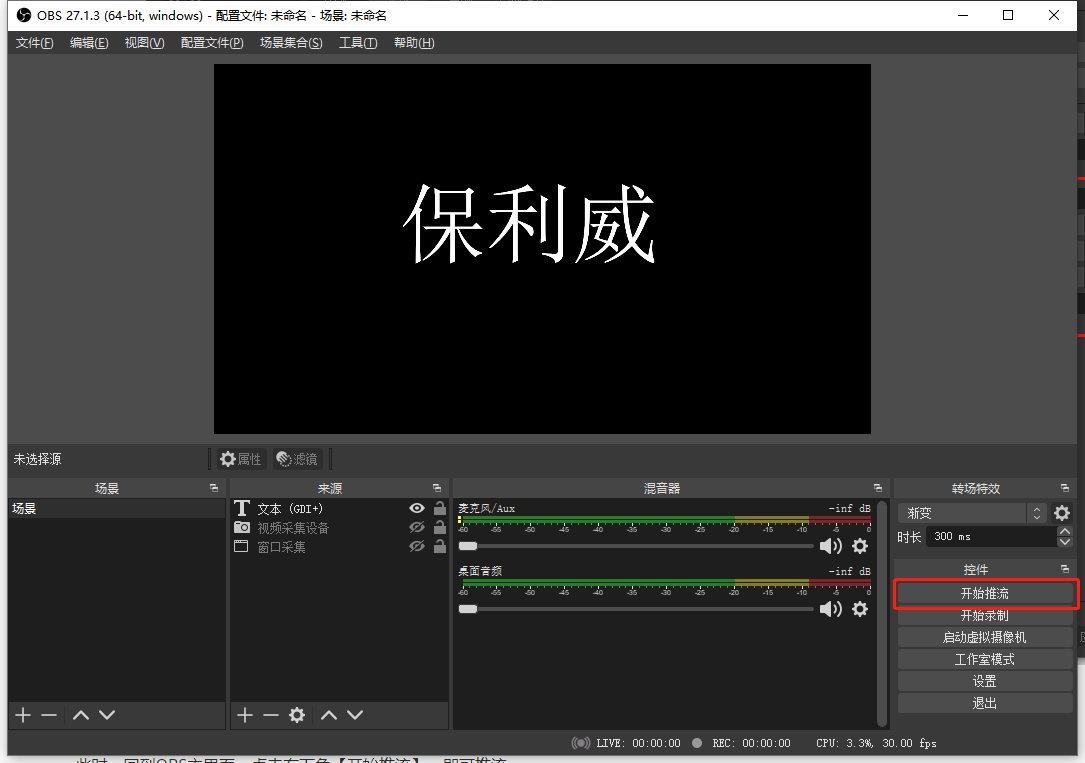
Return to the OBS main interface and click [Start Streaming] in the bottom right corner to begin.
3. VMIX Instructions
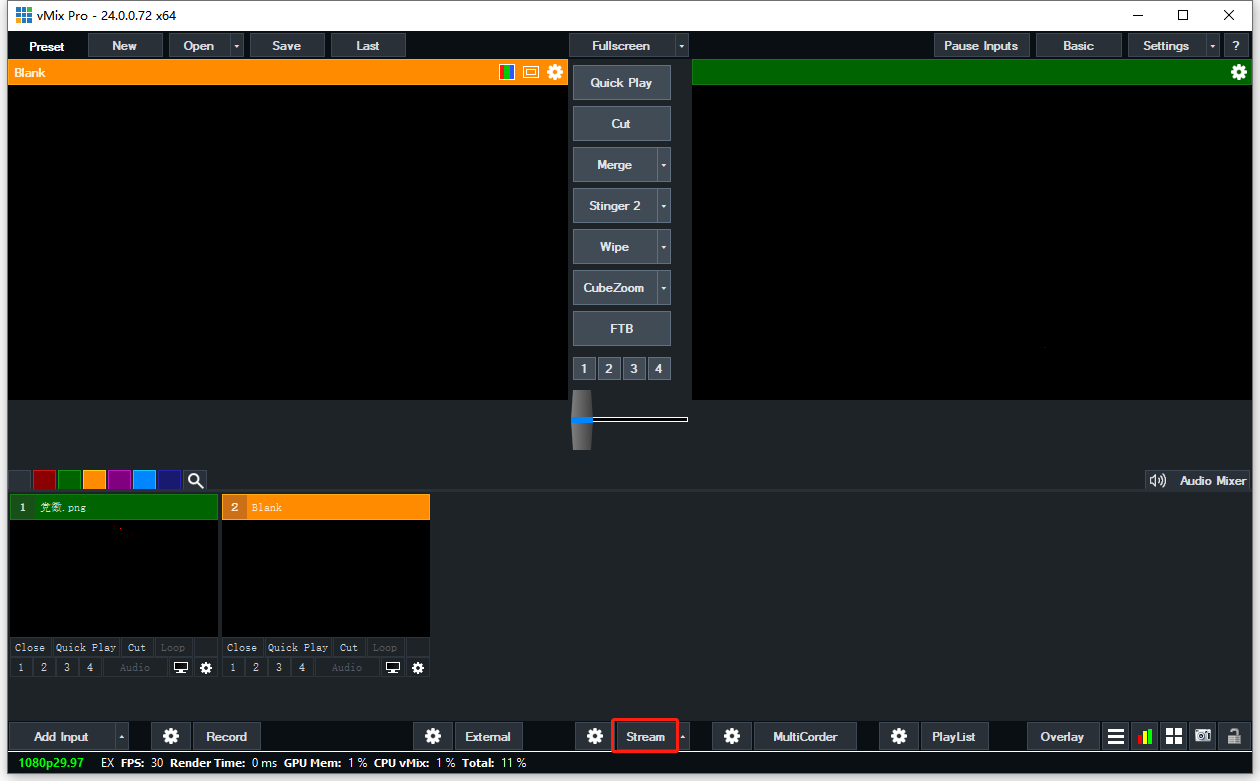
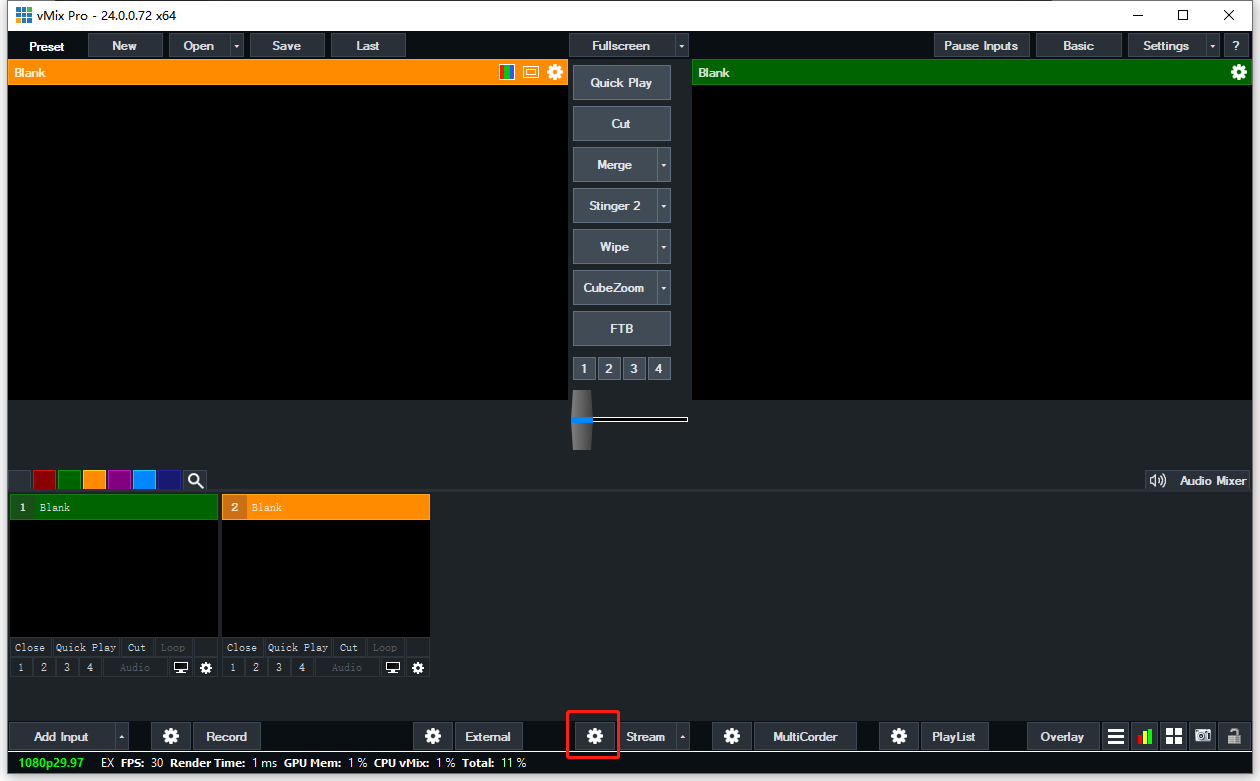
1. Open VMIX and click the Stream settings button
2. Enter the Stream URL
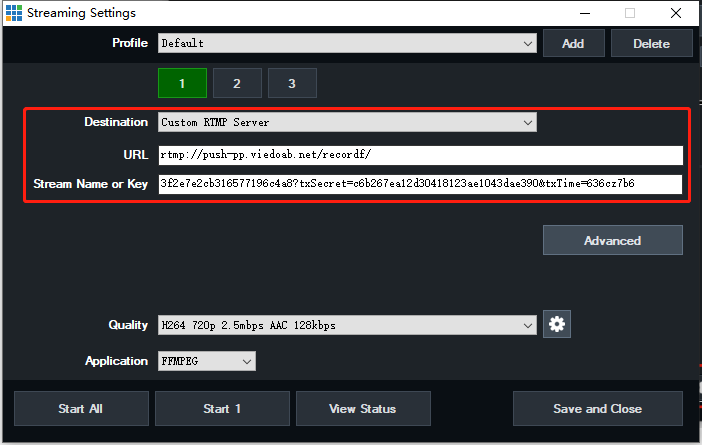
- In the settings, select "custom RTMP Server" for the Destination option.
- The stream URL needs to be split and entered separately into the URL and Stream Name or Key fields.
Using the example stream URL below, the full address is:
rtmp://push-pp.vidoab.net/recordf/**3f2e7e2cb3165acx7196c4a8?txSecret=38d274e9bcasd268dd65a9a8d6e&txTime=6364dasq2
It needs to be split at ..net/recordf/. This part goes into the URL field, and the remaining part goes into the Stream Name or Key field.
3. Normal Latency Channel - Stream Settings
In the Stream settings, click the settings button next to Quality.
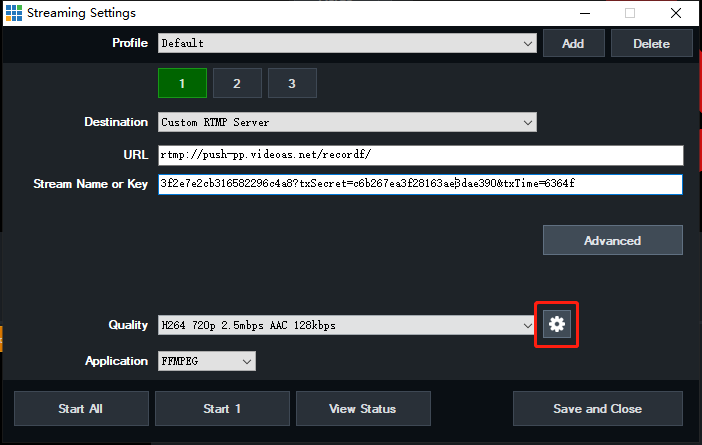
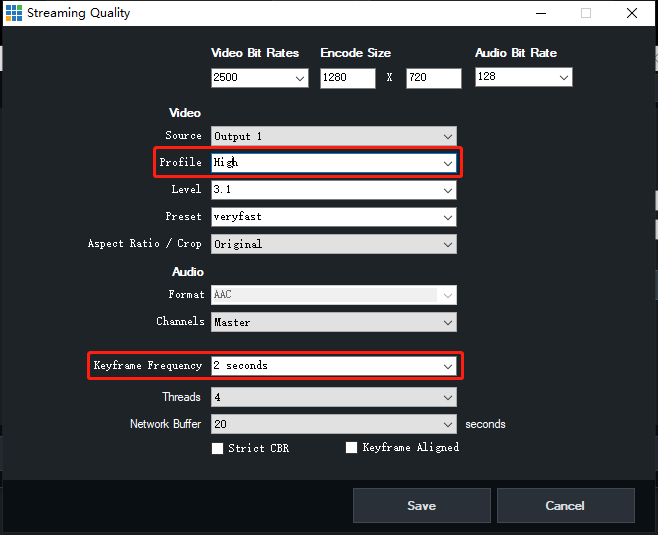
Items to adjust:
- Profile: High
- Keyframe Frequency: 2 seconds
4. Low-Latency Channel - Stream Settings
In the Stream settings, click the settings button next to Quality.
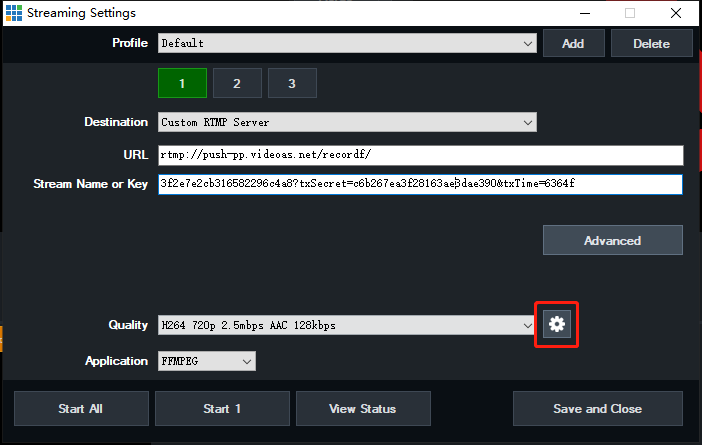
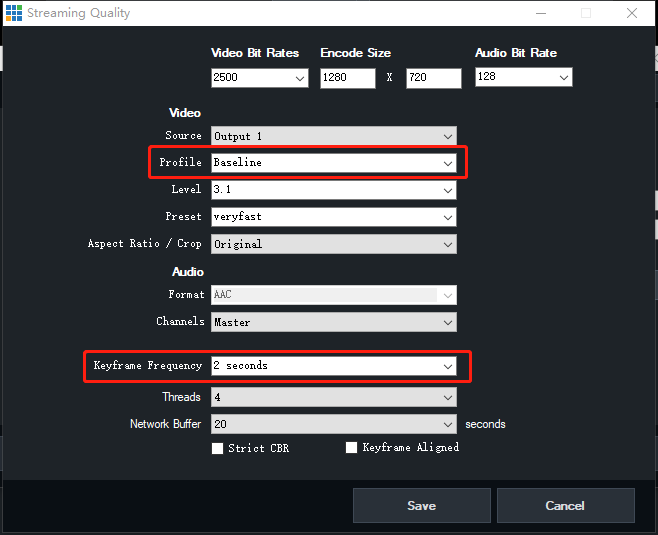
Items to adjust:
- Profile: Baseline
- Keyframe Frequency: 2 seconds
5. Start Streaming
Return to the VMIX main interface and click the [Stream] button below to begin.