Mobile Live Streaming Operation
POLYV Live is an App designed by Polyv for initiating live streaming on mobile devices. Users can upload documents, annotate, interact via IM, and connect via microphone on the App. It supports zero-latency live streaming, suitable for mobile teaching and training scenarios. You can quickly start a class and complete live teaching using just your phone. Administrators can also log in to the management console to create live rooms and perform other operations without needing a computer, enabling a complete live streaming cycle solely on a mobile device. For developers, multi-scenario SDKs can be integrated to enable mobile live streaming capabilities.
| Module | Feature Points | Supported |
|---|---|---|
| Live Template | Document + Video | ✔️ |
| Video Only | ✔️ | |
| Whiteboard | Whiteboard Annotation | ✔️ |
| Multiple Whiteboards | ✔️ | |
| Document | Upload Document from Phone | ✔️ |
| Document Annotation | ✔️ | |
| Microphone Connection | Audience Raises Hand to Connect | ✔️ |
| Guest Microphone Connection | ✔️ | |
| Member Management | Member Management (Online Count, Member Search, Mute, Kick) | ✔️ |
| Interactive Apps | Announcement, Check-in, Lottery, Quiz, Survey, Red Packet Rain | Coming Soon |
| Text Interaction | Chat, Questions, Q&A | Chat only, other interactions coming soon |
1. Preparation Before Starting
1. Download
For iOS and Android downloads, scan the QR code below or visit the link https://soft.polyv.net/soft/live_mobile.html in your browser.

2. Usage Environment Recommendations
- Use WIFI or mobile network, ensuring stable signal in the live streaming venue. Live streaming is affected by upstream bandwidth. Upstream bandwidth should be at least 2Mbps, with 4Mbps or higher recommended. Bandwidth test address: https://www.speedtest.cn;
- Avoid using public networks when possible, as high user density can cause network congestion leading to packet loss, high latency, and audio/video stuttering;
- Telecom broadband is recommended; avoid small operators (e.g., Topway, Great Wall Broadband, etc.).
2. Streaming End
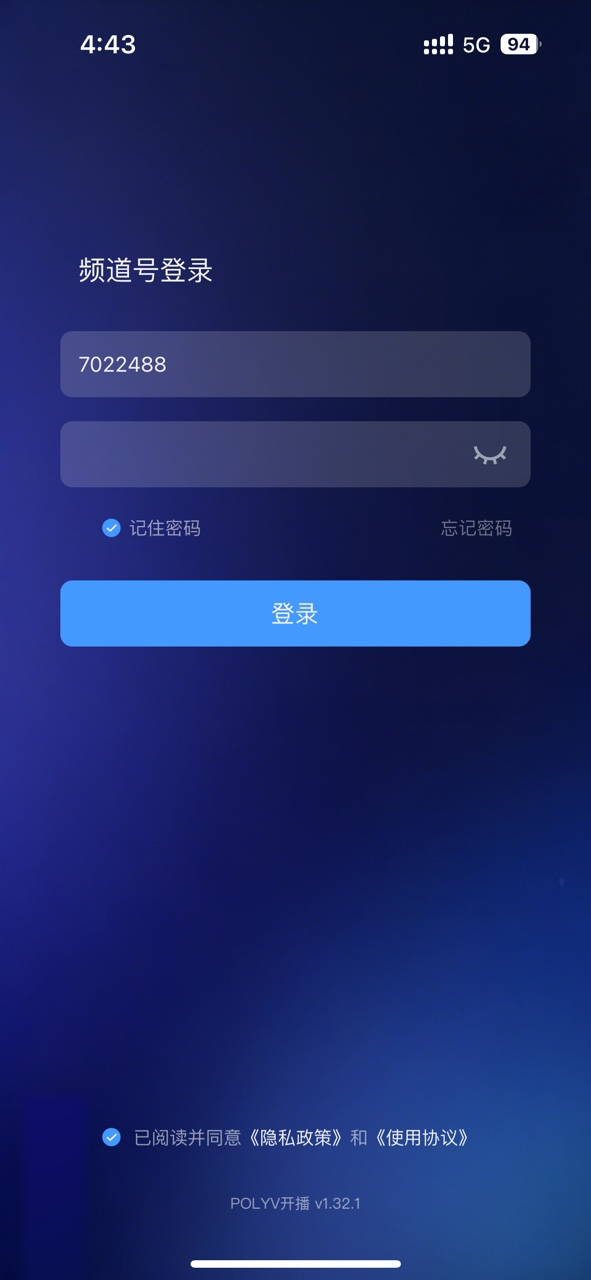
1. Login
<img src="https://liveimages.videocc.net/help_doc/0111cca4-5c9e-4999-a0a6-fa5a6e3ff00a.png"" alt="" width="40%">
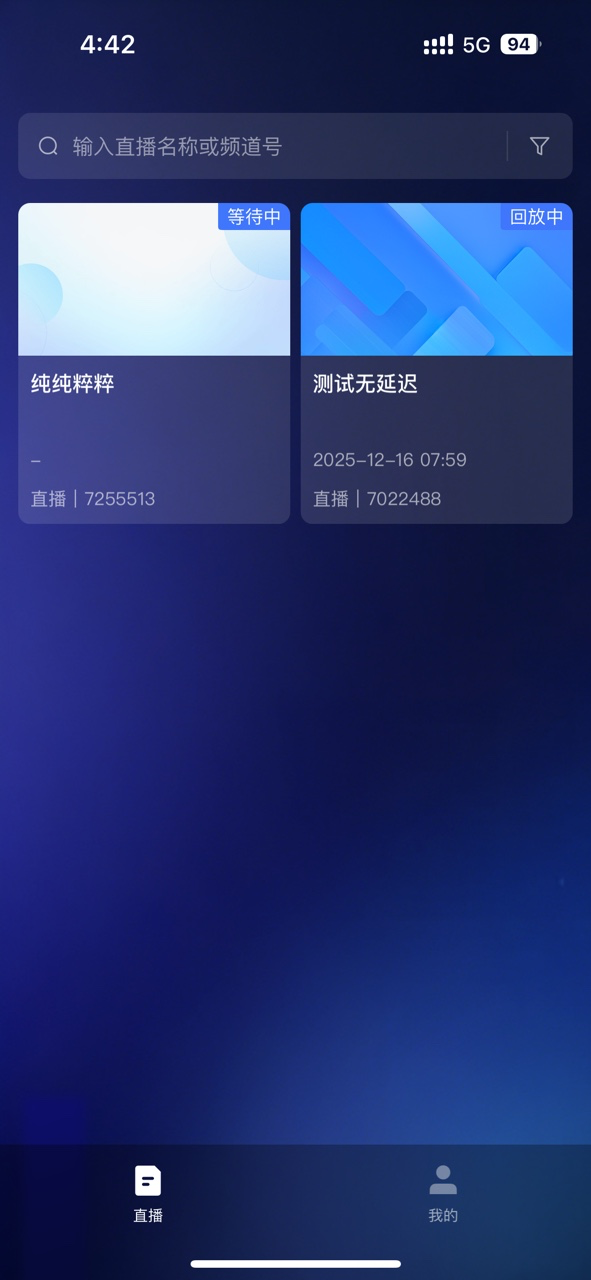
Channel bound to the host: After logging in, enter the live page. Click the card to enter the live preparation page.
<img src="https://liveimages.videocc.net/help_doc/86b945bf-2f25-48c3-a671-2f89a072987b.png"" alt="" width="40%">
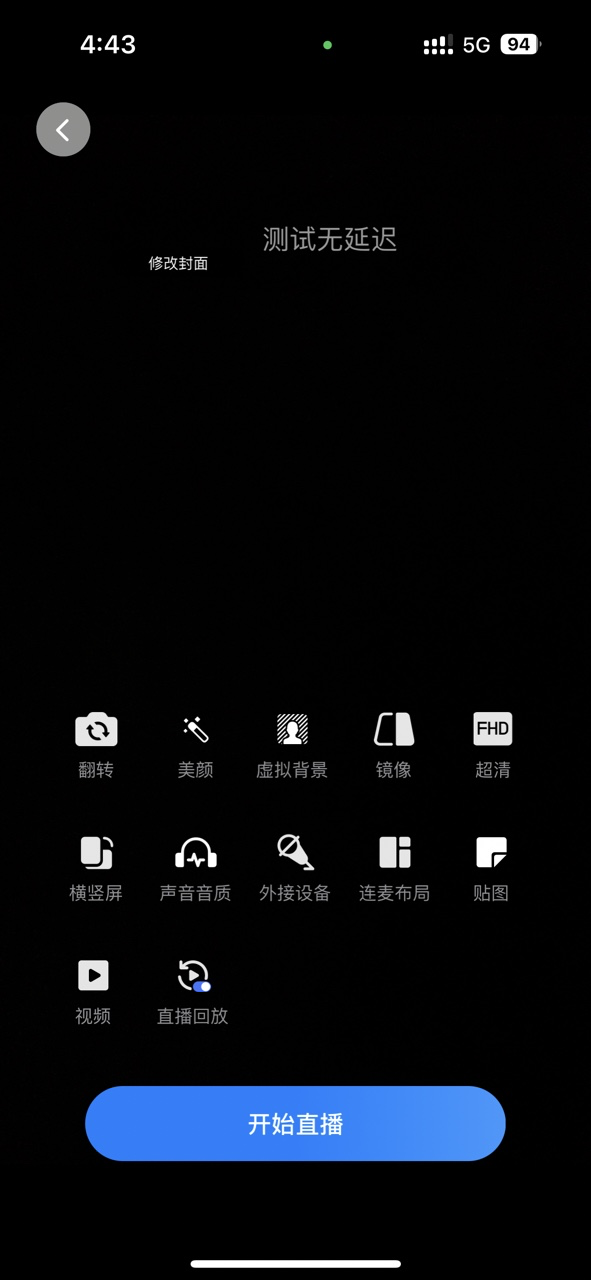
Channel not bound to the host: After logging in, enter the live preparation page. Return to enter the live page.
<img src="https://liveimages.videocc.net/help_doc/0c3a57af-0638-40de-97de-516f628347c0.png"" alt="" width="40%">
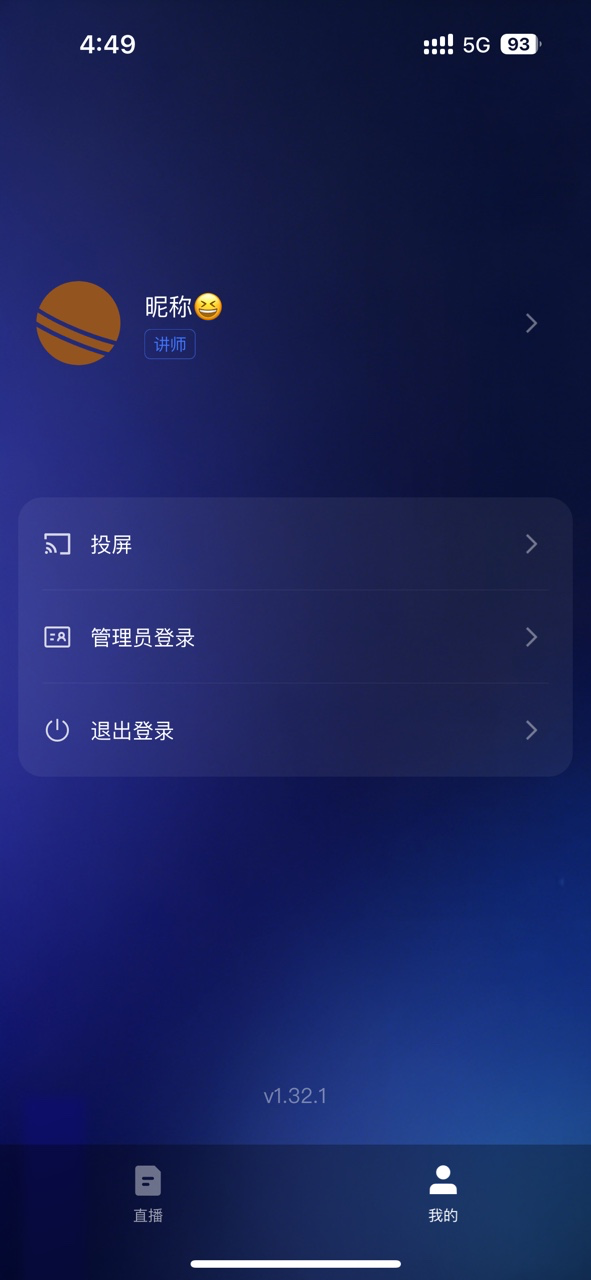
2. My Profile
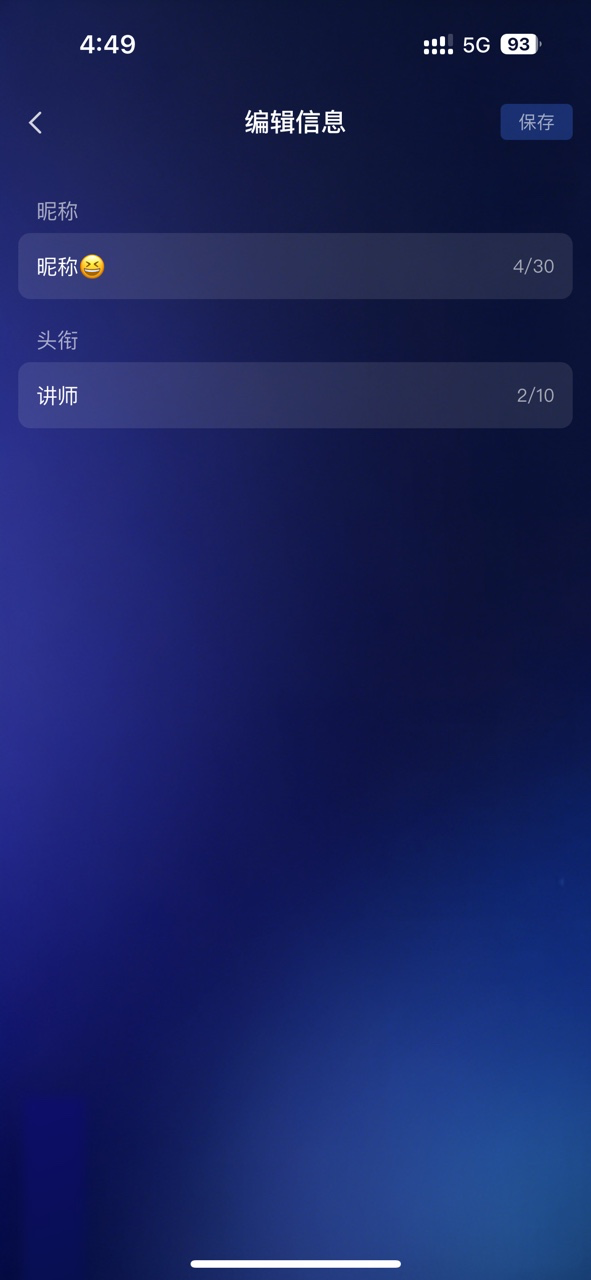
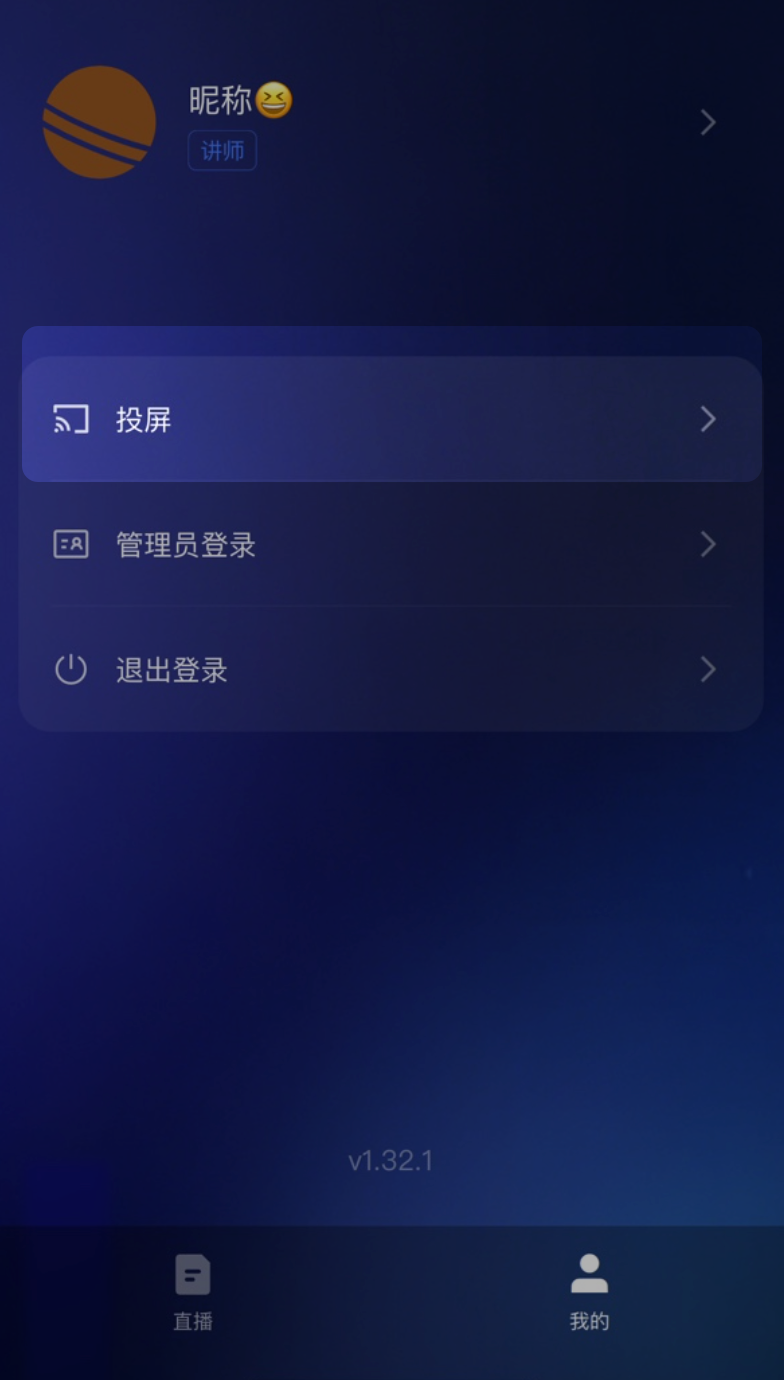
Modify Host Nickname/Title
After logging in, go to My Profile - Nickname/Title to make changes.
<img src="https://liveimages.videocc.net/help_doc/71f8e315-90e8-43b9-810c-6265601ffa13.png"" alt="" width="40%">
<img src="https://liveimages.videocc.net/help_doc/da17caa5-bf89-4003-979c-3342af33761c.png"" alt="" width="40%">
Admin Login
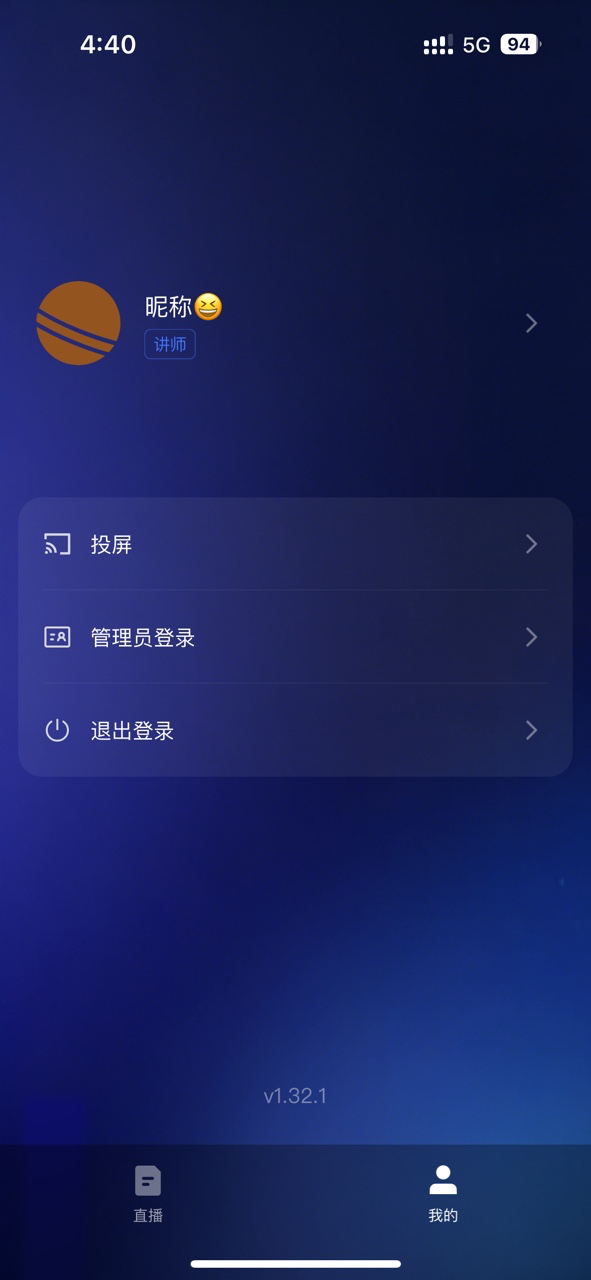
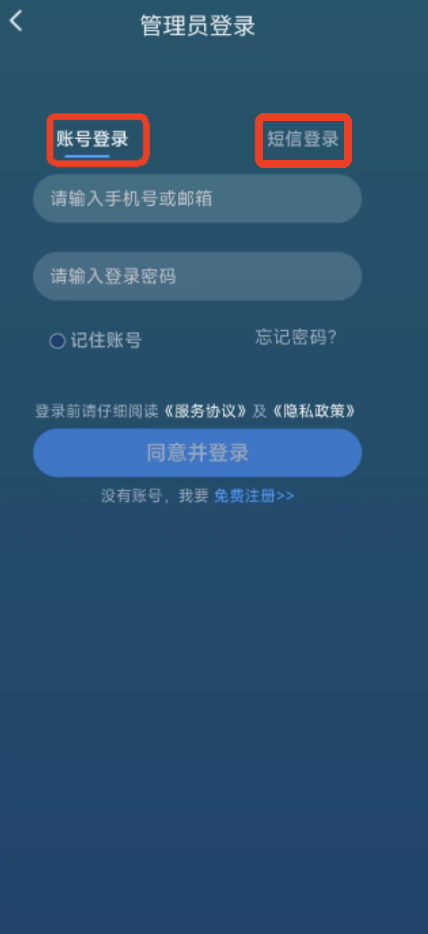
Enter the app, switch to My Profile, and select Admin Login.
<img src="https://liveimages.videocc.net/help_doc/8899ff7e-9b0d-47f8-a034-56f1db1d39ce.png"" alt="" width="40%">
Login methods include account login or SMS login.
<img src="https://liveimages.videocc.net/help_doc/57746e37-c3a0-4765-8515-b6477e0ec27e.png"" alt="" width="40%">
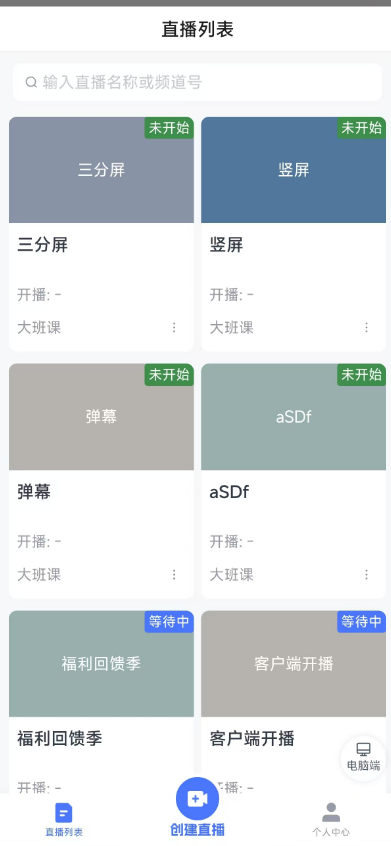
After selecting a login method, you will be taken directly to the live room list page, where you can see all live rooms created under the admin account.
<img src="https://liveimages.videocc.net/help_doc/4ac3929e-b157-4f19-bd73-b2845850cbcb.png"" alt="" width="40%">
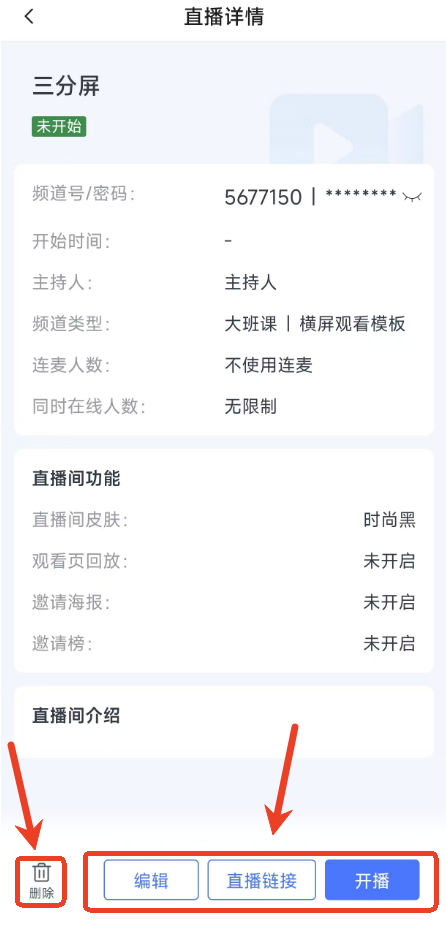
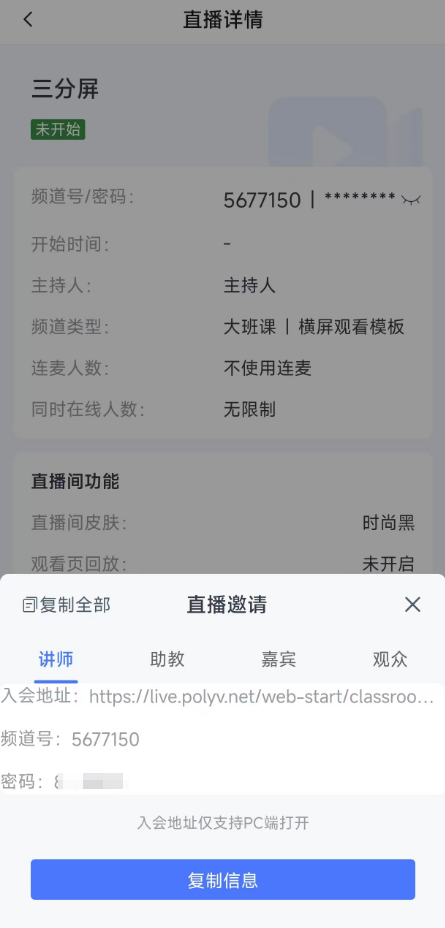
Click any live room to view its detailed information. The live room details page contains various information about the room. Below, you can delete the live room, edit its information, or view the live link. Click the "Start Streaming" button to jump directly to the app's streaming page.
<img src="https://liveimages.videocc.net/help_doc/c0b8791b-73bb-48e3-94d5-ea13cf152eff.png"" alt="" width="40%"><img src="https://liveimages.videocc.net/help_doc/8ad3a198-e6da-4e46-8928-6a86826a3b6c.png"" alt="" width="40%">
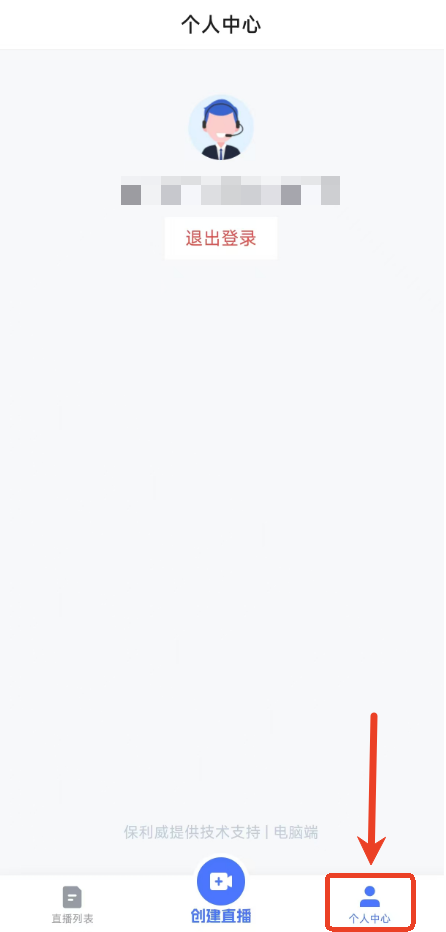
Go to the Personal Center from the bottom navigation bar to see the currently logged-in account name and choose to log out.
<img src="https://liveimages.videocc.net/help_doc/2fc65144-bb63-44b9-abee-e298785d587a.png"" alt="" width="40%">
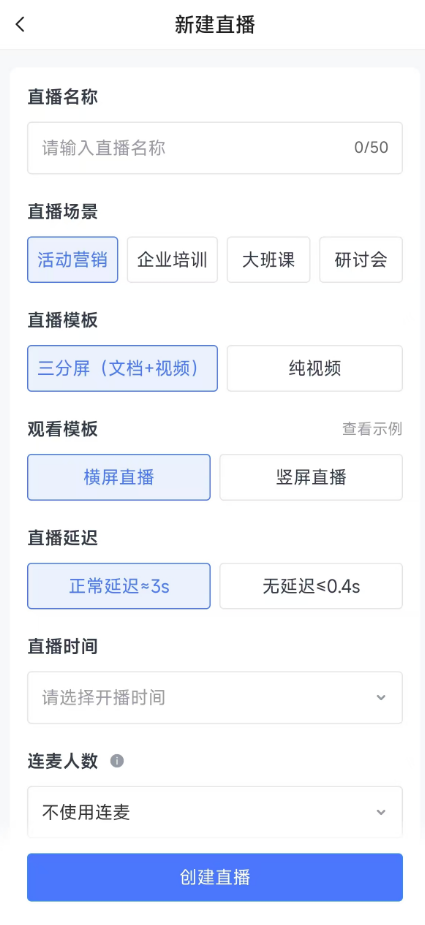
Click "Create Live Room" in the bottom navigation bar to enter the new live room page, where you can create a new live room directly.
<img src="https://liveimages.videocc.net/help_doc/aa2c0cc1-ecf6-4c44-ab36-5d84a533c4c3.png"" alt="" width="40%">
Screen Mirroring
Click Screen Mirroring, scan the code, and then mirror your screen.
<img src="https://liveimages.videocc.net/help_doc/97904bdb-3a6f-40f7-a8e8-ed84032cd90b.png"" alt="" width="40%">
2. Streaming Interface
Three-Panel Layout
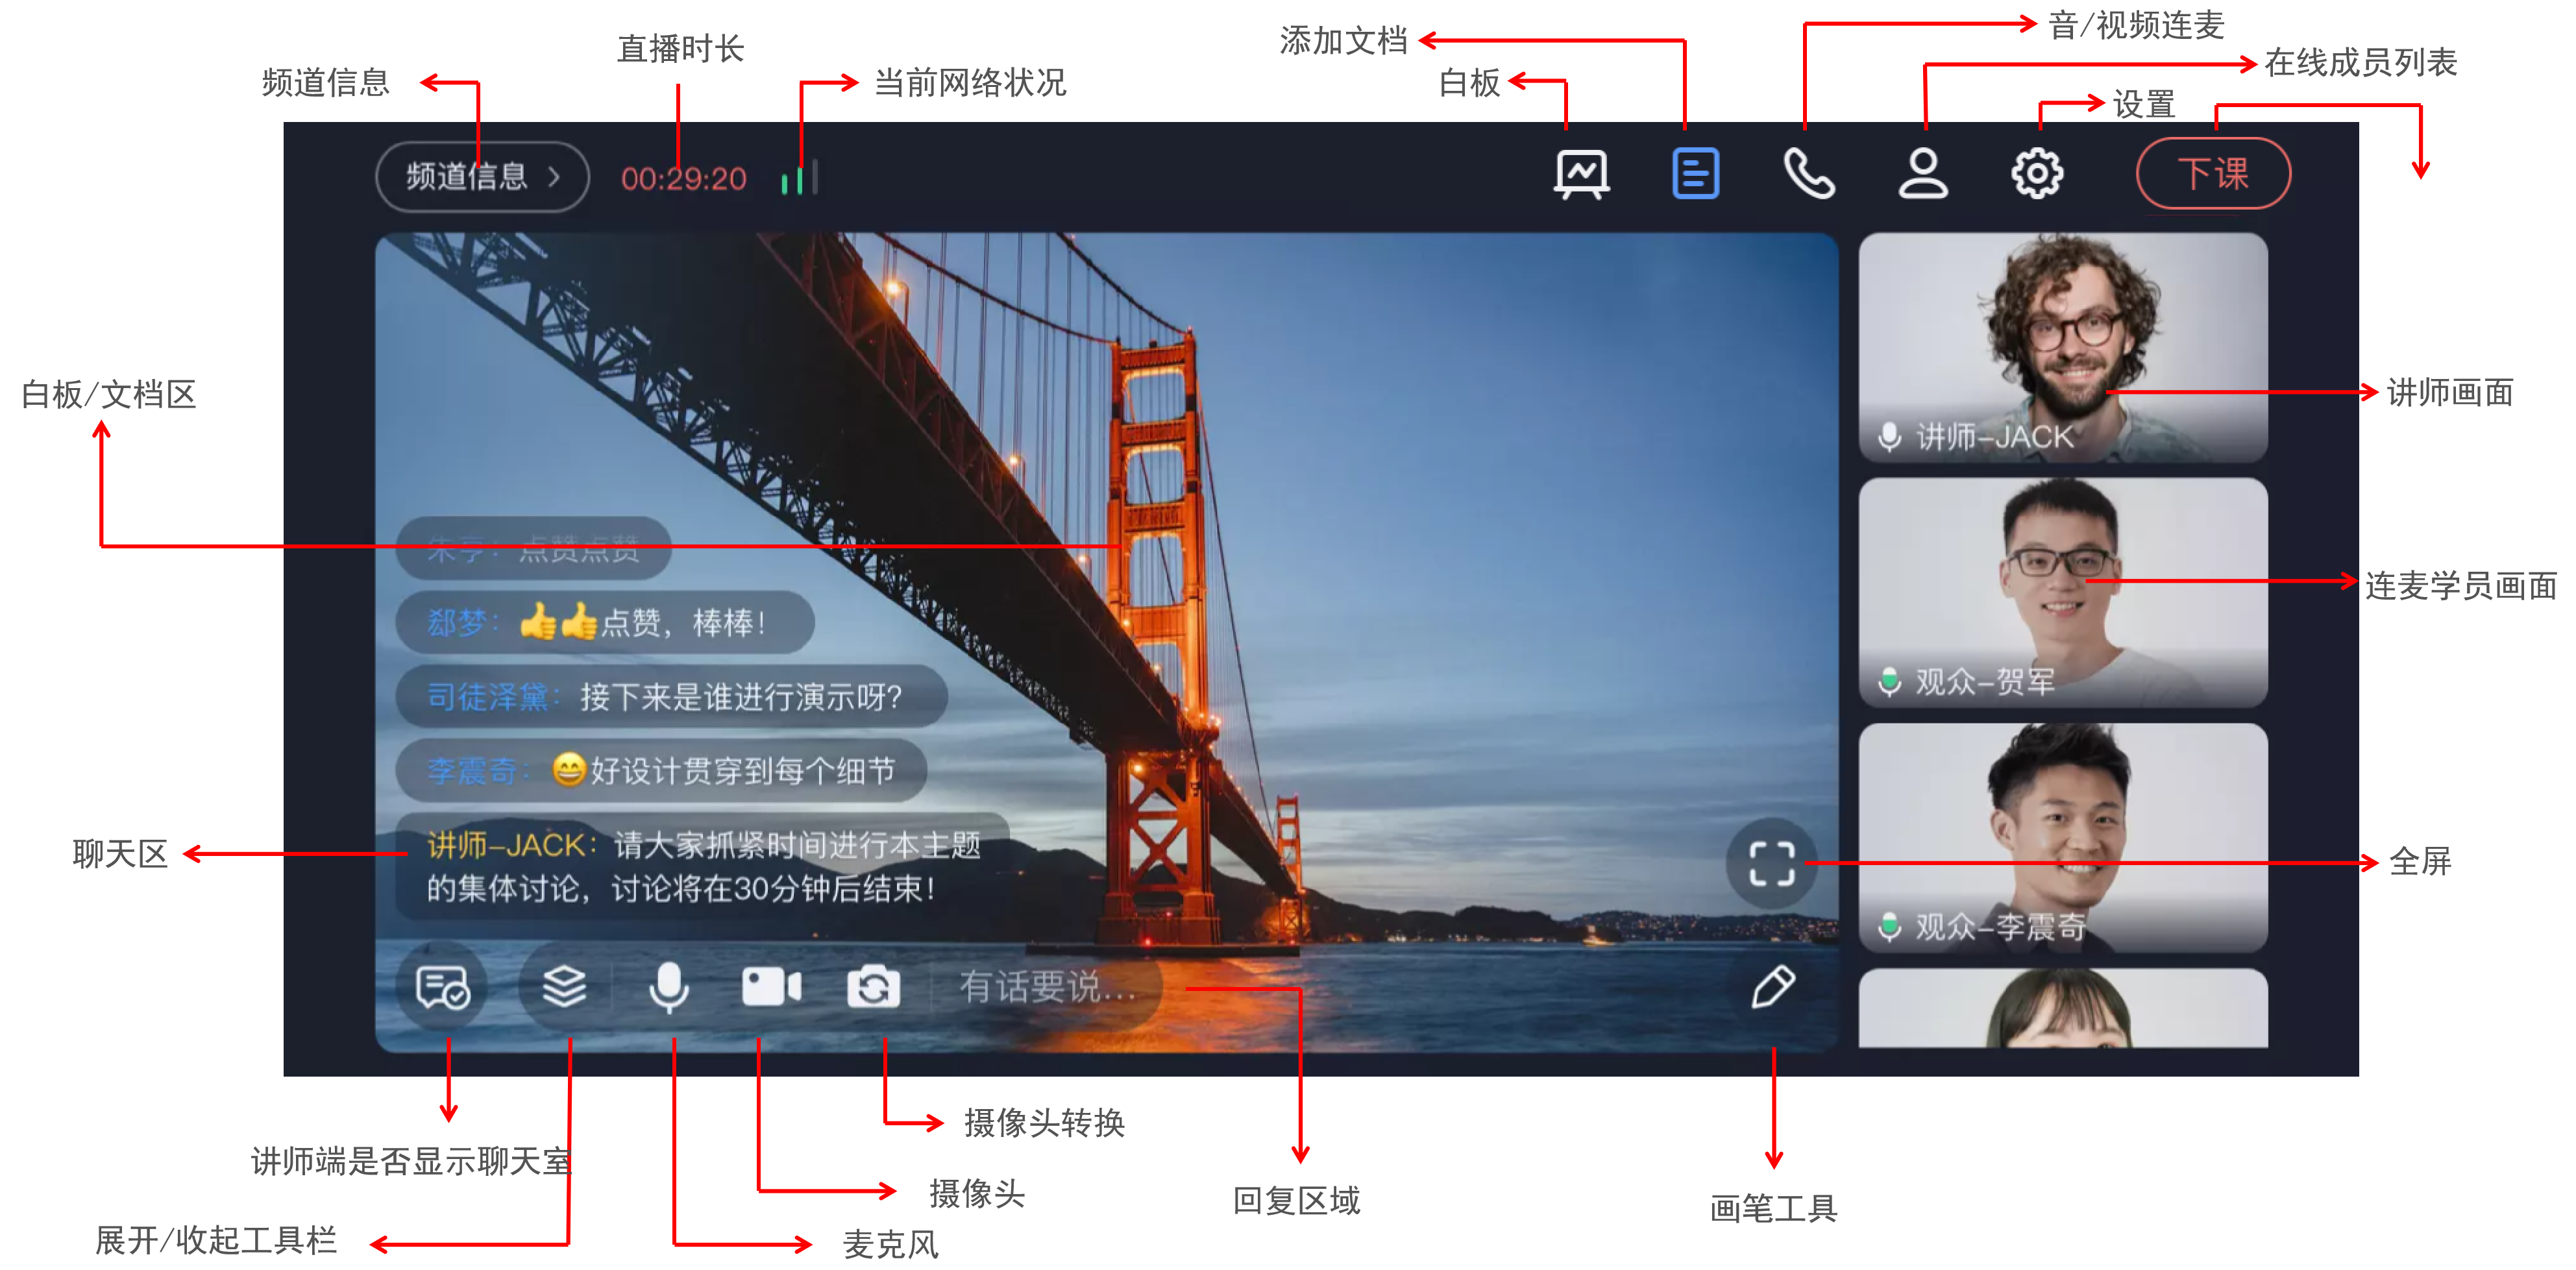
Start and End Class
Click the "Start Class" button to begin. 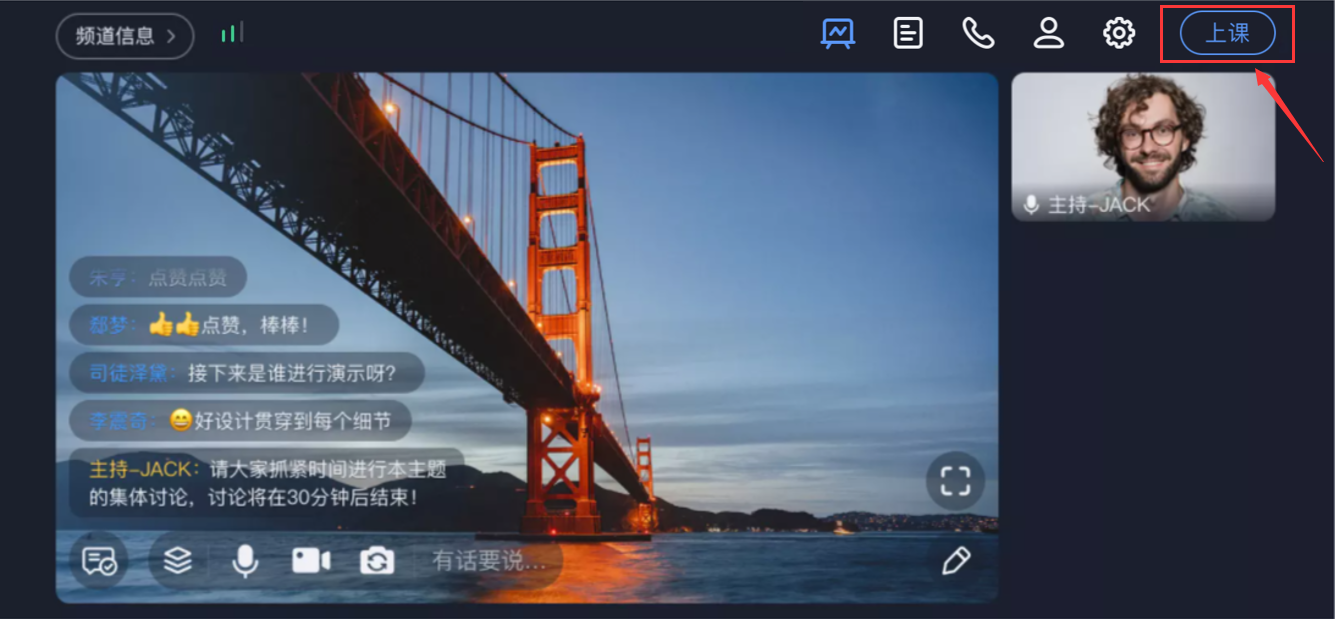 Click "End Class" to finish the live stream and end all microphone connections.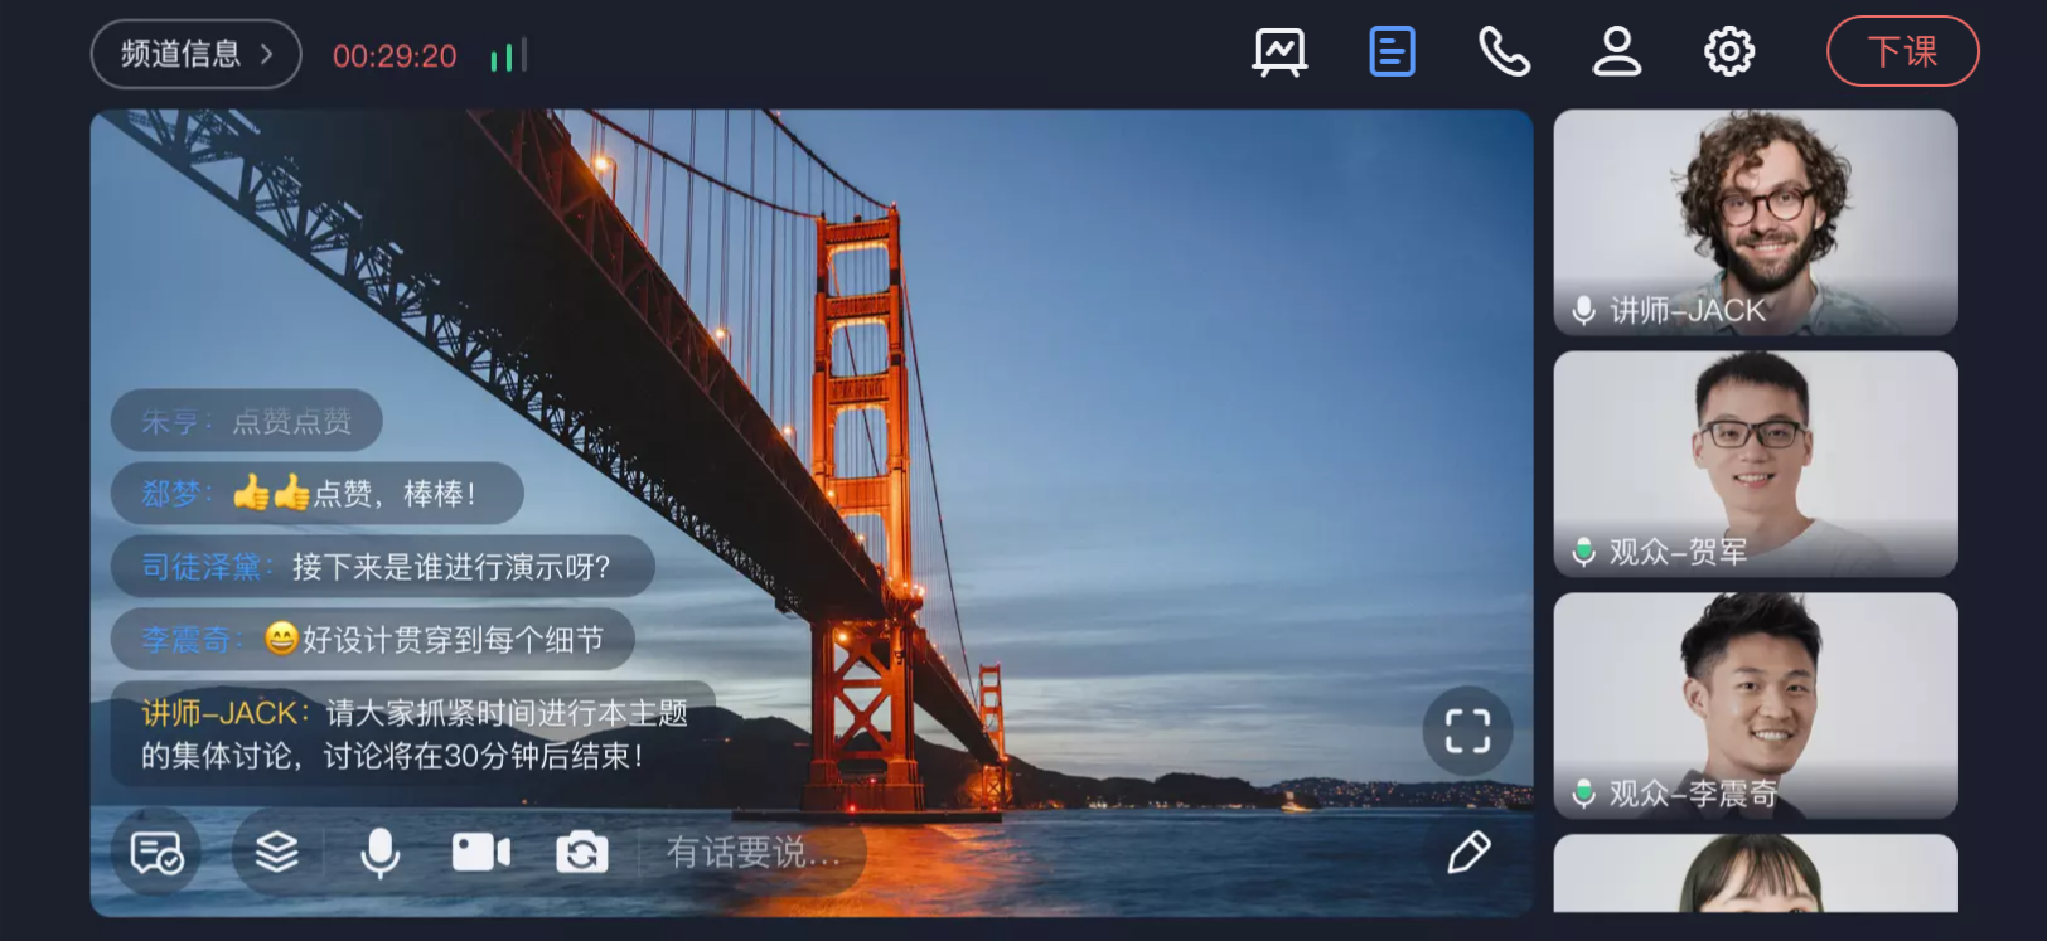
Whiteboard Annotation
Upon entering the streaming page, the whiteboard is displayed by default. You can write on the board in the designated area. 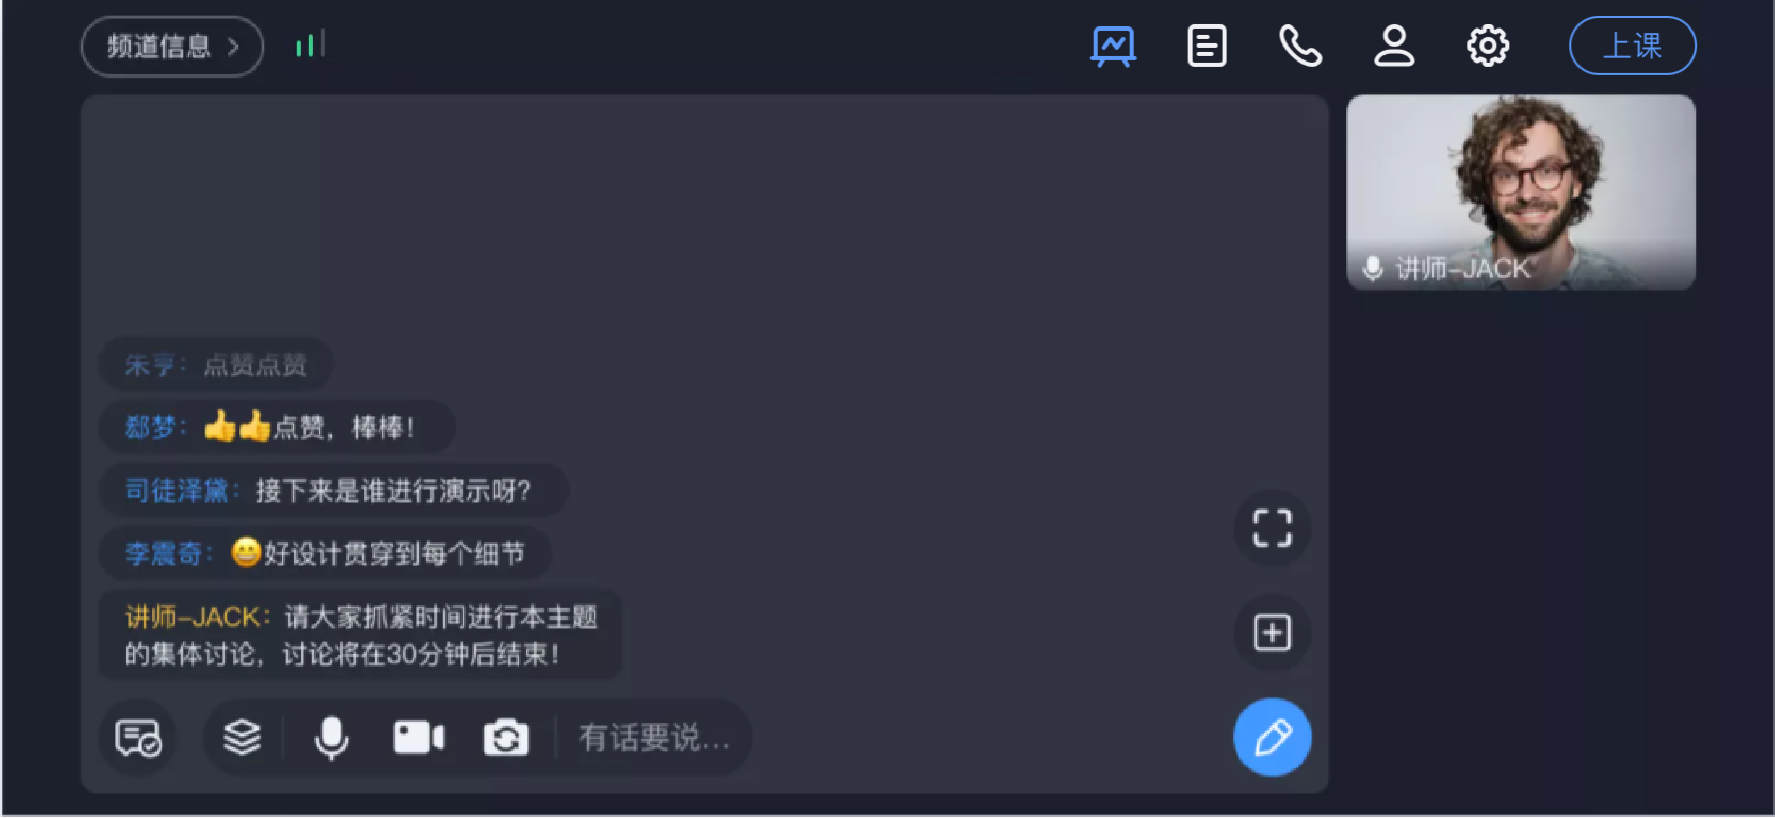
Document
Click "Document" to upload a document from your local device or select one already uploaded in the backend. (Documents uploaded from any streaming end for the same channel are synchronized.) 
Microphone Connection
During the live stream, you can initiate a microphone connection for audio/video interaction with users. Click the "Connect Microphone" button to start. You can choose "Audio Connection" or "Video Connection". After the host initiates the connection and a user applies, click "Members" on the right side of the "Connect Microphone" button to expand the member list. Approve the user's application to complete the connection. 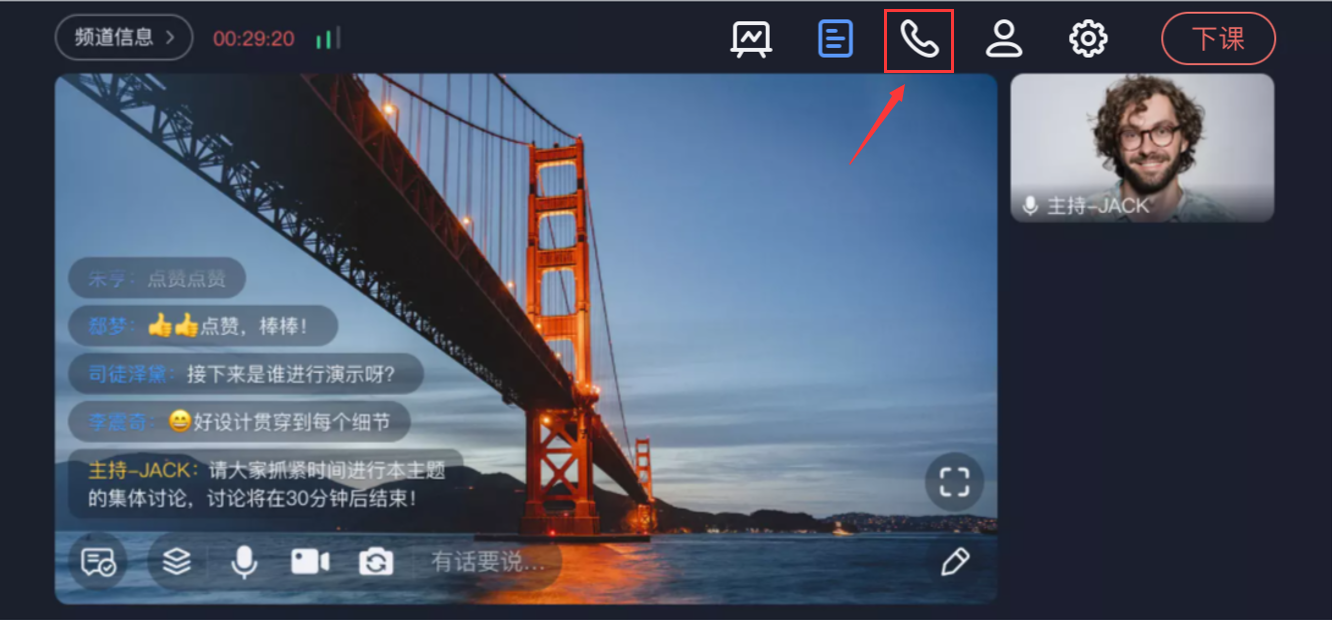
Member Management
"Members" list. In the member list, you can manage the camera and microphone of connected users; you can mute or kick users from the online list. Other quick actions in the member list: Click "Disconnect All" to end all microphone connections; click "Mute All" to turn off all connected users' microphones. 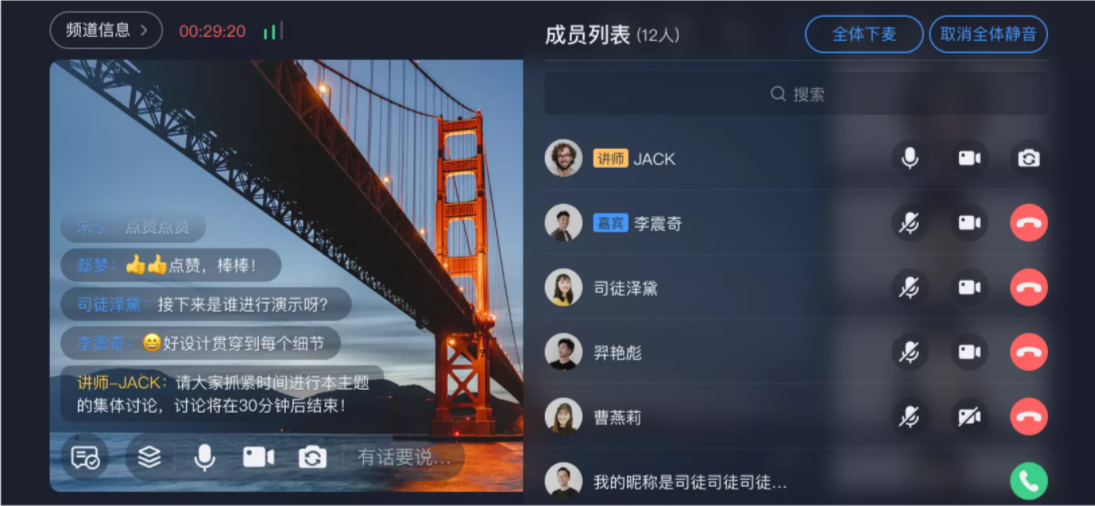
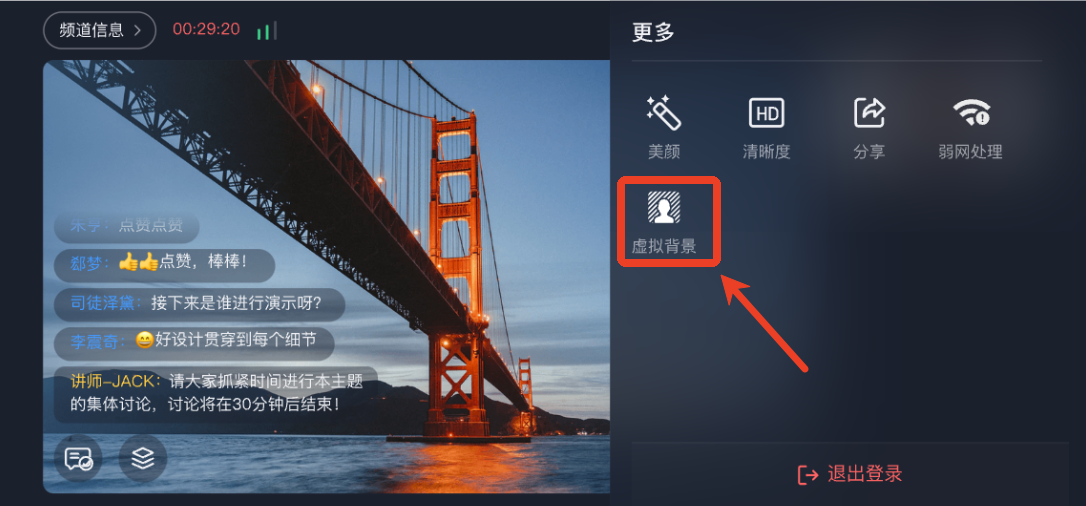
Virtual Background
Click "More" to access Virtual Background.
<img src="https://liveimages.videocc.net/help_doc/08653f58-1700-46a0-8e95-4f228ab19d46.png"" alt="" width="40%">
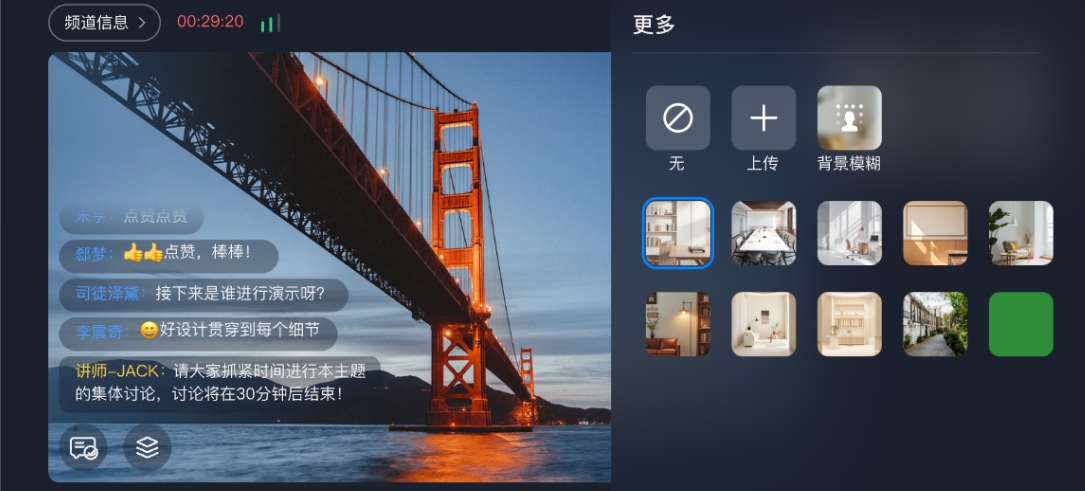
Select a background image as the virtual background. Click the + icon to upload a local image. Only one local image can be uploaded.
<img src="https://liveimages.videocc.net/help_doc/ad562a86-c12f-46d8-87a4-acd6f766df5d.png"" alt="" width="40%">
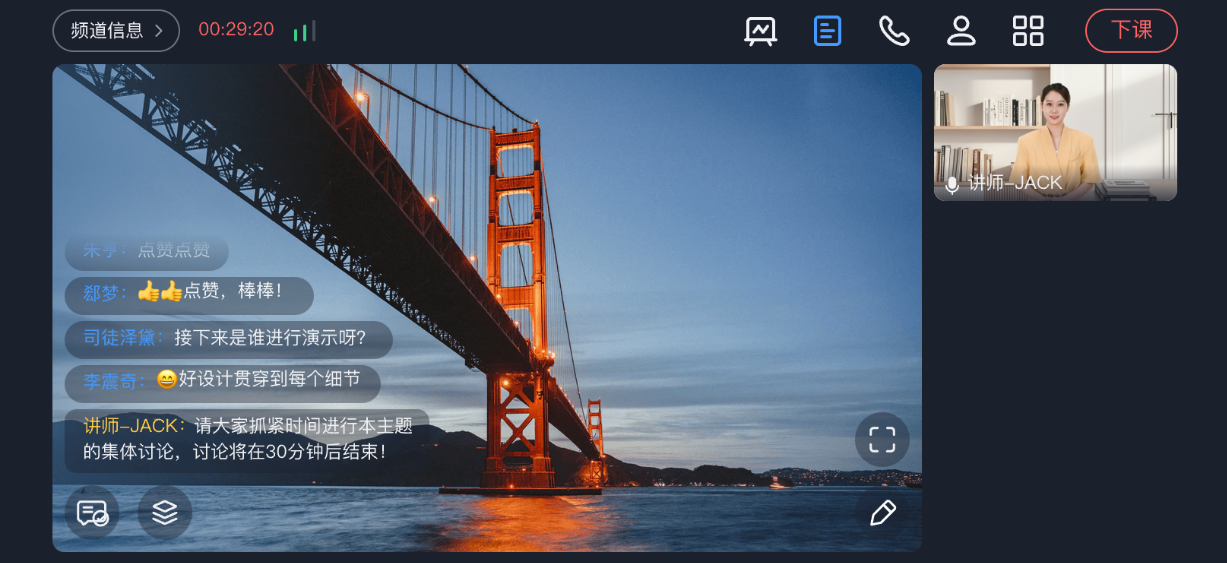
Effect preview
<img src="https://liveimages.videocc.net/help_doc/ce3a3714-05c1-44b1-9337-44c6039f1480.png"" alt="" width="40%">
Video Only
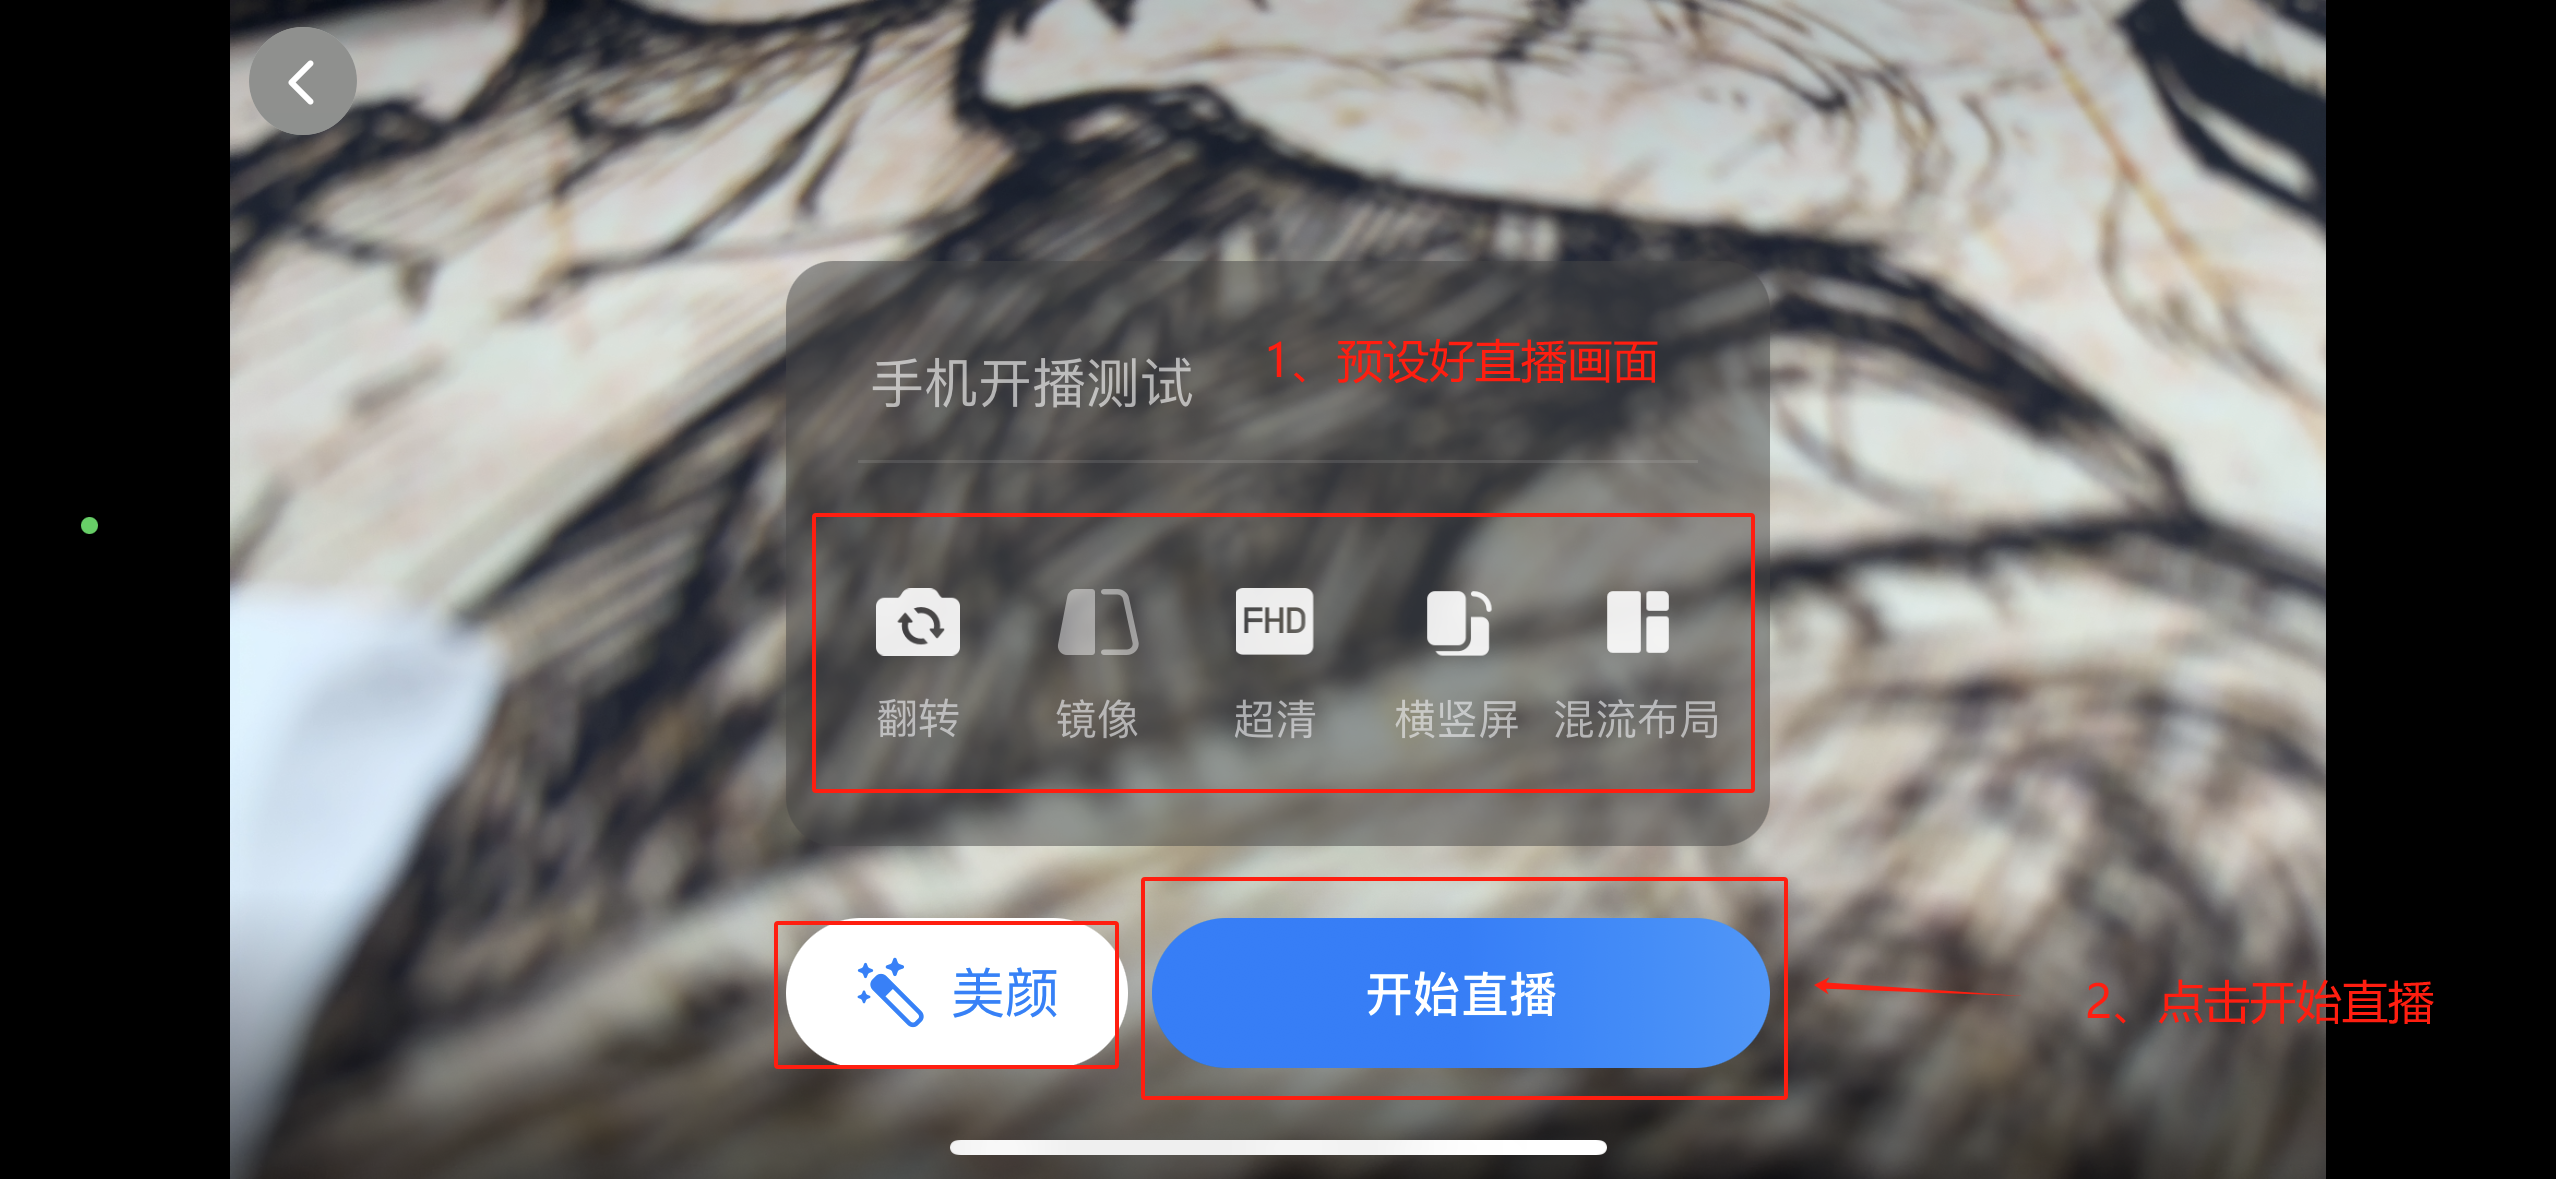
Live Room Interface
More Settings
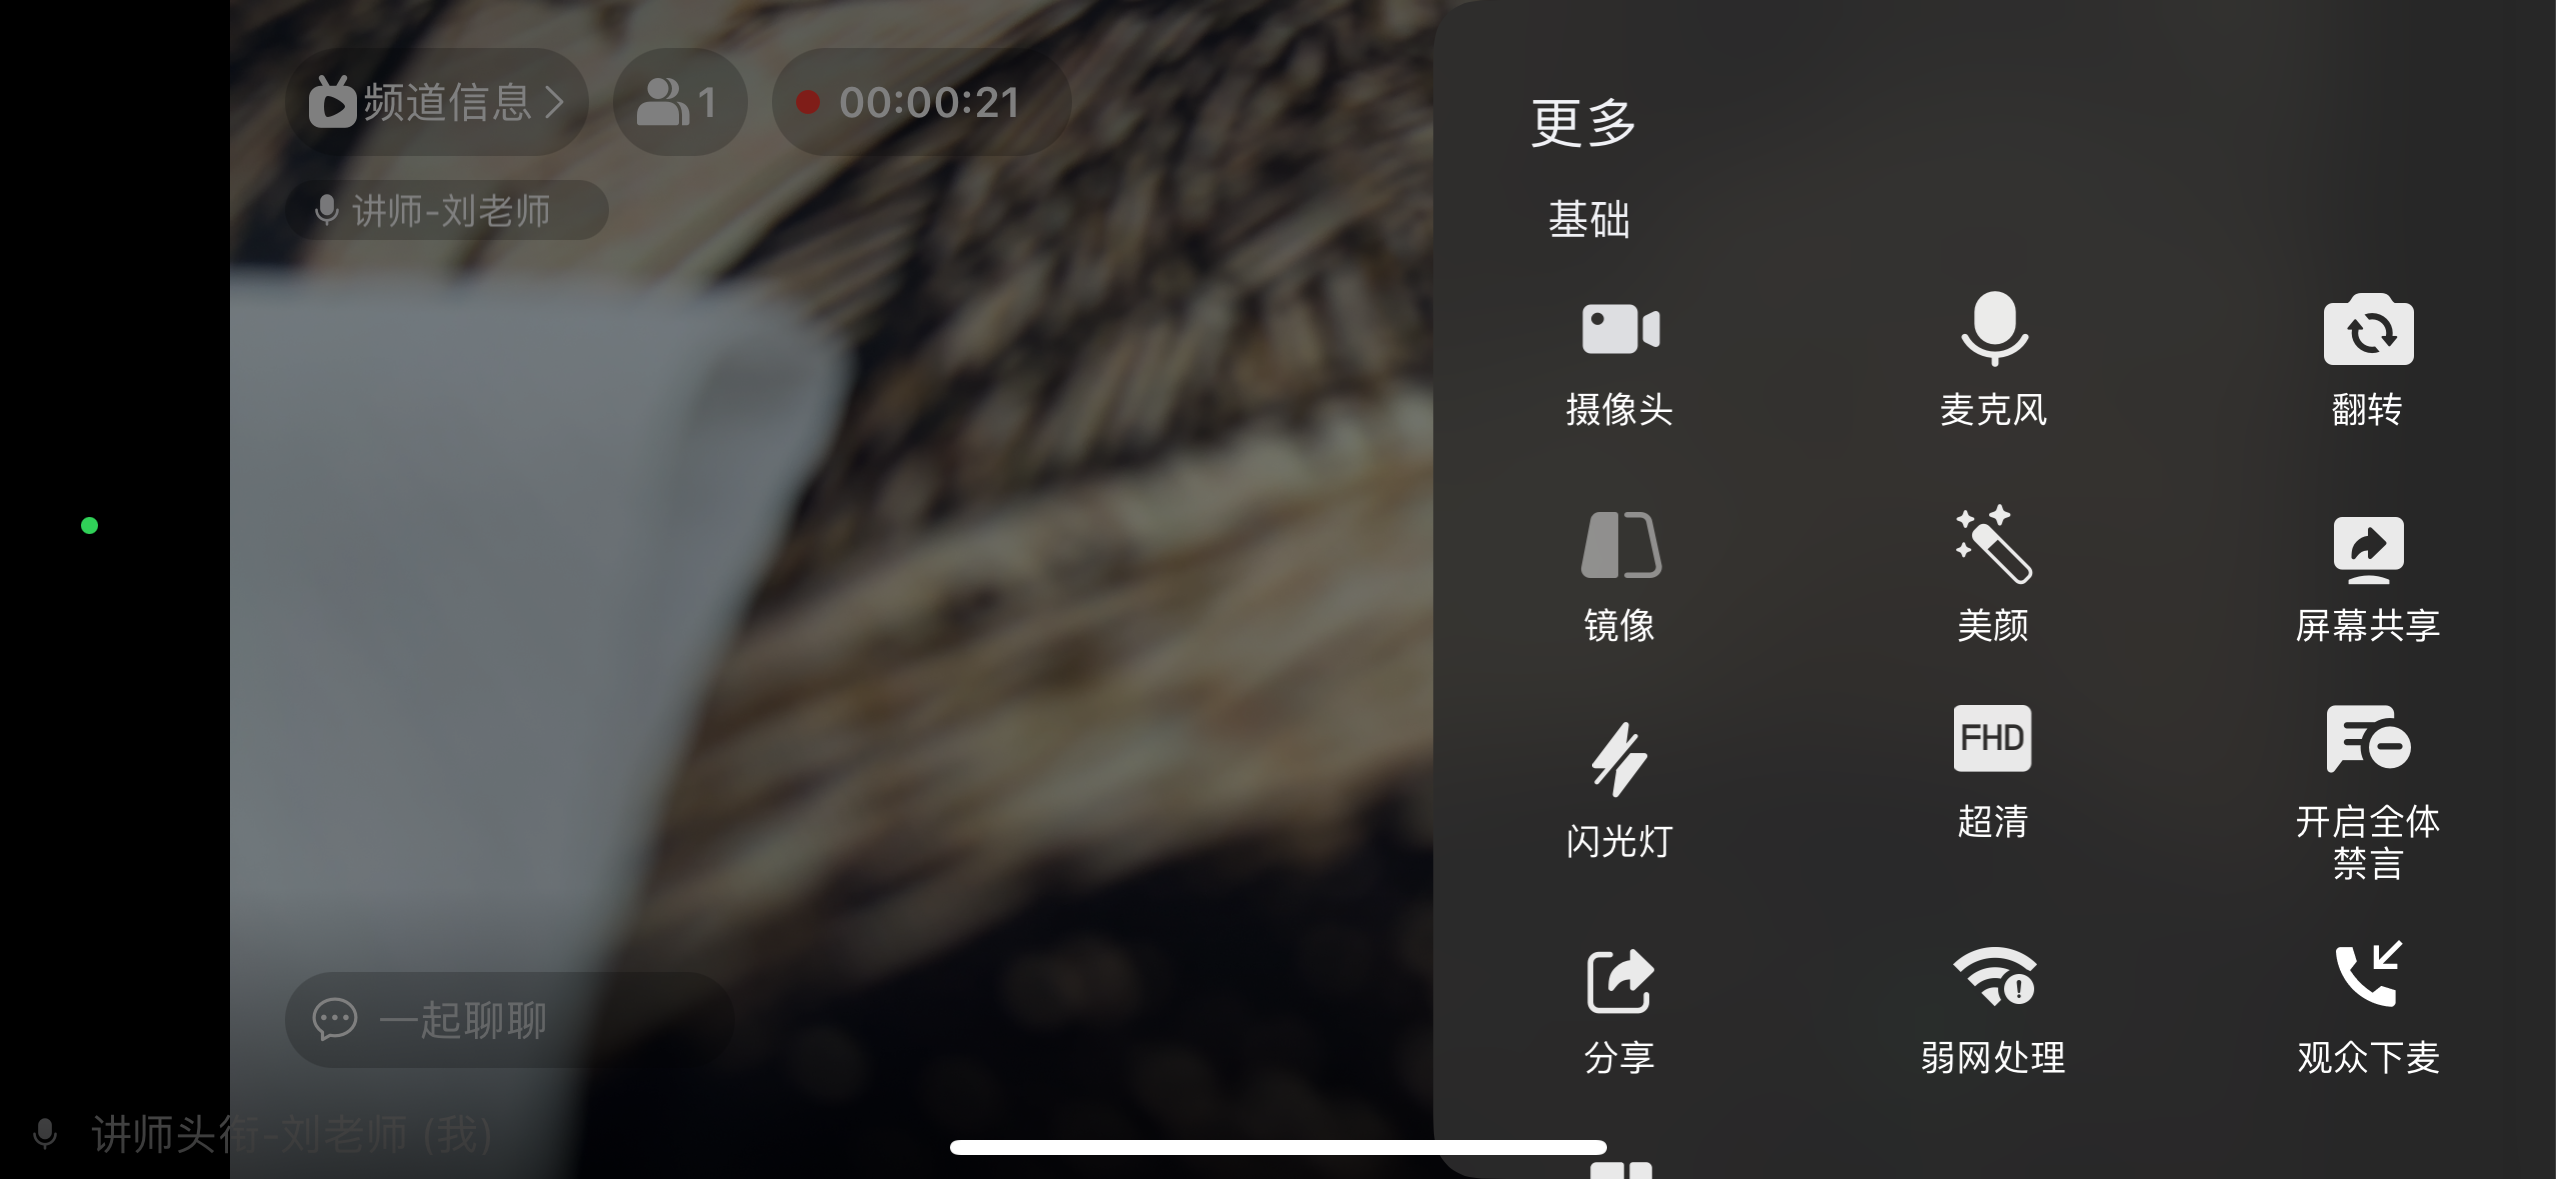
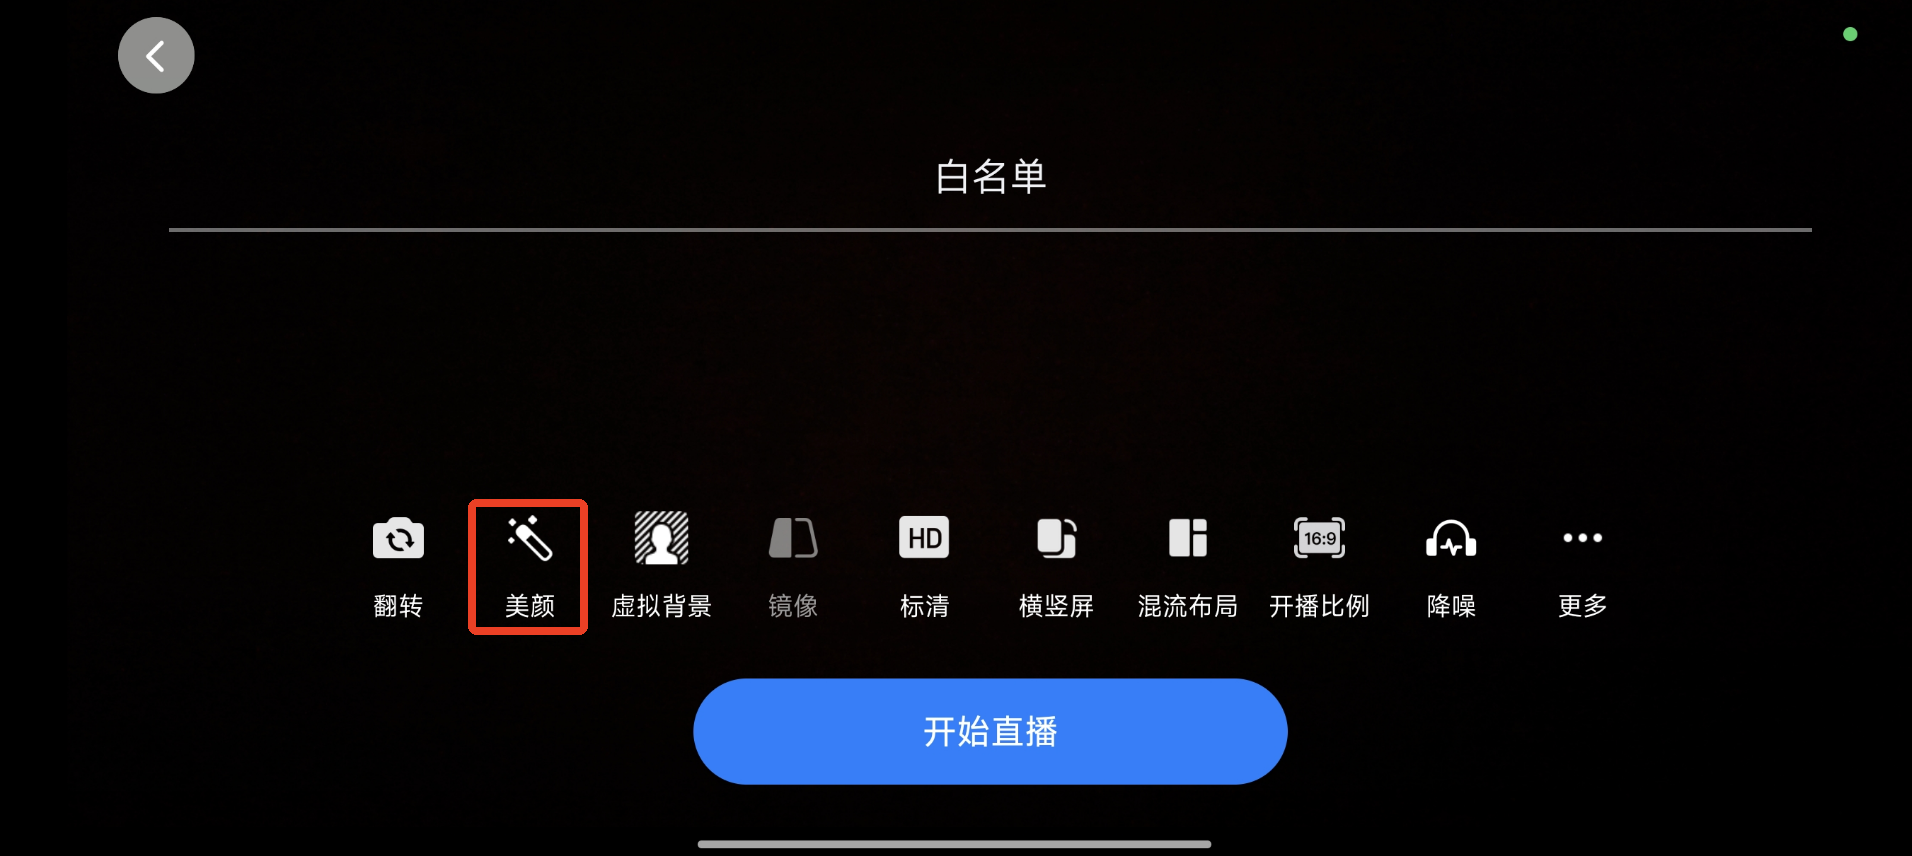
Beauty Filter
Select the Beauty Filter function.
<img src="https://liveimages.videocc.net/help_doc/8116c940-c852-4a3c-b44f-58613f8d475b.png"" alt="" width="40%">
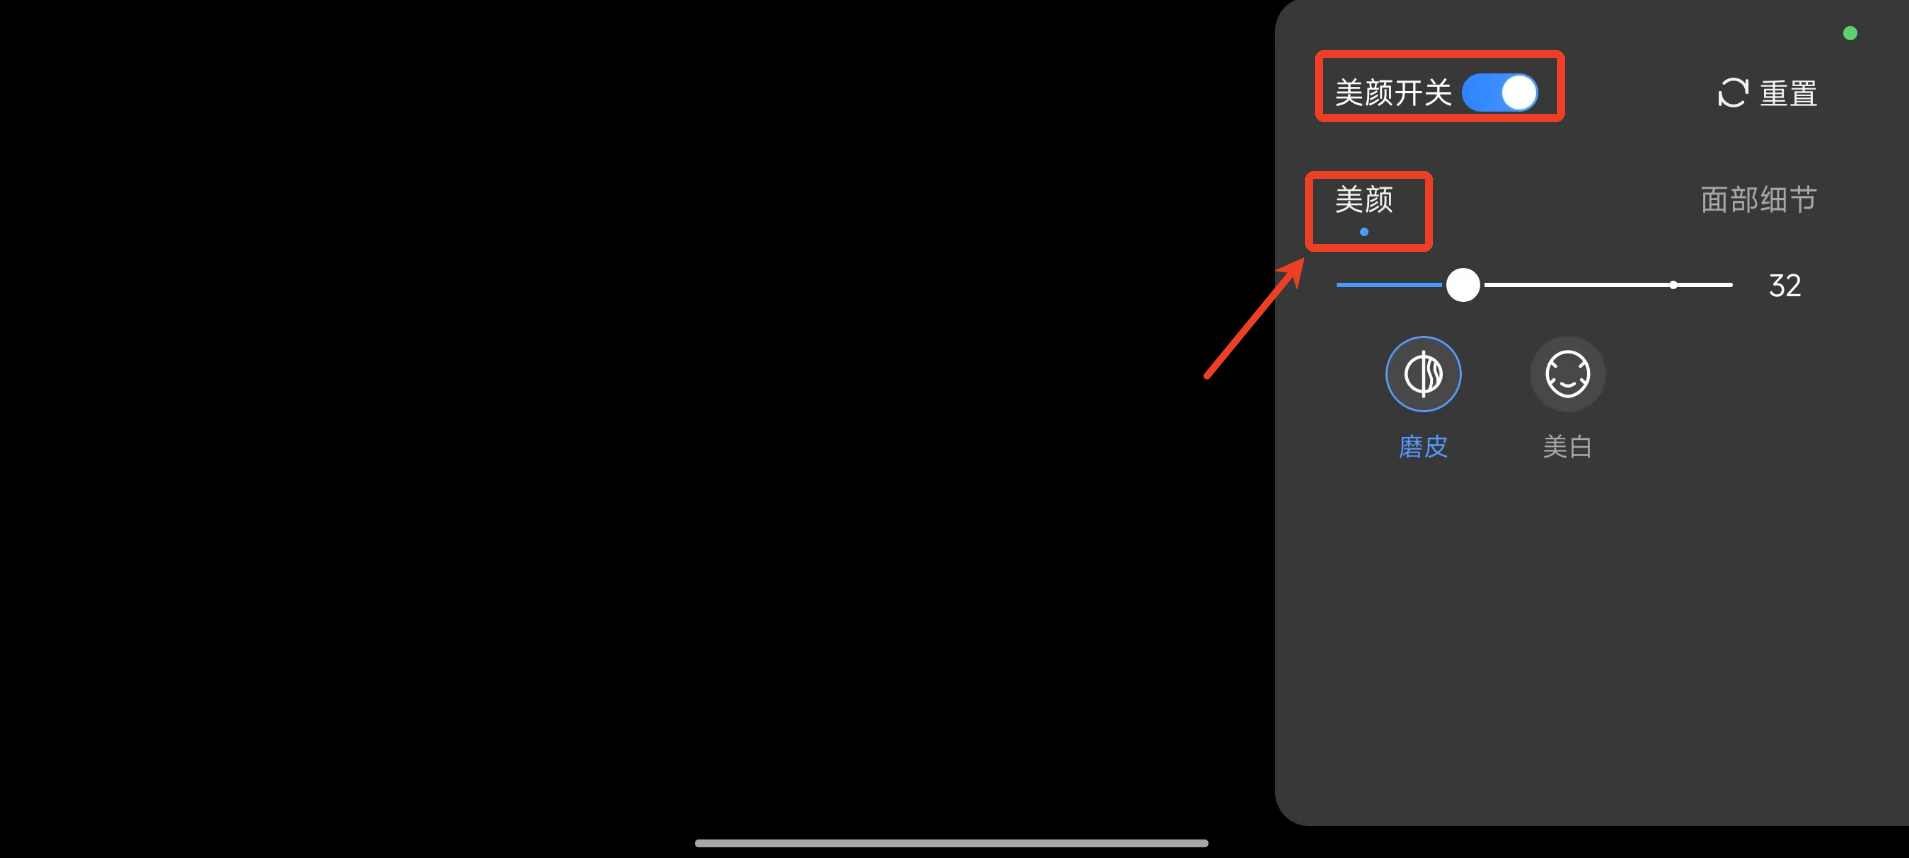
Enable the beauty filter switch, select beauty mode, and adjust the level of skin smoothing and whitening.
<img src="https://liveimages.videocc.net/help_doc/3faa0661-c6ed-4d29-971a-32b24f8c23c2.png"" alt="" width="40%">
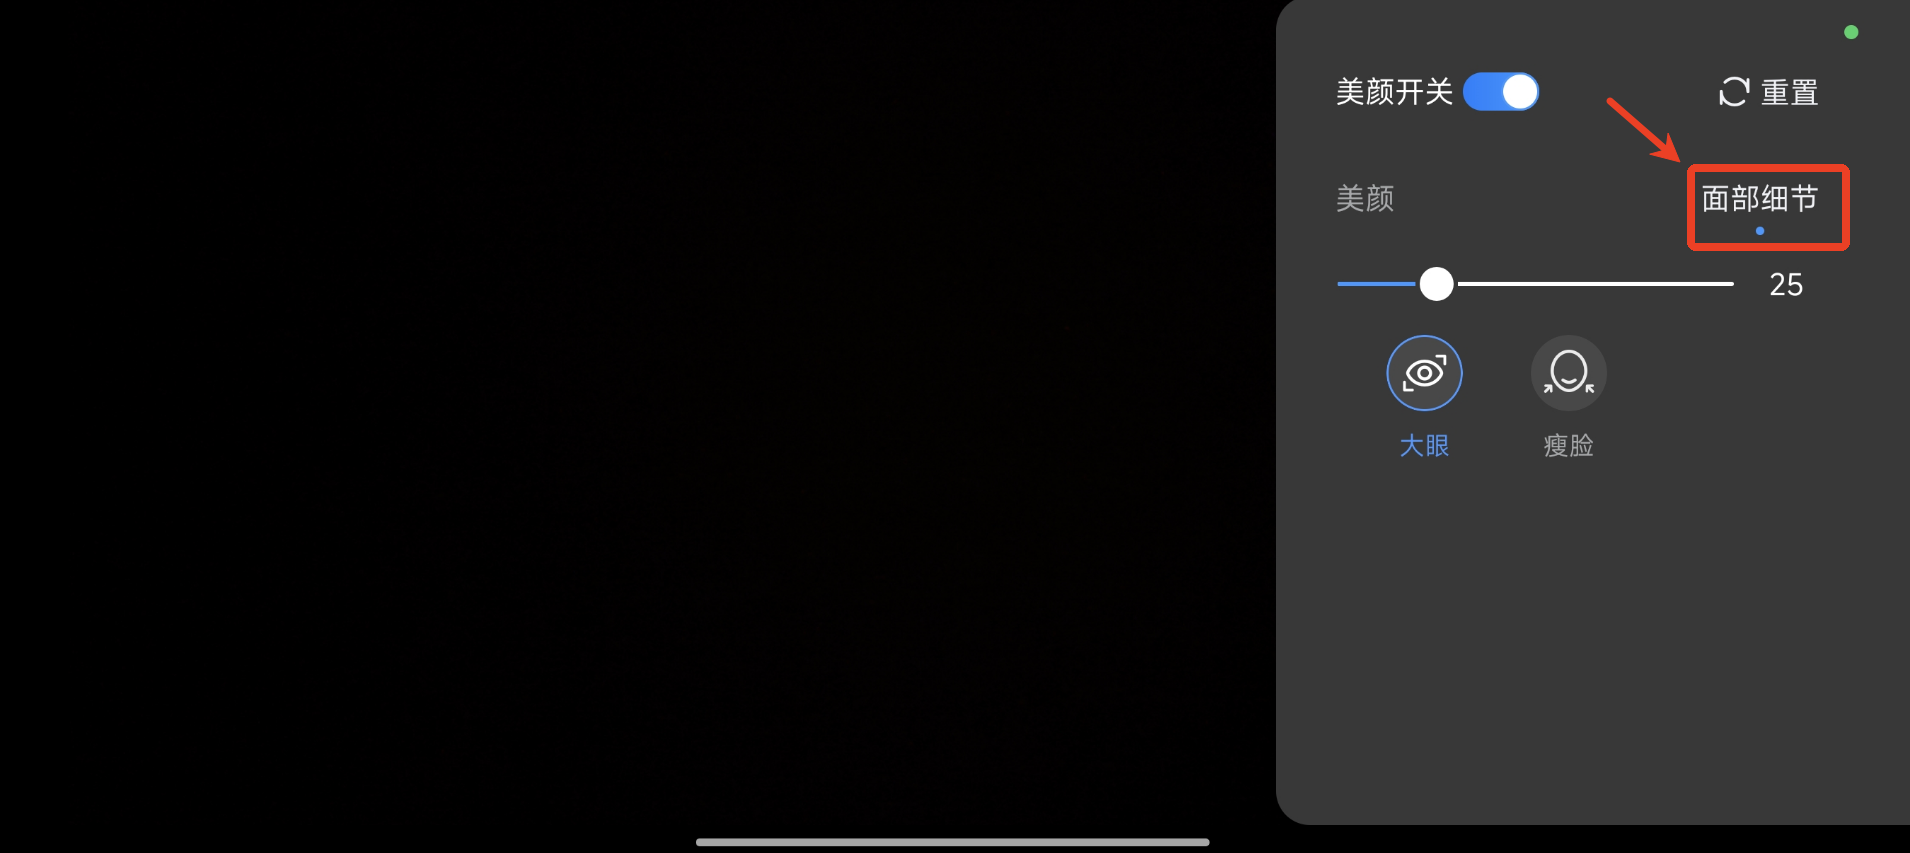
Select facial details to adjust eye enlargement and face slimming.
<img src="https://liveimages.videocc.net/help_doc/0ae25f33-6c56-44e0-aa68-53169f0abdbf.png"" alt="" width="40%">
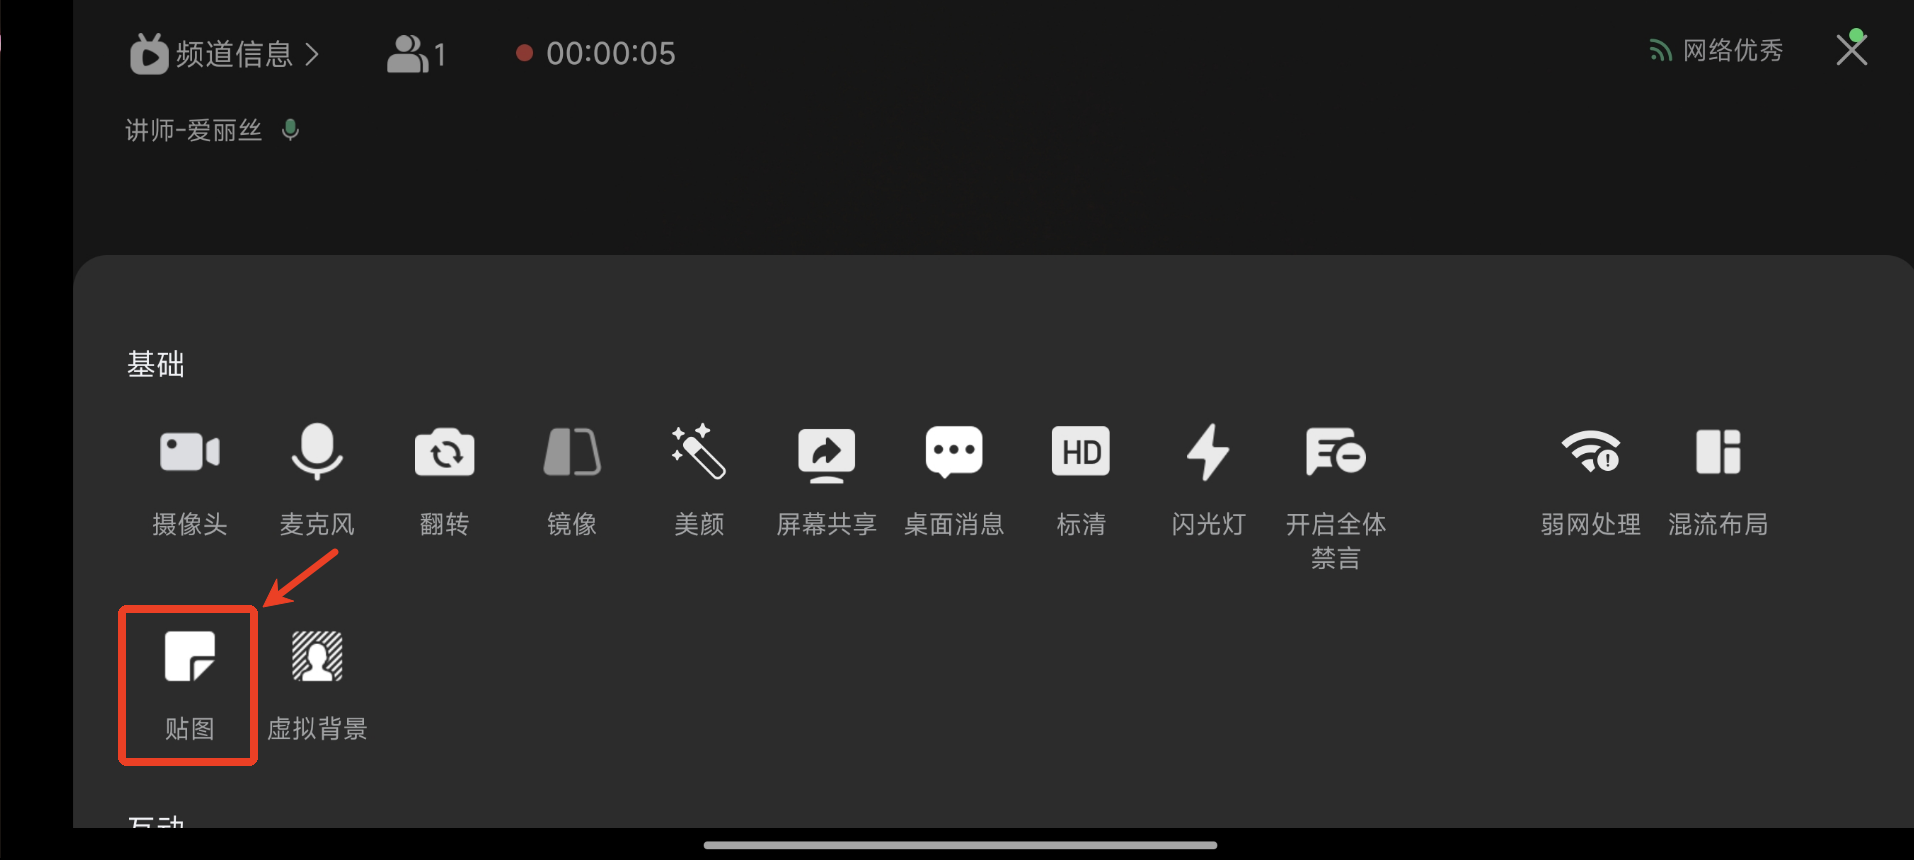
Stickers
Click "More" to open Stickers.
<img src="https://liveimages.videocc.net/help_doc/d198e3c7-584f-4f55-8032-42f7acd58614.png"" alt="" width="40%">
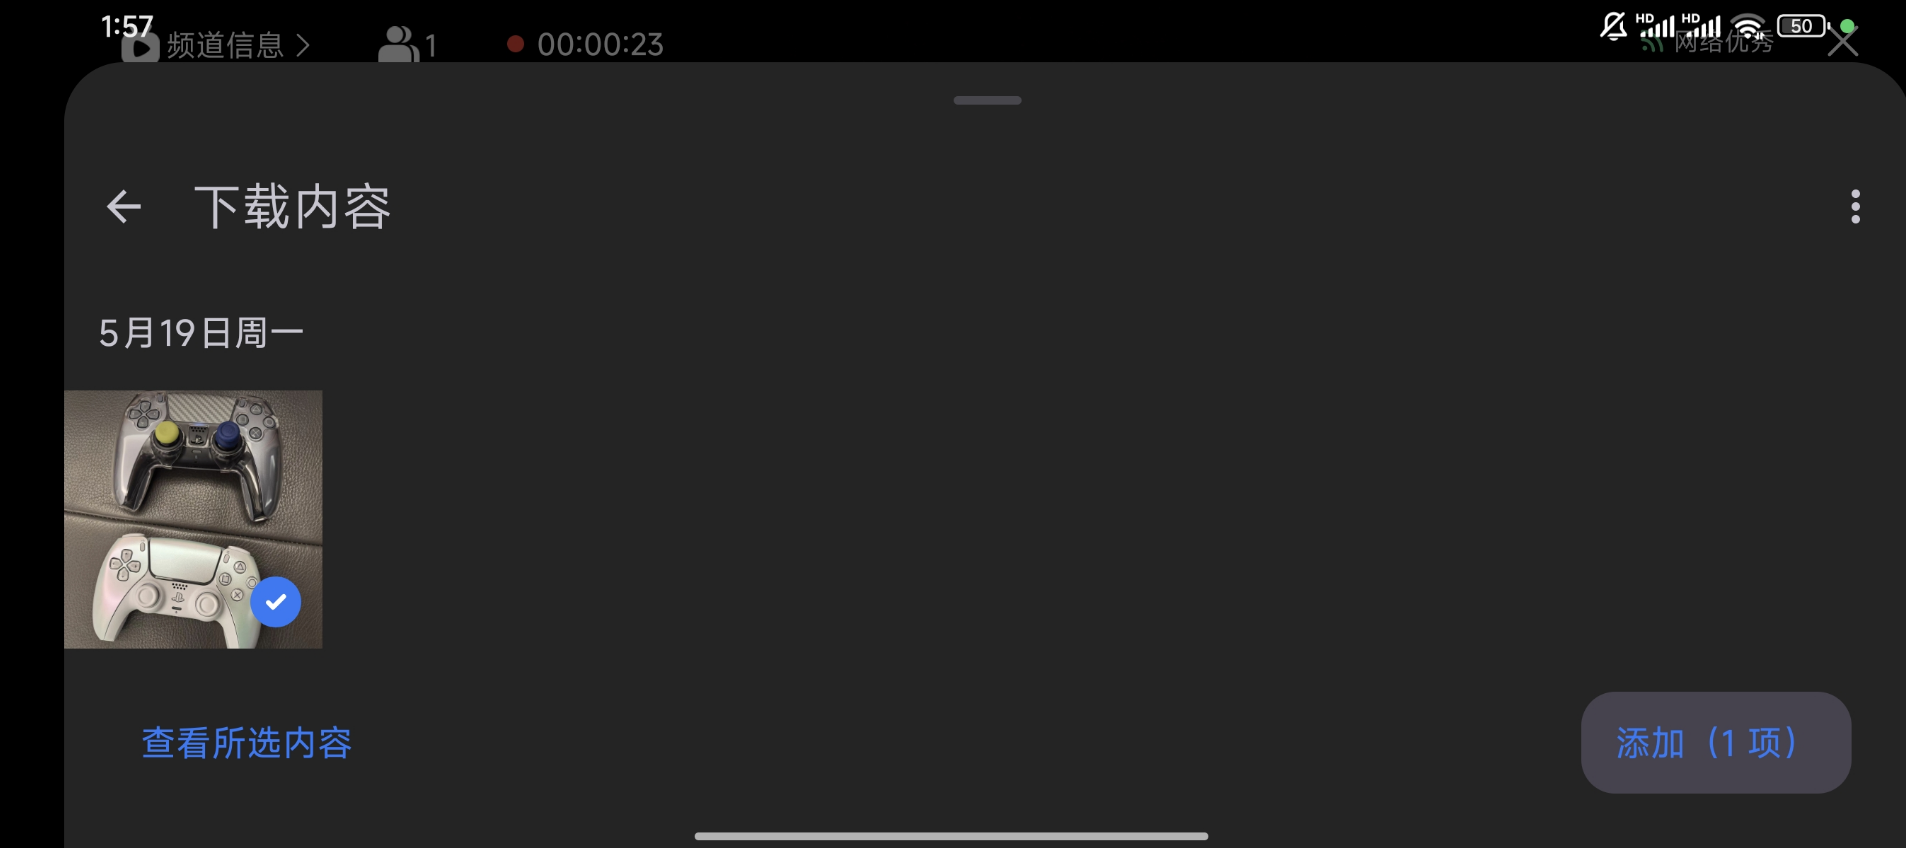
You can open your phone's photo album to select photos to upload. Click "View Selected" to see details in larger size.
<img src="https://liveimages.videocc.net/help_doc/af1ed061-9b0d-4c07-9af3-d2caf5104224.png"" alt="" width="40%">
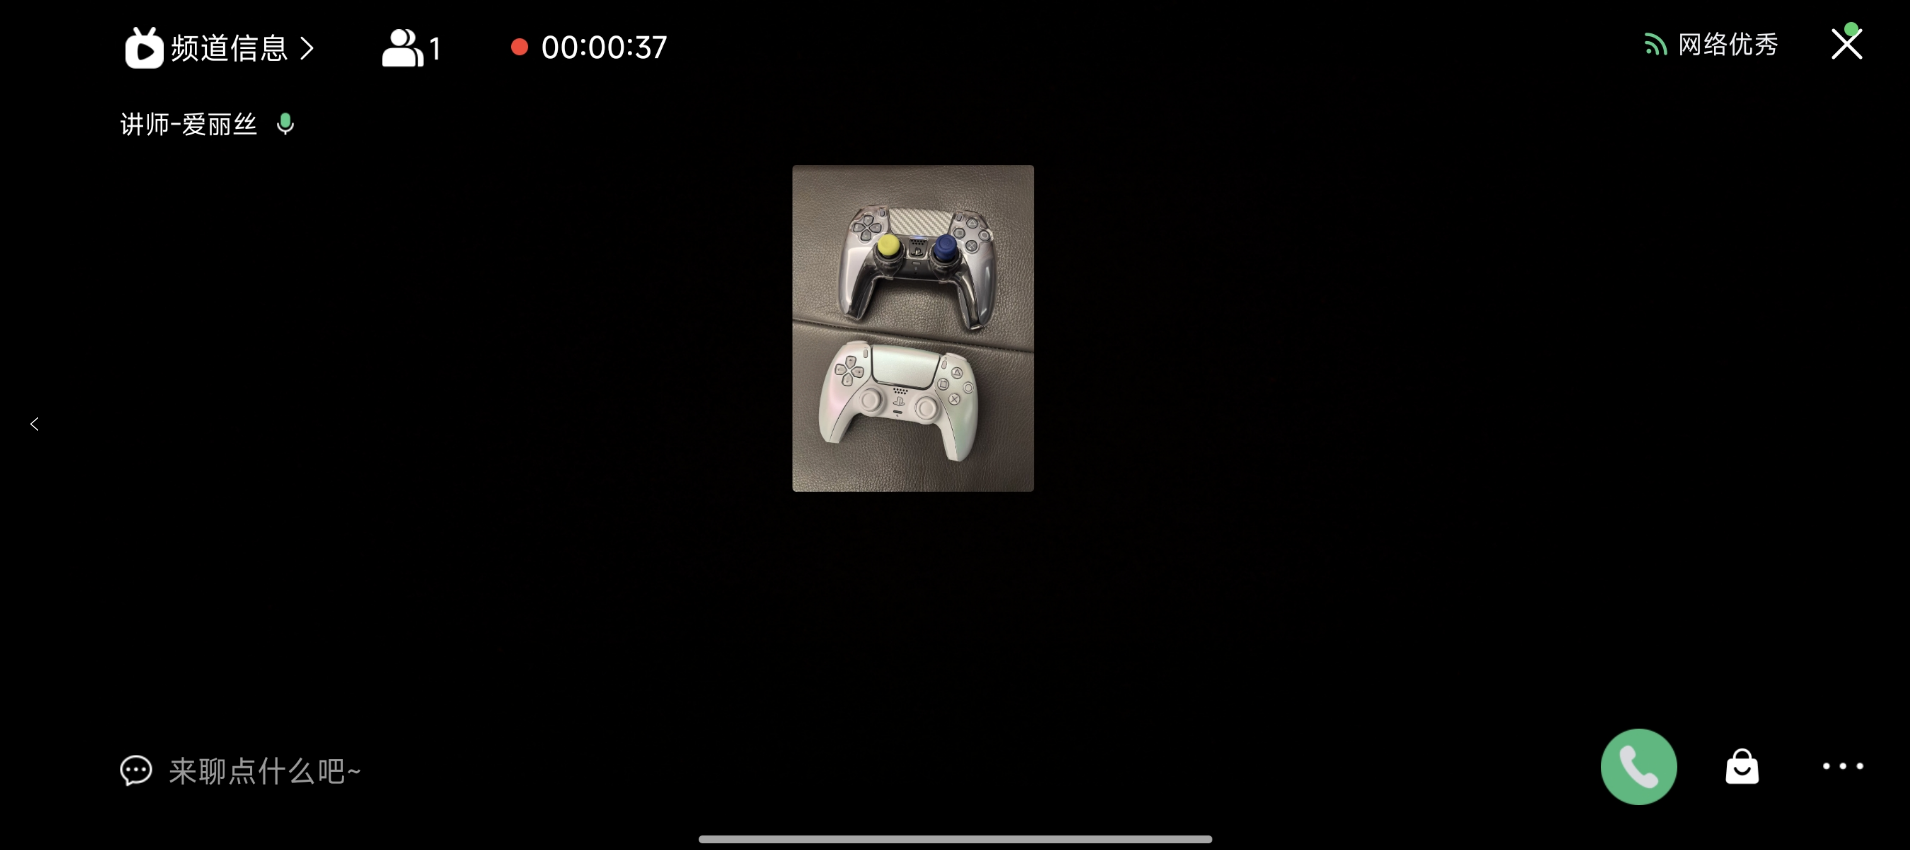
Click "Add" to add stickers to the live stream.
<img src="https://liveimages.videocc.net/help_doc/584056fa-6f59-47b9-86af-ba3f51ec2dd1.png"" alt="" width="40%">
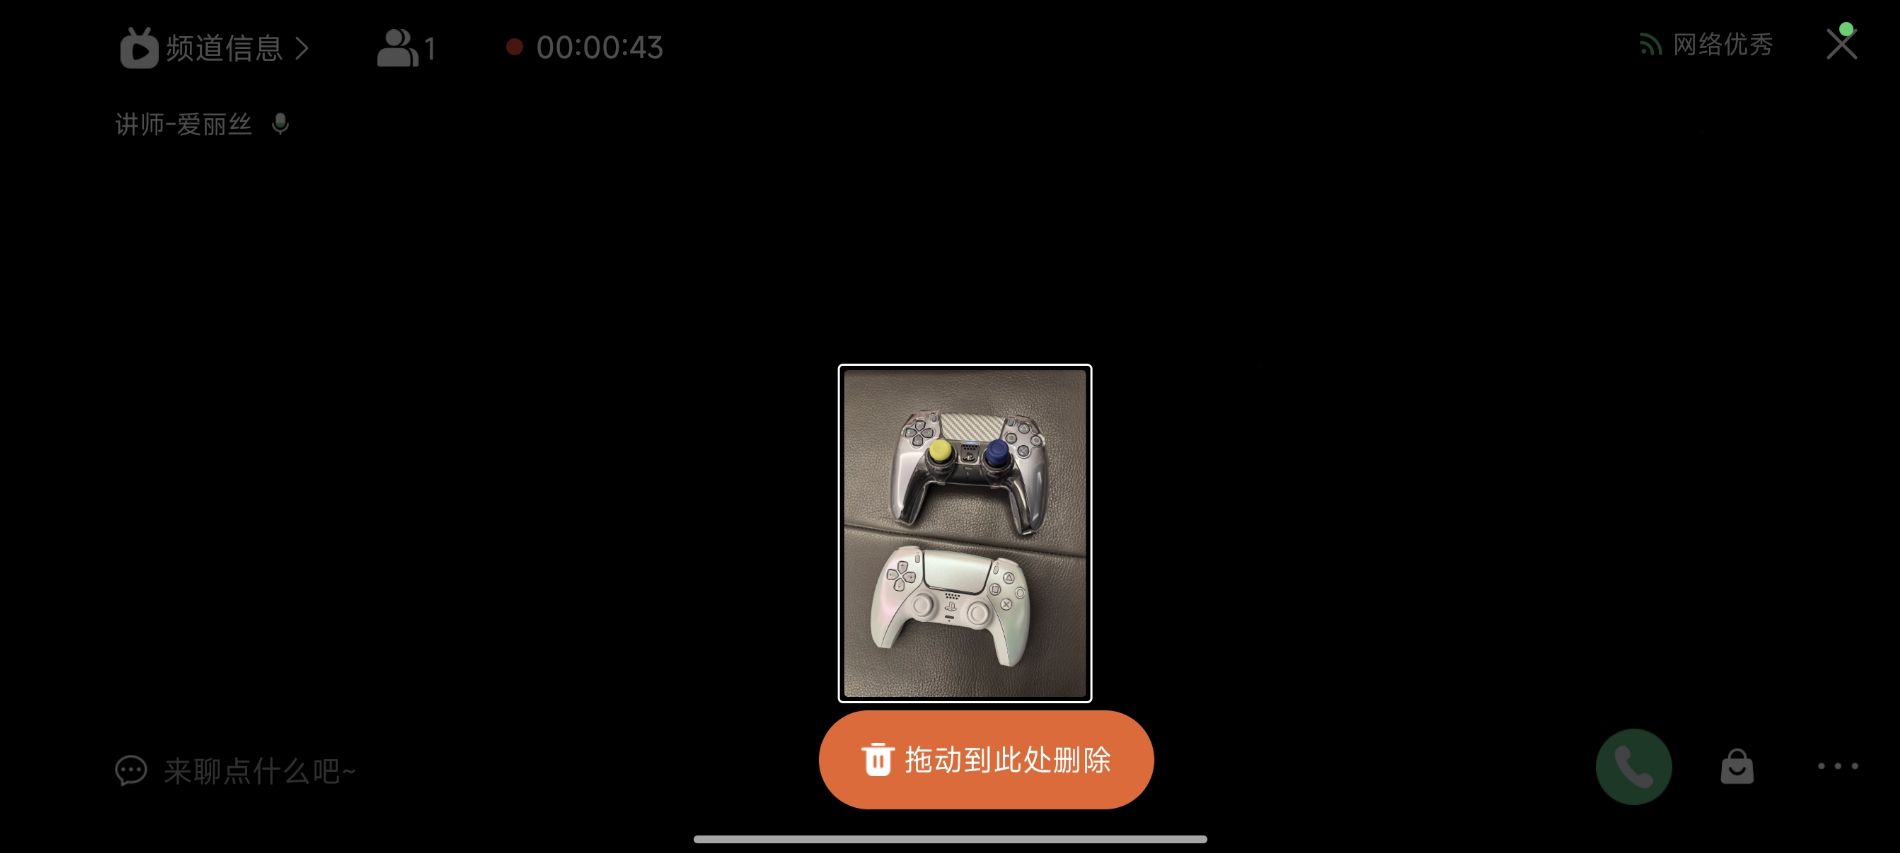
Drag the image sticker downwards to delete it.
<img src="https://liveimages.videocc.net/help_doc/03f9e0ba-adaa-460d-9e93-35cf1a9c9937.png"" alt="" width="40%">
Virtual Background
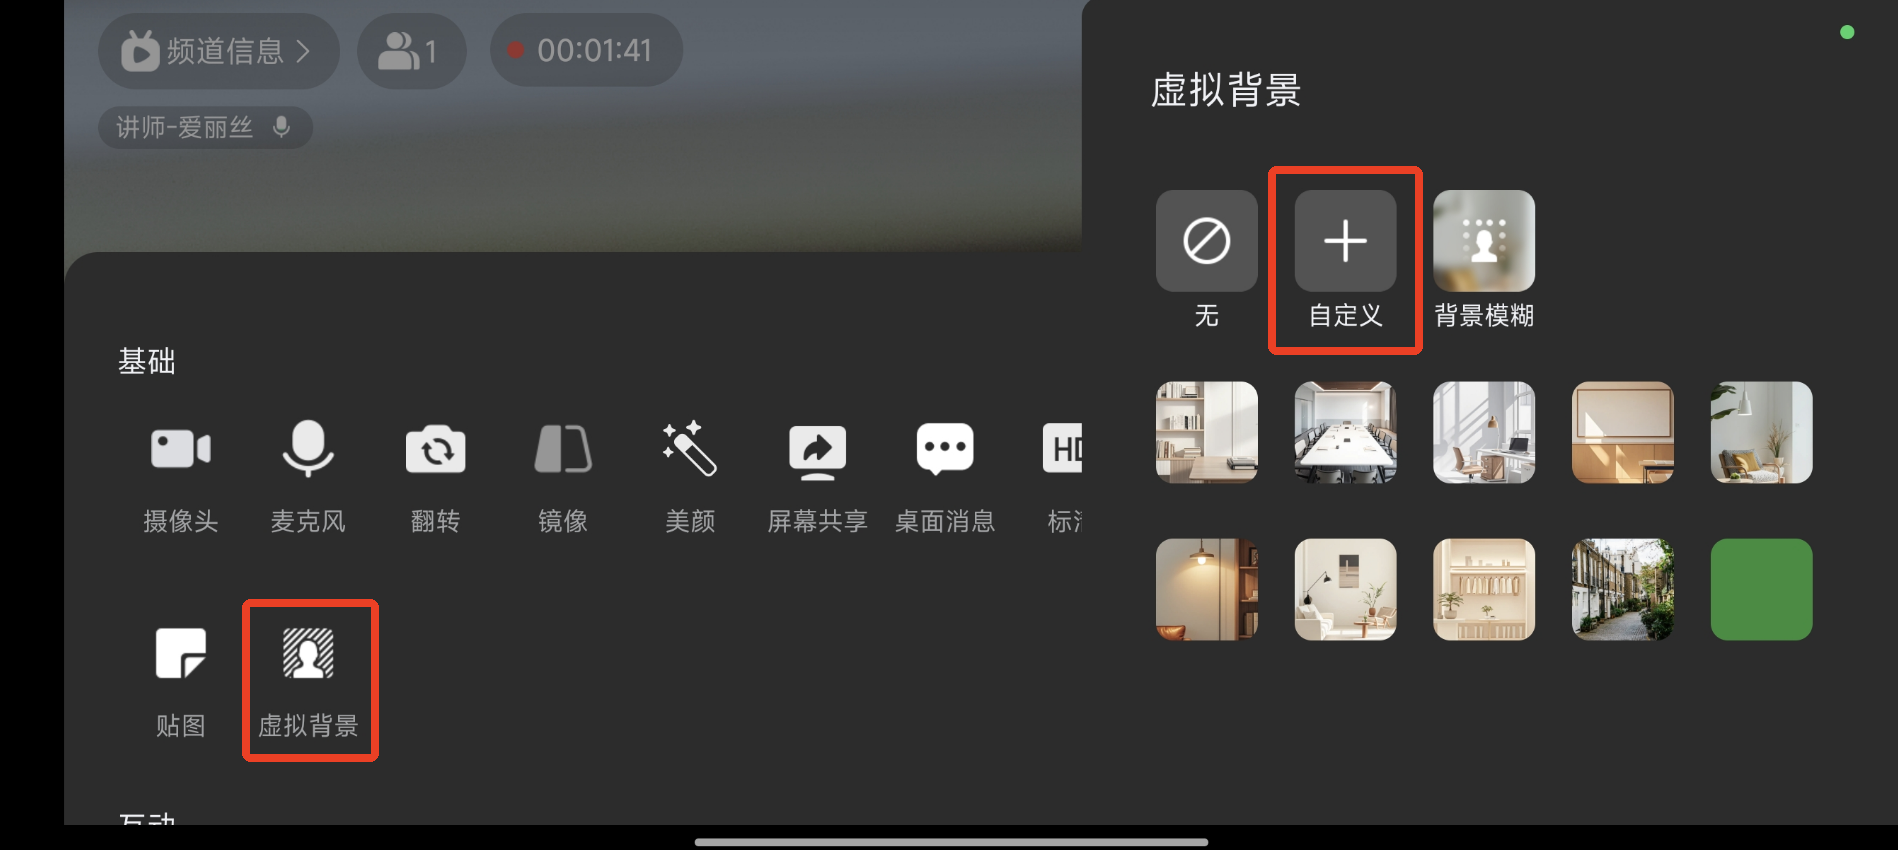
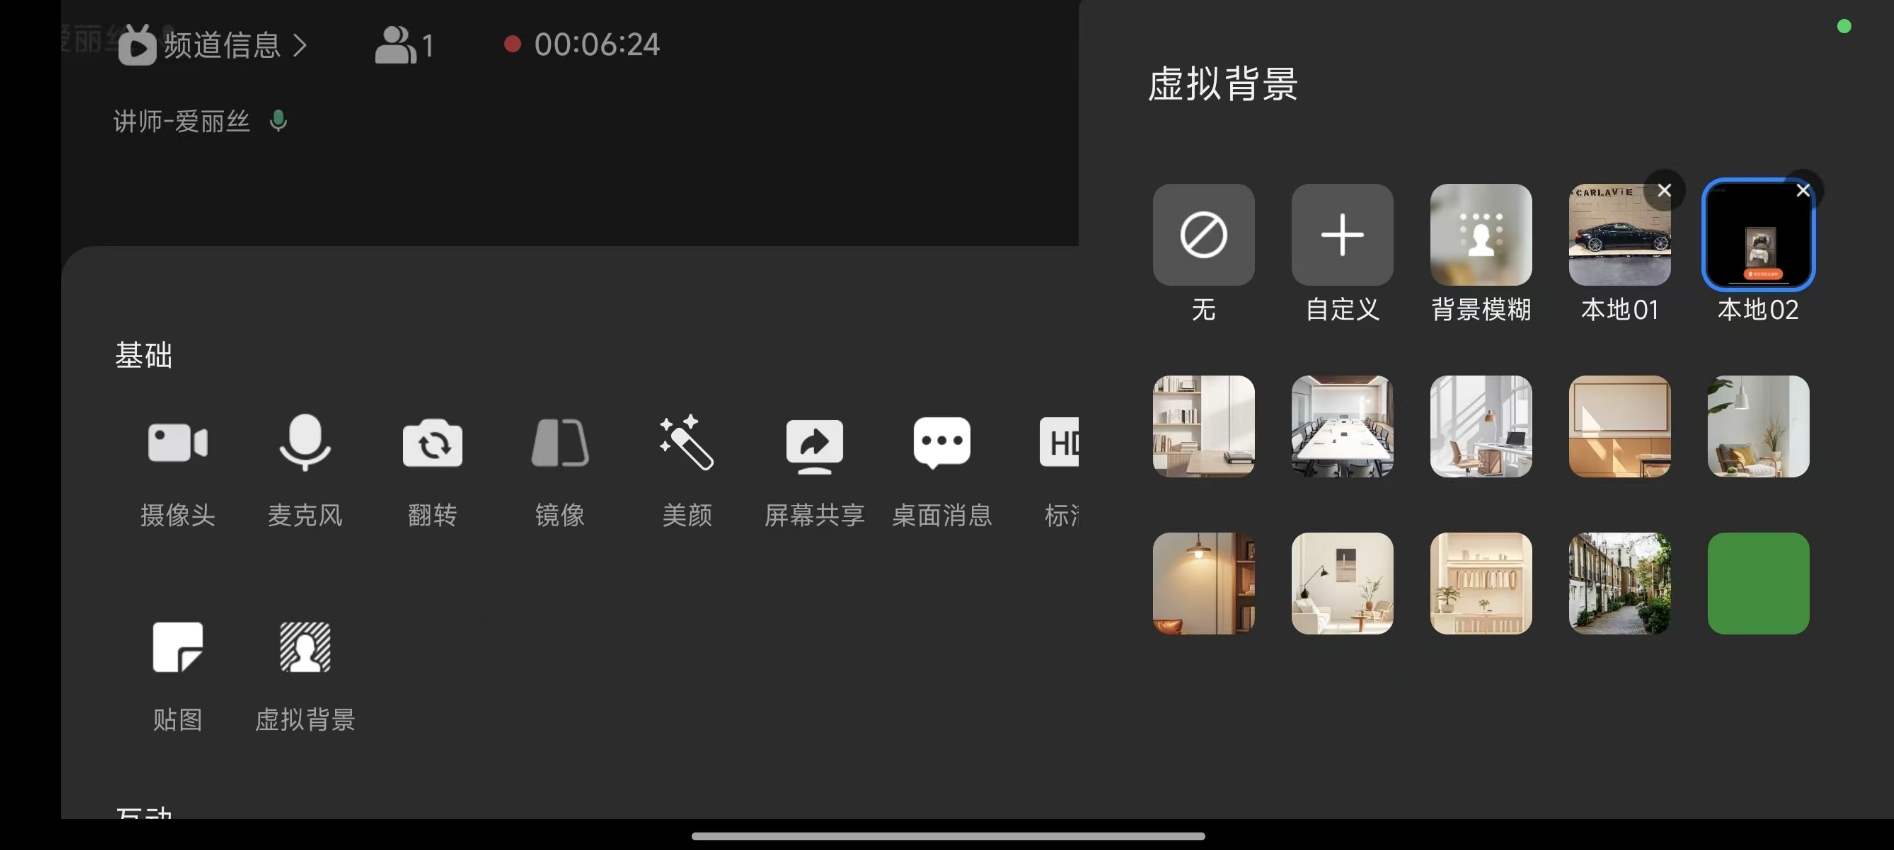
Click "Virtual Background" to open the virtual background operation panel on the right.
Click "Custom" to select an image from the photo album as the virtual background. Multiple custom images can be uploaded.
<img src="https://liveimages.videocc.net/help_doc/643dce53-418e-4121-9d94-07152335fcac.png"" alt="" width="40%">
<img src="https://liveimages.videocc.net/help_doc/3e7145b4-a163-41fe-9336-ea60a5382101.png"" alt="" width="40%">
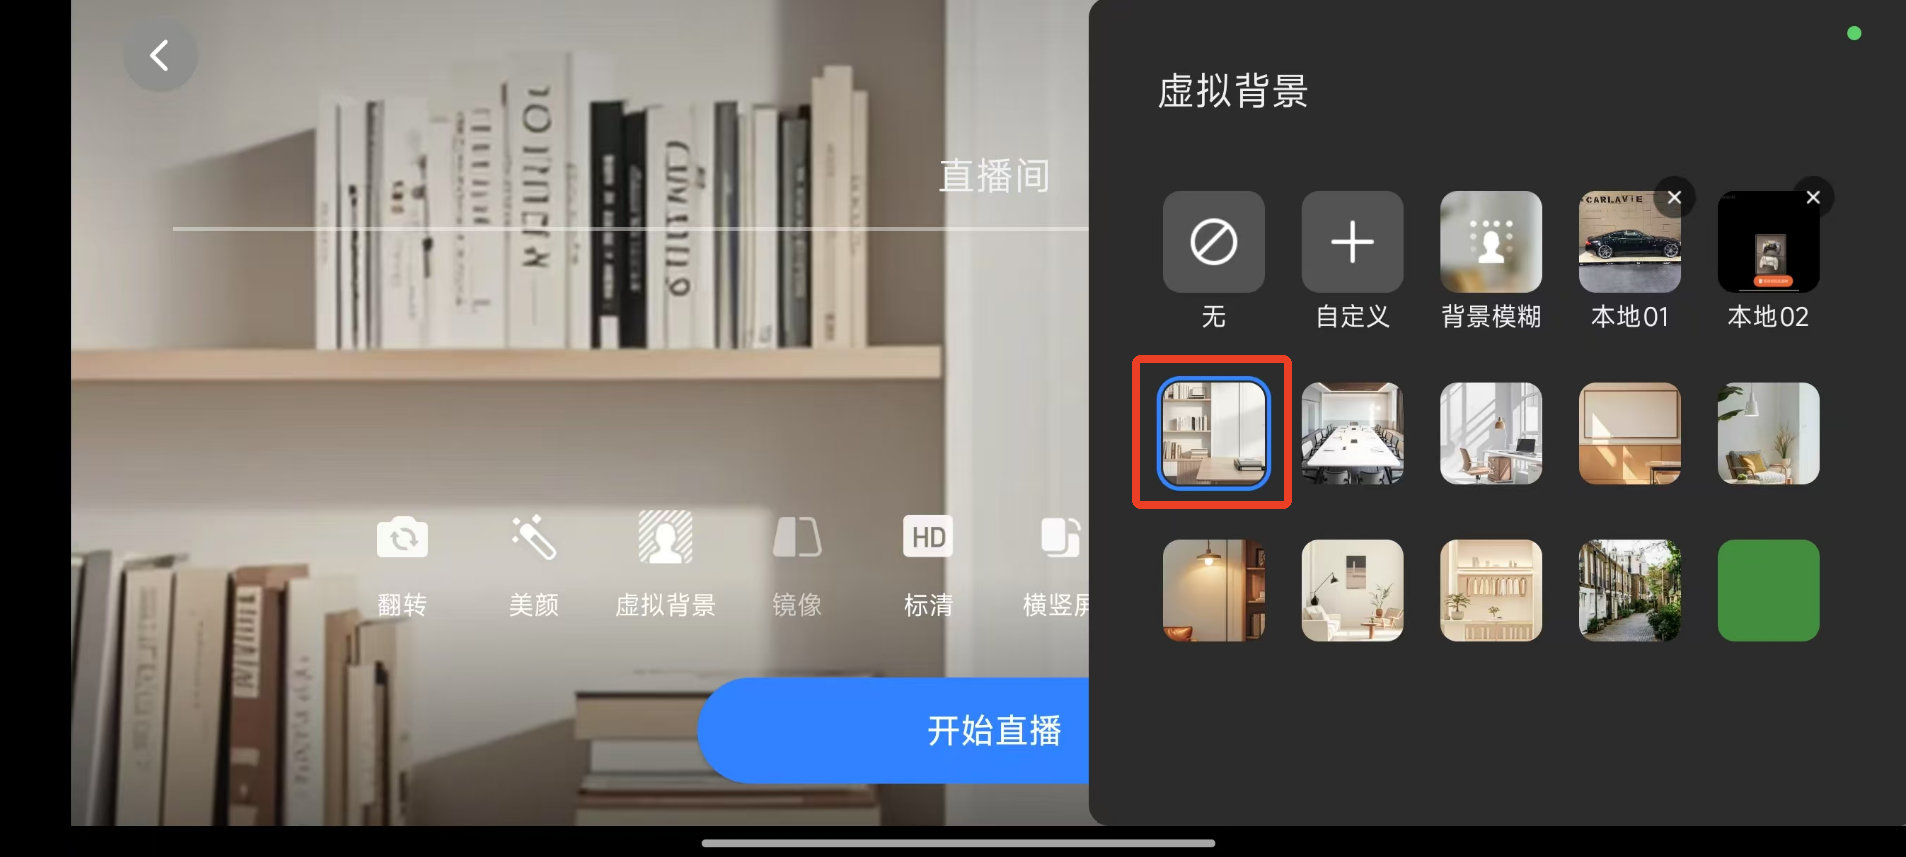
You can also choose a default background provided as the virtual background.
<img src="https://liveimages.videocc.net/help_doc/79120ce4-0e77-4b4f-93ca-00cd1bdcb309.png"" alt="" width="40%">
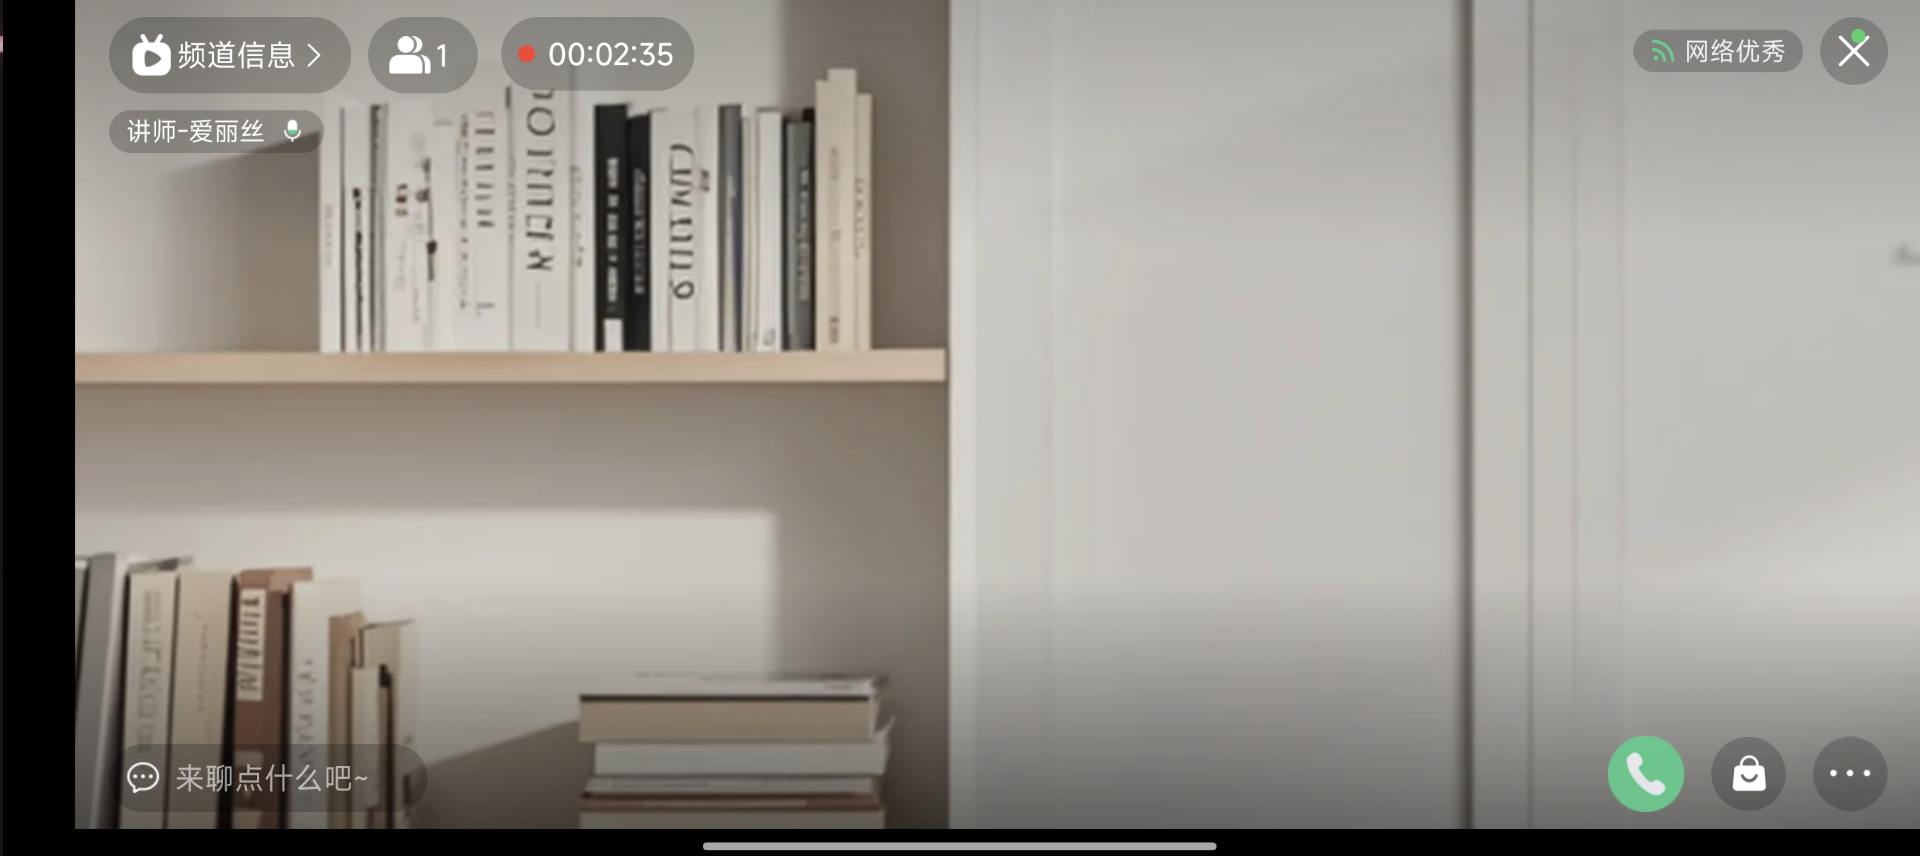
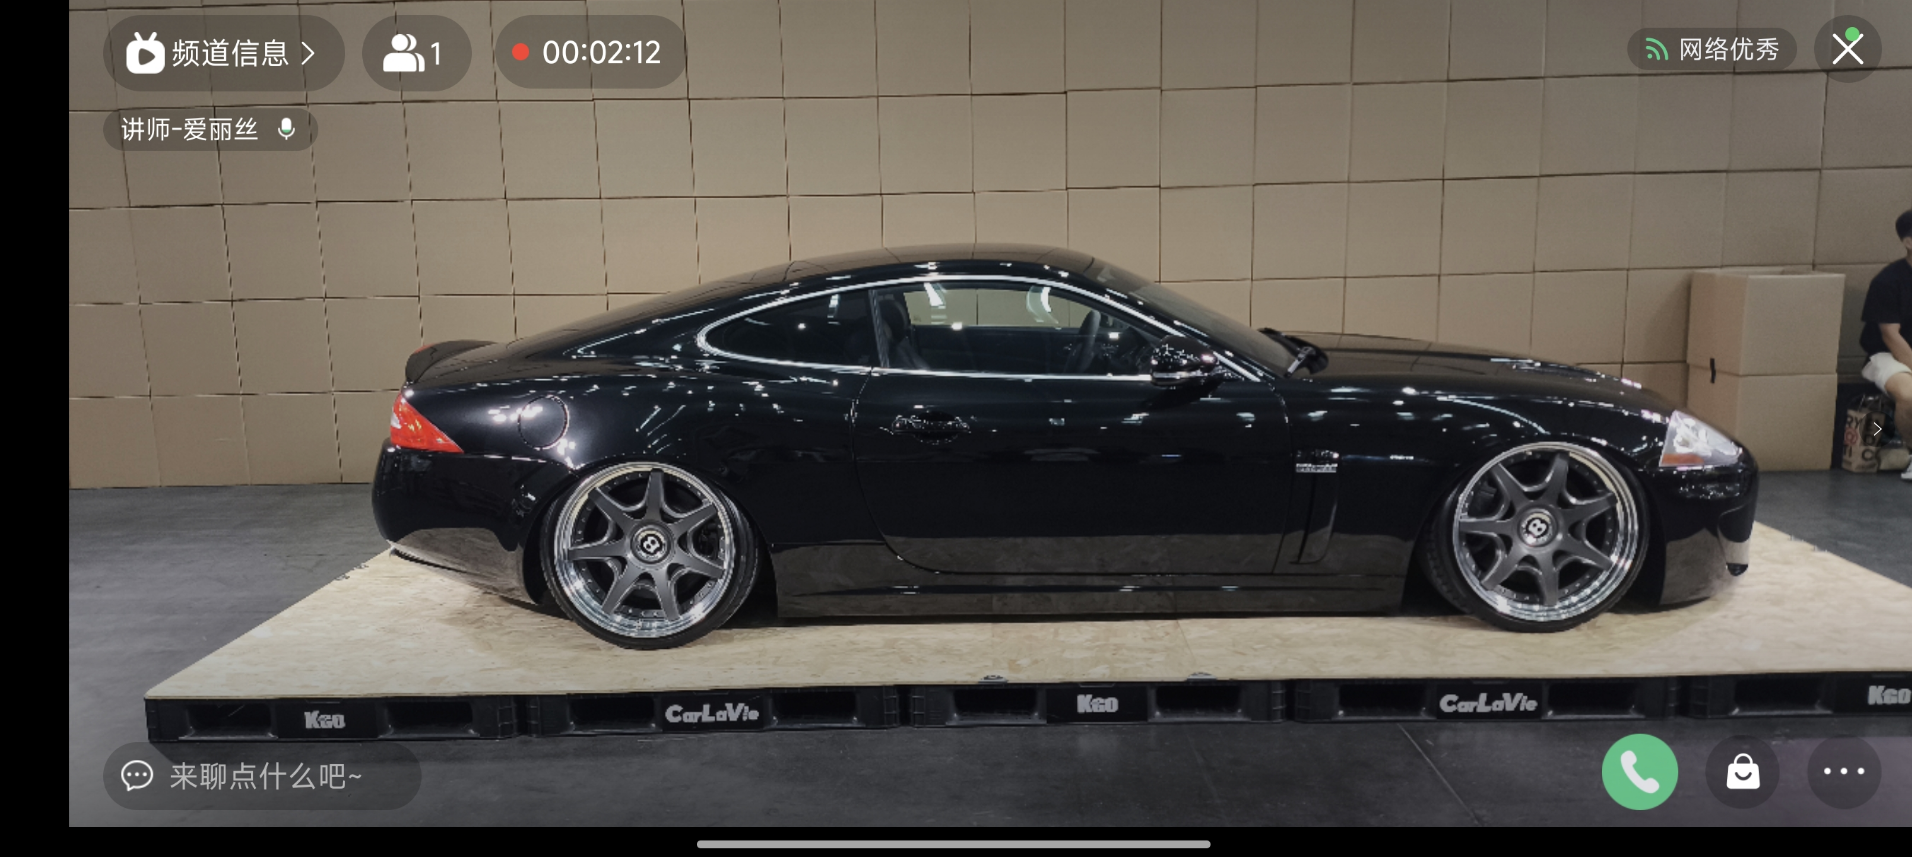
Effect preview
<img src="https://liveimages.videocc.net/help_doc/489b1799-3d49-45a3-b826-a4d8e0b3b8ca.png"" alt="" width="40%">
<img src="https://liveimages.videocc.net/help_doc/2744b0bb-9bf0-4d98-9459-b5b265f122d0.png"" alt="" width="40%">