User Management & Operations
1. Feature Overview
| Feature Info | Description |
|---|---|
| Feature Name | User Management & Operations |
| Feature Description | Unifies user identity across different channels. Supports manual tagging, batch tagging, and automatic tagging. Enables user segmentation based on tags for targeted marketing campaigns, achieving refined operations. |
| Purpose | Facilitates user identification, segmentation, and targeted operations. |
| Use Cases | Private domain live streaming, educational live streaming. |
| Notes | Contact sales to activate the [User Management System]. |
2. User Management Usage Guide
1. User Settings
(1) Supports the following 5 login authorization methods:
- WeChat Authorization: Allows users to log in using WeChat authorization. Suitable for scenarios where users access the live room within WeChat.
- WeCom Authorization: Allows WeCom members to log in using WeCom authorization. Suitable for employee training or scenarios where WeCom contacts access the live room via employee links.
- Google Login: Allows login with a Google account. Suitable for overseas users accessing the live room (not available in embedded browsers like WeChat).
- If using a custom viewing page domain, you need to configure the brand's own Google application ClientID. See: Google ClientID Operation Guide
- Phone Number: Allows users to log in using a phone number + verification code. Suitable for scenarios where users access the live room from non-WeChat web pages.
- Independent Authorization: Developers pass an external ID to create a user on this platform. Suitable for scenarios where users first log in to an external system before entering the live room on this platform.
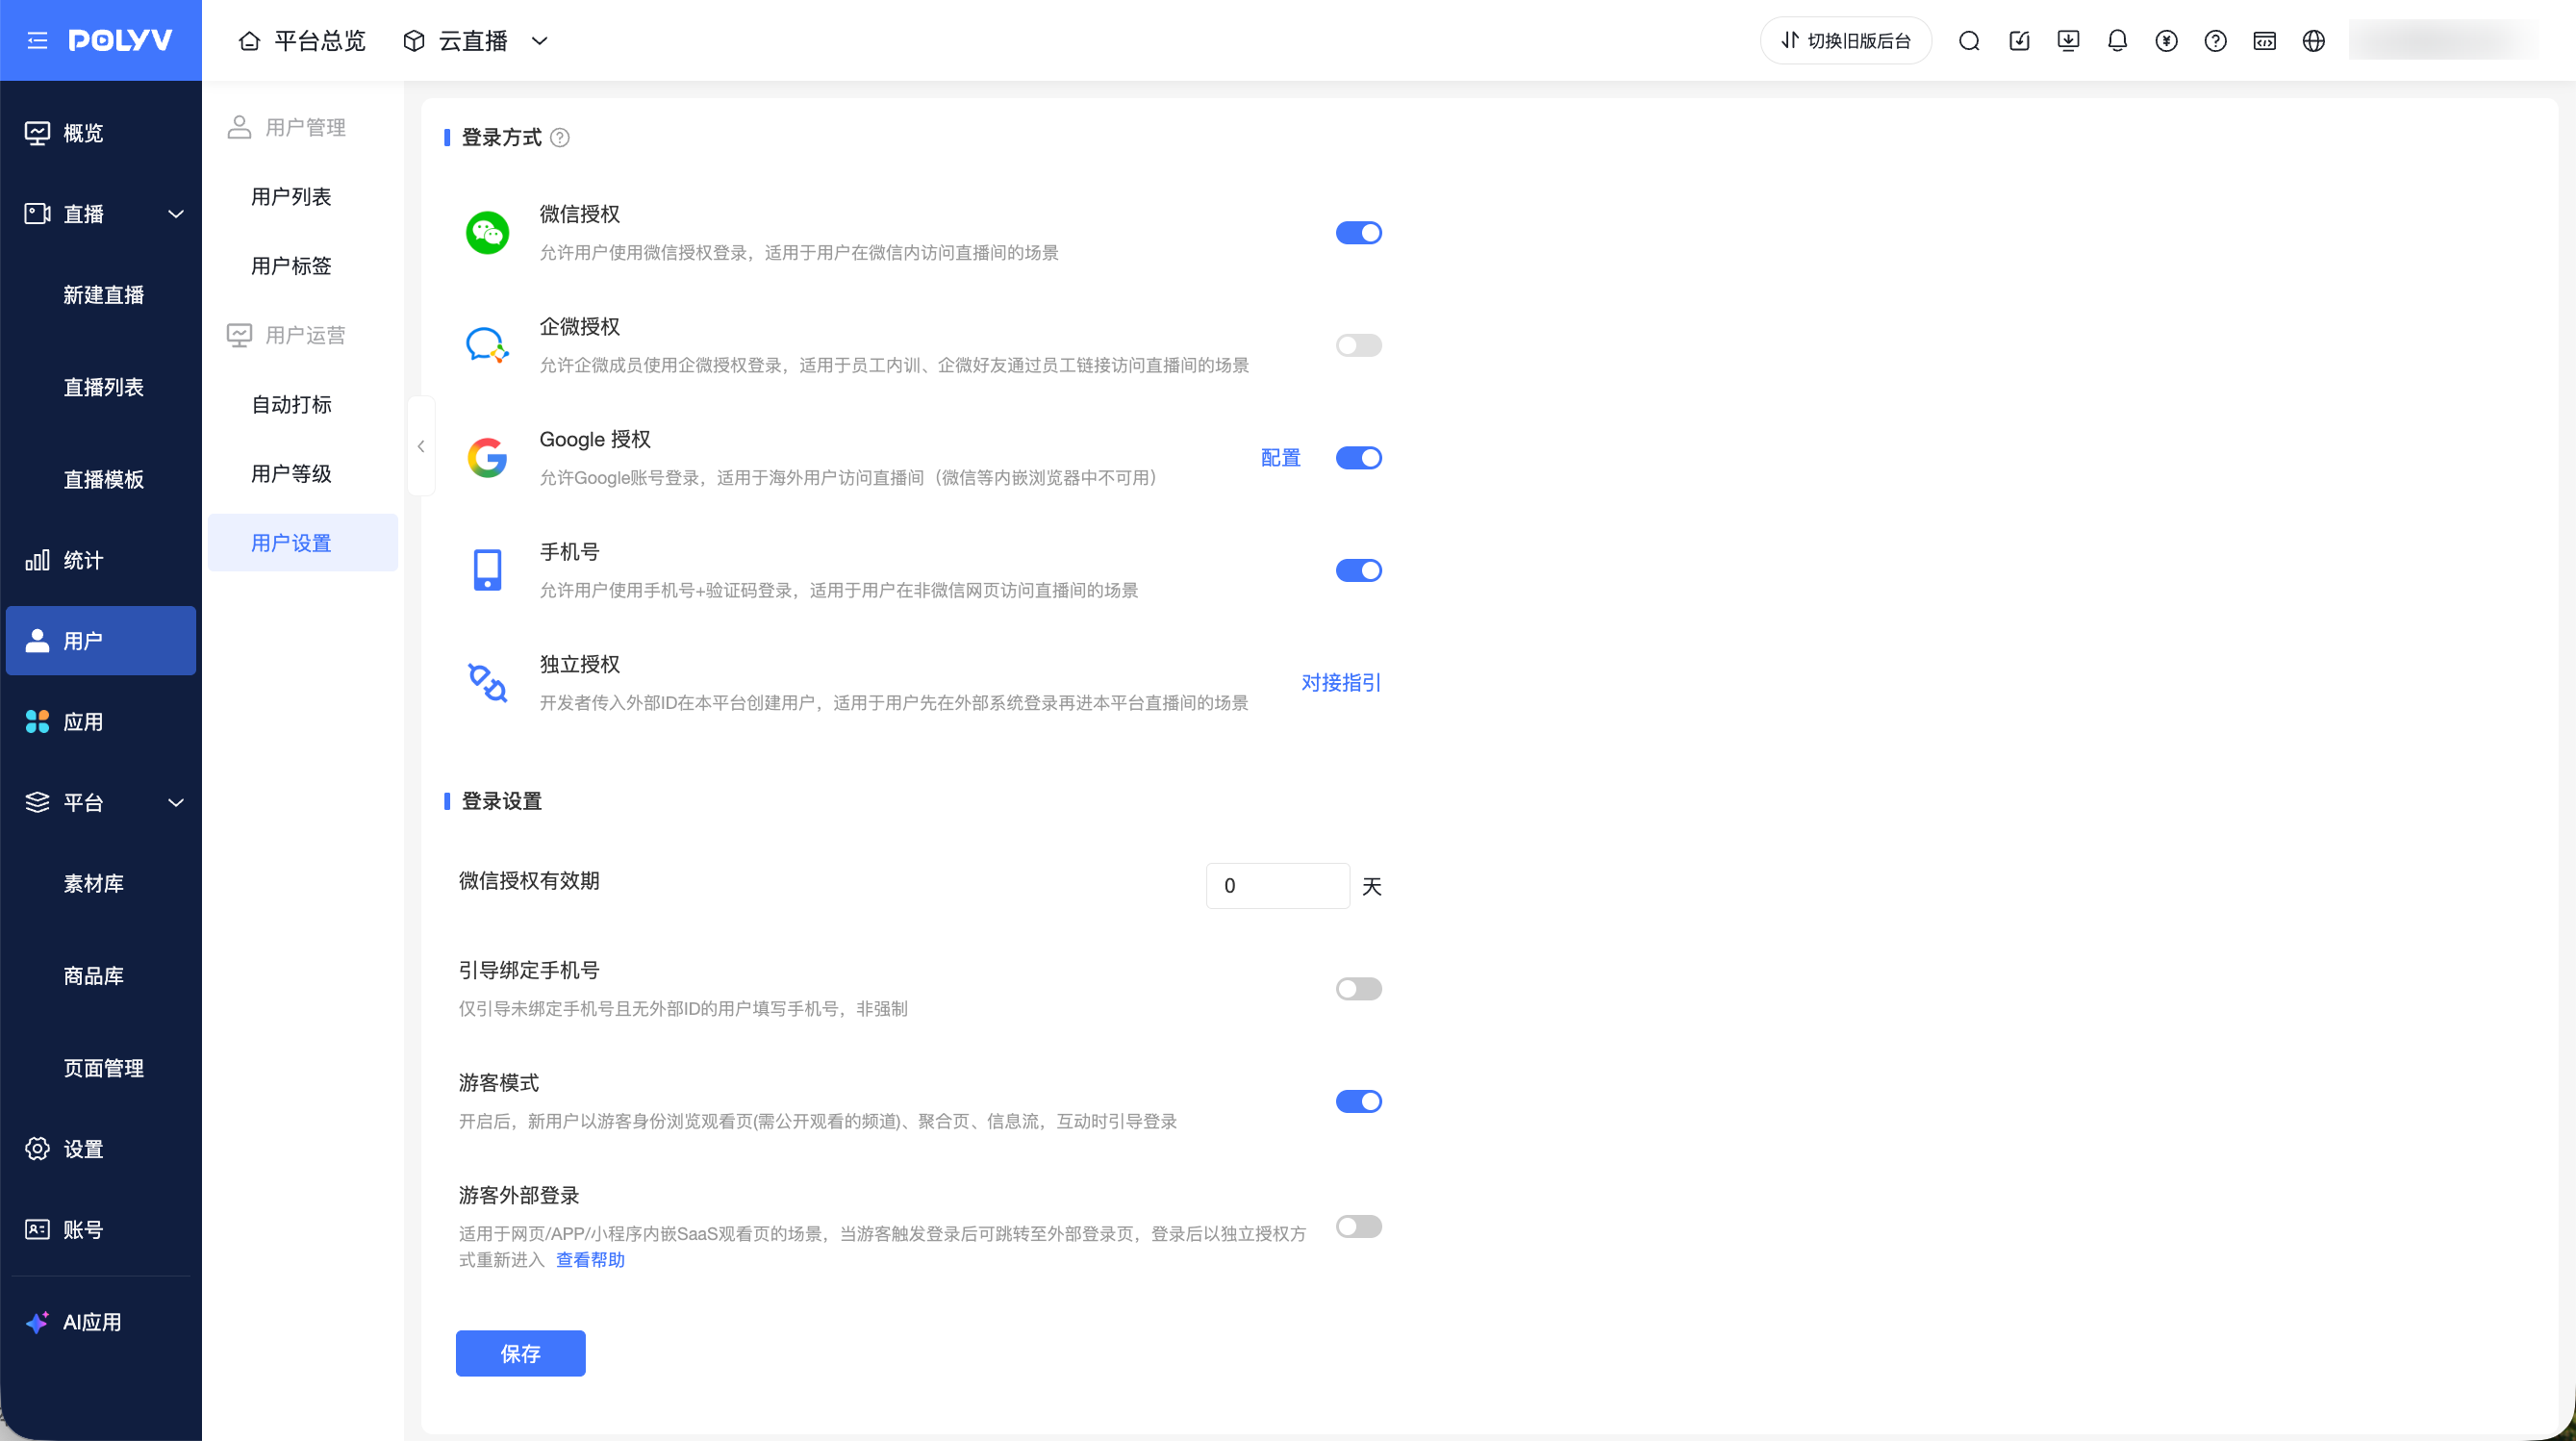
(2) Login Settings:
In [Login Settings], you can configure the WeChat authorization validity period, guide users to bind their phone numbers, and enable guest mode.
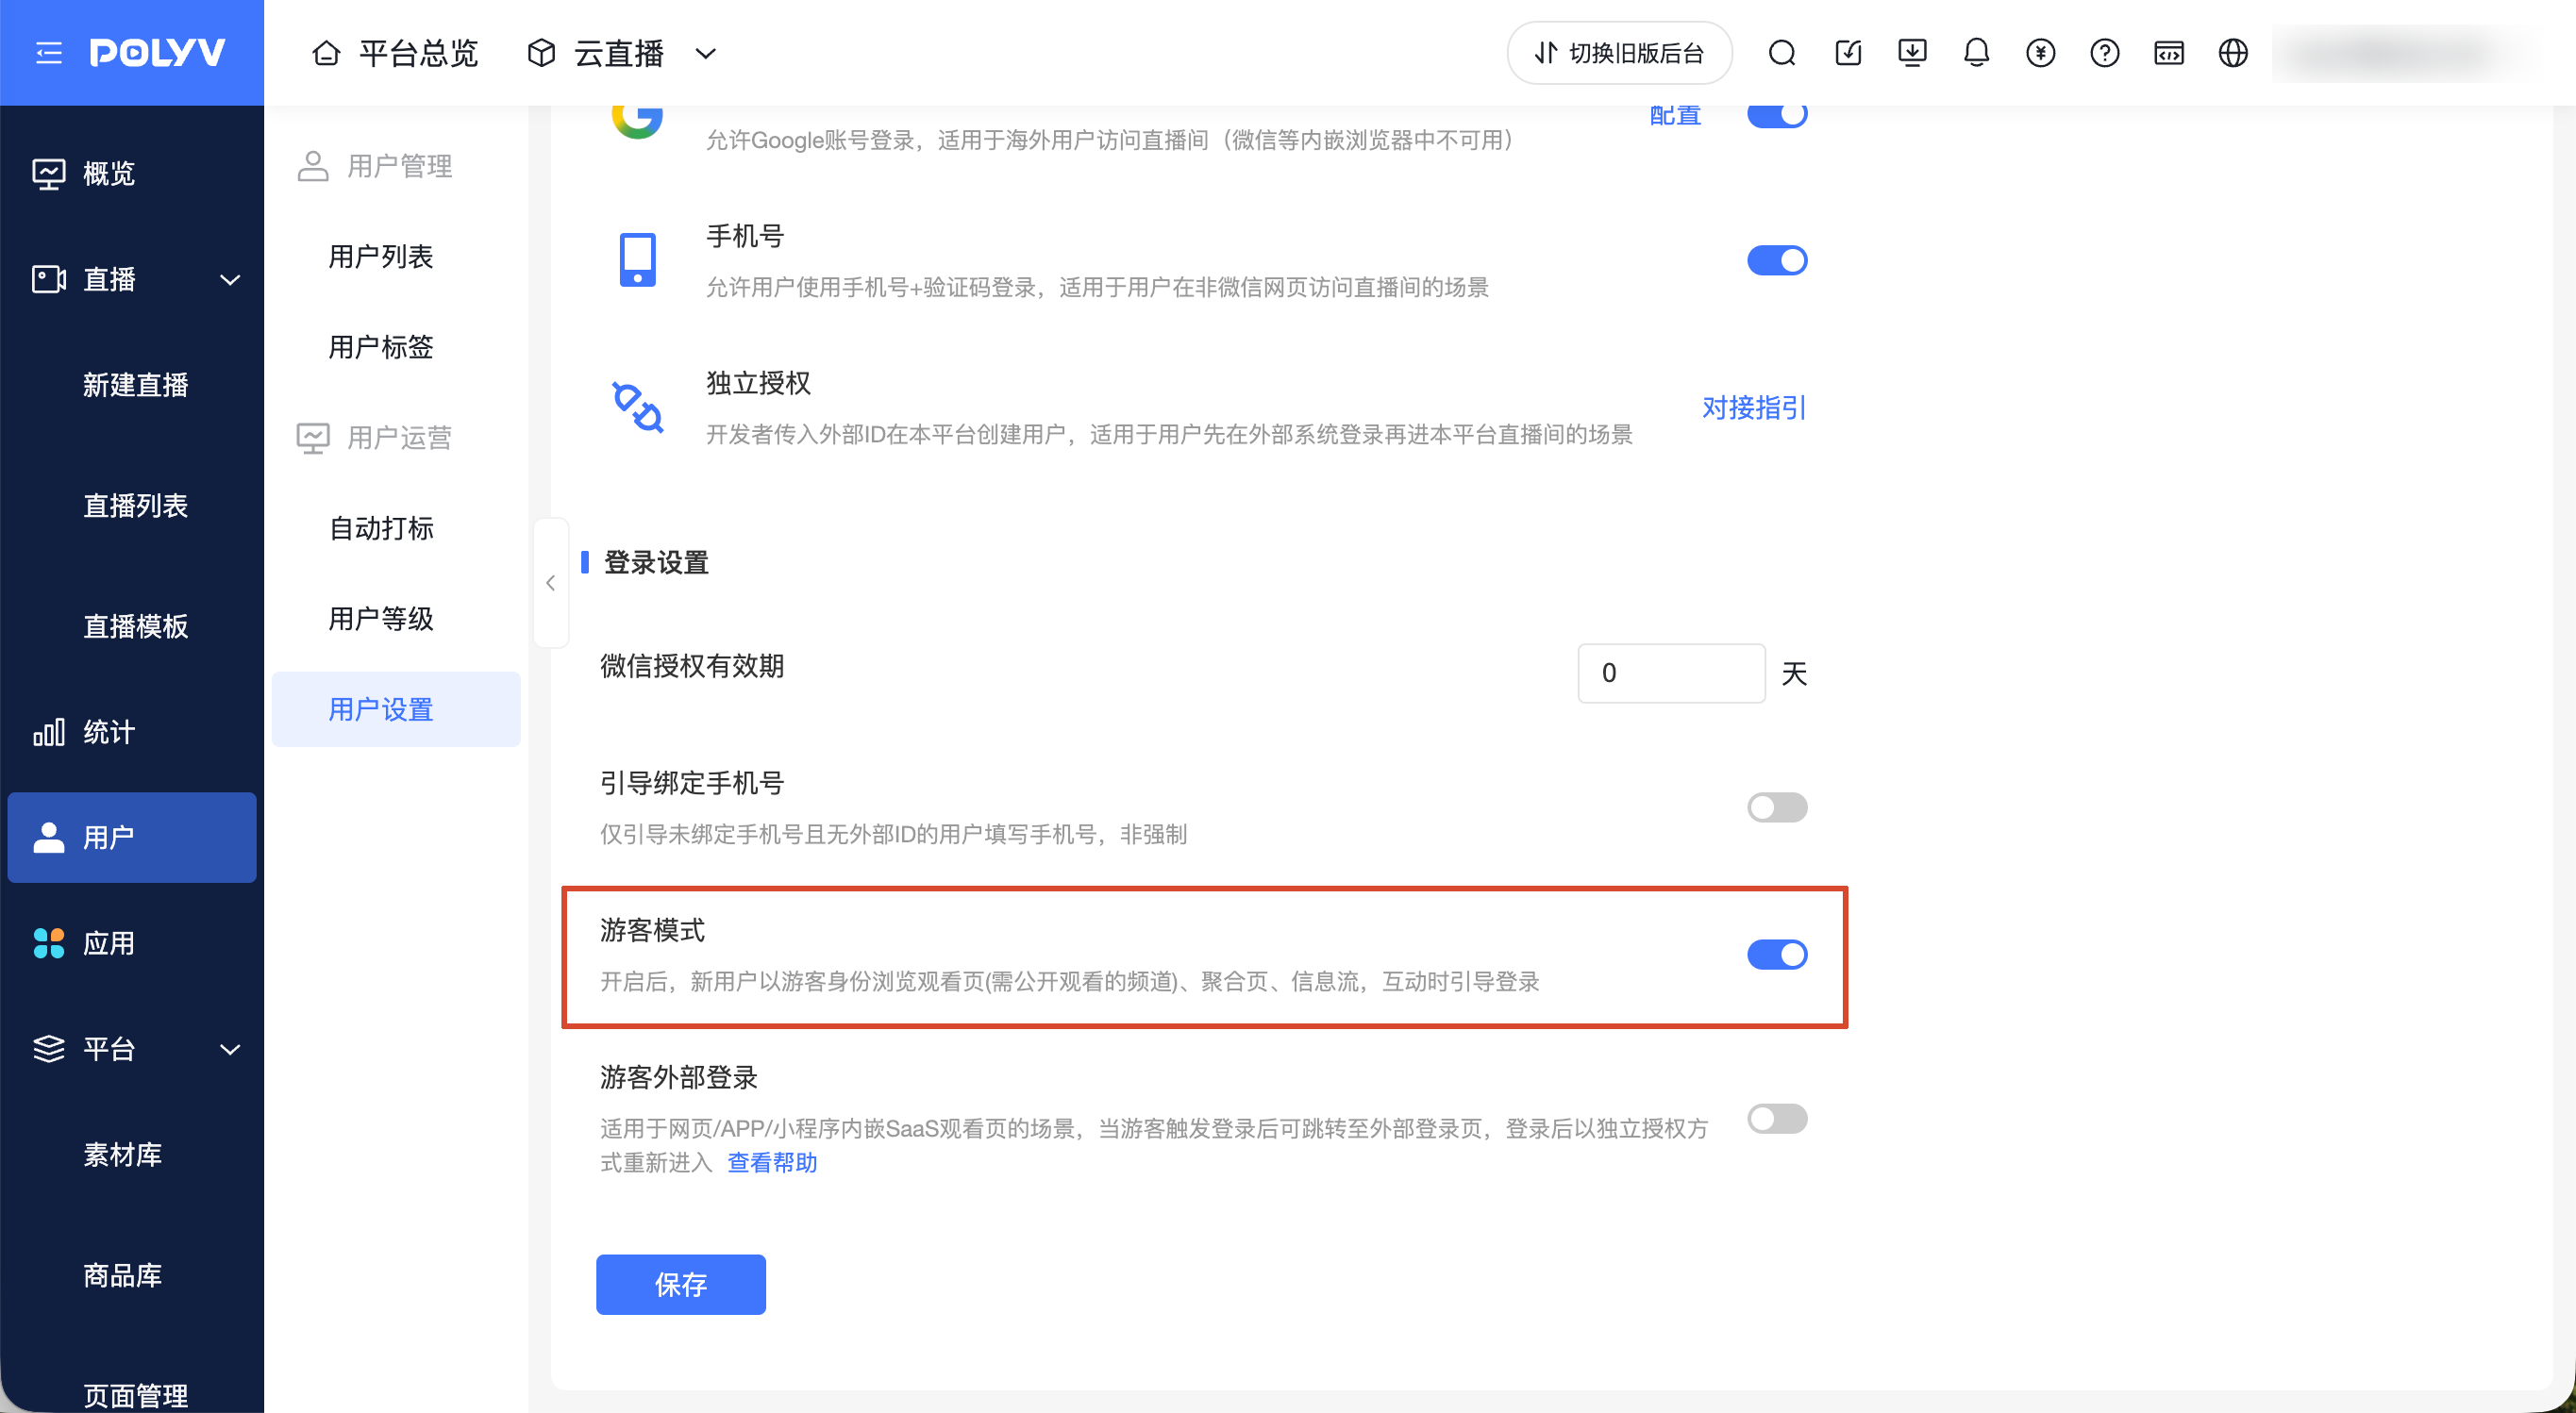
- WeChat Authorization: Supports setting a validity period. Users accessing the viewing page/aggregation page/news feed via WeChat will not need to re-authorize within the validity period, improving the user experience.
- Guide to Bind Phone Number:
- Regardless of whether the [Phone Number] login method is enabled, the system will guide users who have not bound a phone number and have no external ID to fill in their phone number. Suitable for clients distributing live streams within WeChat, using WeChat as the login method to lower the login barrier for users in WeChat, while still collecting user phone numbers for subsequent SMS/phone contact or internal lead distribution.
- Timing for guiding phone number binding on the viewing page: Every time a non-silent authorization (authorization popup appears, viewers need to manually click to authorize) or silent authorization (no authorization popup, viewers are unaware, silent authorization validity is 6 hours) occurs, as long as the phone number field in the user list is empty and the user's external ID is empty, the guidance will be triggered.
- Guest Mode: After enabling [Guest Mode], new users can first browse the viewing page, aggregation page, and news feed as guests, and complete login when interacting in features that require it.
How to enable: Go to [Users] -> [User Settings], enable [Guest Mode] in [Login Settings], then click [Save].
Guest Entry Process into Live Room
The process for guests entering the live room under different channel configurations is as follows:
- Public Video Viewing Channel:
- When the guide page is enabled, guests first view the guide page, click [Enter] to access the viewing page without logging in.
- When the guide page is disabled, guests directly enter the viewing page.
- During a single session of opening the viewing page, the guide page is shown only once; if a guest logs in after entering the viewing page, the guide page will not be shown again.
- Channels with Viewing Conditions (Whitelist, Payment, Password, Registration, etc.):
- Except for Invitation Viewing and WeCom Viewing, regardless of whether the guide page is enabled, guests first view the guide page.
- After clicking the corresponding viewing condition button, guests must first complete login or authorization in a popup, then proceed with viewing condition verification.
- When only one condition (Whitelist, Password, Registration, or Sign-up) is configured, the corresponding condition popup will automatically open once after login returns.
- When multiple viewing conditions are configured, the condition popup will not automatically open after login returns. Viewers can select the condition they need to complete on the guide page.
- If viewing condition verification fails, viewers cannot enter the viewing page.
- WeChat Viewing Channel:
- When the guide page is enabled, guests first view the guide page, then complete WeChat authorization after clicking [Enter].
- When the guide page is disabled, WeChat authorization is completed first according to the original process.
- Invitation Viewing and WeCom Viewing Channels: Continue to follow the original login and condition verification process to enter the live room, unaffected by this process adjustment.
For more information on viewing conditions, see Viewing Conditions.
Features Available to Guests
After entering the viewing page, guests can perform the following operations:
- Receive real-time chat messages and scroll up to view historical chat messages.
- View the like count and like animation effects.
- View product widgets.
- View large and small product push cards.
- View coupon widgets.
- View conditional lottery widgets (not supported without conditions).
- View lucky draw widgets.
- View the [My Rewards] entry.
When a guest clicks to speak or clicks on the above entries, cards, or widgets, the system will guide the guest to log in. Guests can complete login within a half-screen login popup without leaving the live room.
2. Tagging
Supports the following 3 tagging methods.
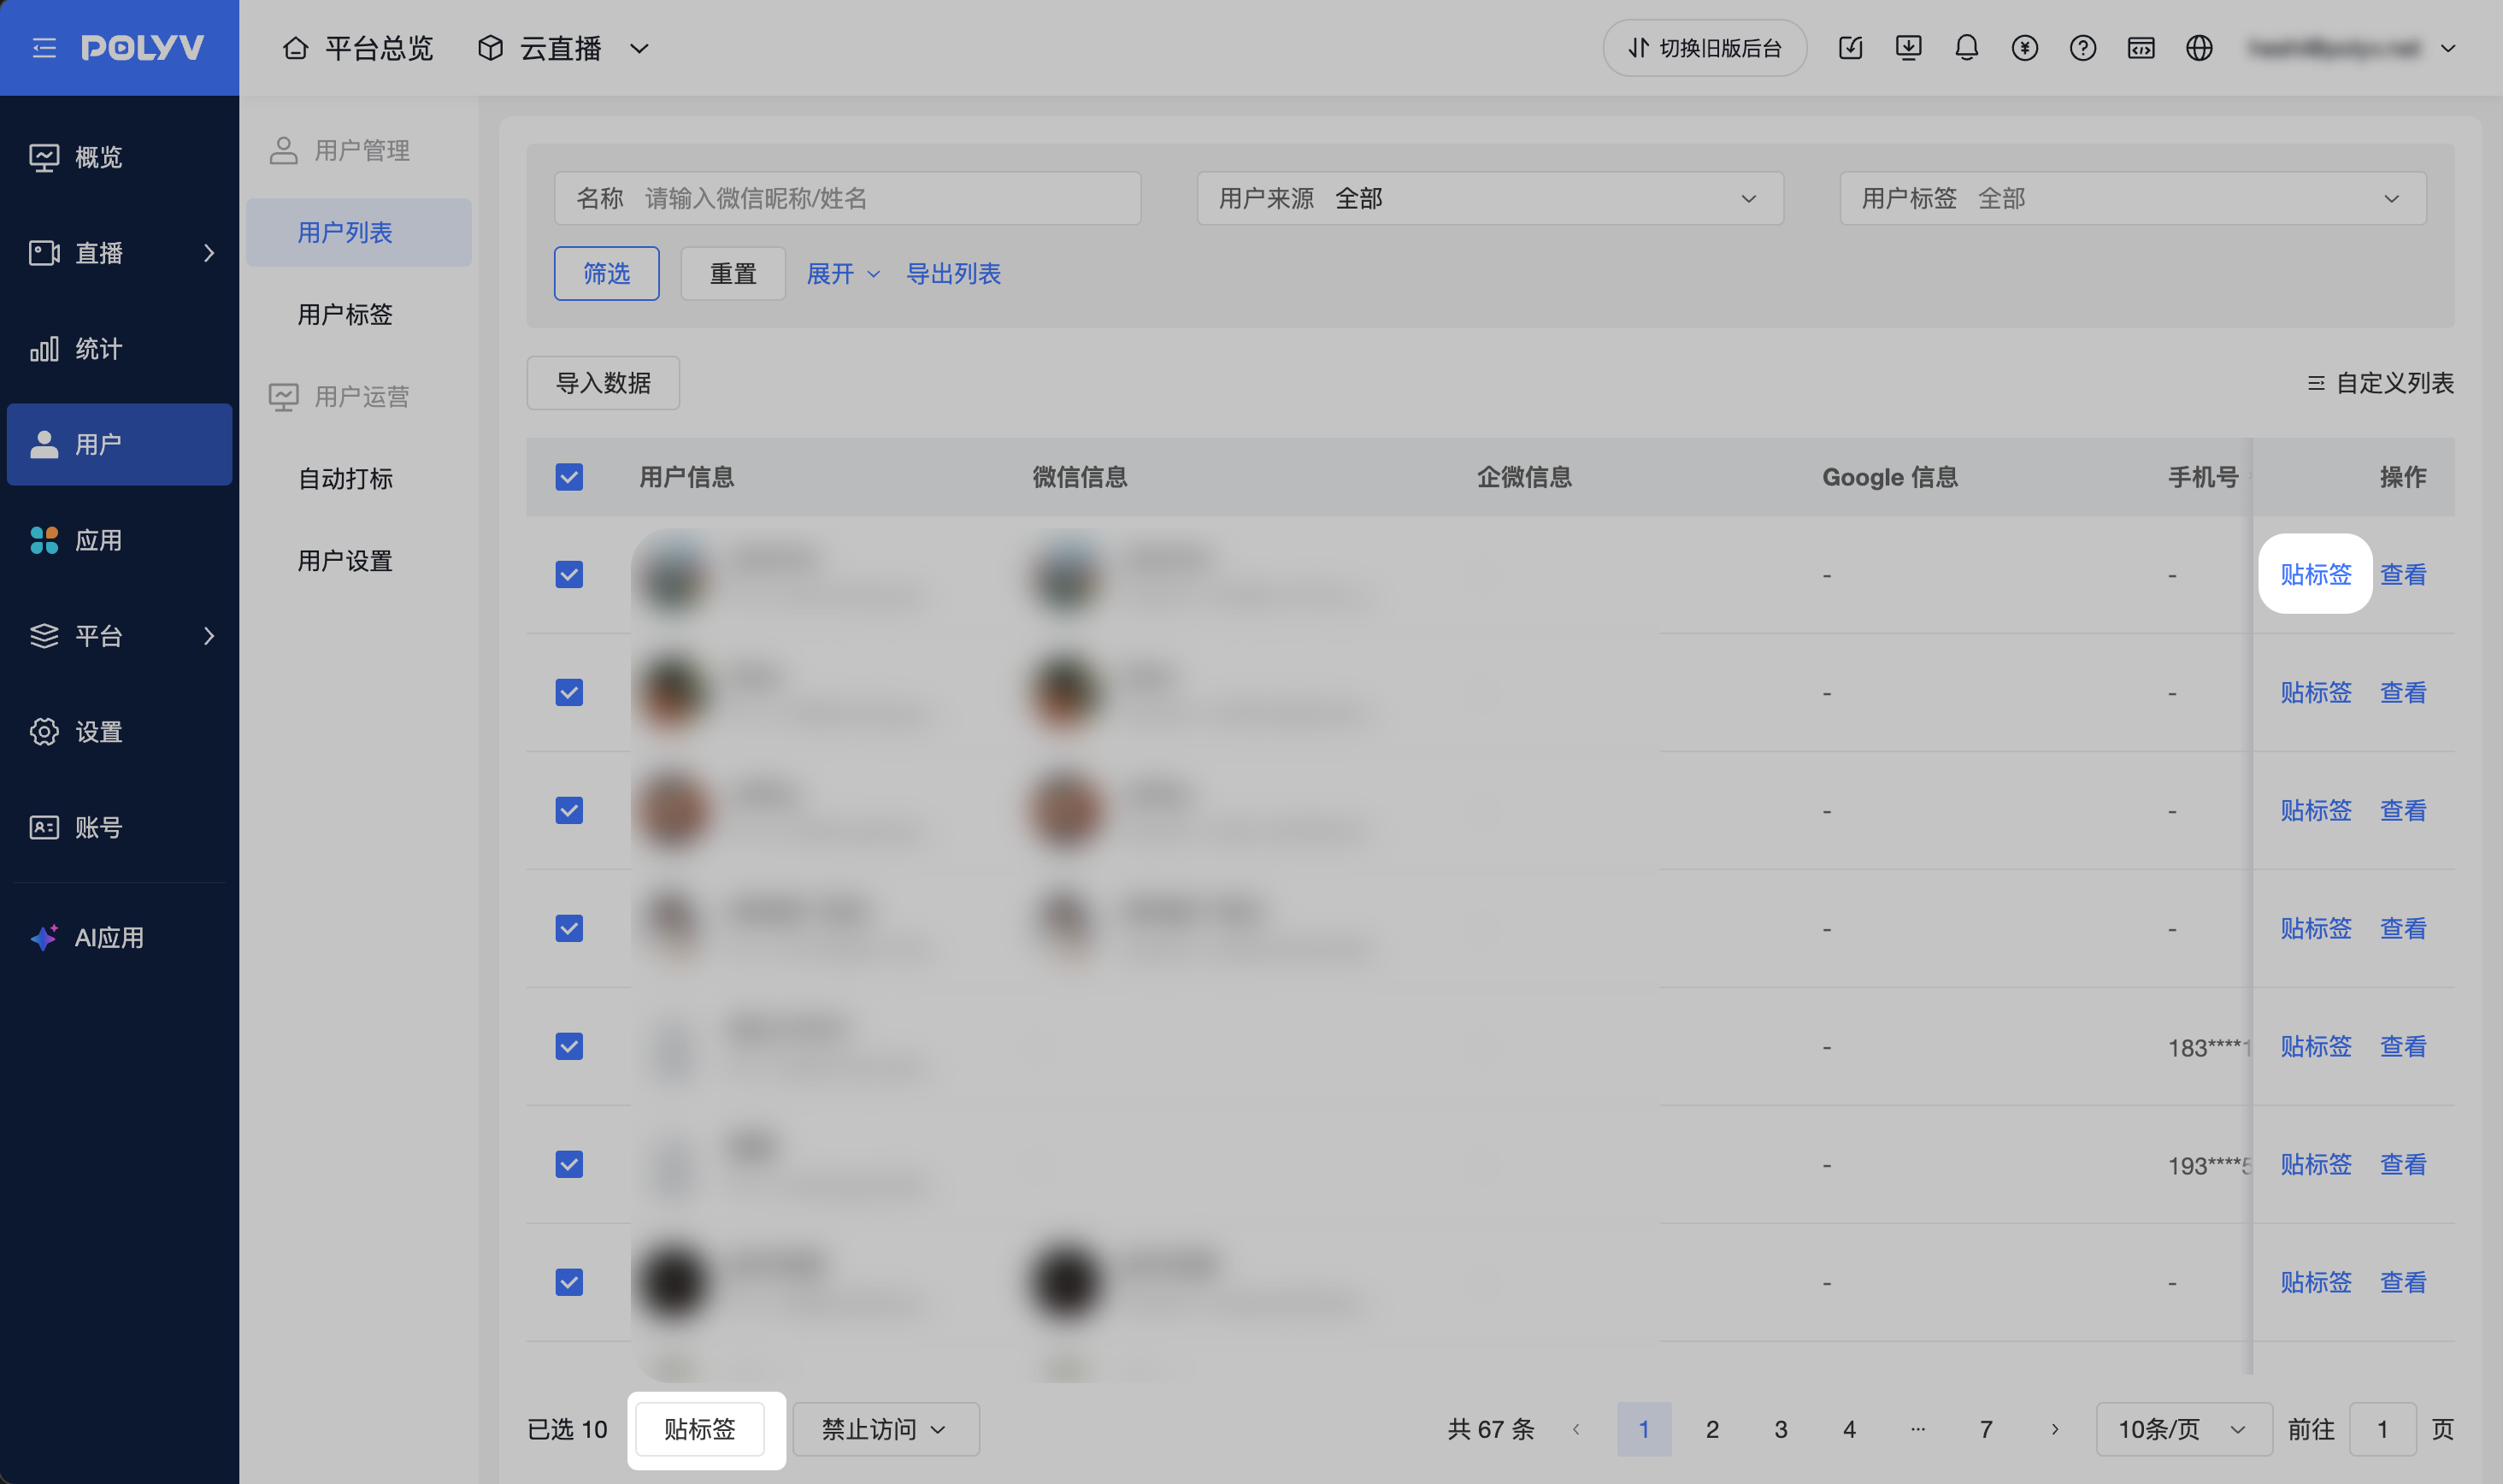
Method 1: Manual Tagging
You can [Tag] a single user in the management console, or select multiple users and perform [Batch Tagging].
Method 2: Import Tags
You can download the import template, fill in the tag information in the spreadsheet, and then upload the Excel file to complete the import.
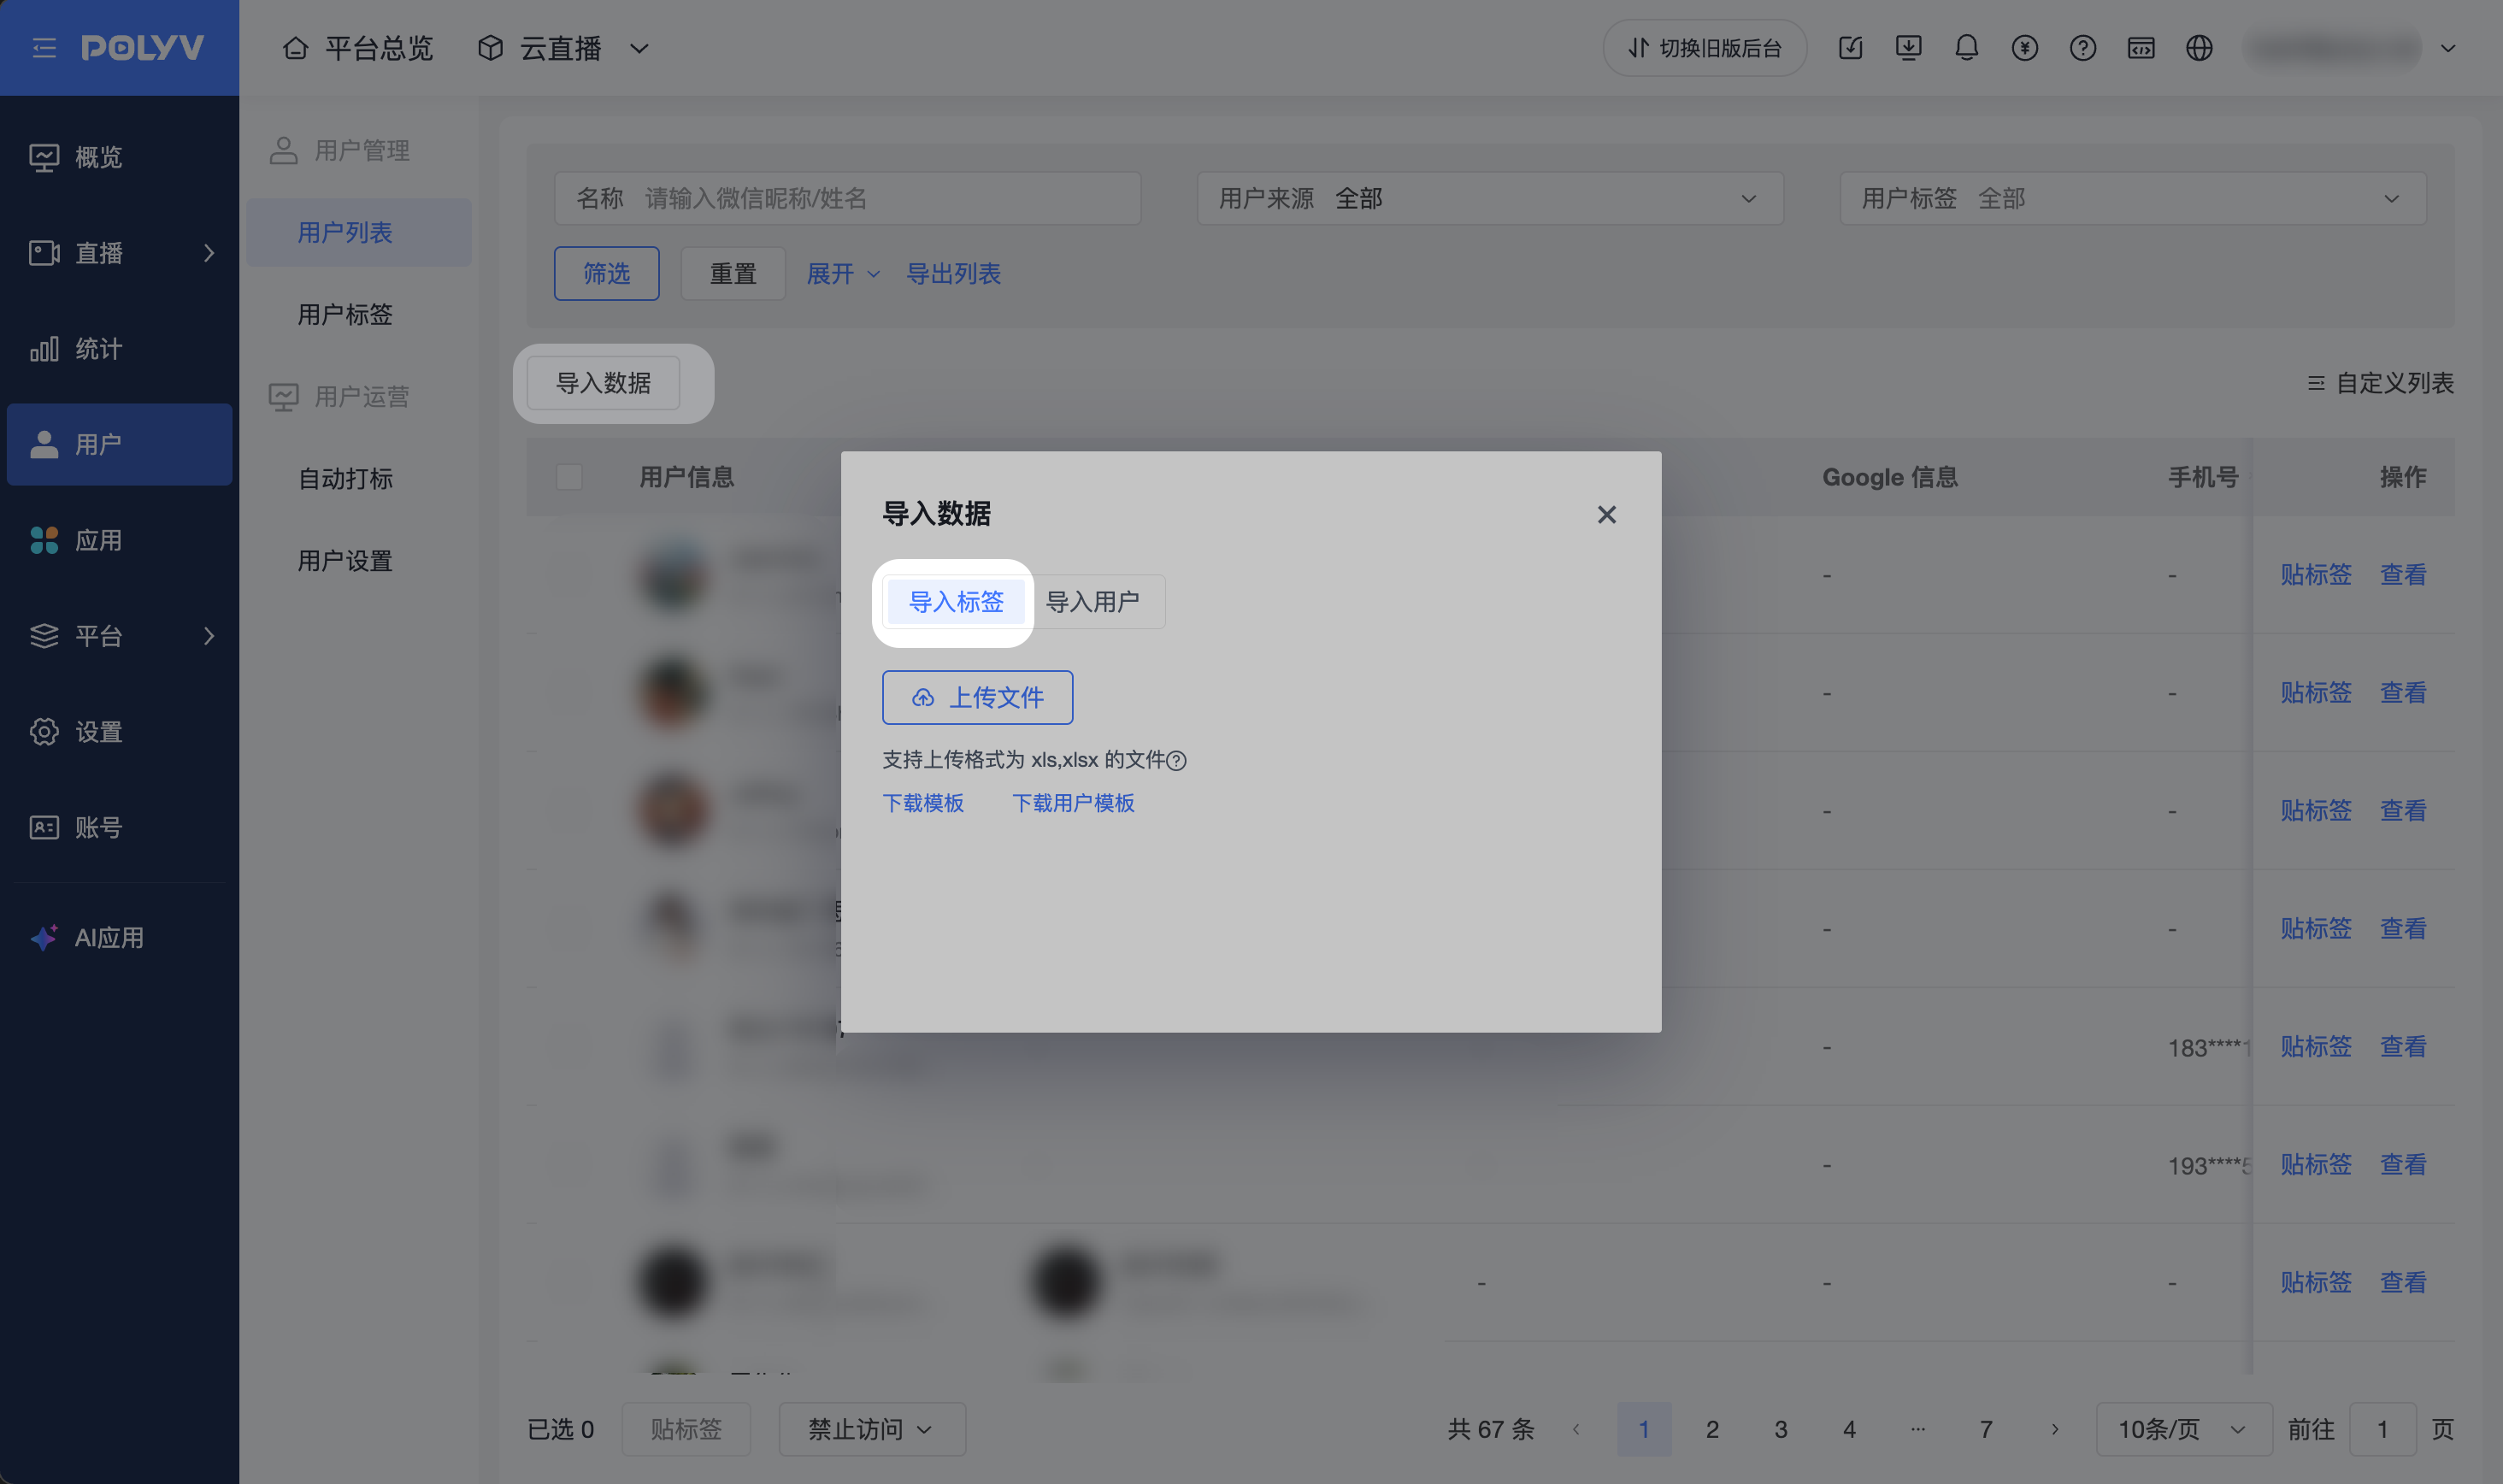
Template Description:
- To import a batch of new users and tag them, select [Download Template].
- To tag existing users, select [Download User Template]. The current user information will be included when downloading.
Method 3: Automatic Tagging
Automatically tag users based on their behavior within the live room.
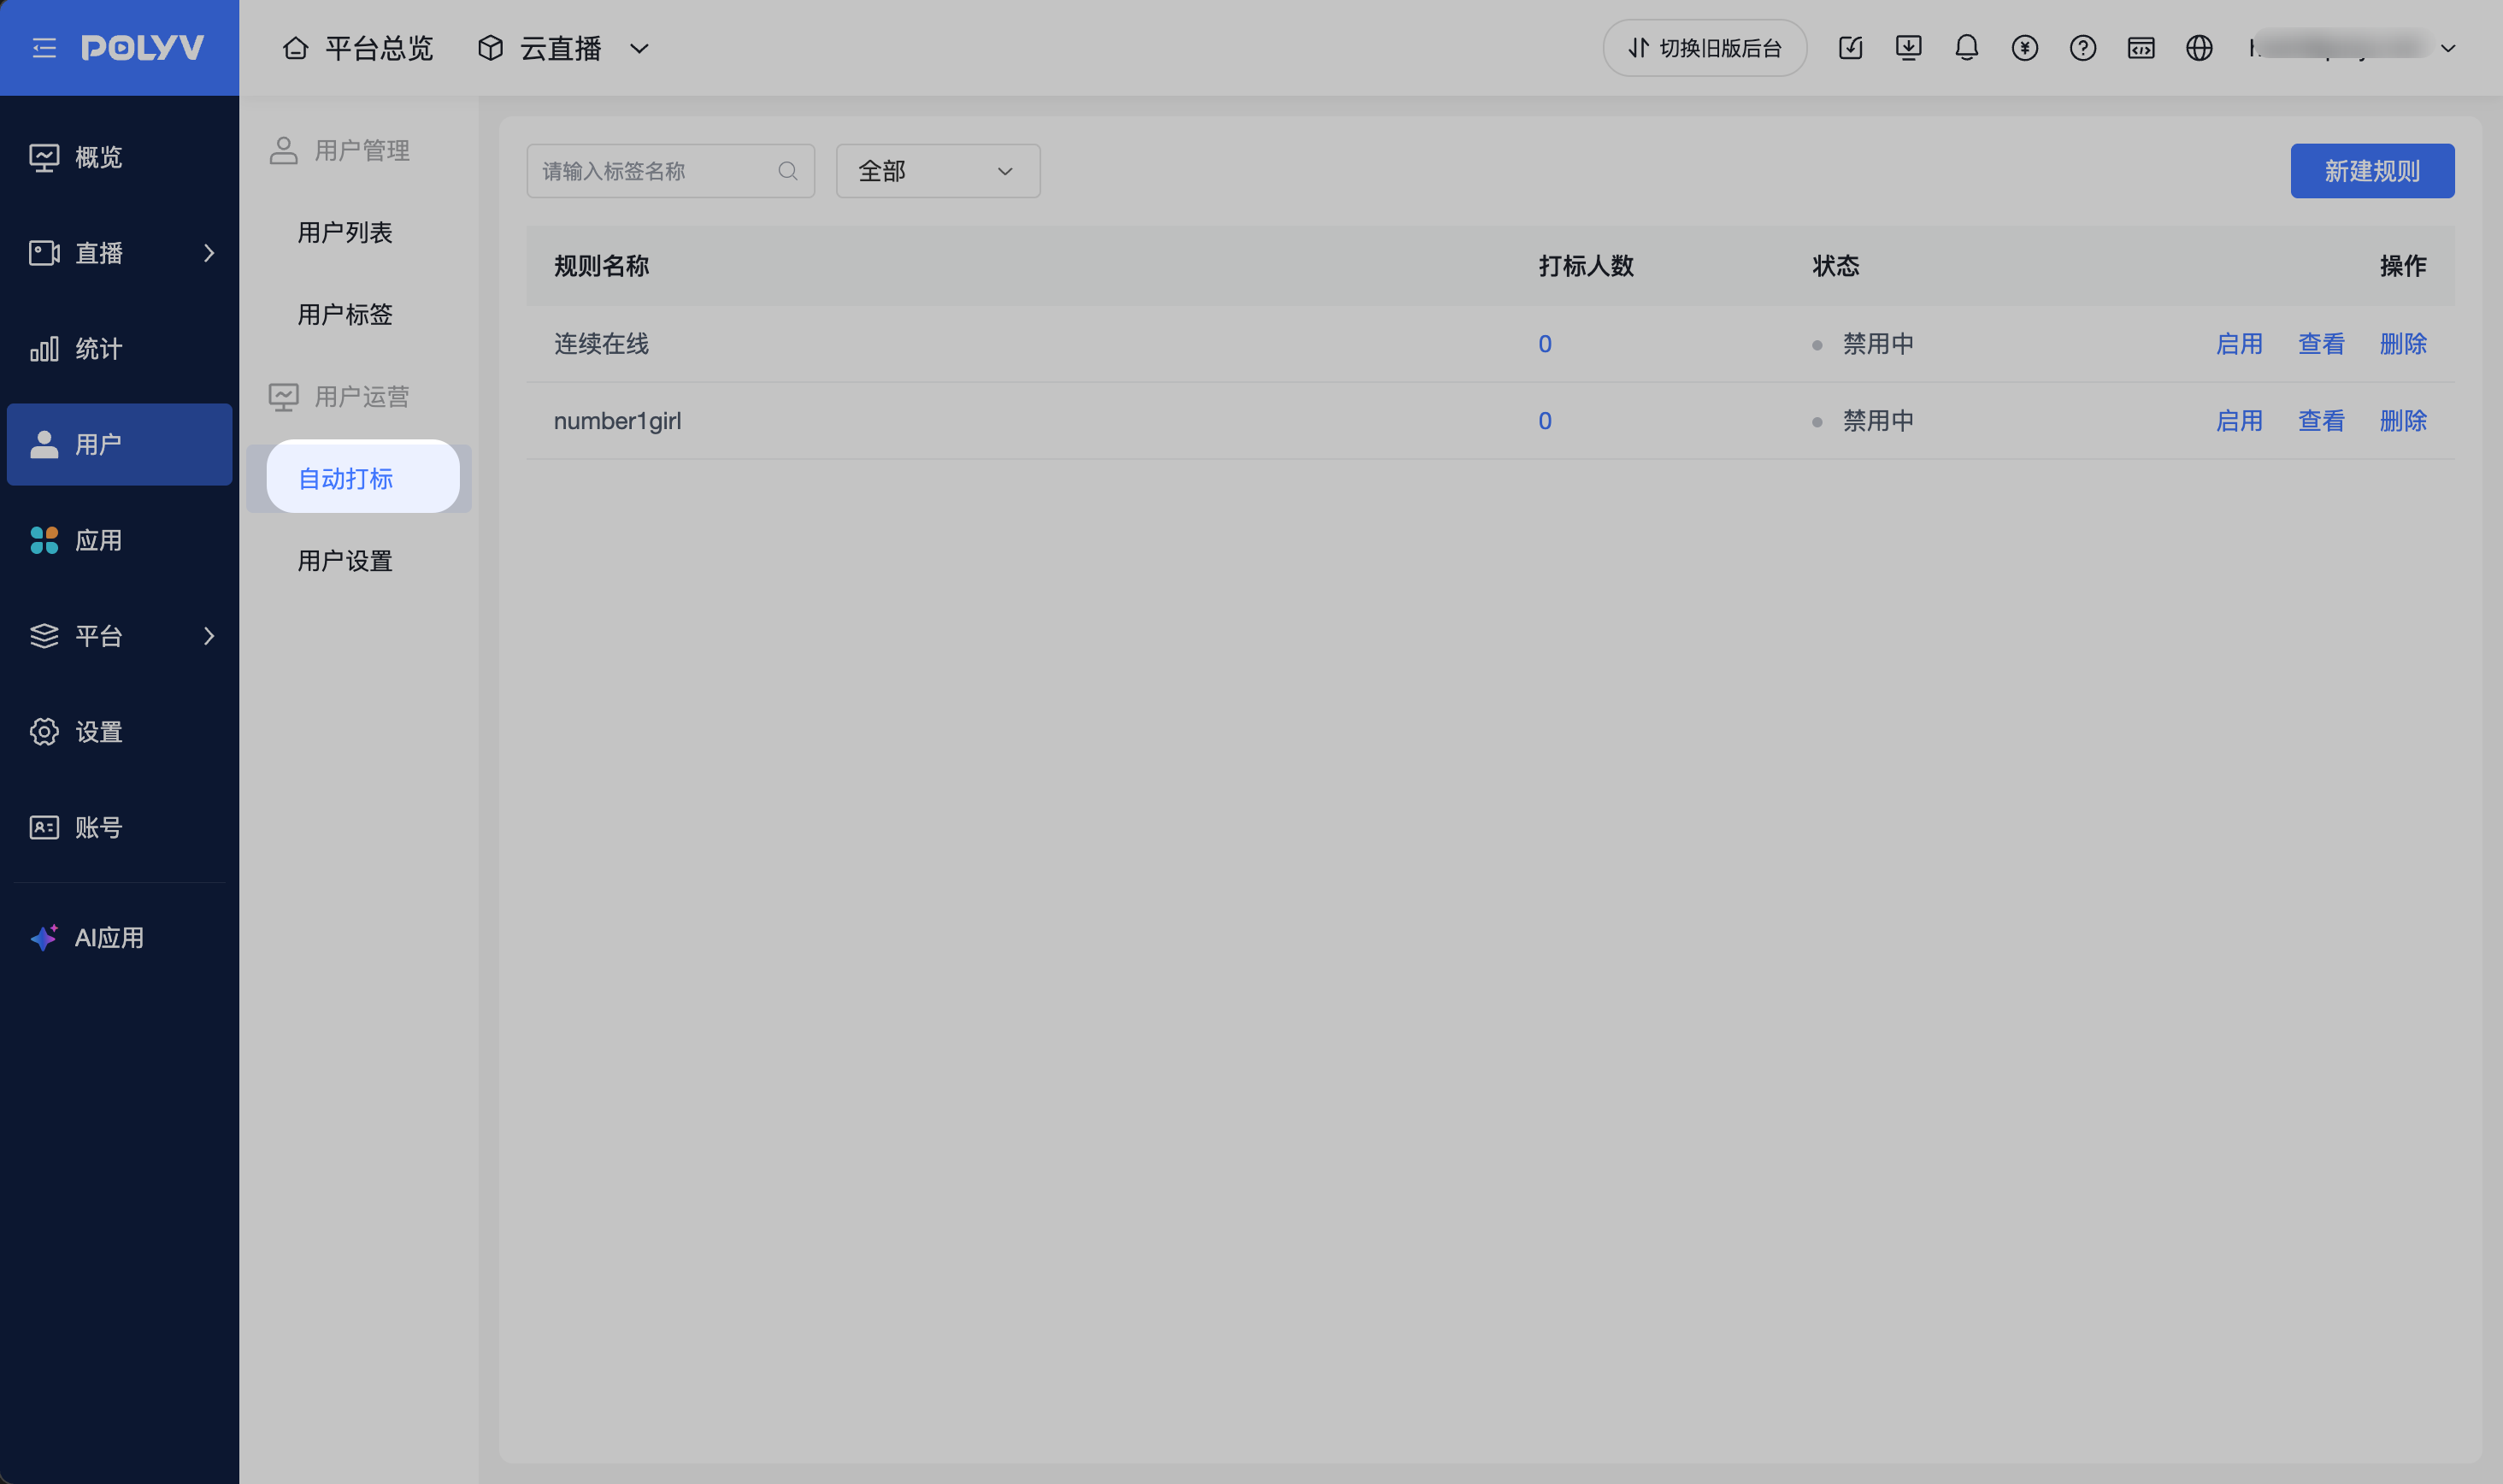
Automatic Tagging Rule Configuration
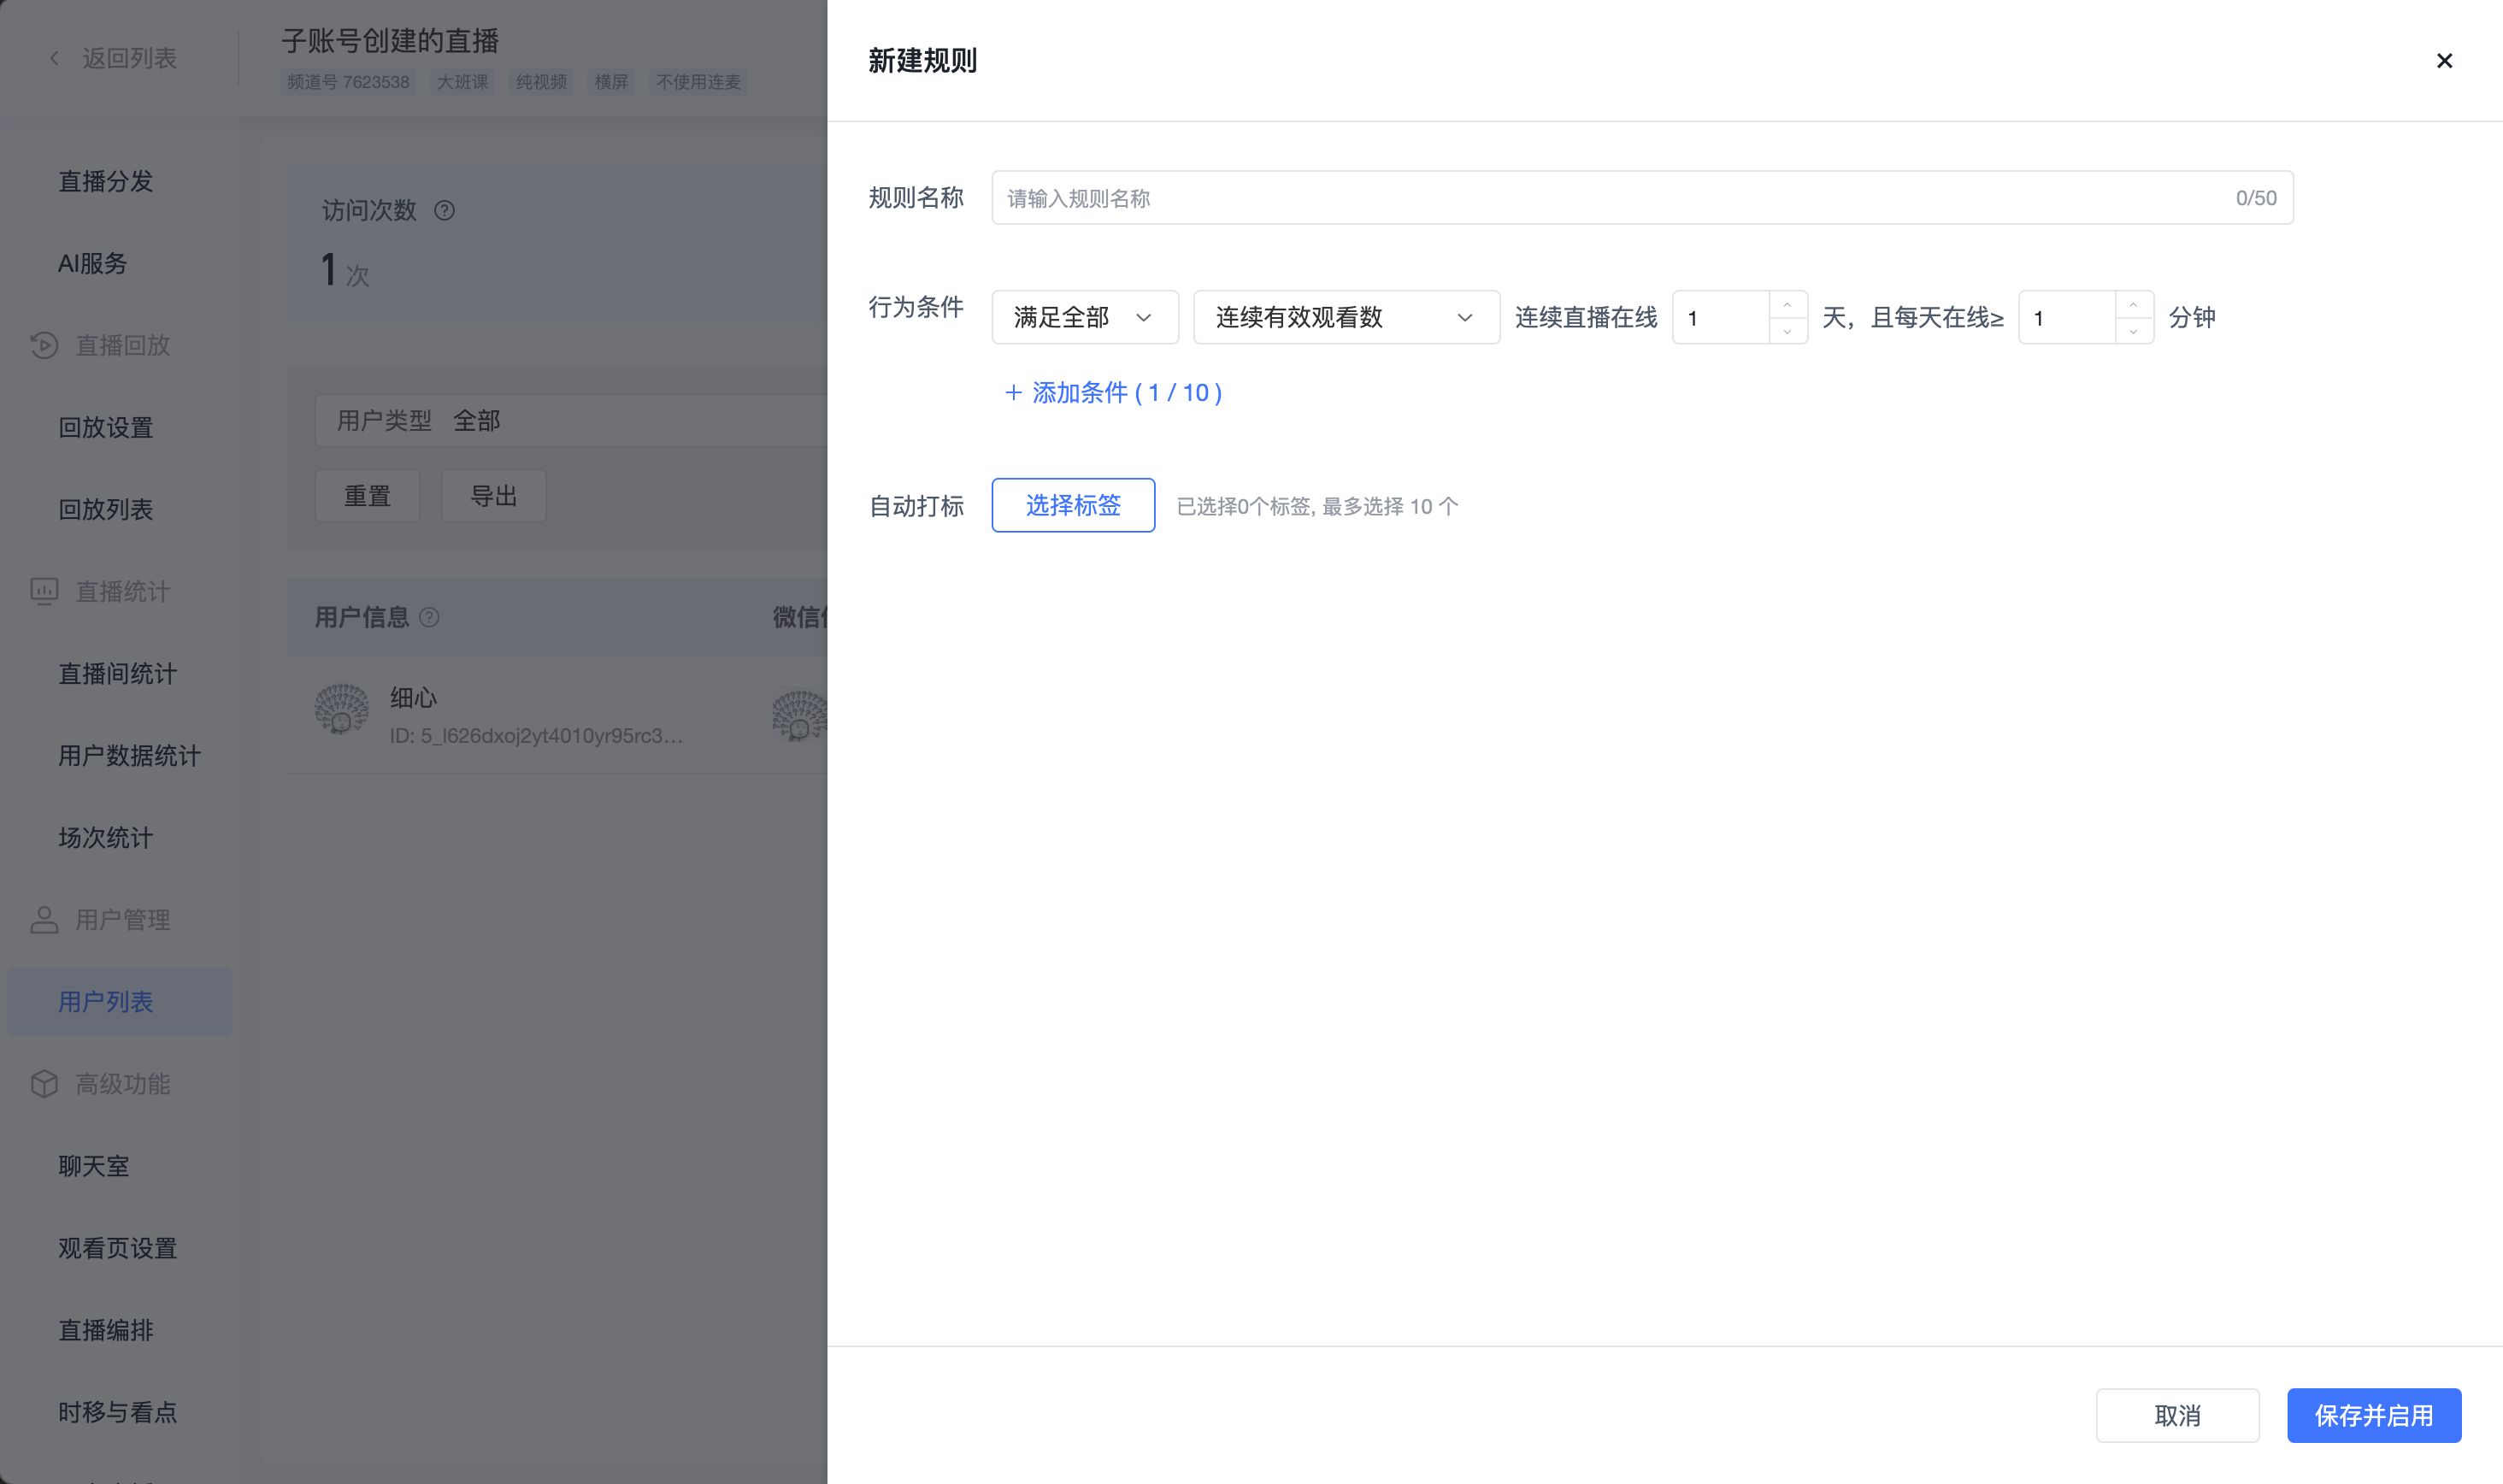
Click [New Rule] to configure automatic tagging rules.
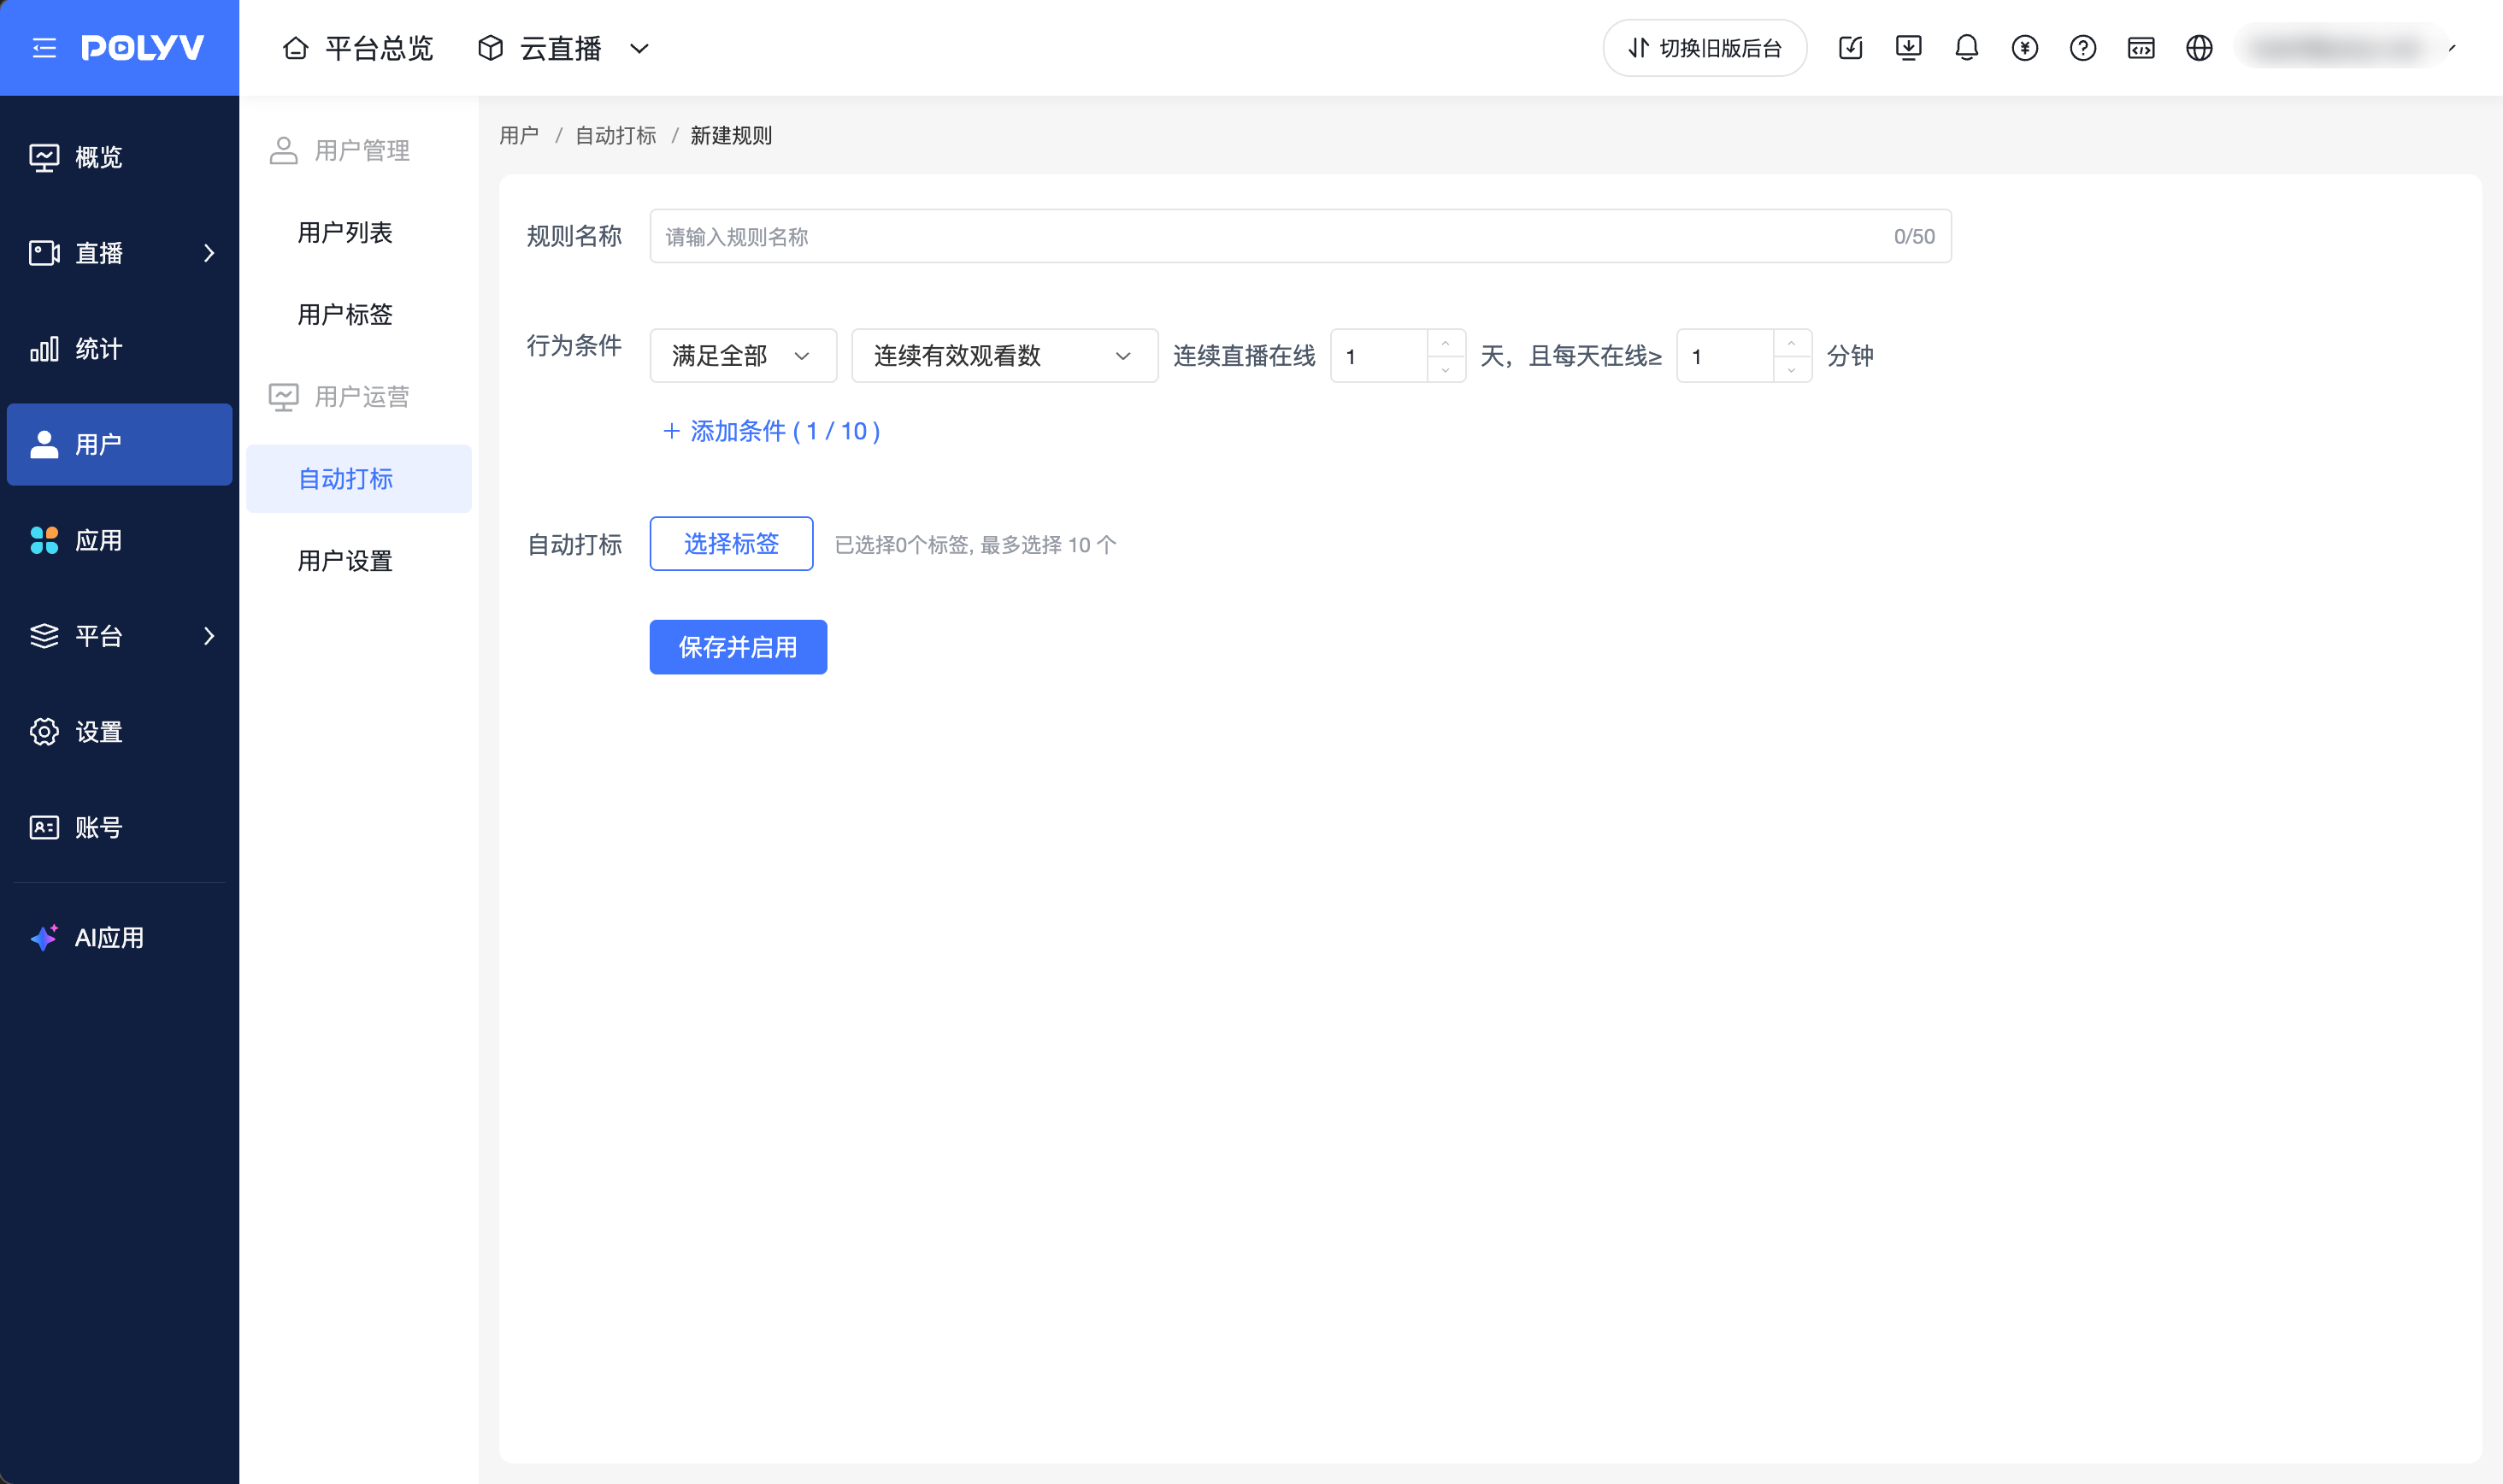
| Configuration Item | Description |
|---|---|
| Rule Name | Custom rule name, up to 50 characters. |
| Behavior Conditions | Supports configuring 1 to 10 conditions. Condition types include: Consecutive Valid Views, Cumulative Check-ins, Cumulative Messages. |
| Condition Relationship | [Meet All]: Tag is applied only when all conditions are met; [Meet Any]: Tag is applied when any one condition is met. |
| Consecutive Valid Views | Online for X consecutive live days, with a minimum online duration of X minutes per day. |
| Cumulative Check-ins | Cumulative check-ins reach X times. |
| Cumulative Messages | Cumulative messages reach X times. |
| Automatic Tag | Select the tag to be automatically added when the rule is satisfied. |
| Select Channel | [All Channels]: The rule applies to all channels; [Specific Channels]: The rule applies only to the selected channels. |
3. Using Tags
Tags can be used in the following 3 types of operational scenarios.
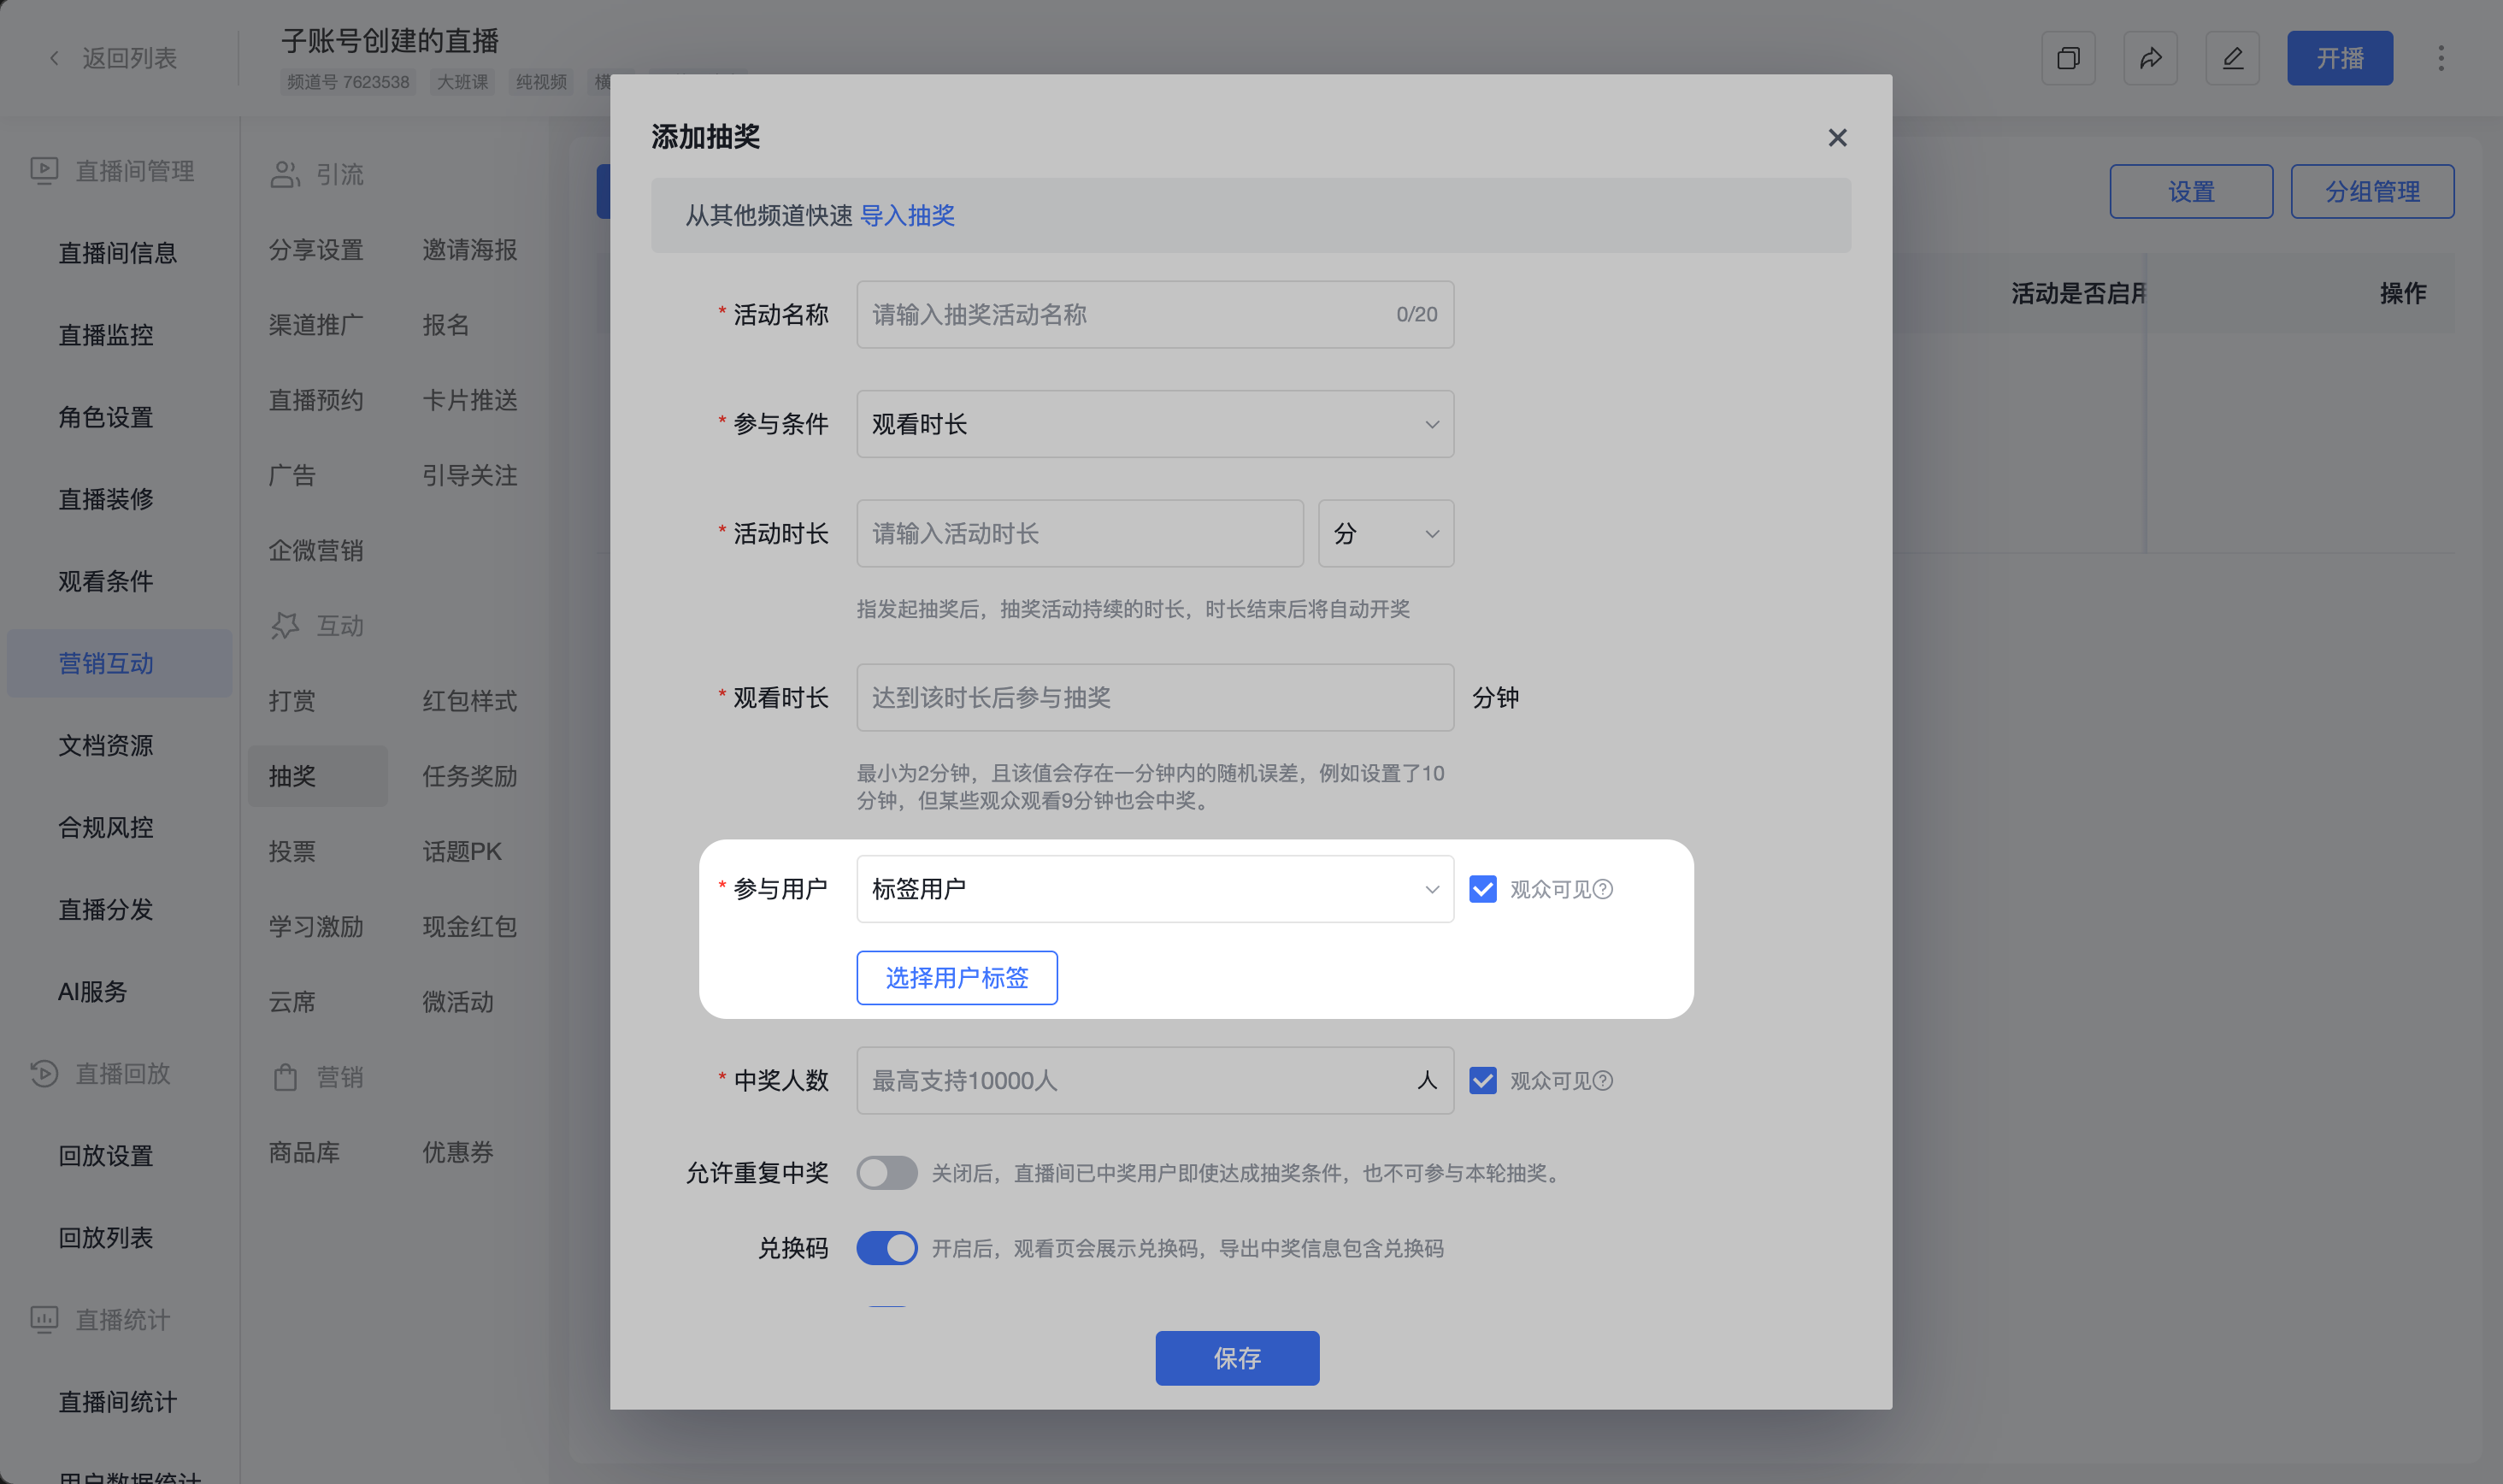
Scenario 1: Lottery Activity
When creating a new lottery in the management console, you can select users with specific tags to participate.
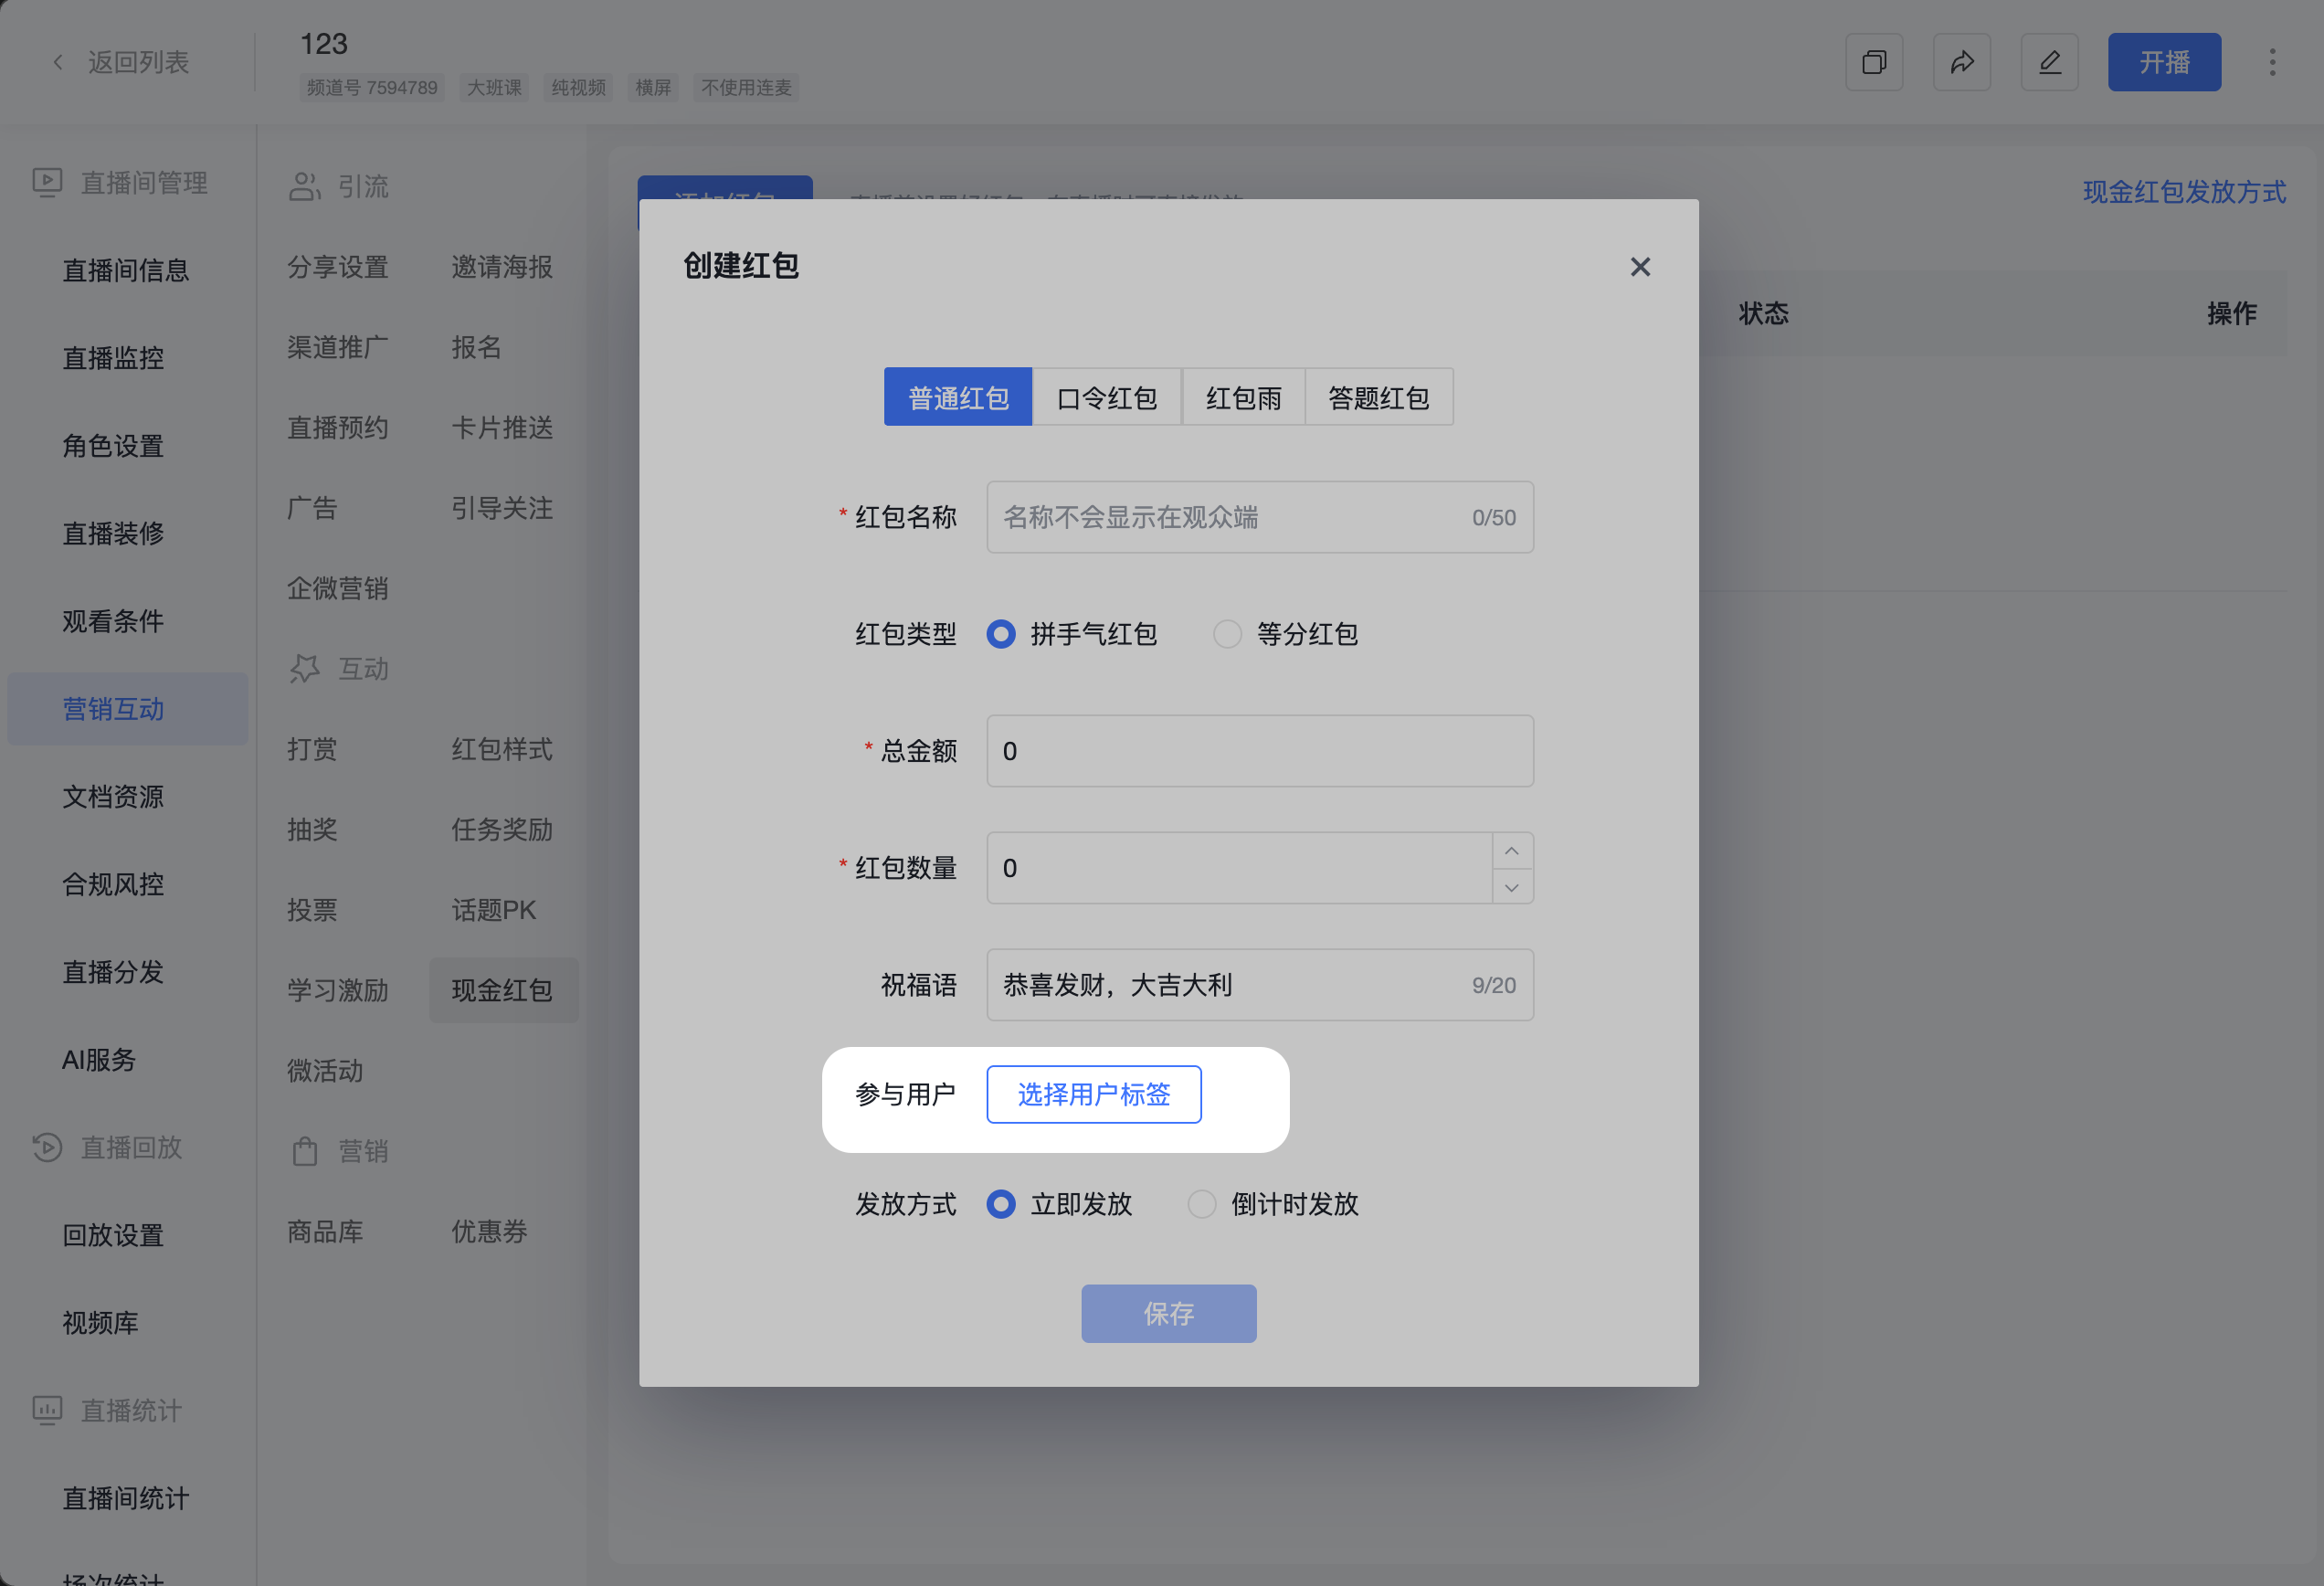
Scenario 2: Red Packet Activity
When creating a new red packet in the management console, you can select users with specific tags to participate.
Scenario 3: Task Rewards
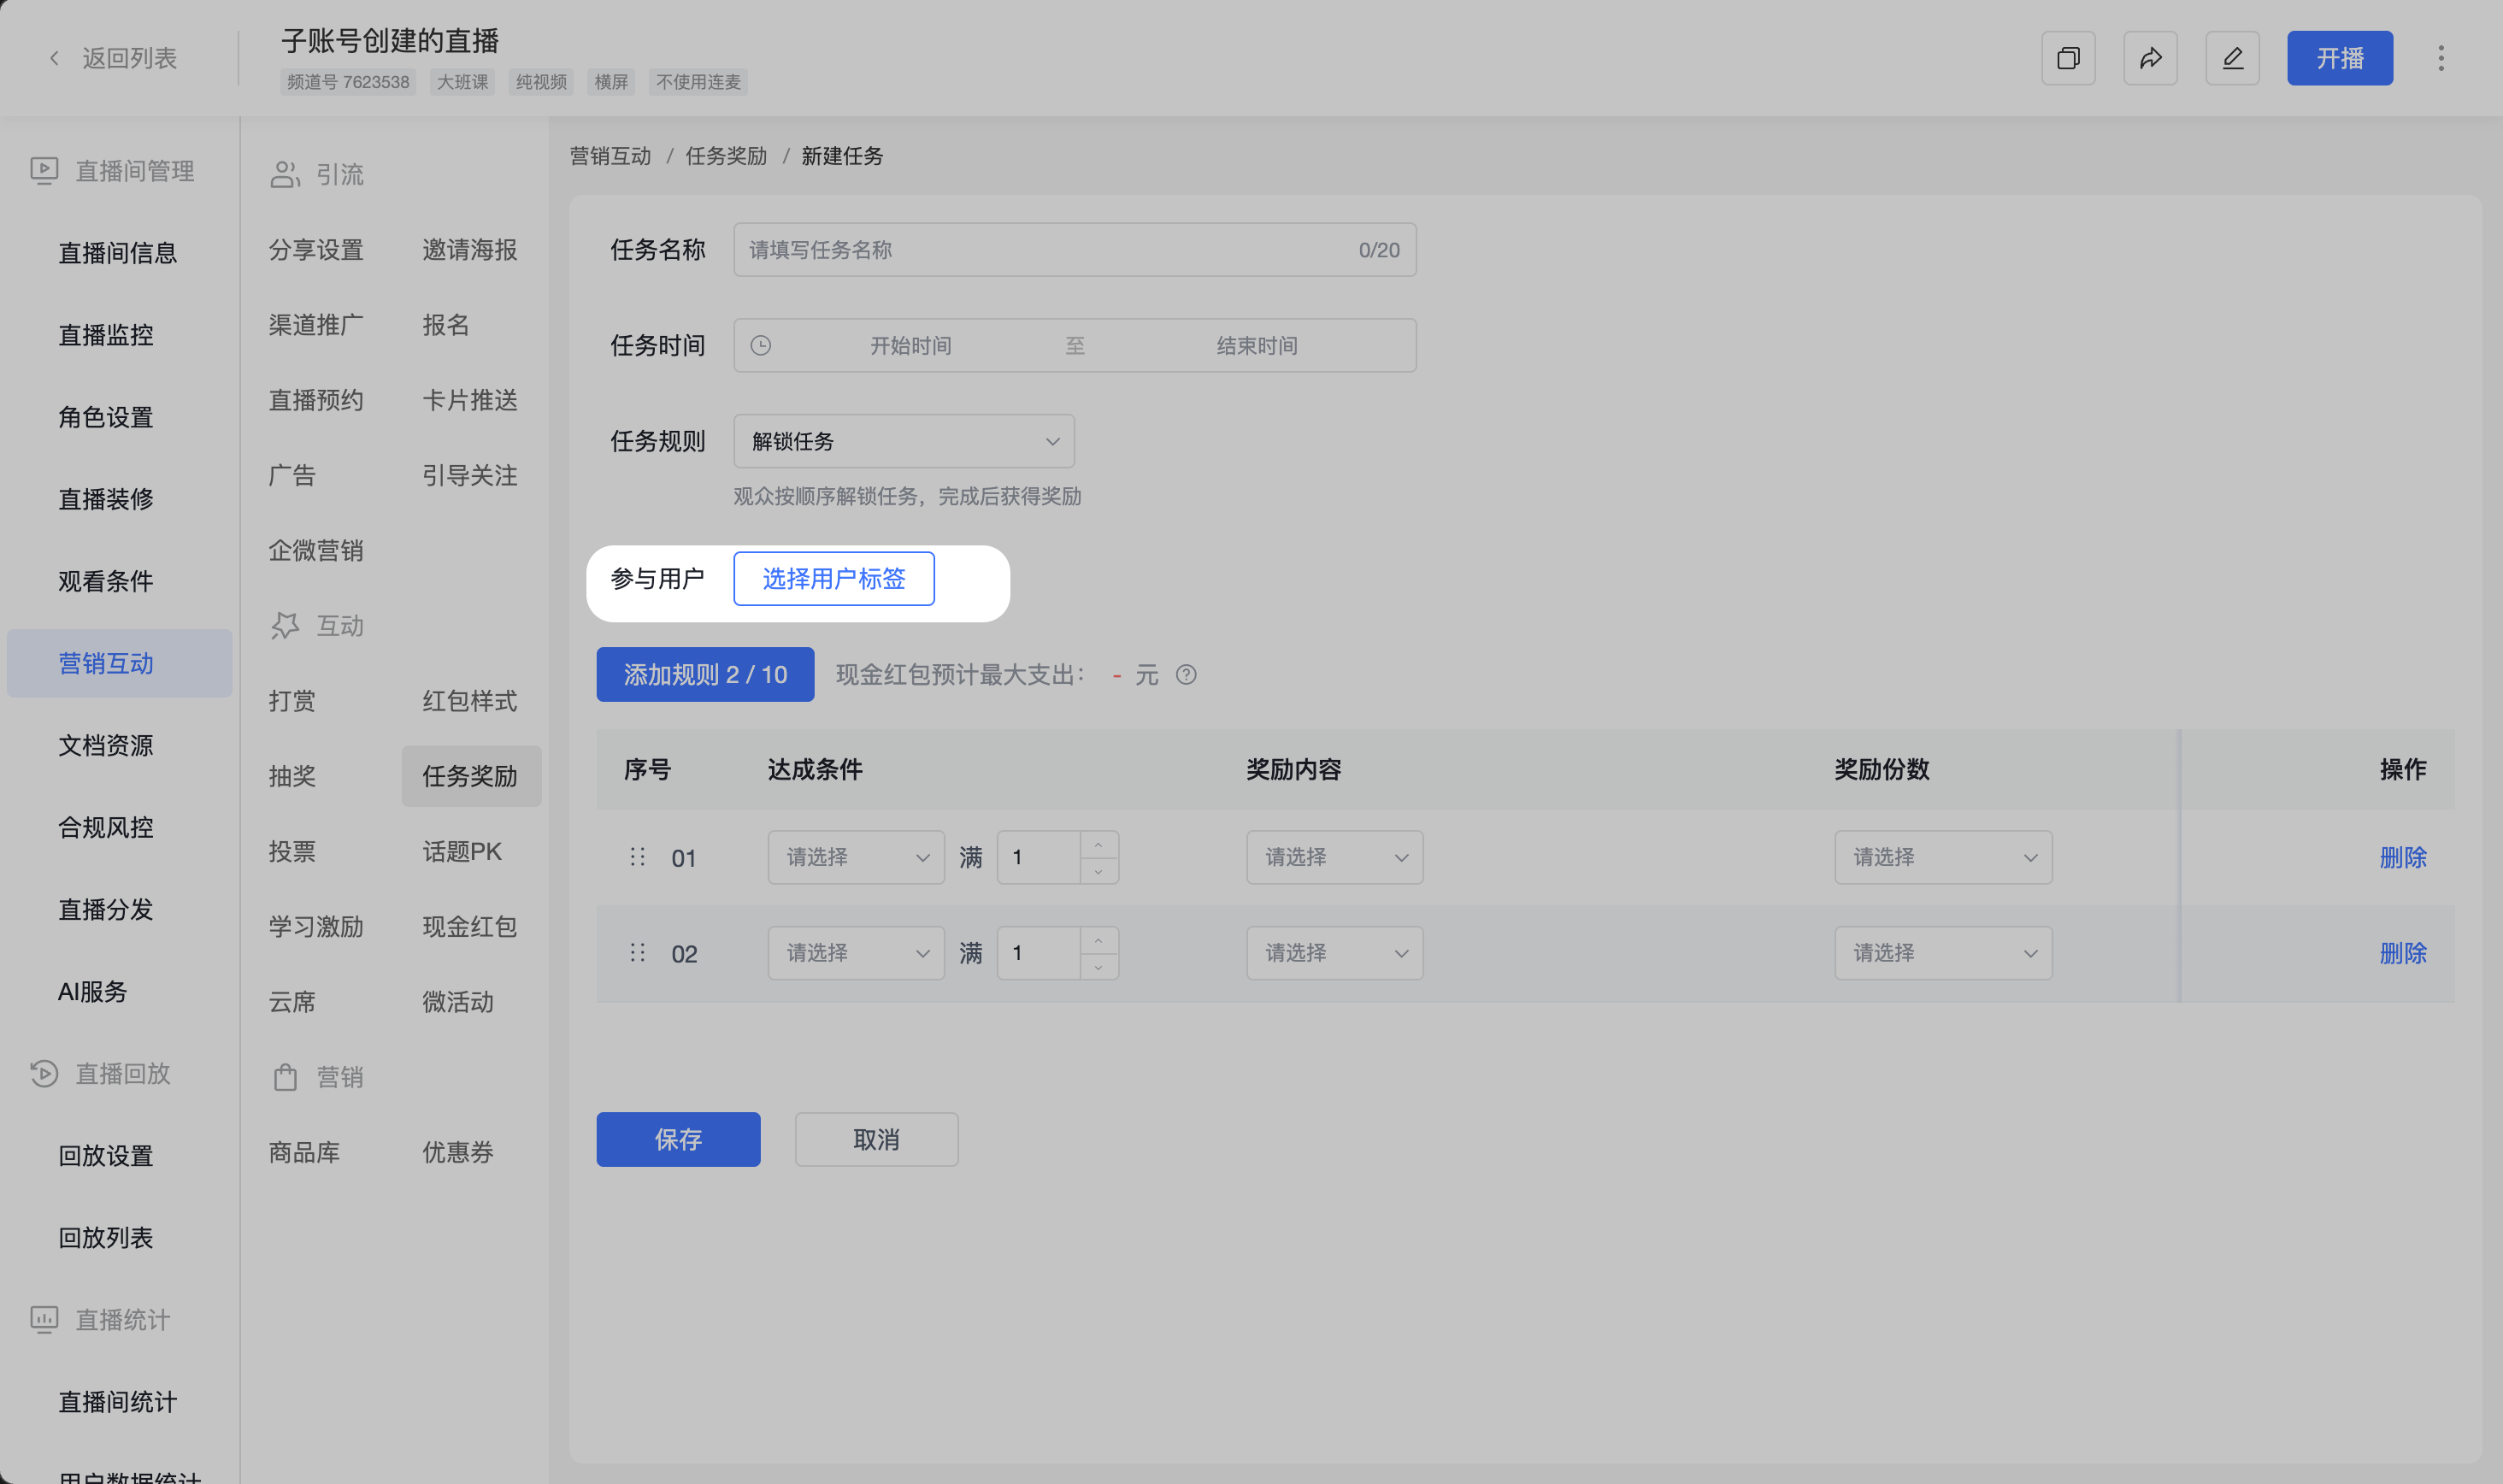
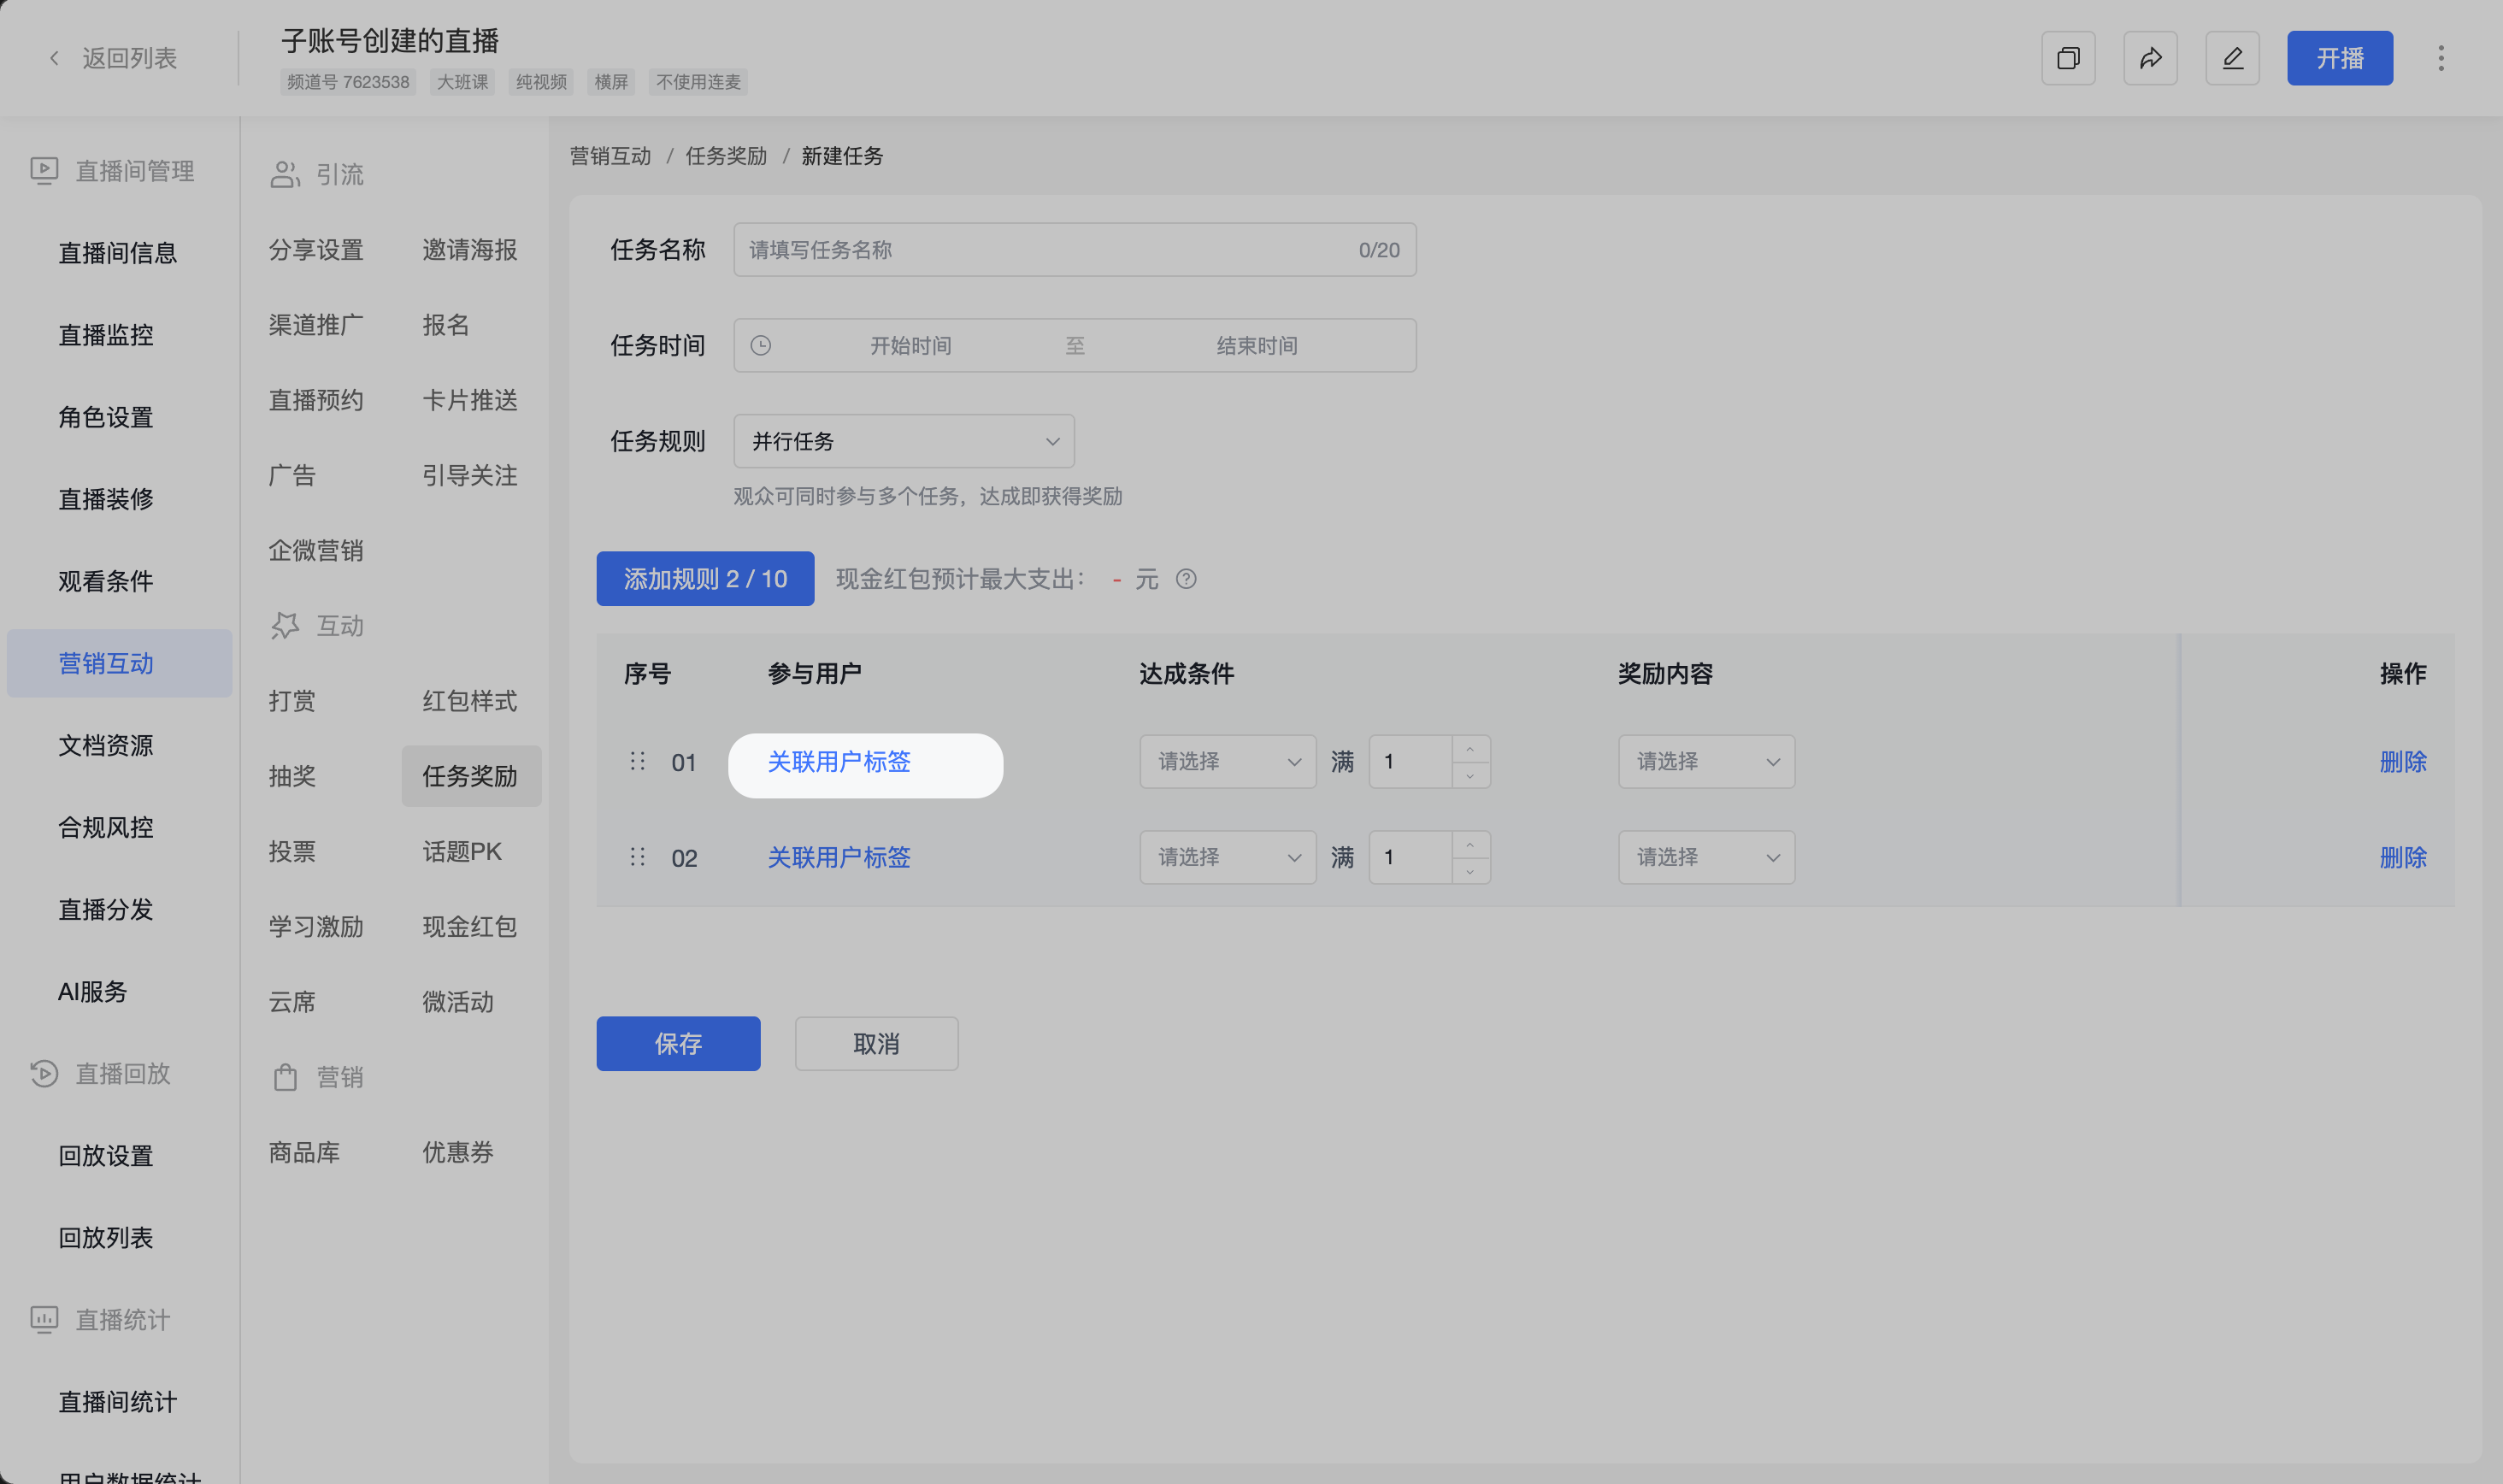
When creating new task rewards in the management console, you can select users with specific tags to participate.
- Unlock tasks support setting tags for the entire activity.
- Parallel tasks support setting tags for individual sub-tasks.
4. Banning User Access
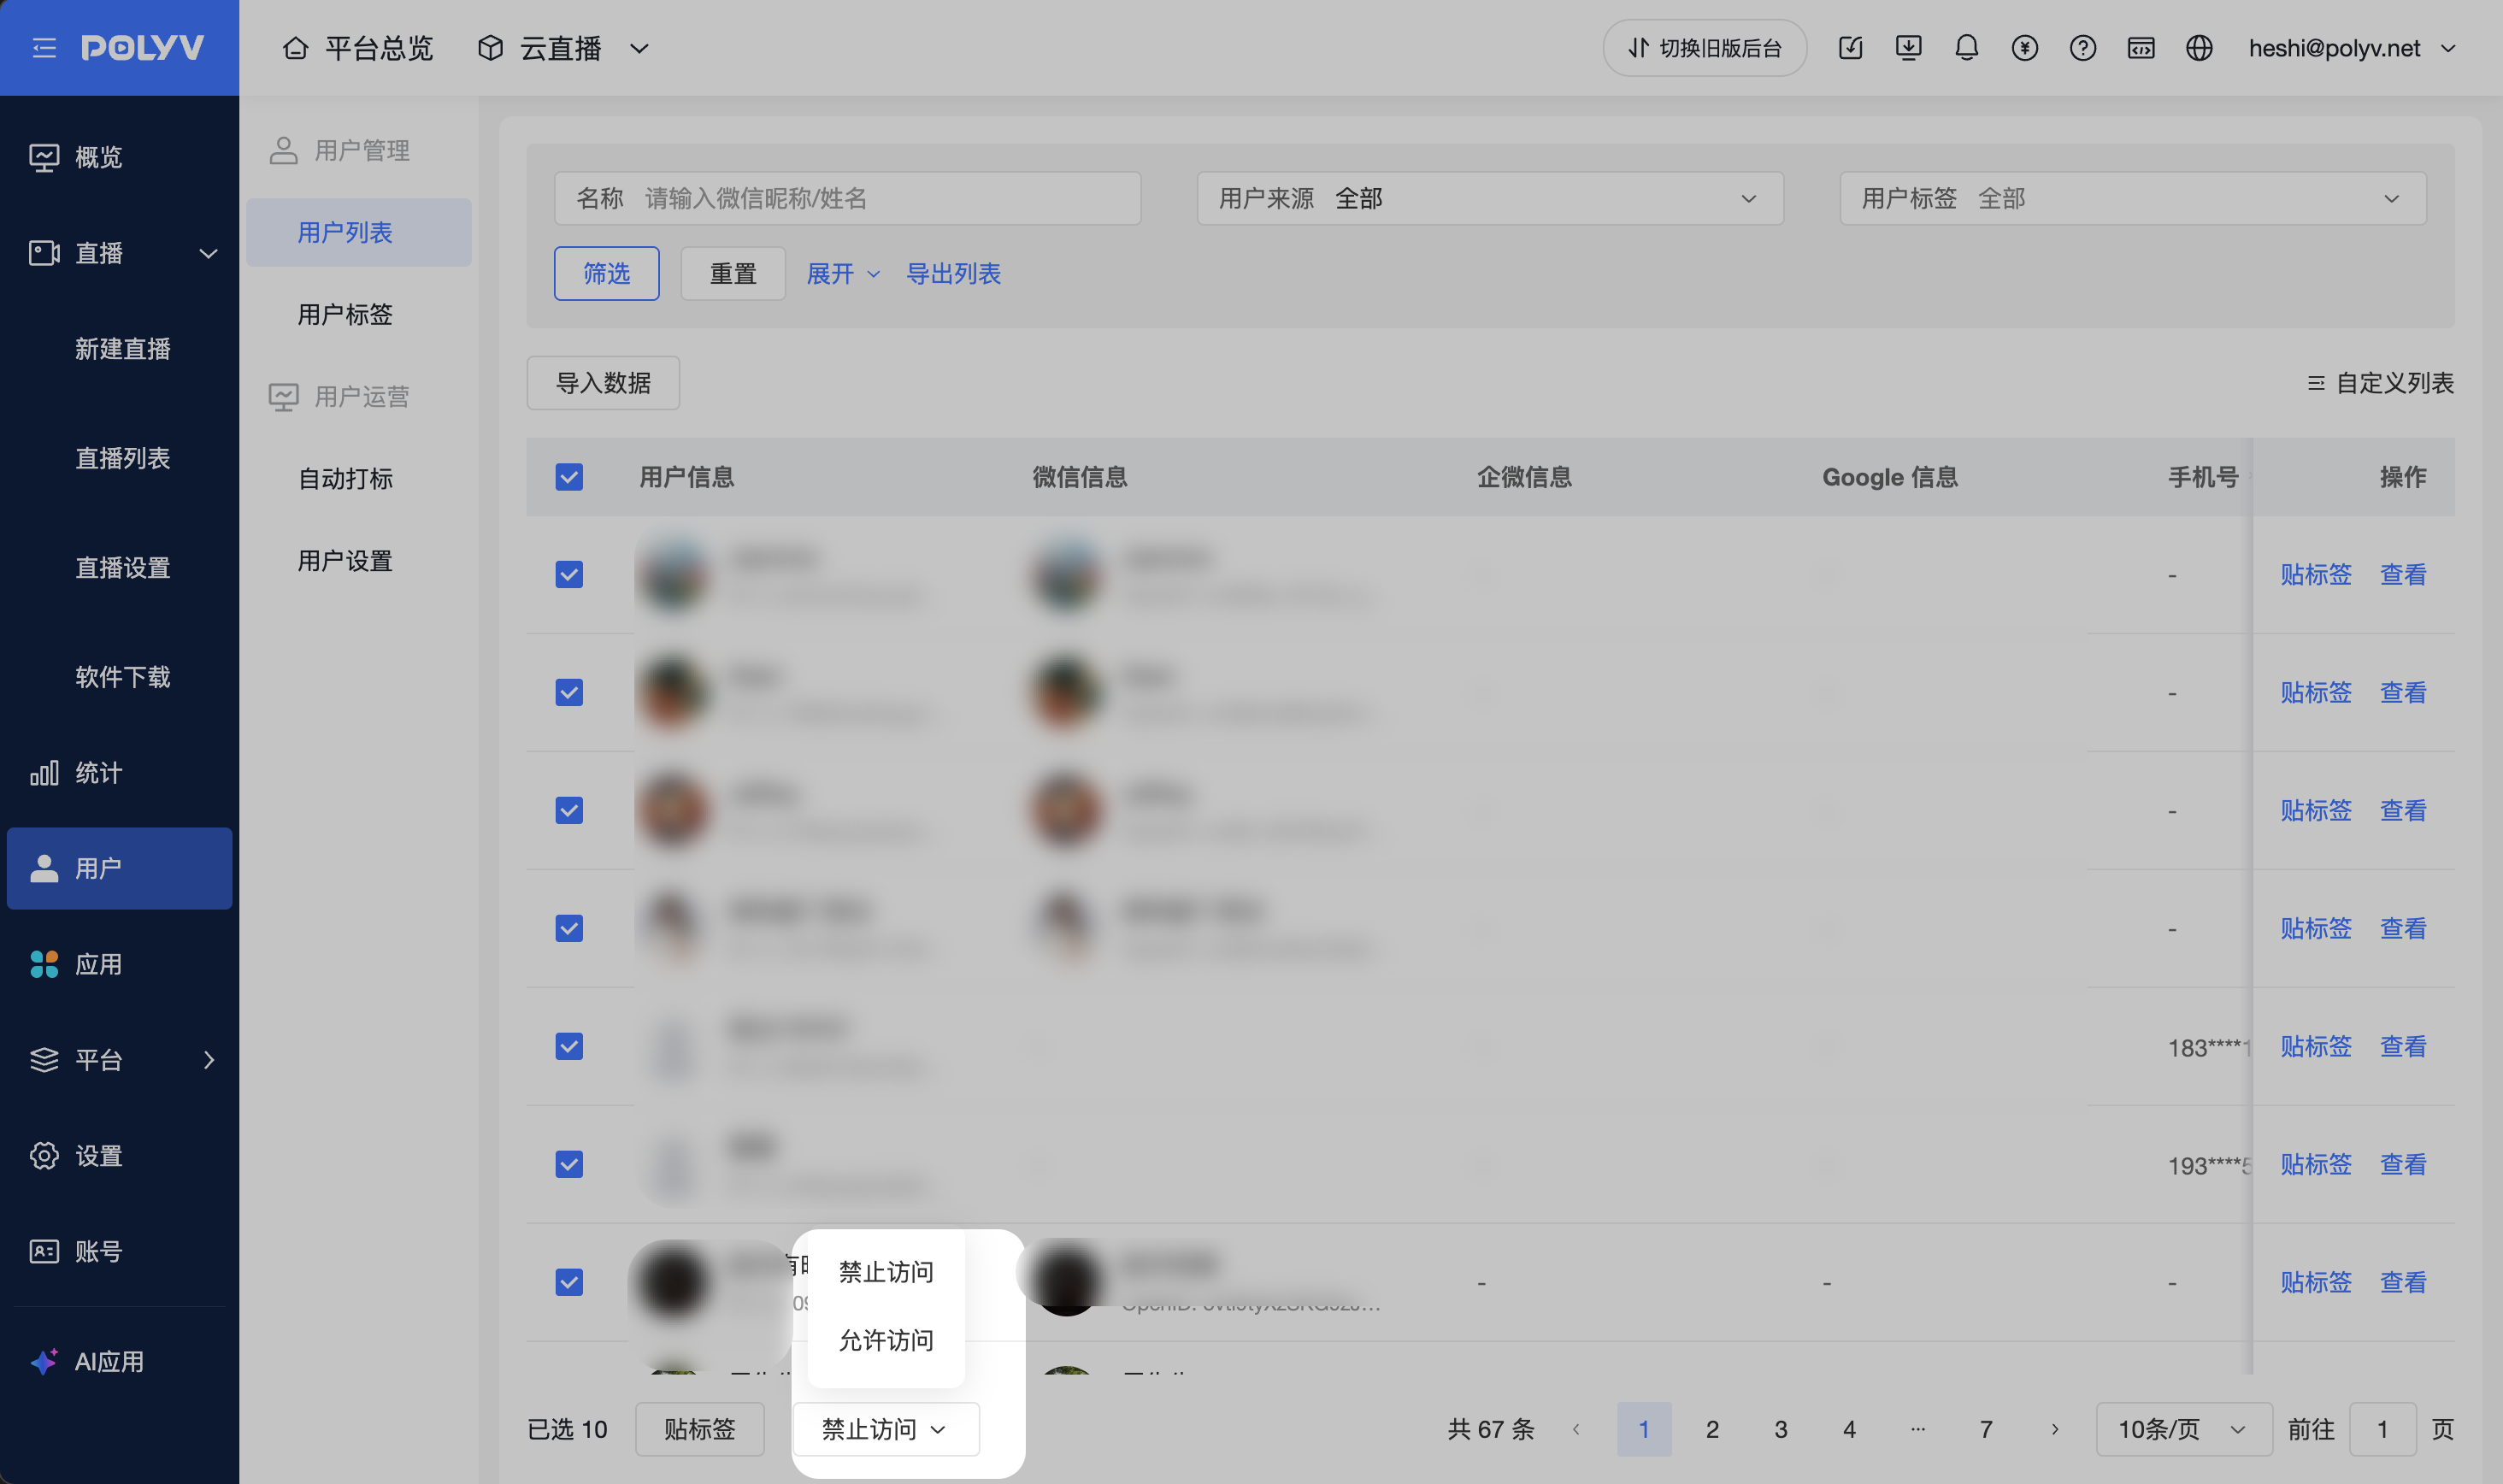
(1) Operation Path
User List -> Select User -> Set Banned Access
(2) Use Cases
Suitable for scenarios where you do not want certain users to continue accessing all pages requiring login under your account, including:
- Viewing Page
- News Feed
- Aggregation Page
- Personal Center
(3) Feature Description
- Supports batch setting users to a banned access status.
- Supports batch unbanning users.
- Banned users will be blocked by the system when trying to log in to the above pages and cannot continue accessing them.
3. Channel User Management Usage Guide
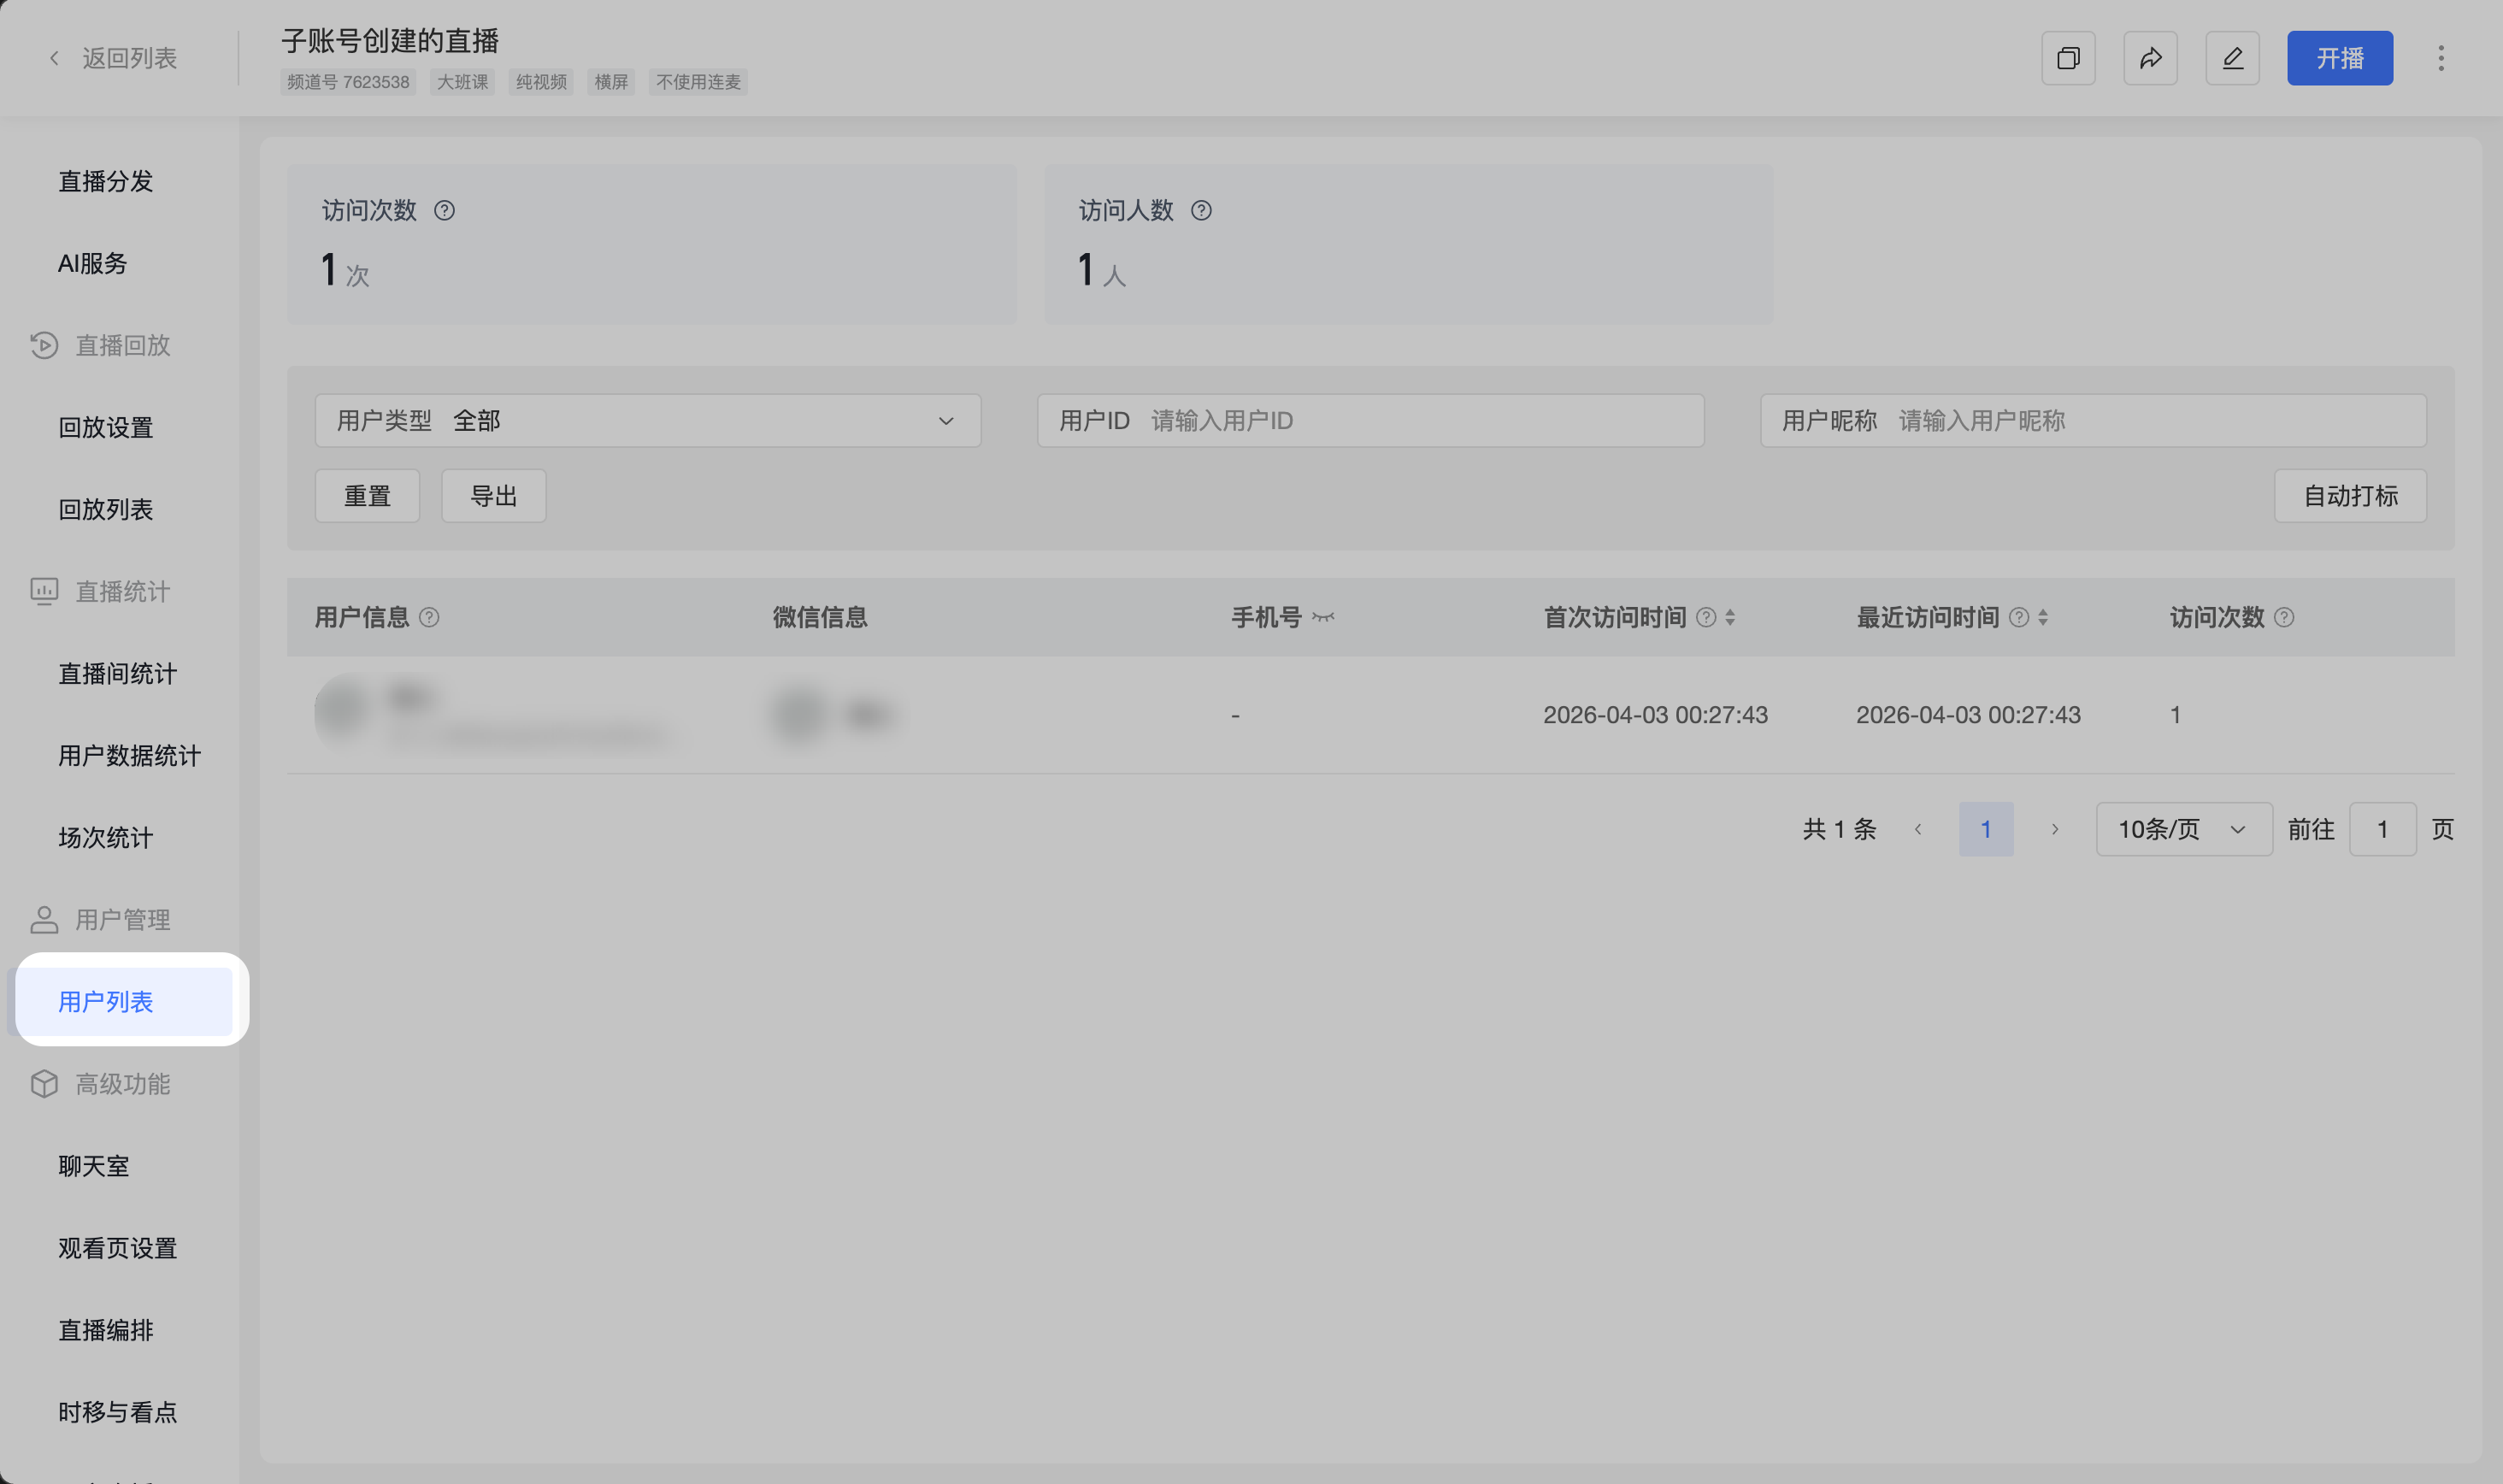
1. Entry Point
Operation Path: Management Console -> Channel -> User Management
Note:
- This page is only visible to accounts that have enabled the user system.
- Sub-accounts need the [Channel User Management] permission enabled to access this page.
2. Data Overview
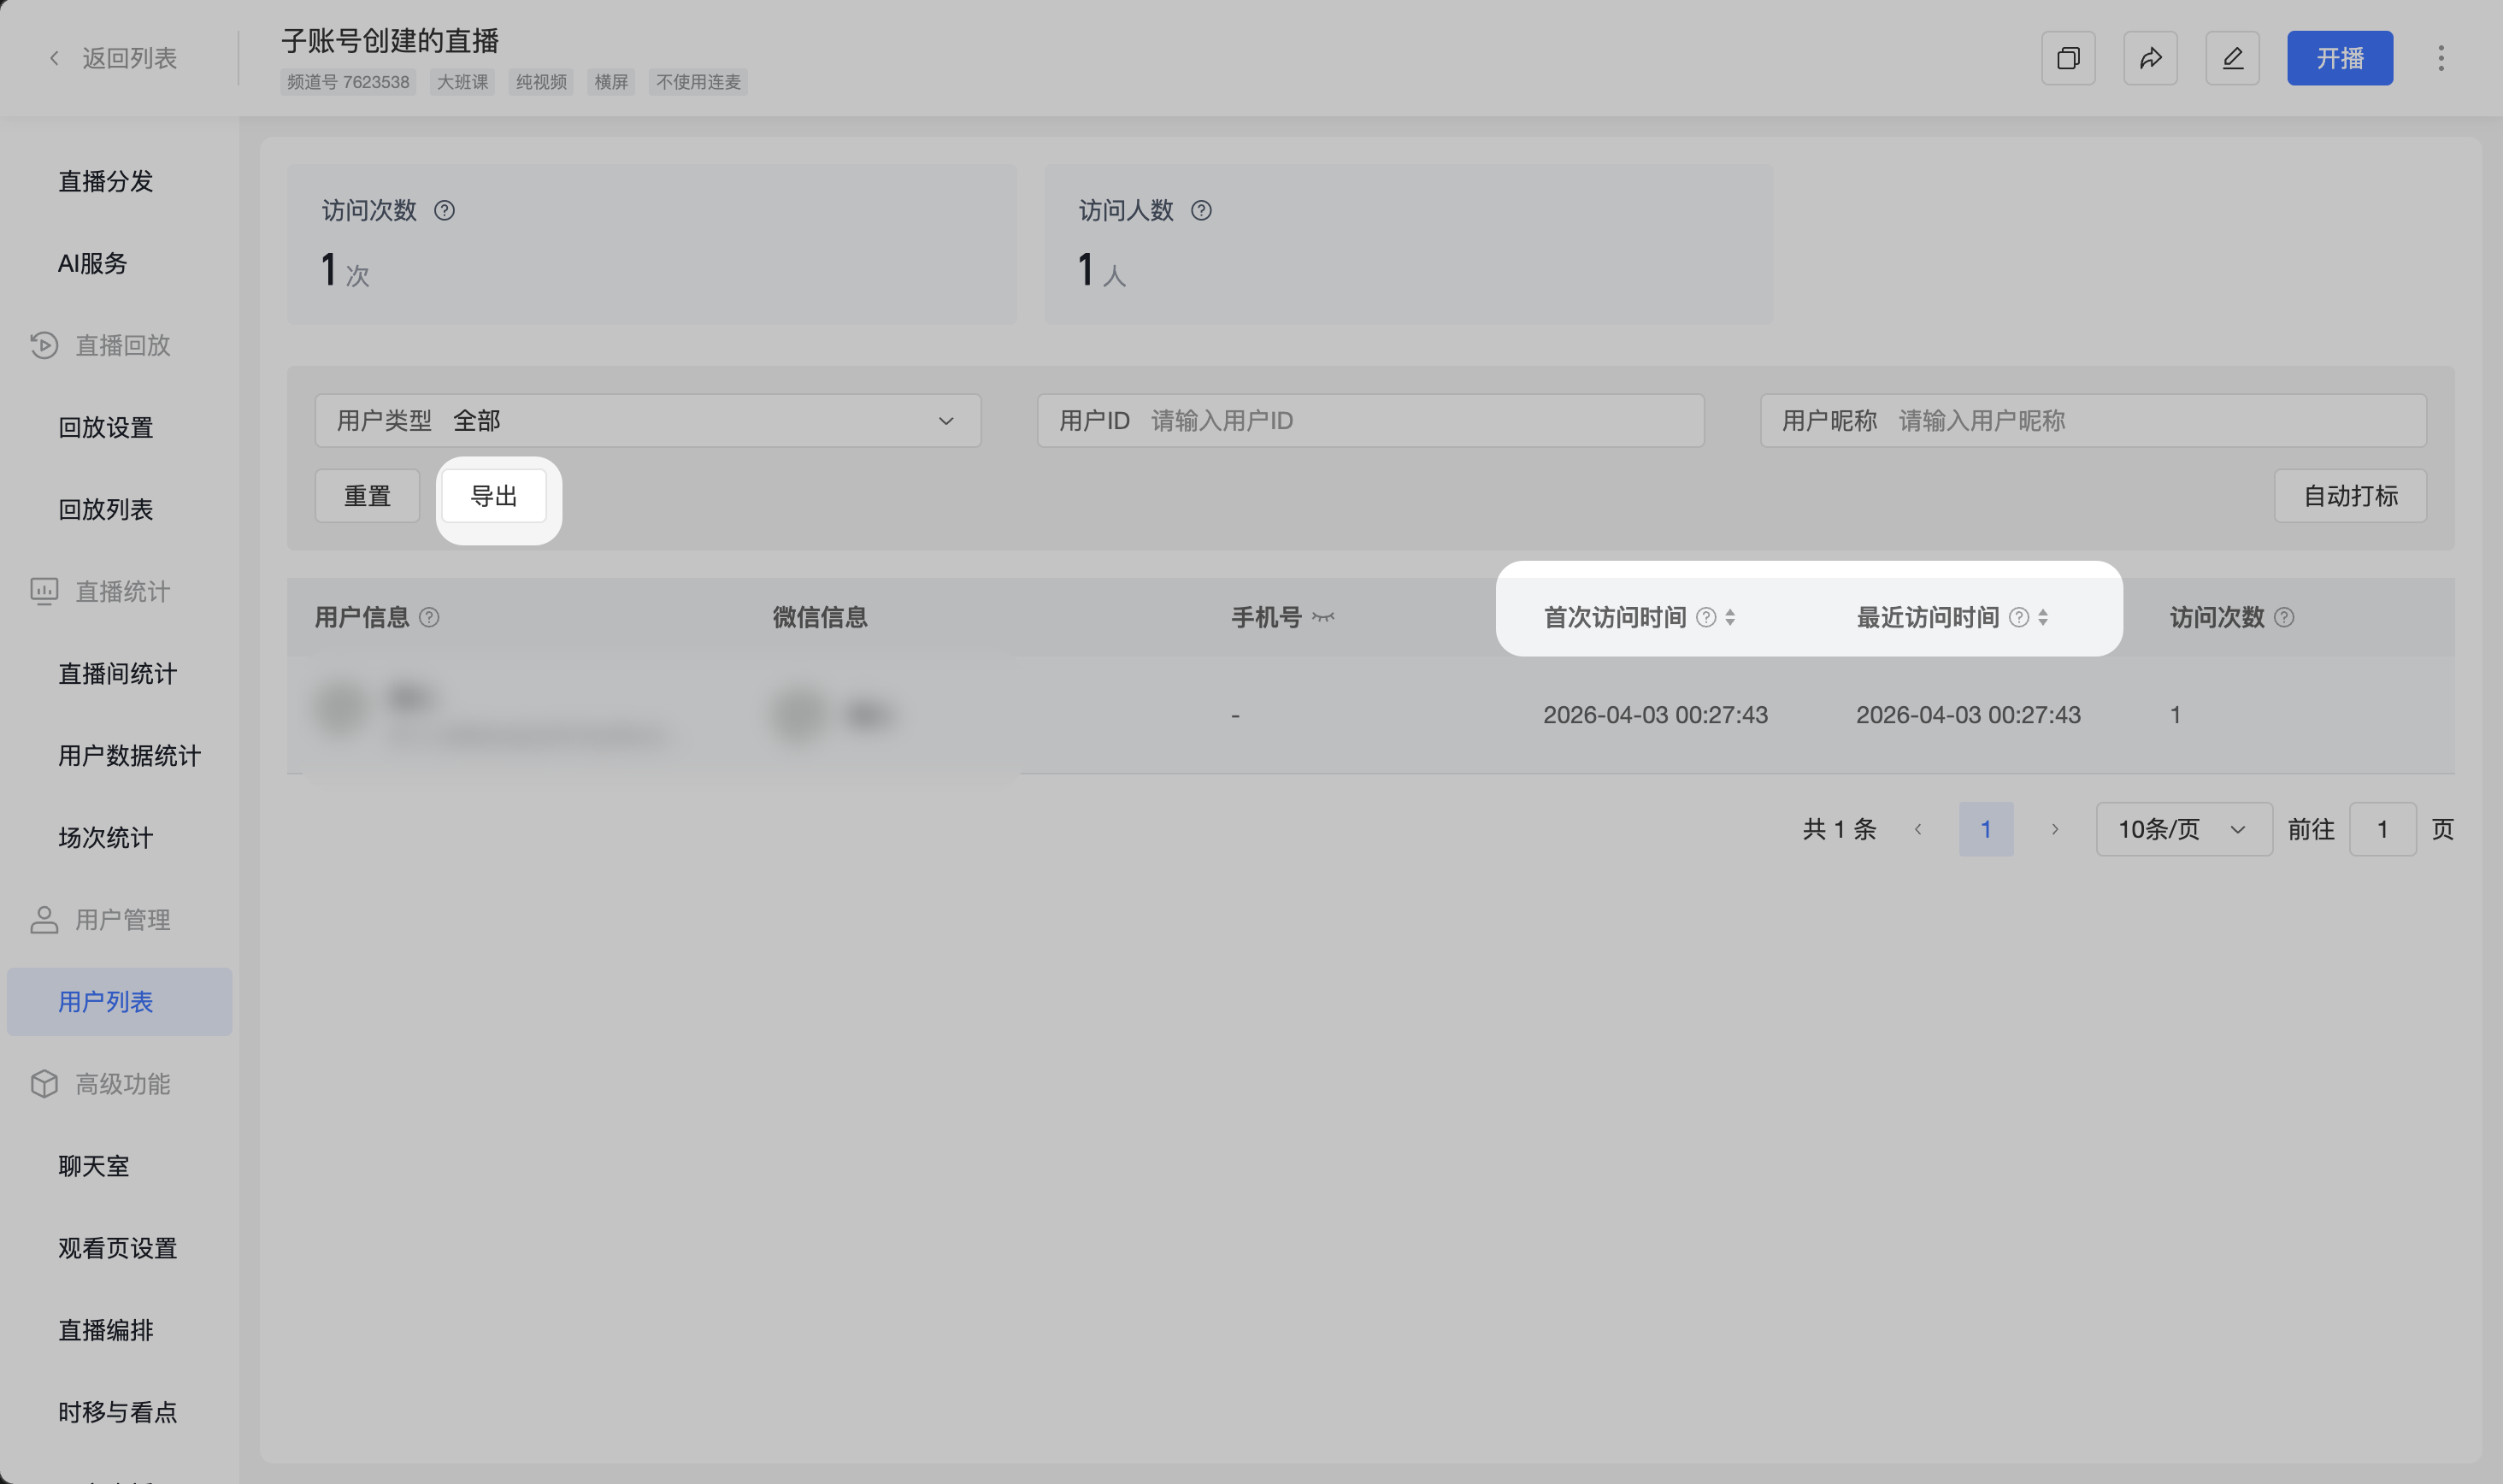
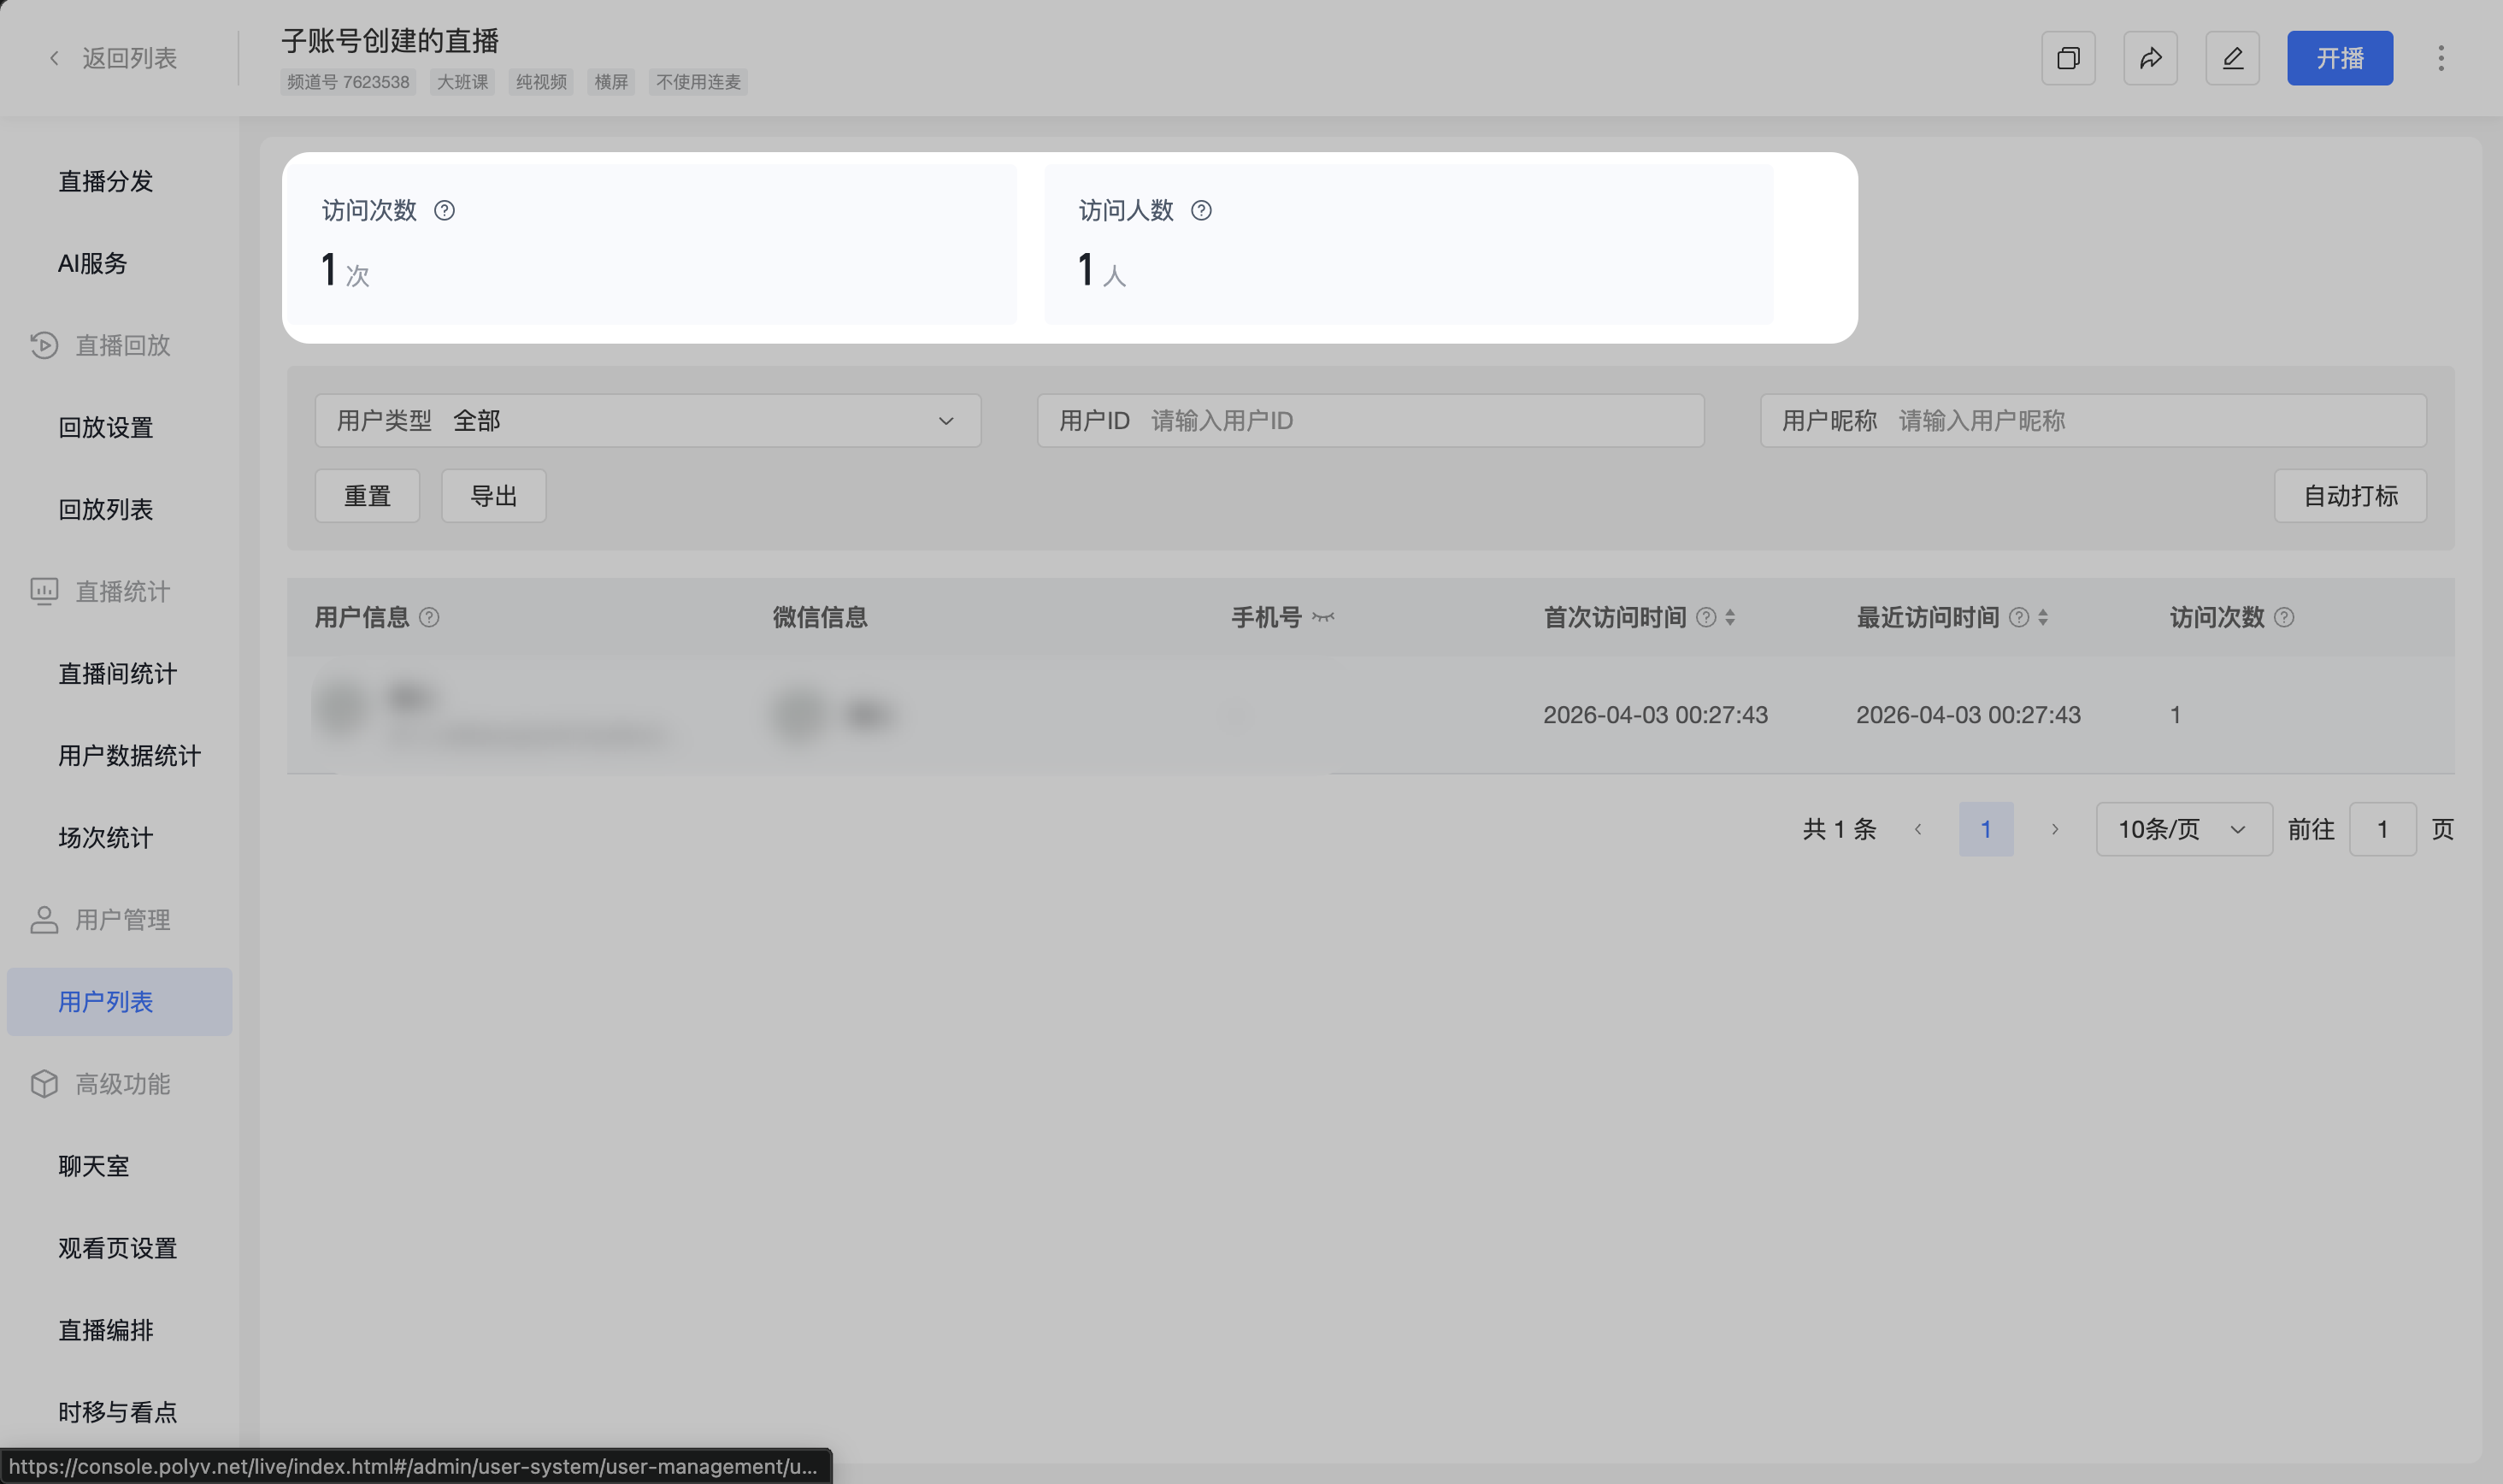
The top of the page displays access statistics for the channel's viewing page, including:
- Visit Count: Total cumulative number of times users entered the viewing page.
- Unique Visitors: Number of unique users who have visited the viewing page at least once.
Statistical Scope Description:
- Visit Action: Refers to a user entering the viewing page.
- User Scope: Includes both guests and logged-in users.
3. User List
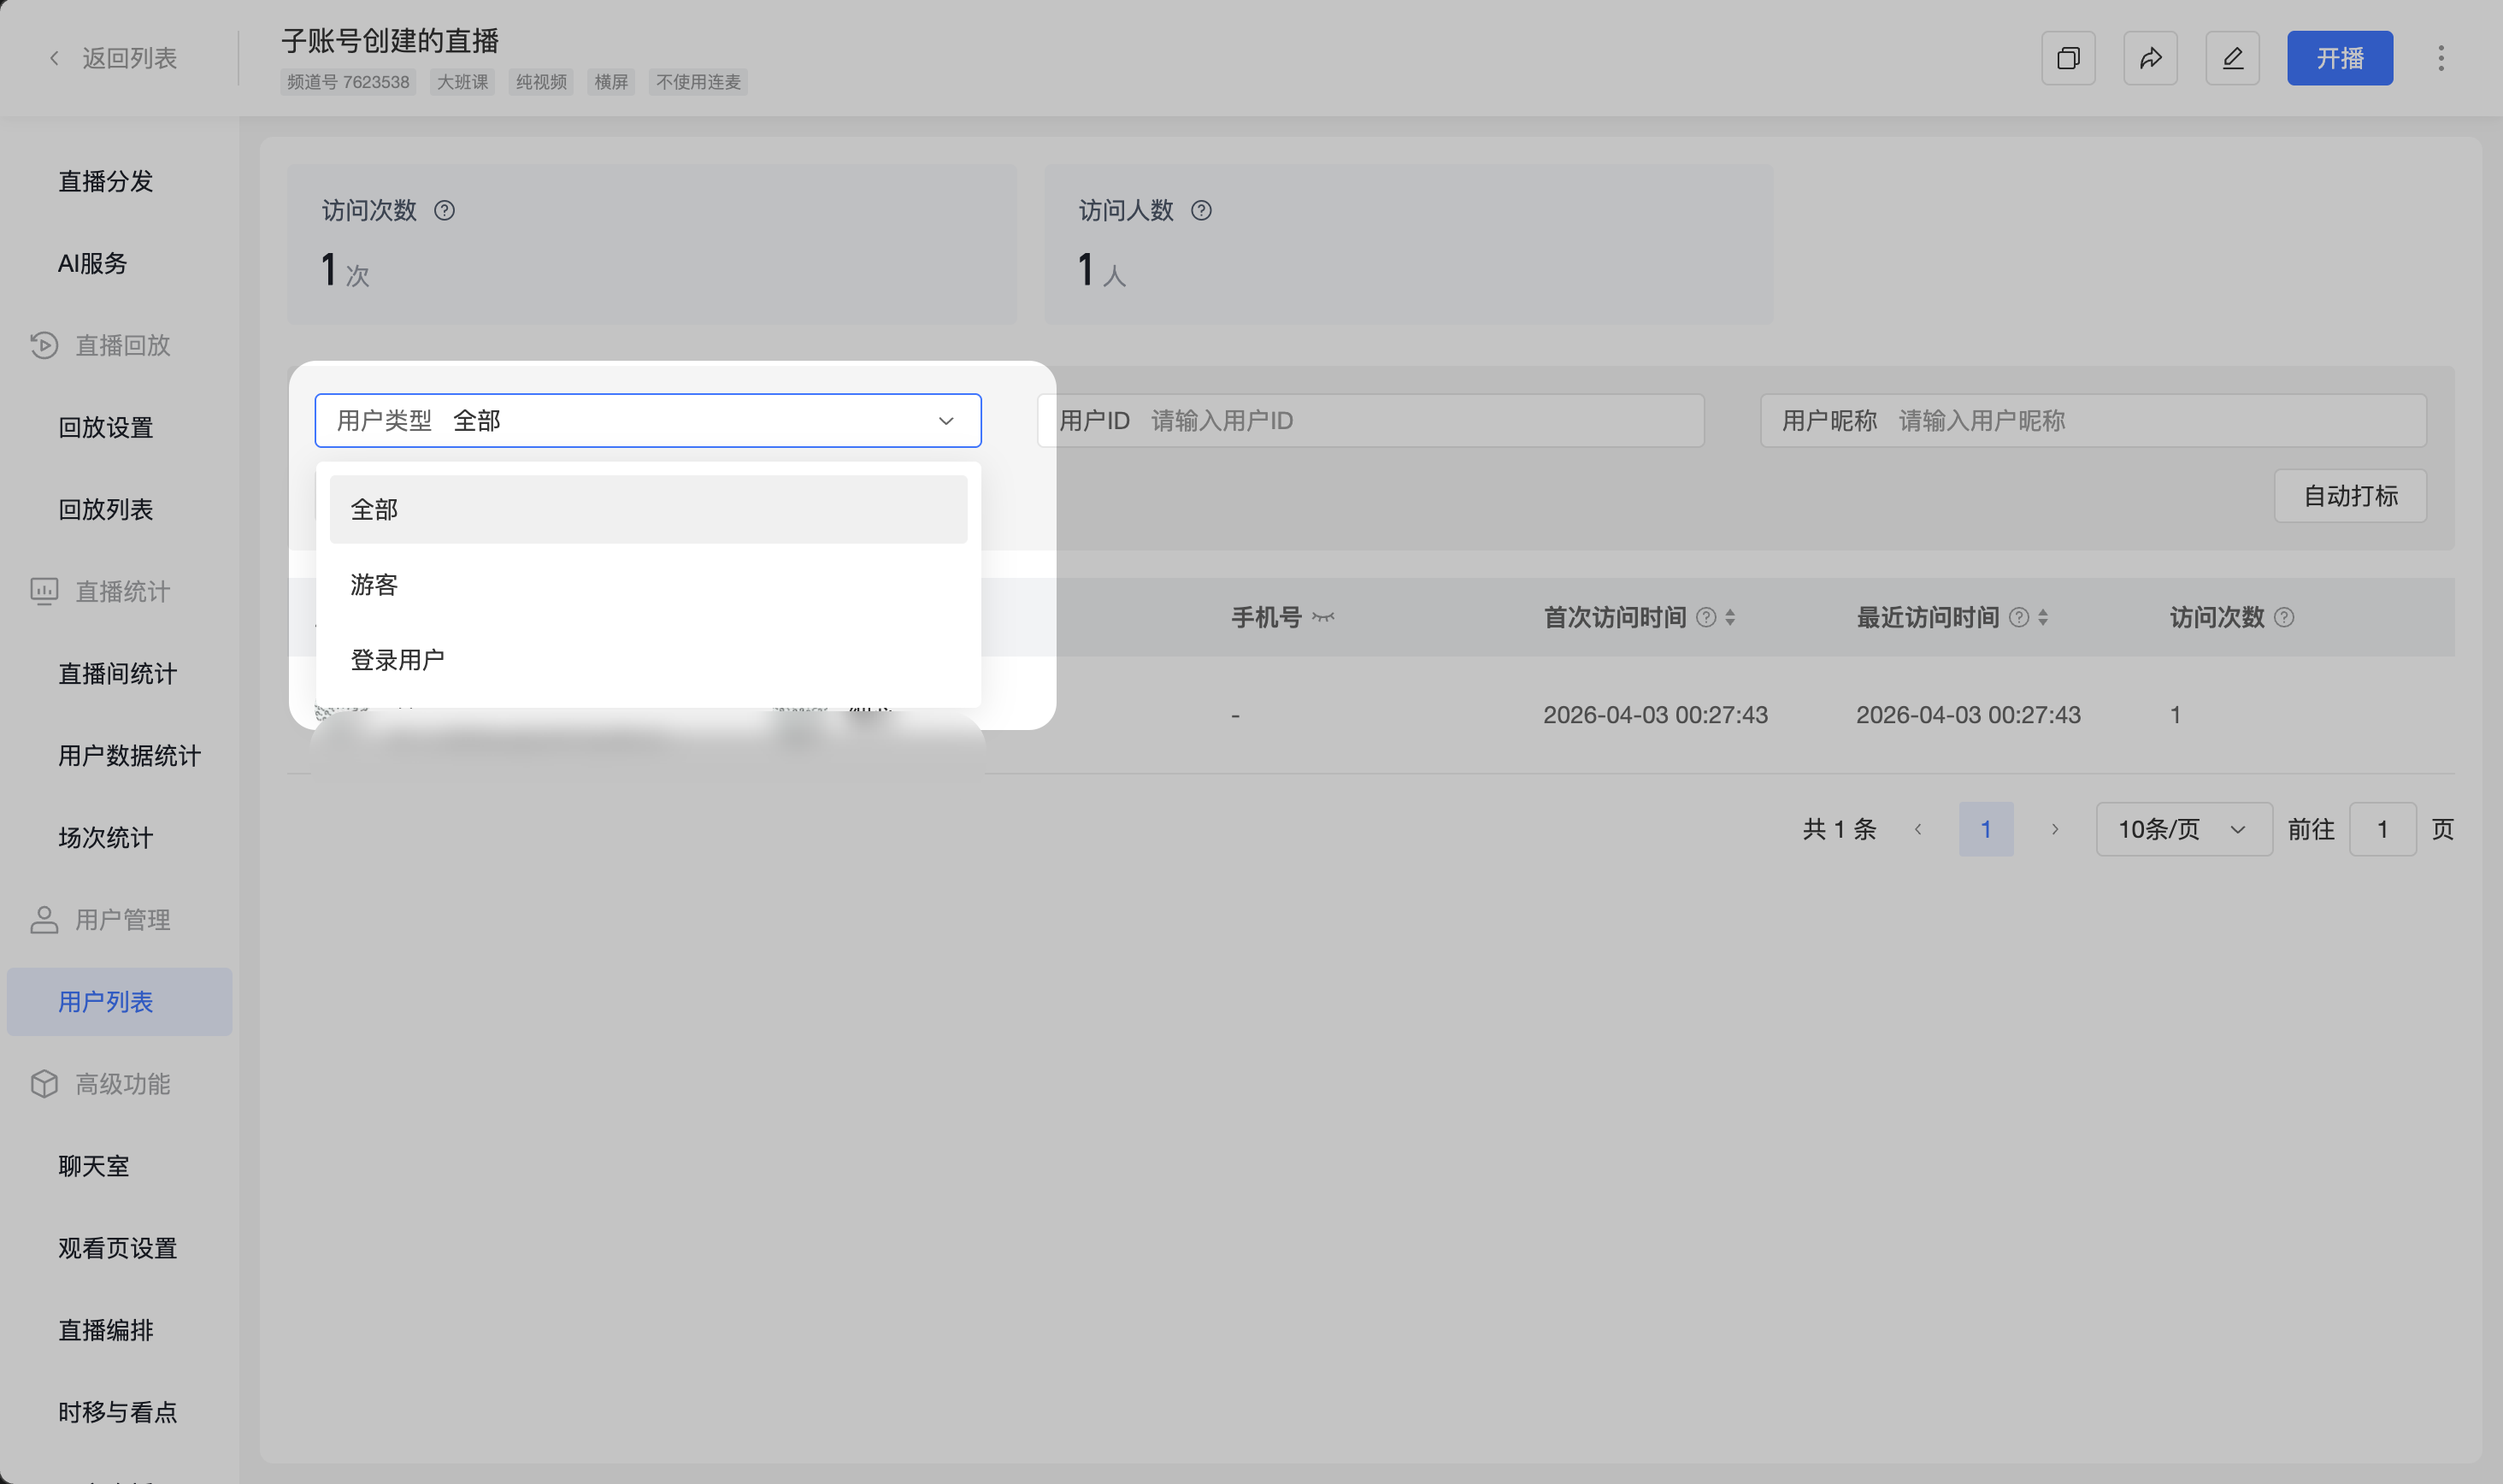
The user list displays information about users who have accessed the current channel's viewing page, including logged-in users and guests.
Guest user data has the following characteristics:
- Nickname, avatar, and phone number are not displayed.
- Only the User ID is displayed.
- Identified as a guest in the list.
When a user first accesses the viewing page as a guest and later logs in with an account, the system processes it based on the User ID:
- Same User ID: Access data is automatically merged, and the user type is updated from guest to logged-in user.
- Different User ID: The guest record is retained, and a new logged-in user record is added. The two data entries are counted separately and are not merged.
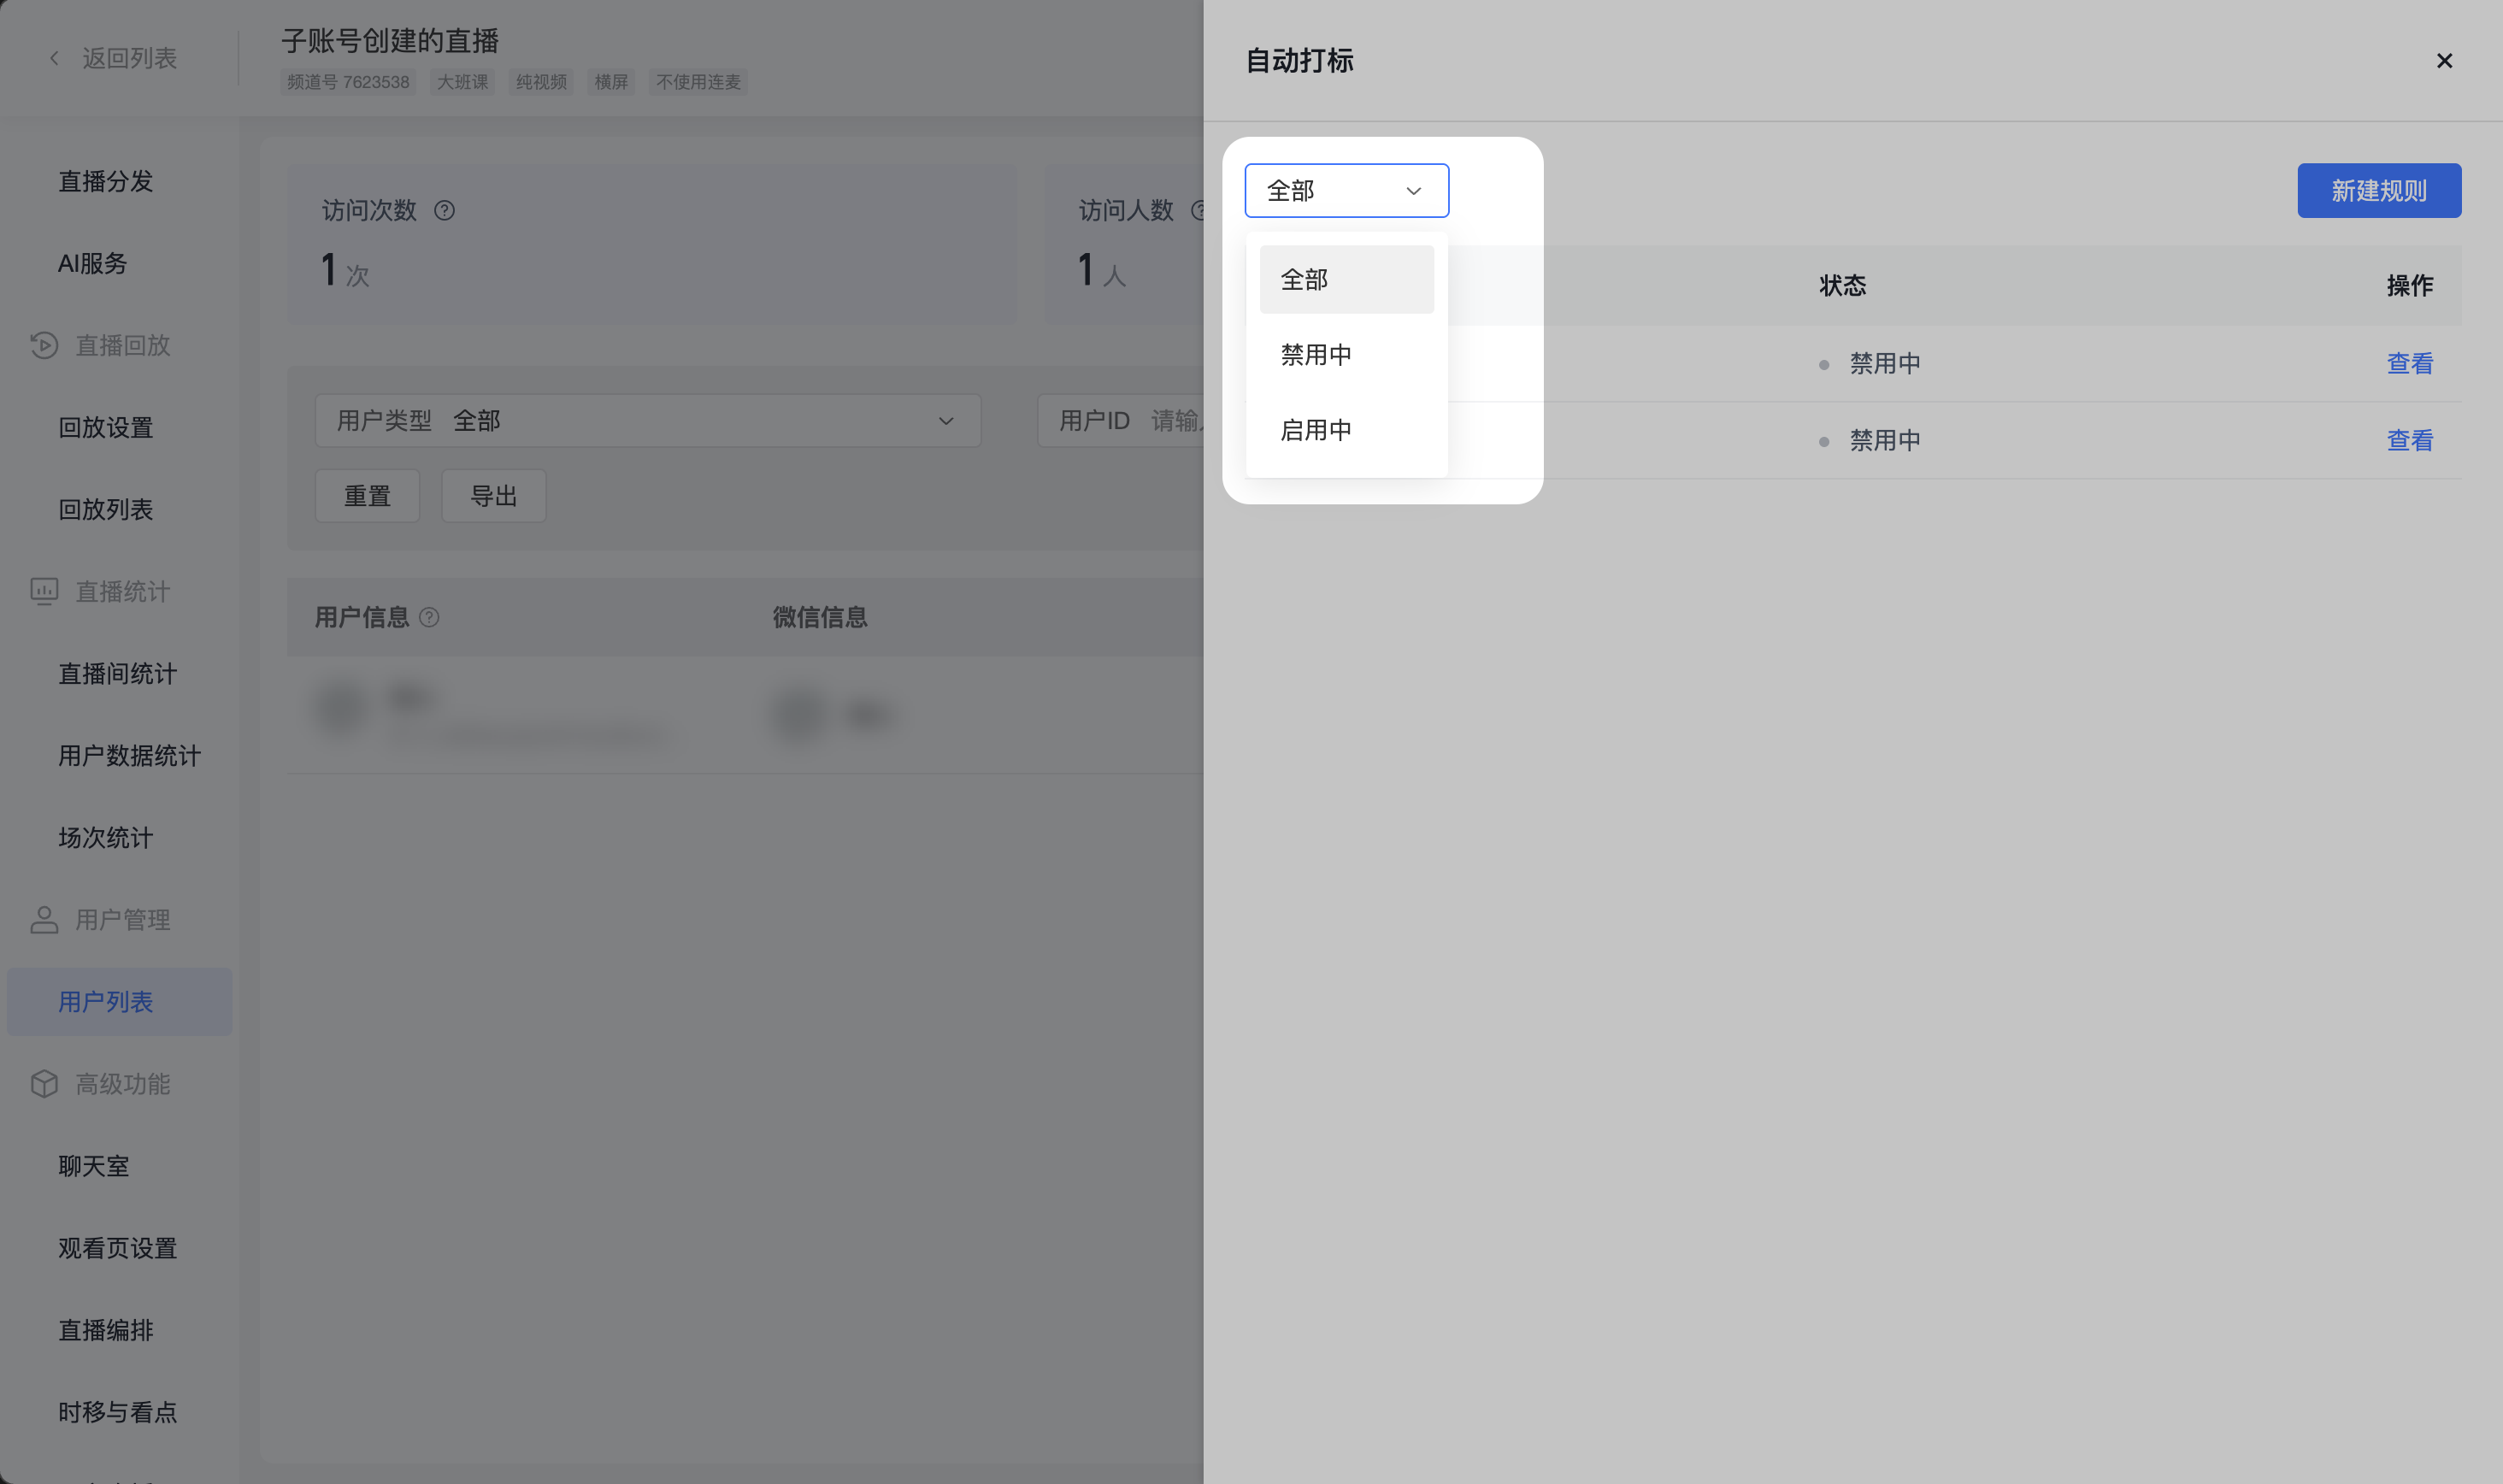
4. Automatic Tagging
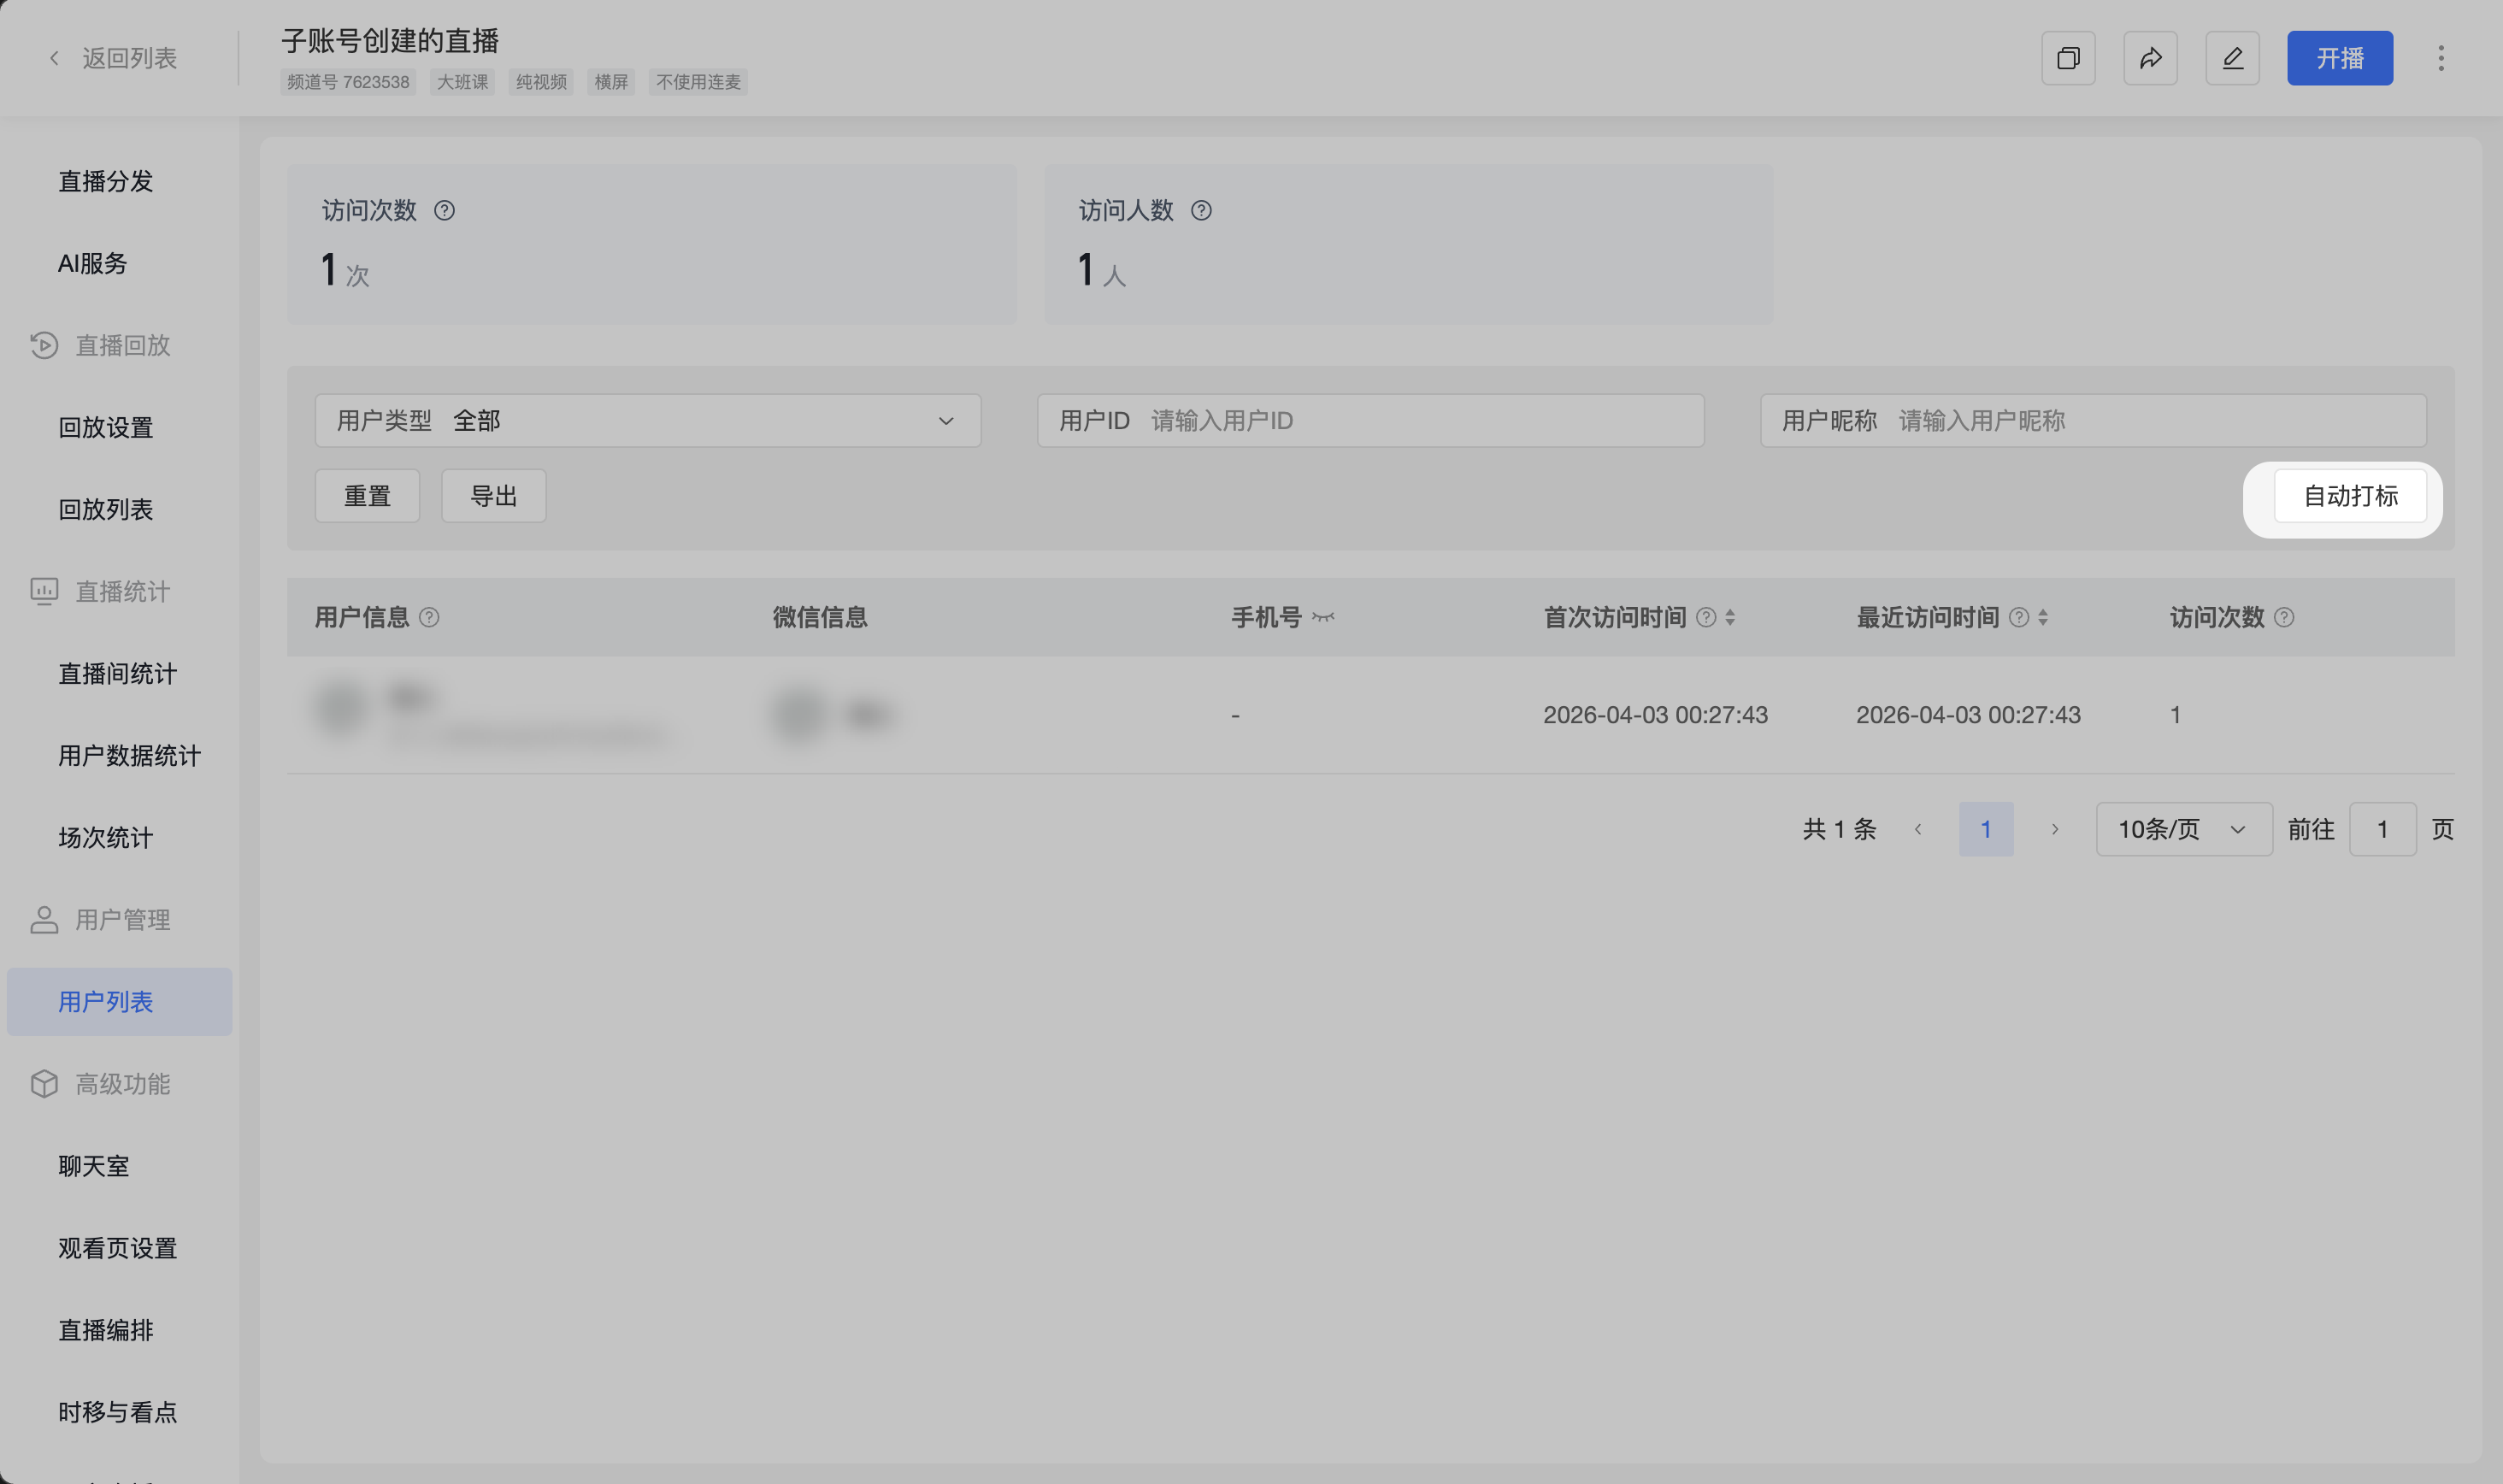
The Channel User Management page supports viewing automatic tagging rules related to the current channel and displays the rule status distinctly.
Viewable rules include:
- Rules containing the current channel: Rules whose scope includes the current channel.
Rule statuses include:
- Enabled
- Disabled
Operation Instructions:
- Supports creating new automatic tagging rules within the current channel.
- Supports viewing [Enabled] and [Disabled] rules under the current channel.
- Only rules that [Only apply to the current channel] support direct operations, such as [Enable] or [Disable].
- For rules that [Contain the current channel but do not only apply to the current channel], only viewing is supported; they cannot be directly enabled or disabled within the current channel. Management must be done via [Users -> Automatic Tagging].
5. Operation Instructions
The Channel User Management page supports the following operations:
- Search by User ID or User Nickname.
- Filter by User Type, including Guest and Logged-in User.
- Sort by [First Visit Time] or [Last Visit Time].
- Export the user access data list for the current channel.