


Cloud Studio Operation Manual
1. Feature Overview
The new Cloud Studio enables multi-location live streaming to be viewed on the same screen. It offers faster scene switching, smoother video, and an improved overall experience.
2. Applicable Scenarios
Suitable for multi-session live streaming, managing multiple video and audio sources to produce professional live or recorded programs. It is commonly used in TV broadcasts, webcasts, conferences, sports events, and performances that require high-quality visual content.
3. Prerequisites
Contact sales to activate this feature.
4. Detailed Operation Steps
4.1 Entering Cloud Studio
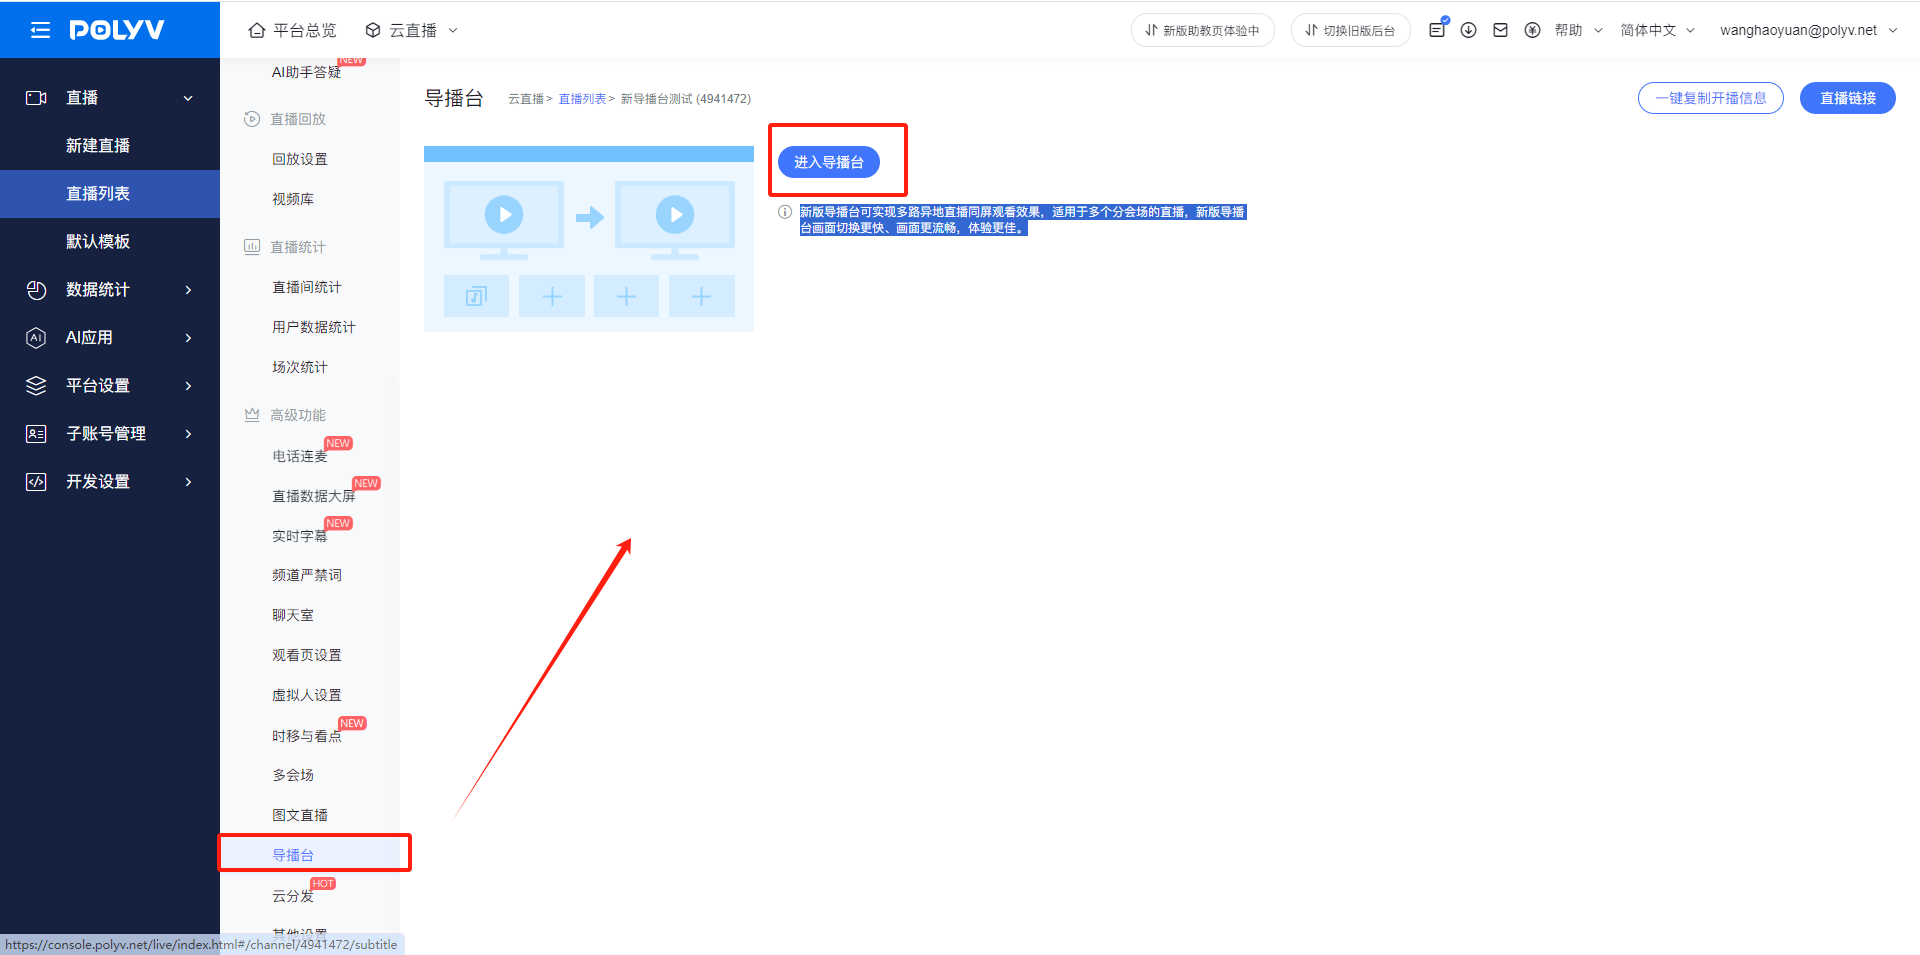
Log in to the Polyv backend, create a channel, select [Large Class] [Video Only], choose the channel, and enter.
4.2 Cloud Studio Interface Overview
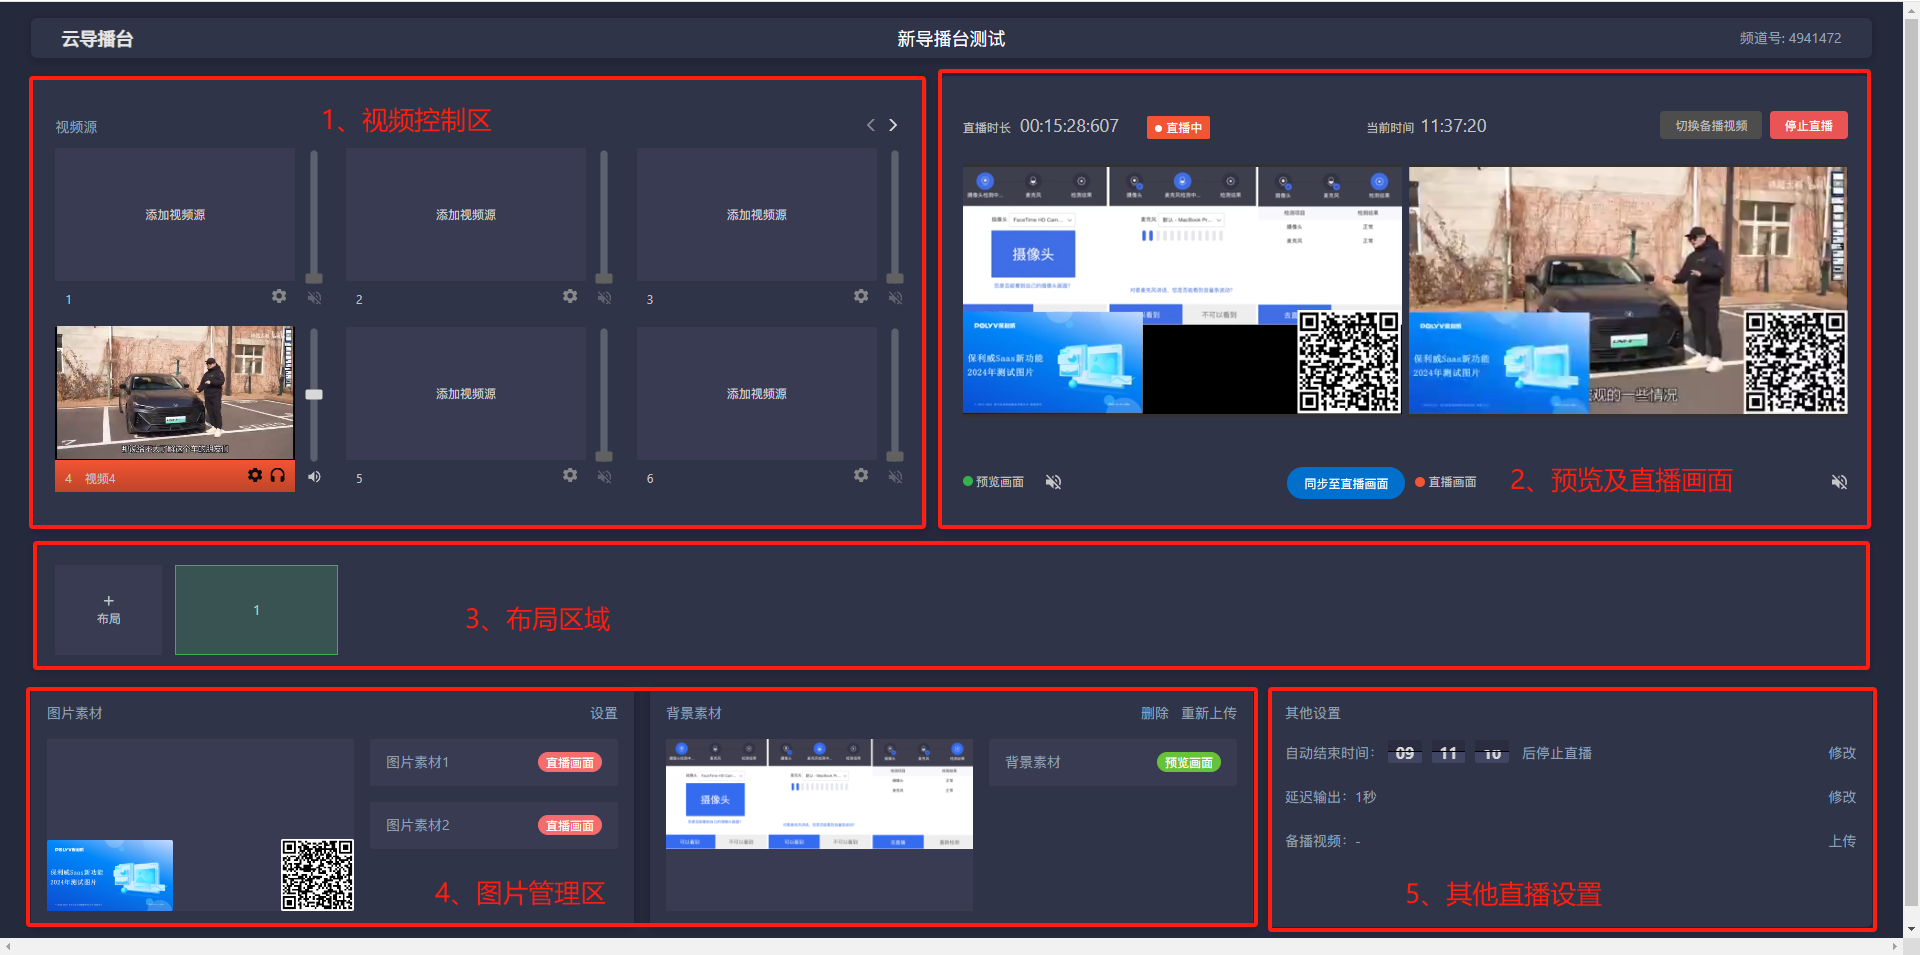
After entering, you will see the main interface of Cloud Studio, which typically includes areas such as video source management and live streaming settings.
4.3 Video Source Management
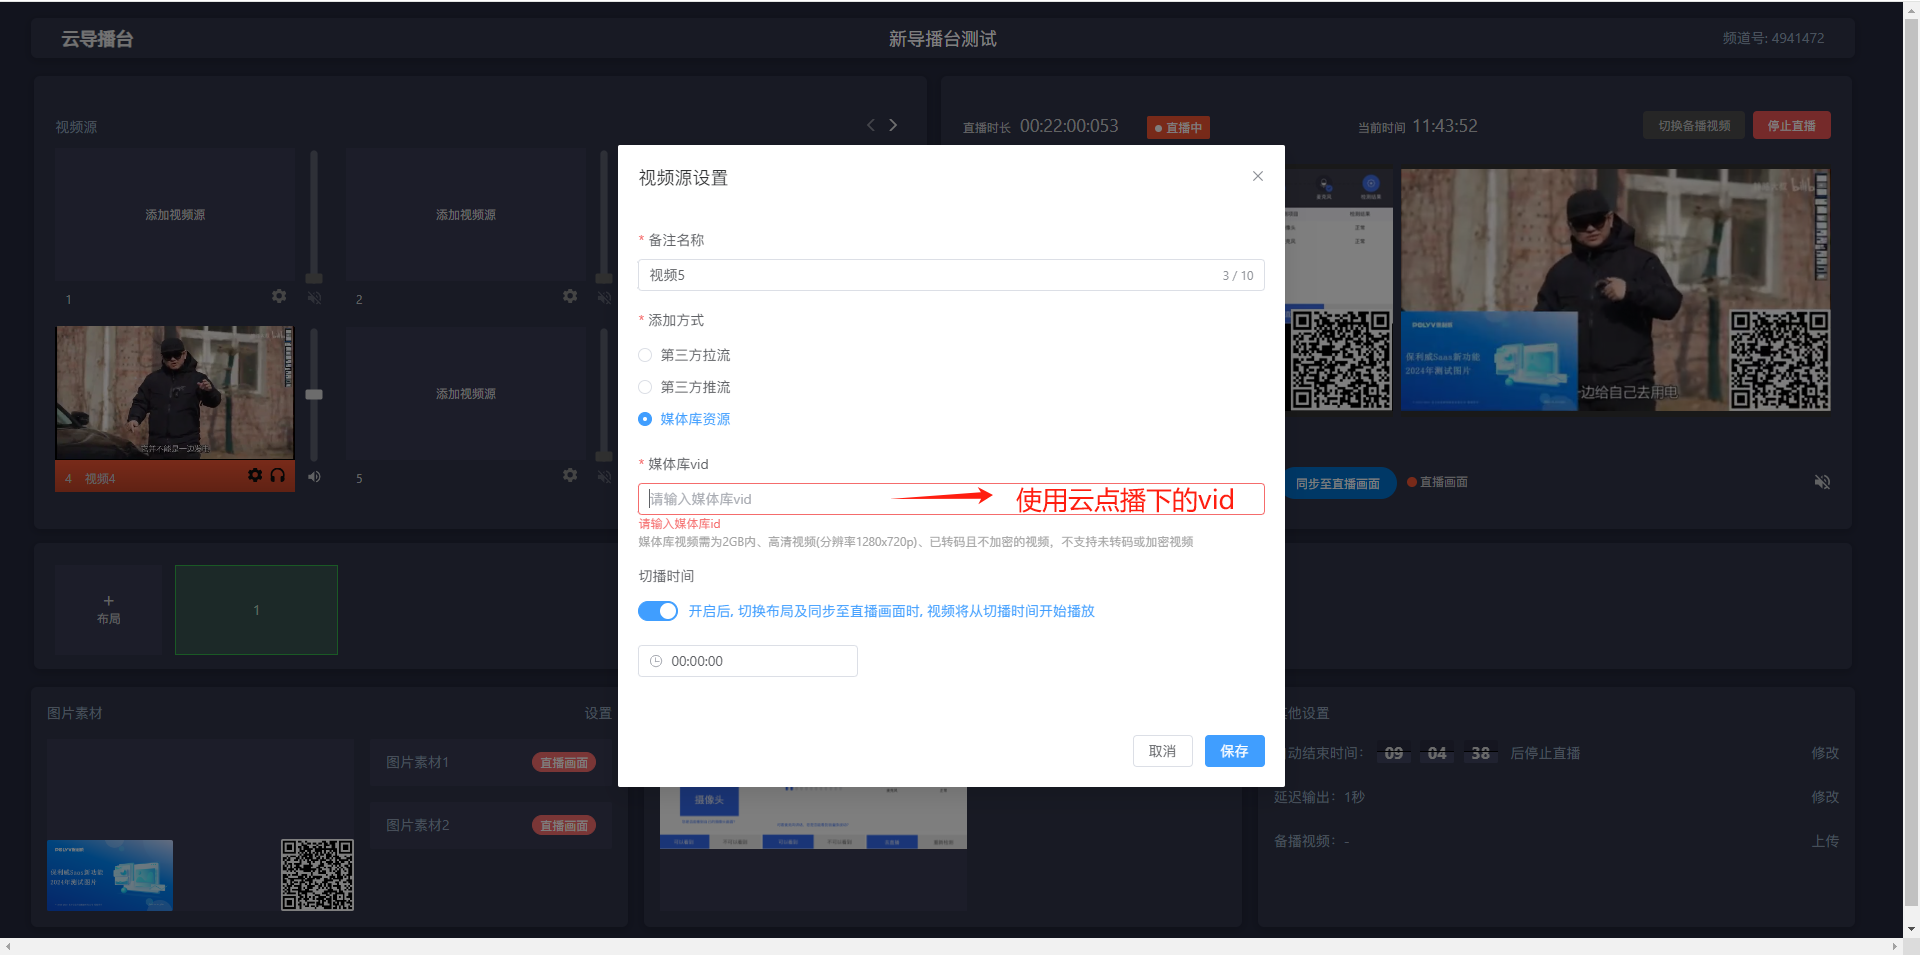
In the video source management area, you can add or switch live video sources.
Click the "Add Video Source" button and select the video input device or file you wish to stream.
Three addition methods are supported: third-party pull stream, third-party push stream, and media library resources (cloud on-demand videos).
4.4 Audio Control
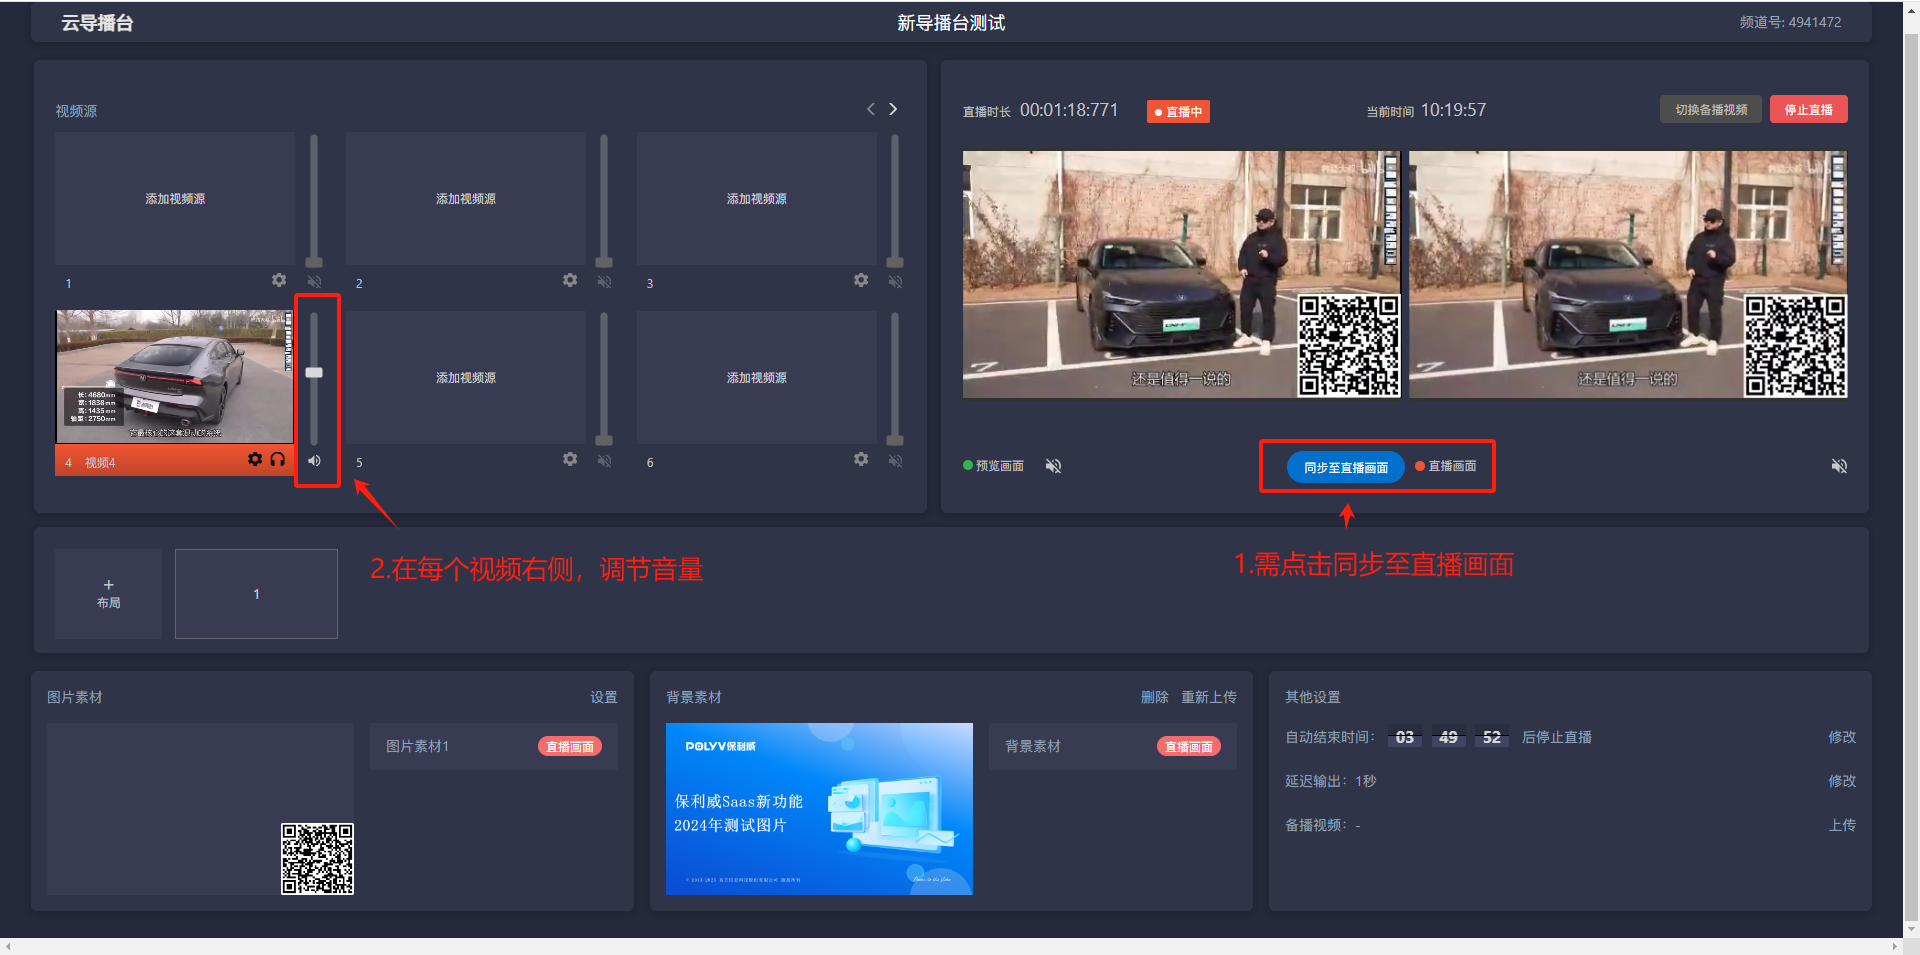
In the audio control area, you can adjust the live volume and select the audio input source.
The slider for volume adjustment is only available after syncing to the live screen, ensuring clear audio during the broadcast.
4.5 Layout Area
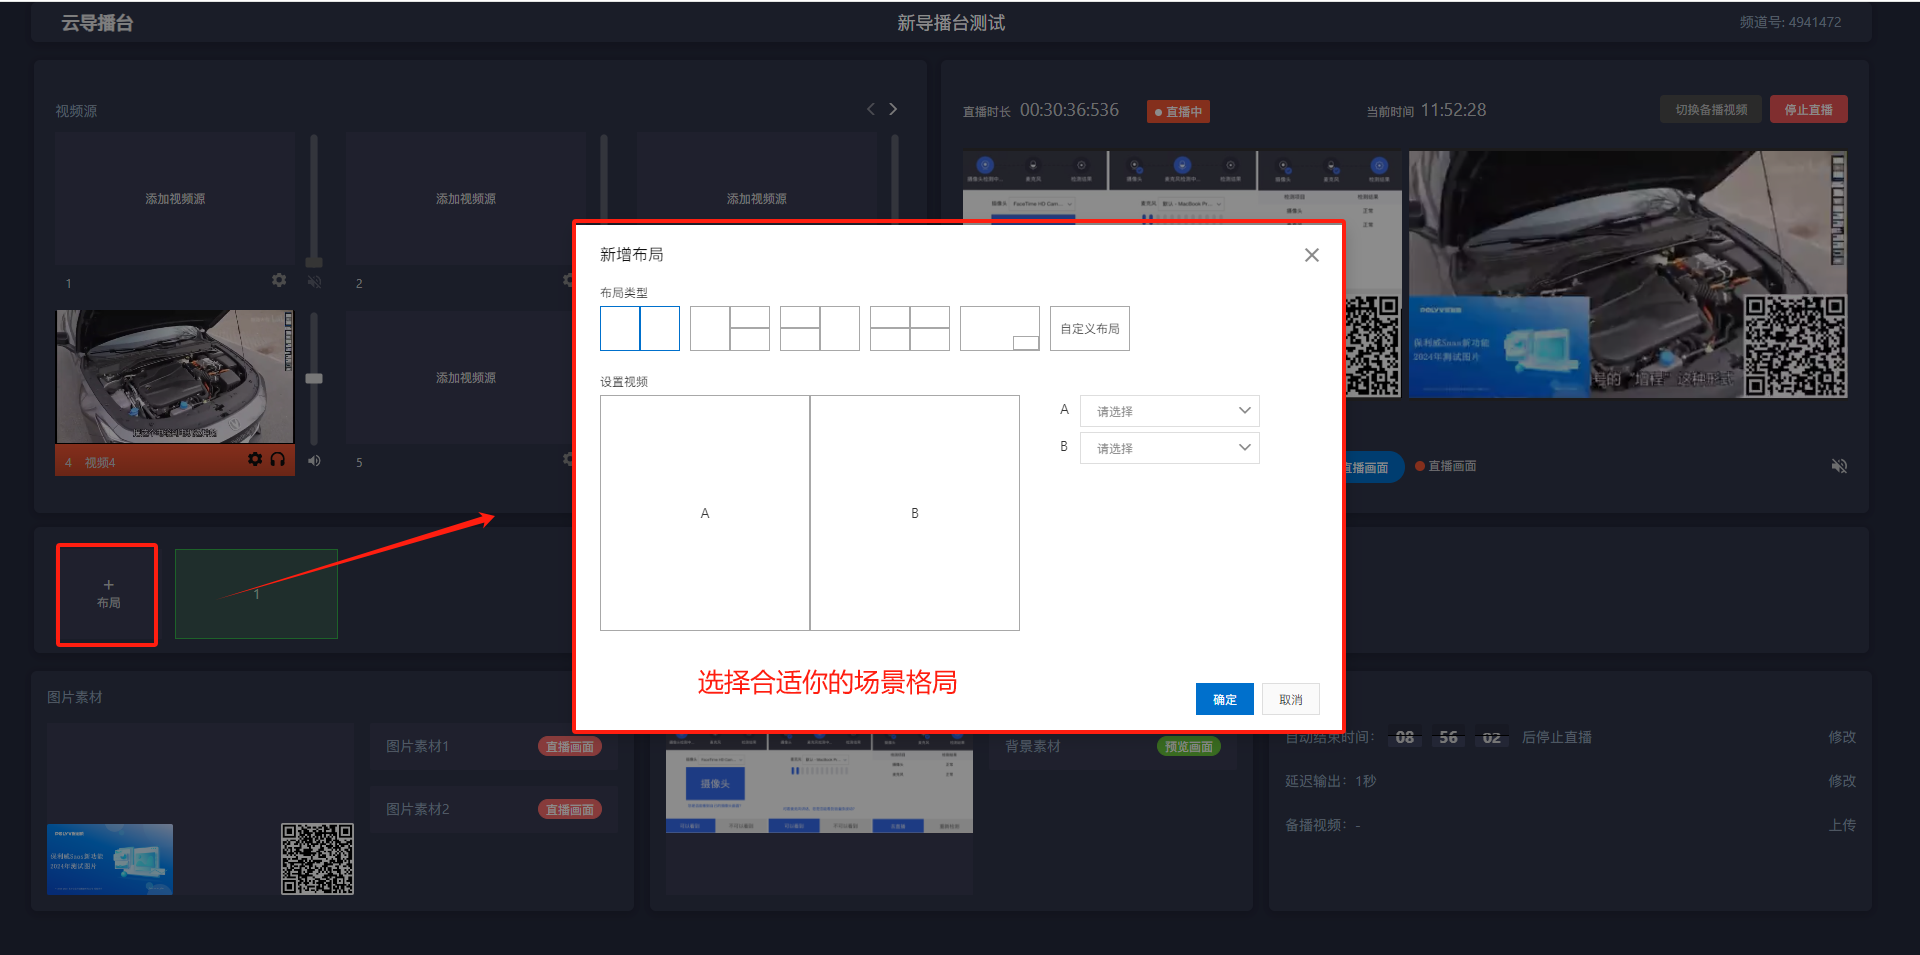
Different layout formats are supported. After selecting a format, choose the video for the corresponding area.
4.6 Image and Background Materials
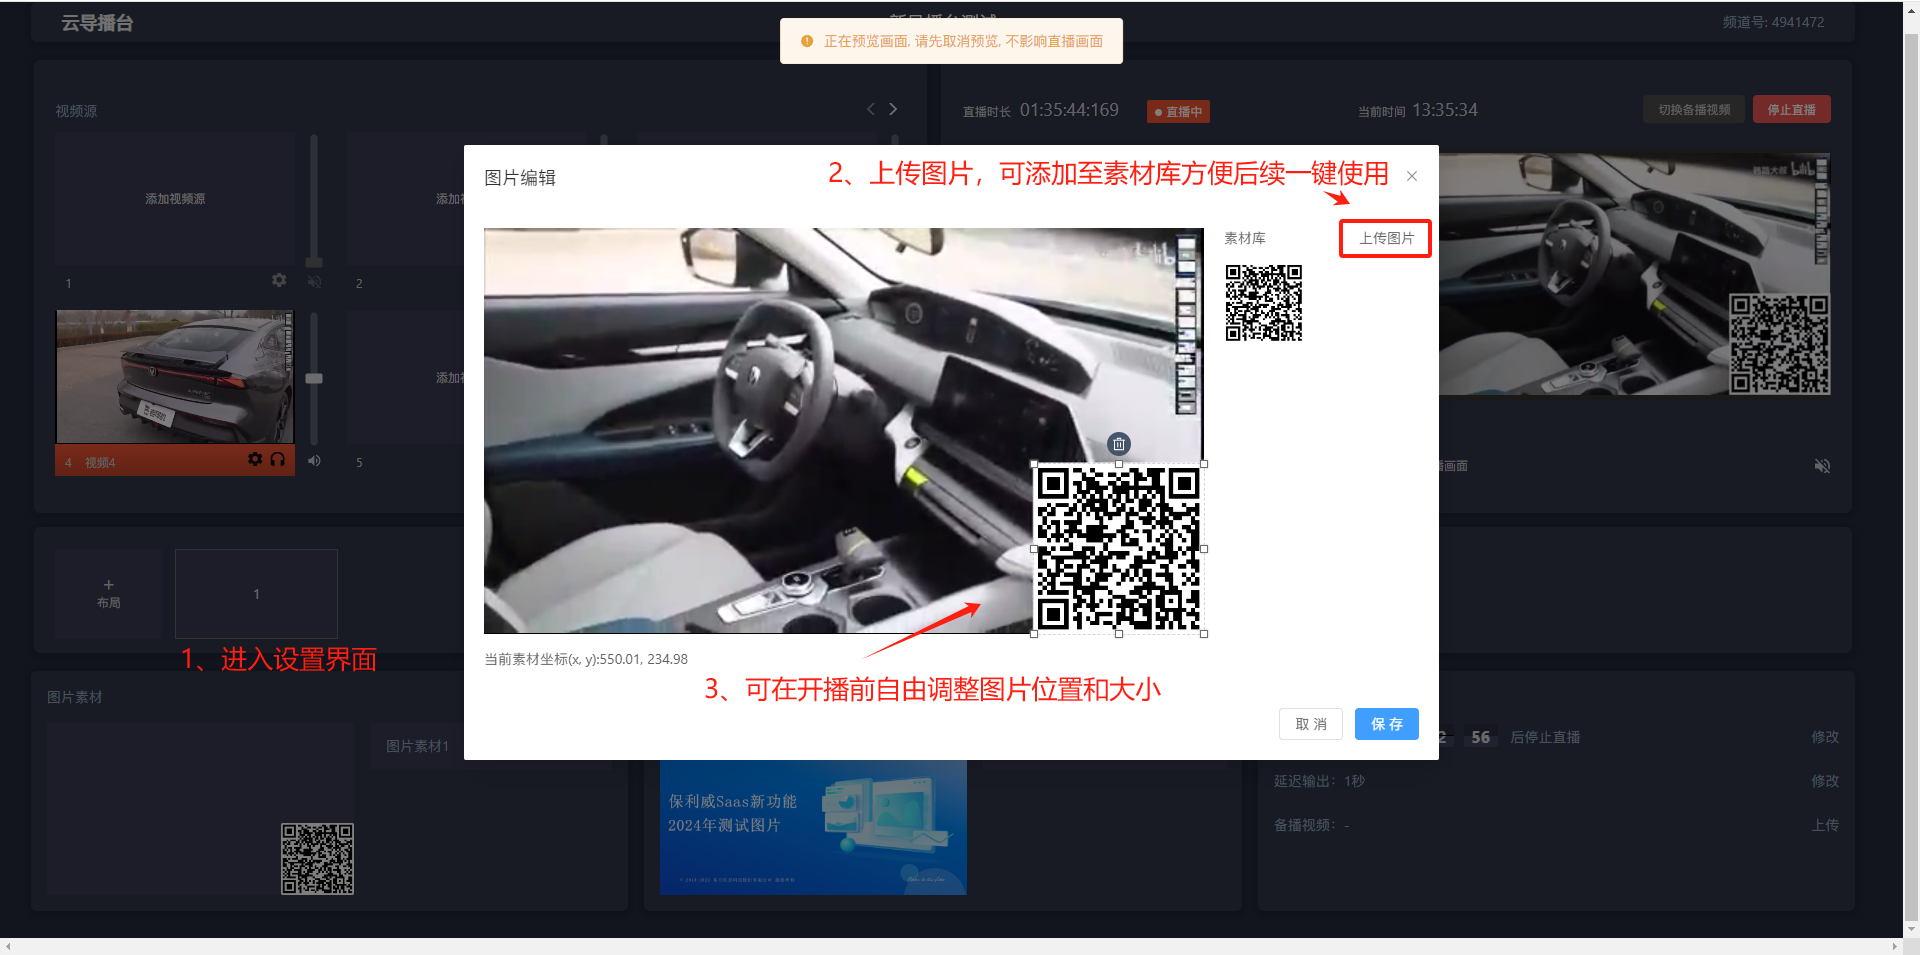
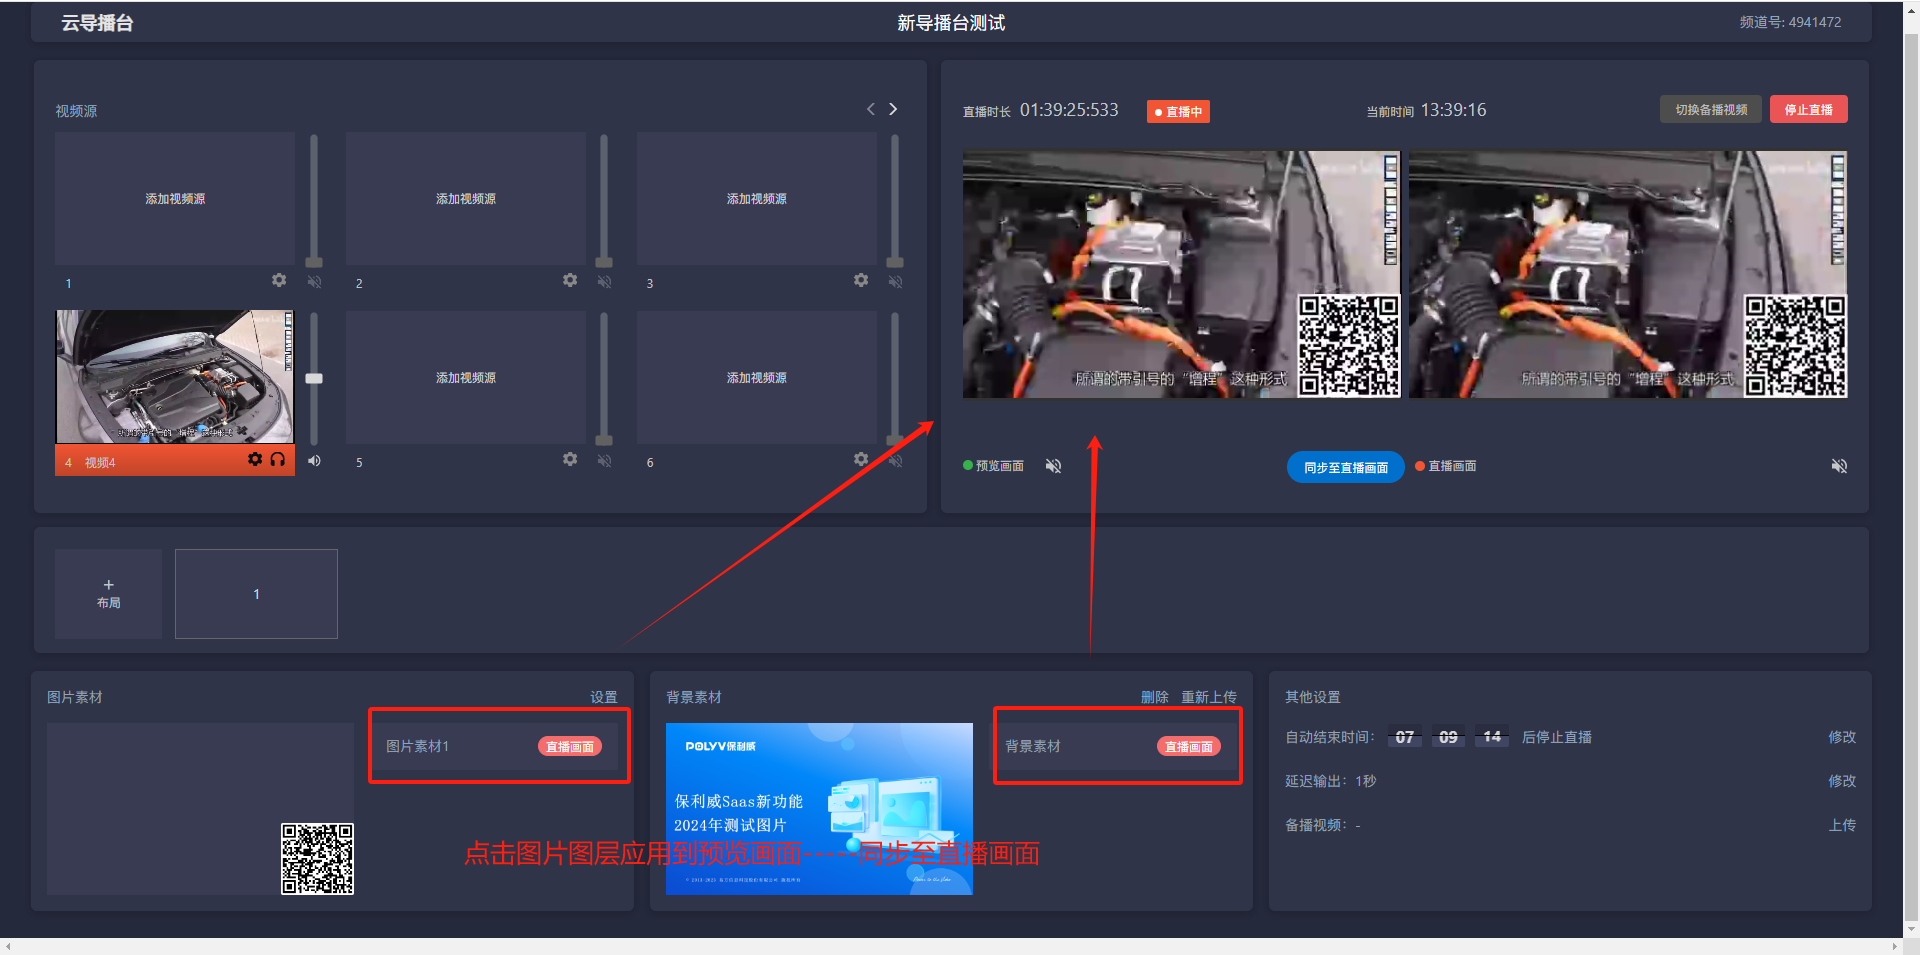
Image materials follow a top-layer logic; you can click settings to adjust their position. Background materials are bottom-layer and cannot be repositioned; they fill the screen by default.
4.7 Live Streaming Settings
- In the live streaming settings area, you can configure the auto-end time, output delay (maximum 300 seconds), and backup video.
- Backup video: If an unexpected situation occurs during the live broadcast, or if you need a time gap or want to insert an advertisement, you can switch to a backup video. Only MP4 files under 30MB are supported.
- After configuration, click the "Start Live" button to begin your broadcast.
4.8 Preview and Live Screen
- During the broadcast, you can monitor real-time data and the video feed.
- You can adjust live streaming settings in real time as needed.
5. Common Problem Solving
- If you encounter technical issues such as video or audio interruptions, check whether the input device connection is normal.
- Check the network connection to ensure stability.
6. Technical Support
- Steps for single sign-on (SSO) operation:
- URL to redirect to after successful SSO: https://console.polyv.net/live/index.html#/channel/4376774/guide?stopTime=14400(带上时间单位秒)
- Pass the parameters stopTime and channelId to the API: https://live.polyv.net/v2/channel/newGuide/set-stop-time.do
- After the API returns successfully, redirect directly to: https://console.polyv.net/live/caster/?channelId=4376774
- If the above steps do not resolve the issue, contact customer service for assistance.
