Notes on Using the Client on Mac
Mac System and Device Permissions
- Supported system version: macOS 10.14 or later.
- macOS requires user permission to access files, folders, camera, microphone, and screen recording. Ensure these three permissions are enabled in the system settings; otherwise, issues such as black screens or no audio may occur during use.
- Once camera, microphone, and screen recording permissions are granted, macOS will not prompt again for subsequent use.
- On macOS 10.14, in a three-screen scenario, switching between PPT and camera may cause display anomalies on the client's main interface. This can be resolved by minimizing and then restoring the client.
How to Obtain Device Permissions
Screen Recording
Before starting a live broadcast, it is strongly recommended to obtain screen recording permission first, then log out and log back into the client.
- Manually click [Screen Share]. macOS will display the "Screen Recording" dialog.
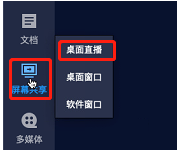
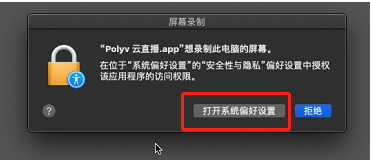
- Select [Open System Preferences].
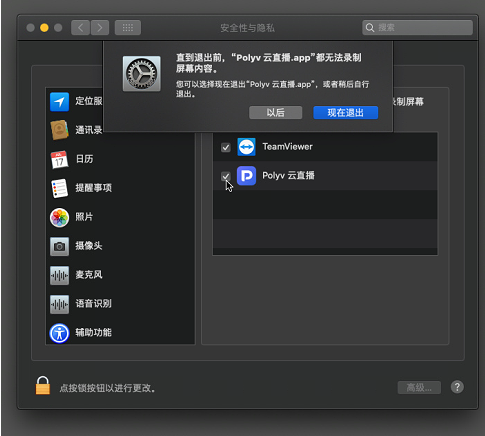
- Navigate to "Security & Privacy" settings, check "Polyv Cloud Live". macOS will display a confirmation dialog. Select [Quit Now], then restart the client for the changes to take effect.
Camera
When using the camera in the client for the first time, macOS will automatically display a dialog. Select [OK] to enable camera use during the live broadcast.
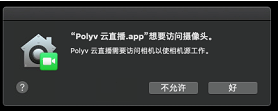
If [Don't Allow] was selected, go to macOS System Preferences > Security & Privacy > Camera, allow "Polyv Cloud Live", then log out and log back into the client for the changes to take effect.
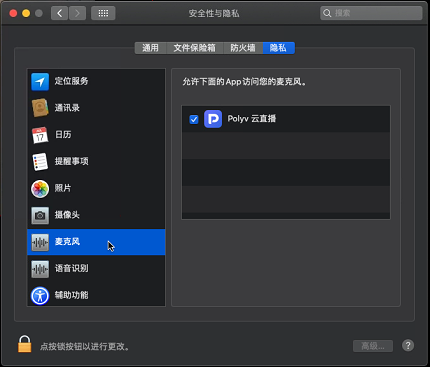
Microphone
Upon first entering the client, macOS will automatically display a microphone permission dialog. Select [OK] to grant the client microphone access.
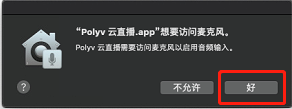
If [Don't Allow] was selected, go to macOS System Preferences > Security & Privacy > Microphone, allow "Polyv Cloud Live", then log out and log back into the client for the changes to take effect.
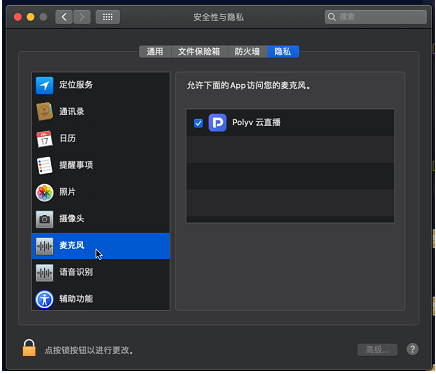
Speaker Audio Capture
macOS does not natively support speaker audio capture. Due to macOS system updates that have modified underlying functionality, the following method may not work. Use with caution!
Principle: Use the BlackHole plugin to capture speaker audio. Plugin download link: https://soft.polyv.net/tools/BlackHole2ch.v0.2.10.pkg
Instructions
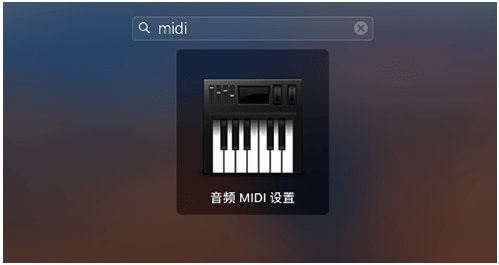
- Click the "Launchpad" icon in the dock at the bottom of the screen. In the search bar at the top of the interface, type "midi" to find and open Audio MIDI Setup.
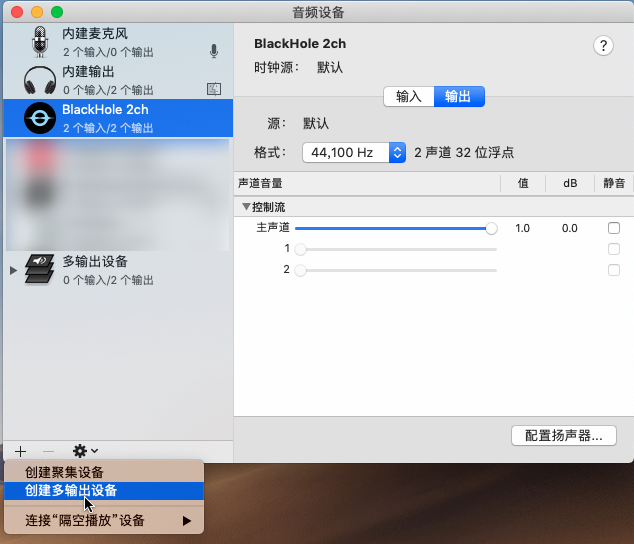
- Click the "+" button and select "Create Multi-Output Device". Create a multi-output device.
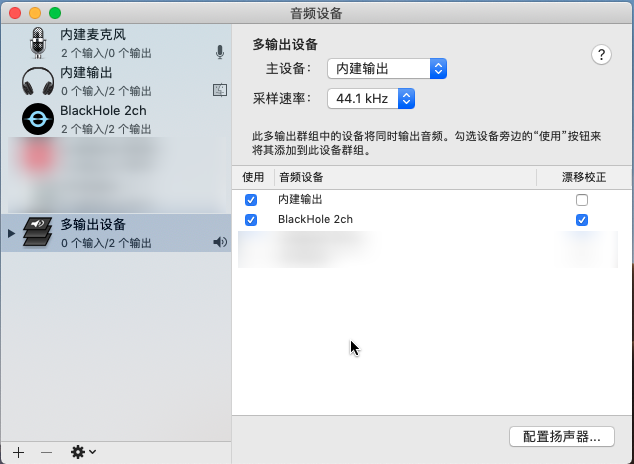
- Check "Built-in Output" and "BlackHole (2ch)".
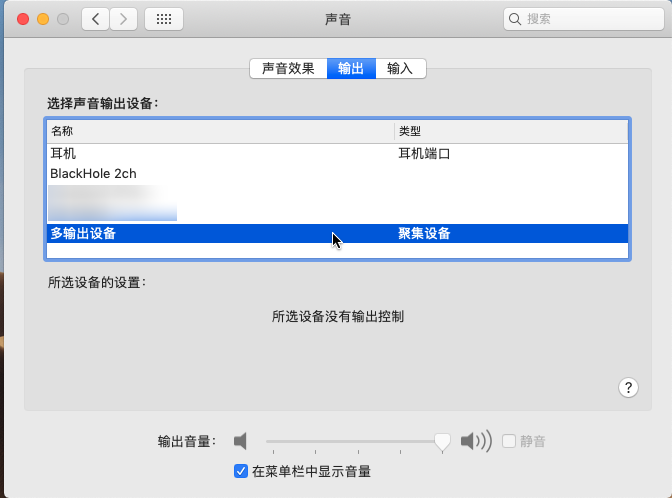
- Now open "System Preferences" > "Sound" > "Output". You will see "BlackHole 2ch" and the newly created multi-output device in the output device list. Select the "Multi-Output Device" you created.
- Return to the client's device detection > Speaker, and select "BlackHole (2ch)".
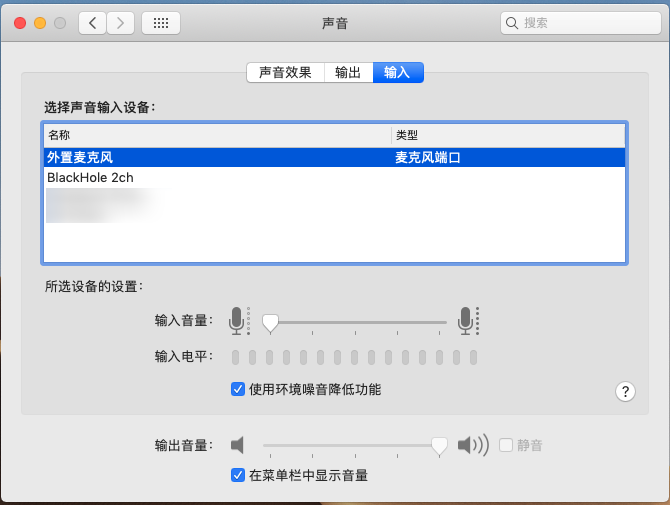
Note: Downloading BlackHole is to resolve the issue of being unable to select a speaker device. No changes to the microphone settings are needed. In Sound settings, select the corresponding device for Input. If the input level shows activity, the microphone device is functioning normally.