


Google Client ID Configuration Guide
Description
The Google Client ID is used to identify applications that initiate Google authorization login for customers using custom domains. You can configure your own Google Client ID to match the Google authorization login with your current custom domain. If no custom Client ID is configured, the system continues to use the platform's default configuration, and the existing Google login method remains unaffected.
Use Cases
- Custom domain watch page: Viewers access the watch page via the customer's own domain and need to log in with Google
- Brand authorization display: The Google authorization consent screen needs to display the customer's own application name and brand information
- Authorization error handling: Google login fails under a custom domain due to OAuth domain mismatch
Prerequisites
The following information is required before configuration:
| Item | Description |
|---|---|
| Google Account | Used to log in to Google Cloud Console and create an OAuth application |
| Custom Domain | The domain viewers use to access the watch page, recommended to use https |
| Application Brand Information | Includes application name, support email, homepage URL, privacy policy URL, etc. |
| Authorized Redirect URI | Must be filled in Google Cloud Console. If unsure about the complete address, contact technical support for confirmation |
1. Create a Client ID in Google Cloud Console
1.1 Open Google Cloud Console
Go to Google Cloud Console, select an existing project, or create a new one.
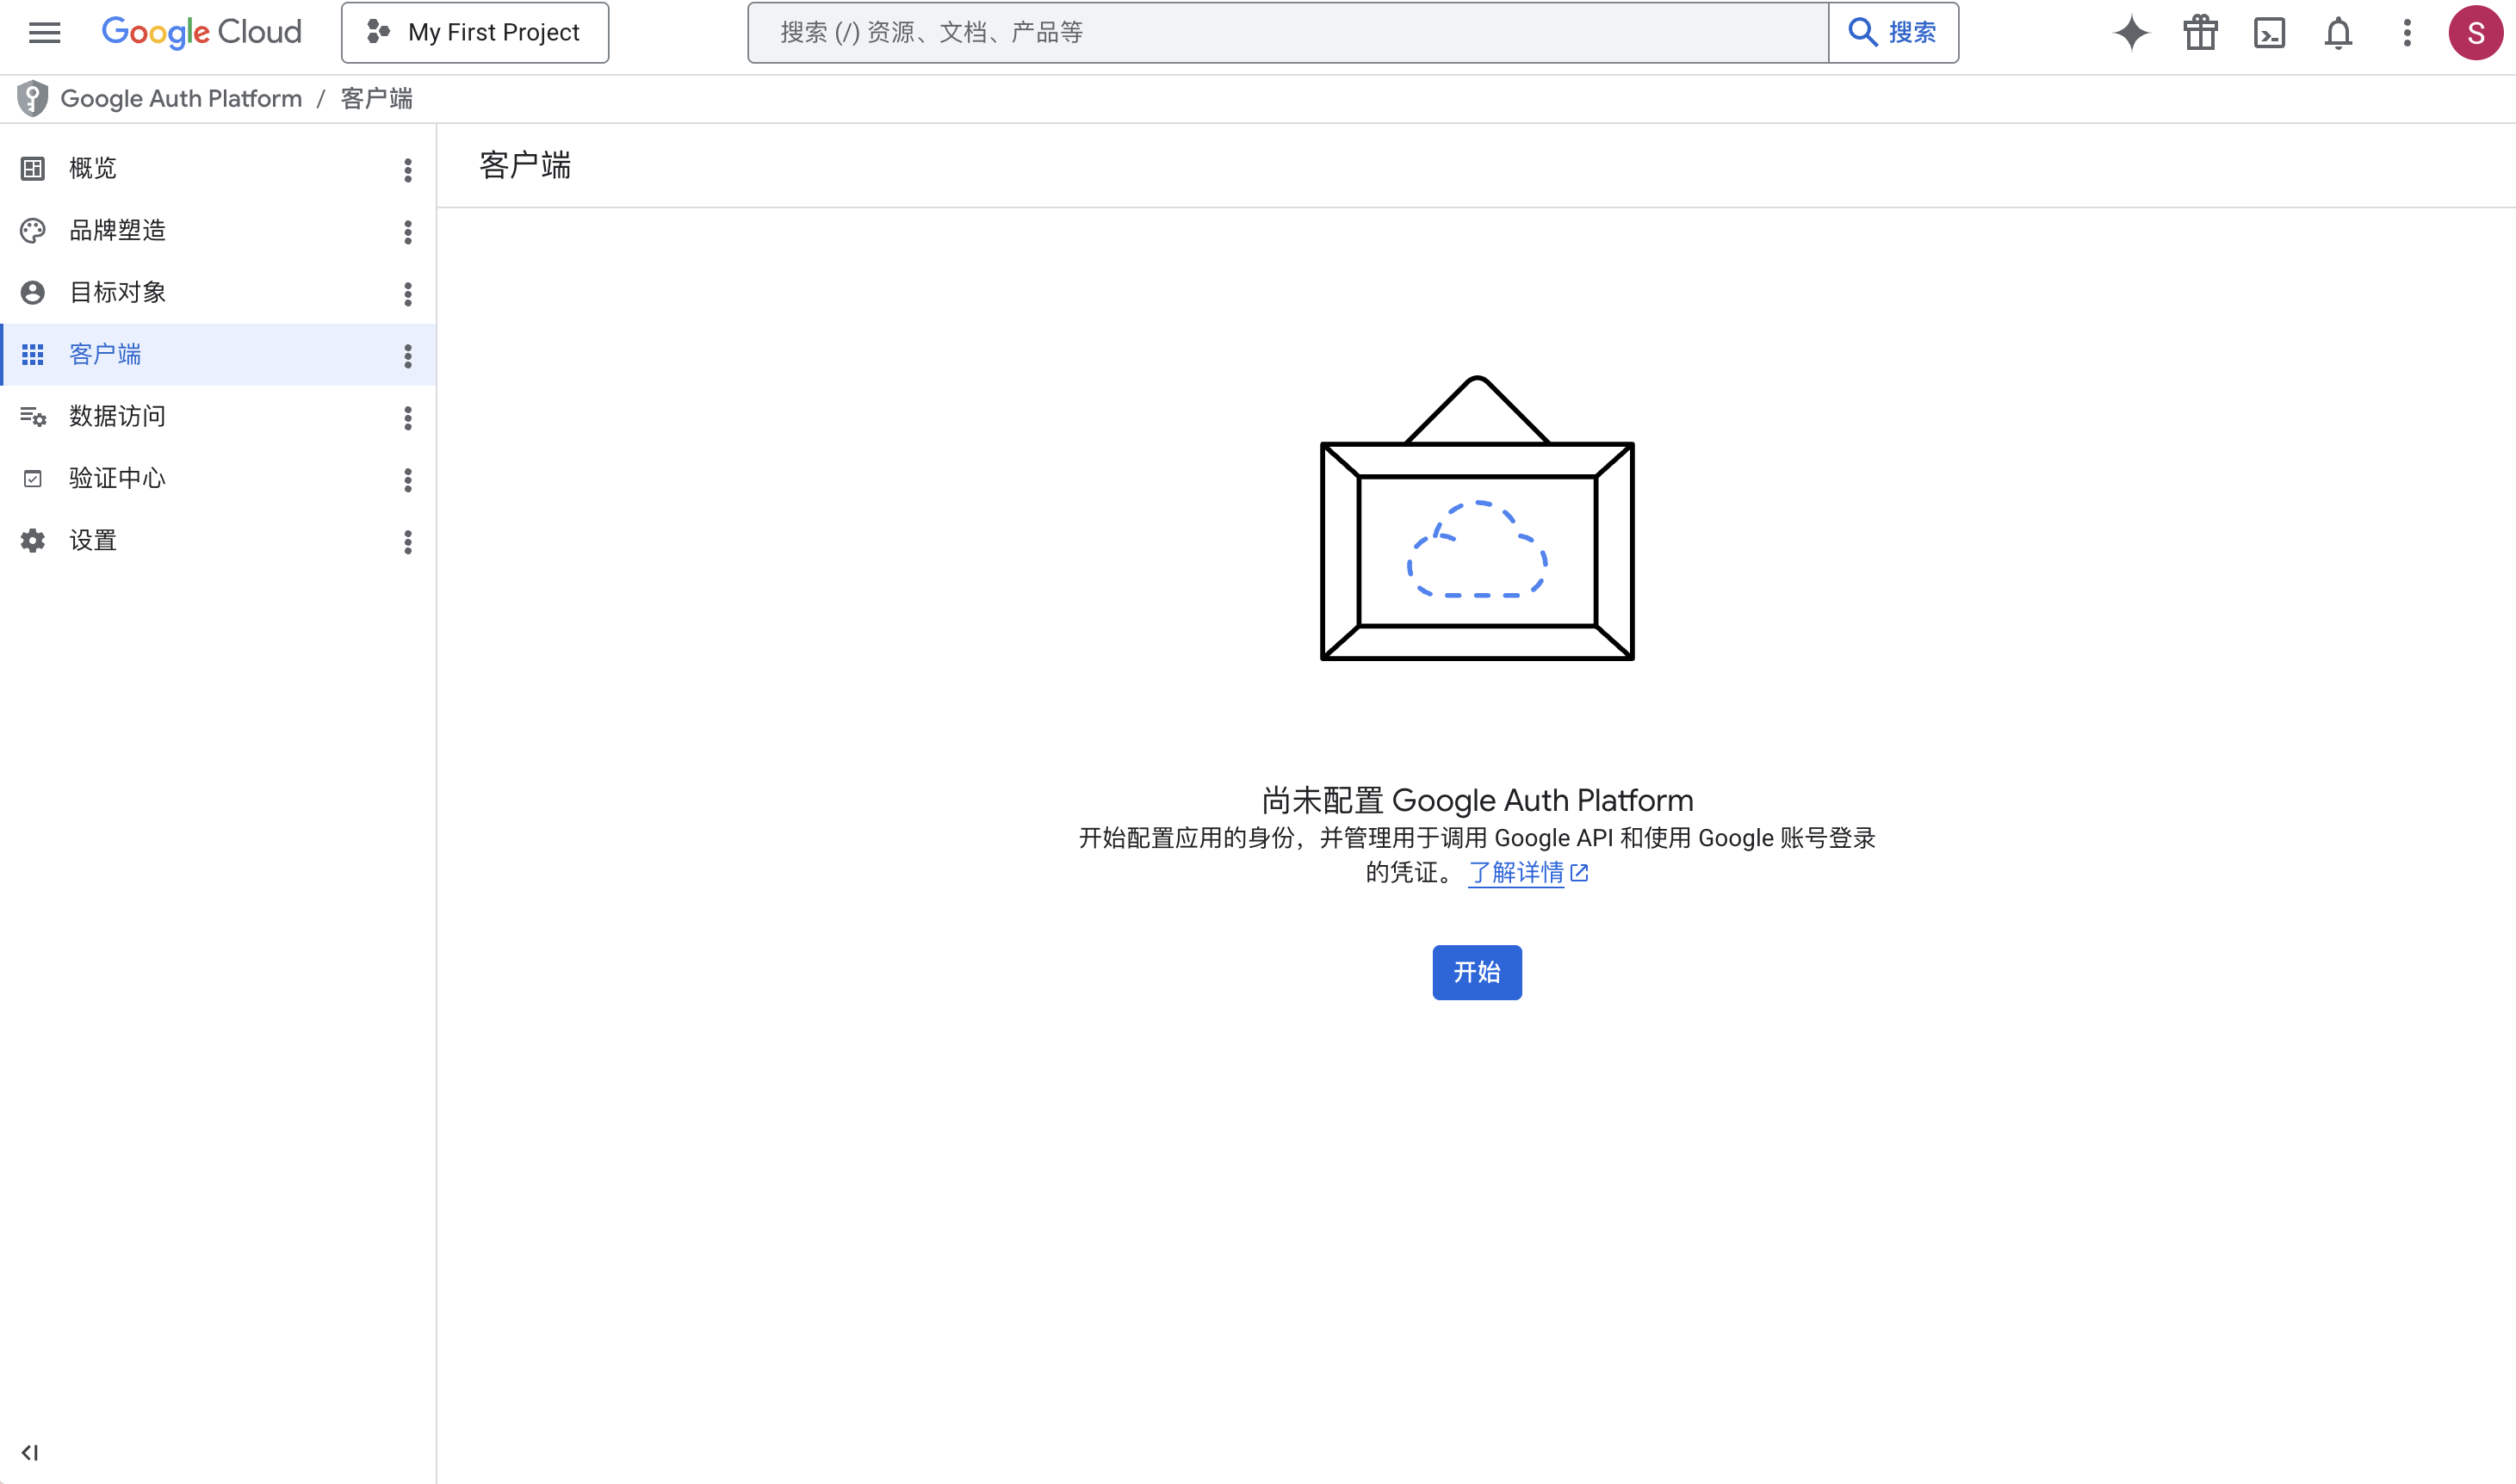
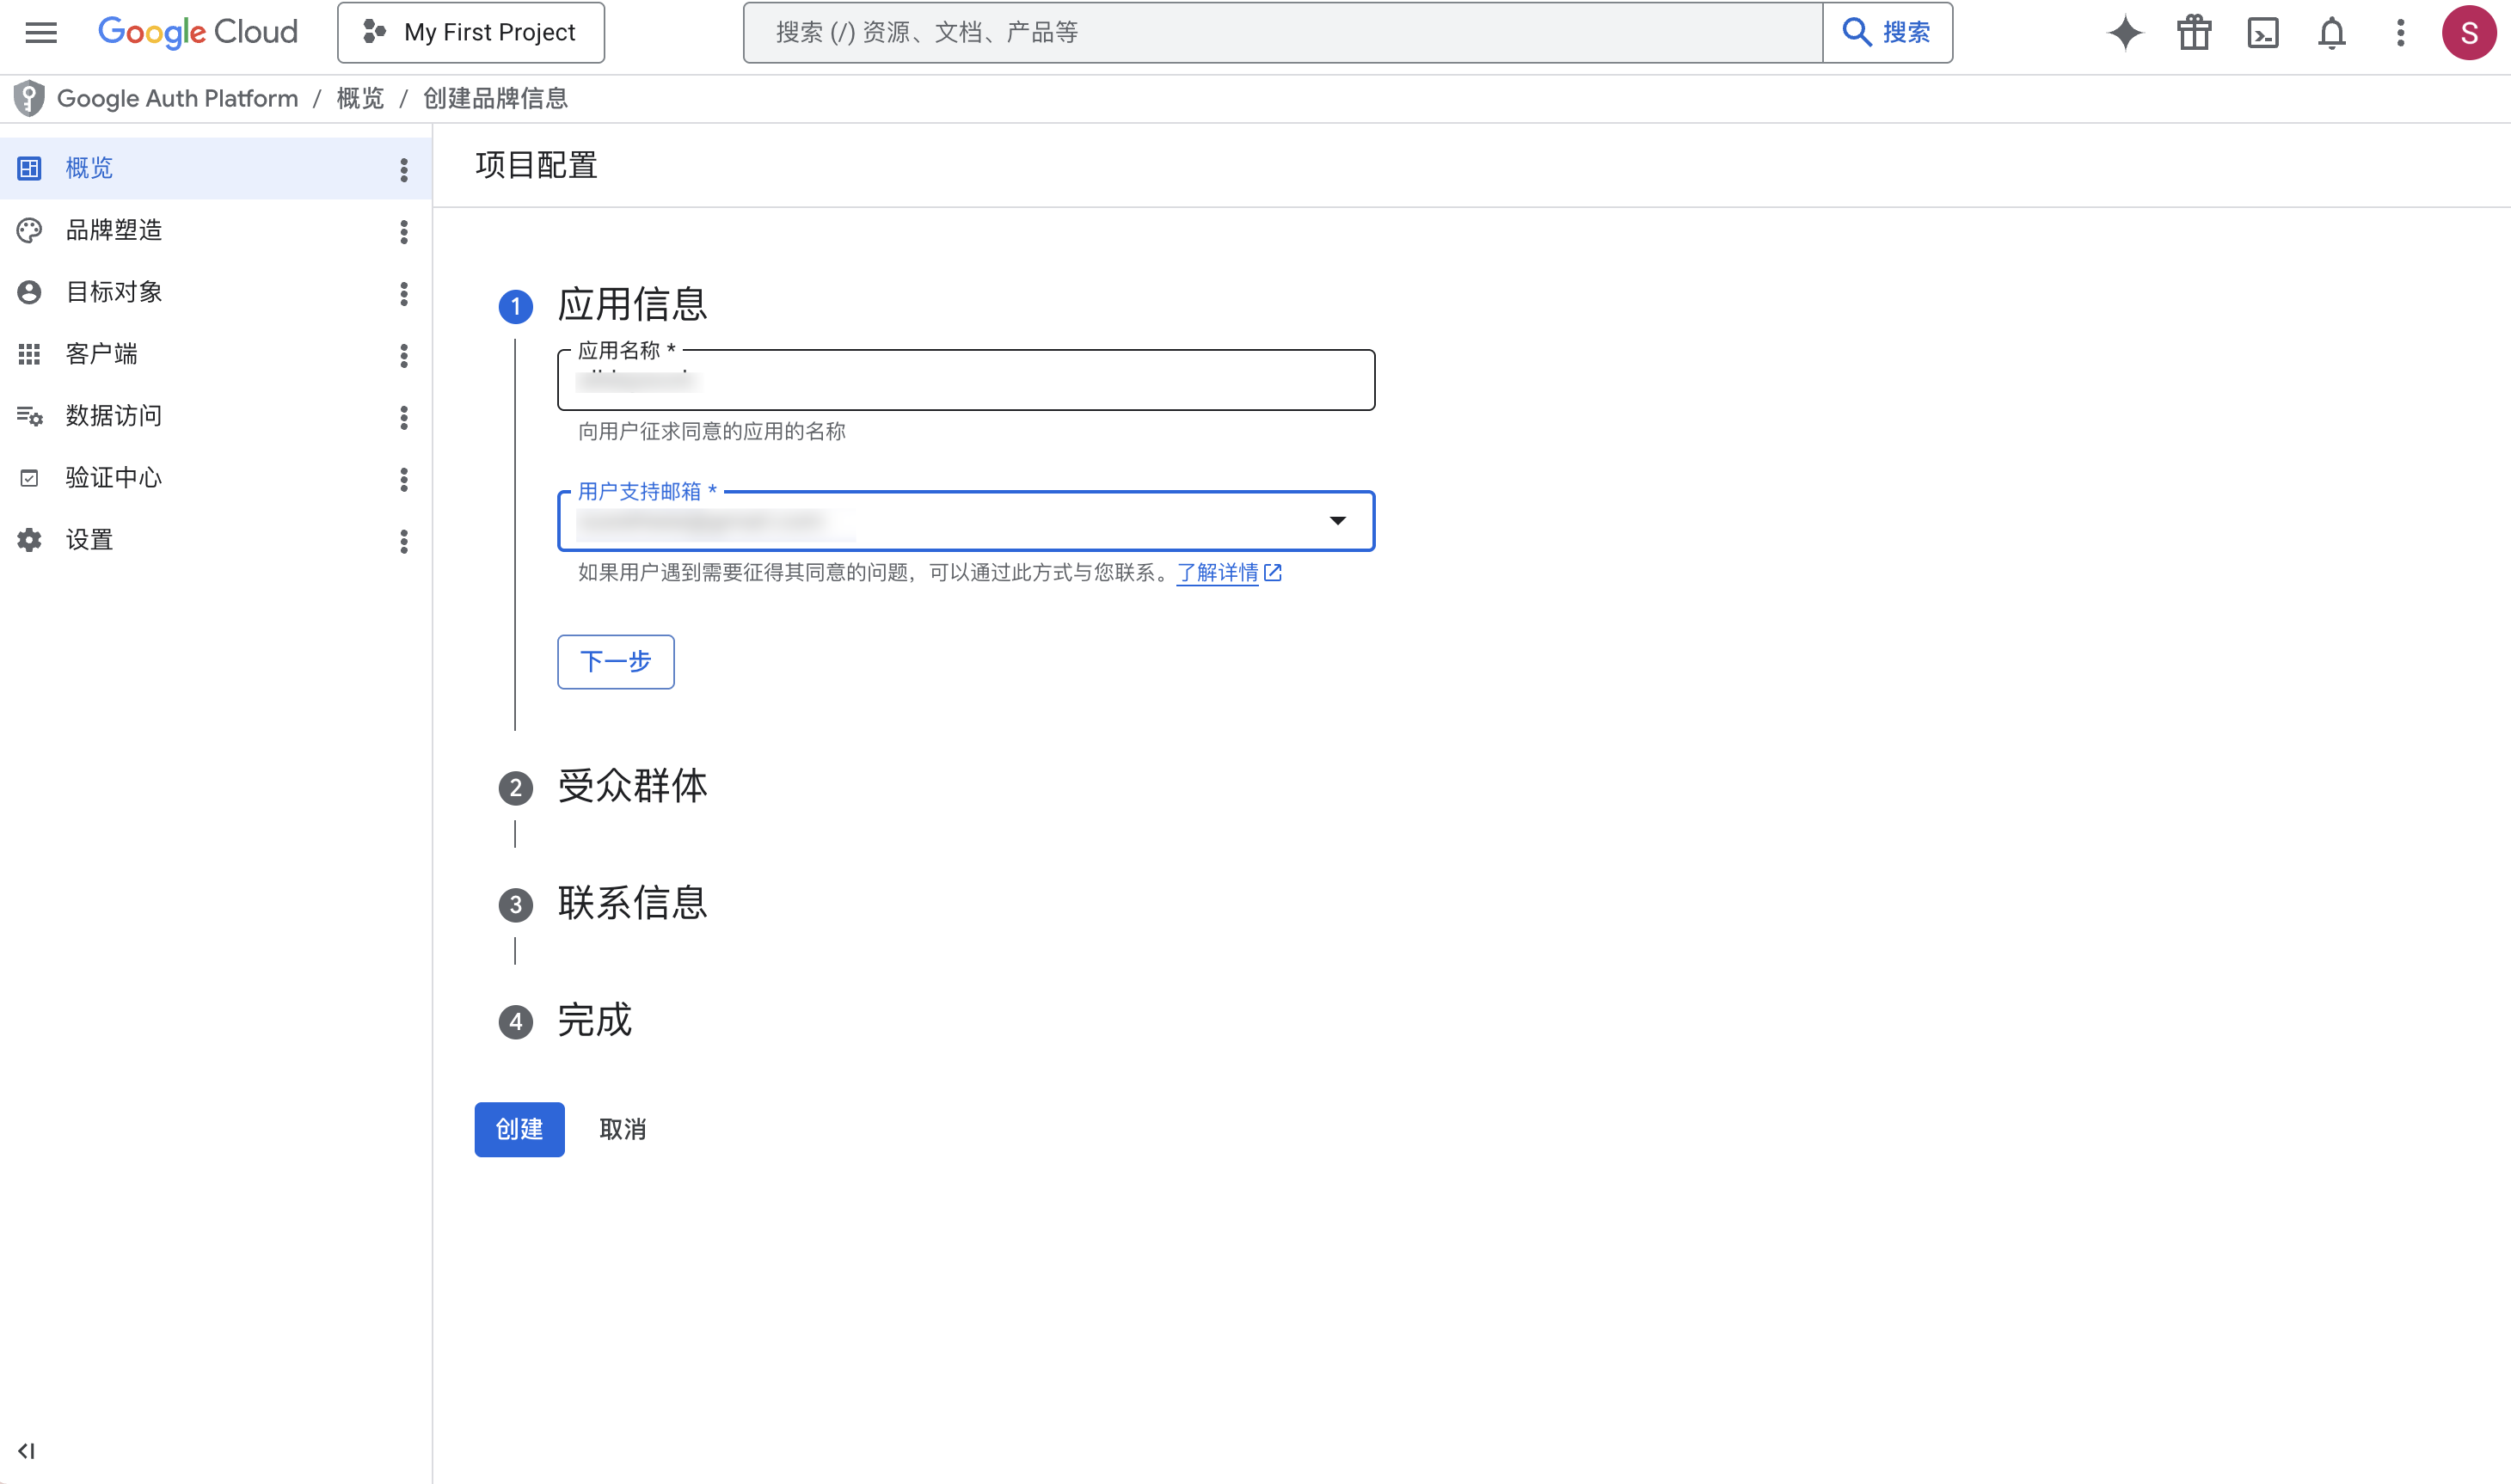
1.2 Configure Application Brand Information
In Google Cloud Console, navigate to the brand configuration page of Google Auth Platform. Fill in the application name, support email, authorized domain, homepage URL, and privacy policy URL as required by the page. This information affects the application name and brand display viewers see on the Google authorization consent screen.
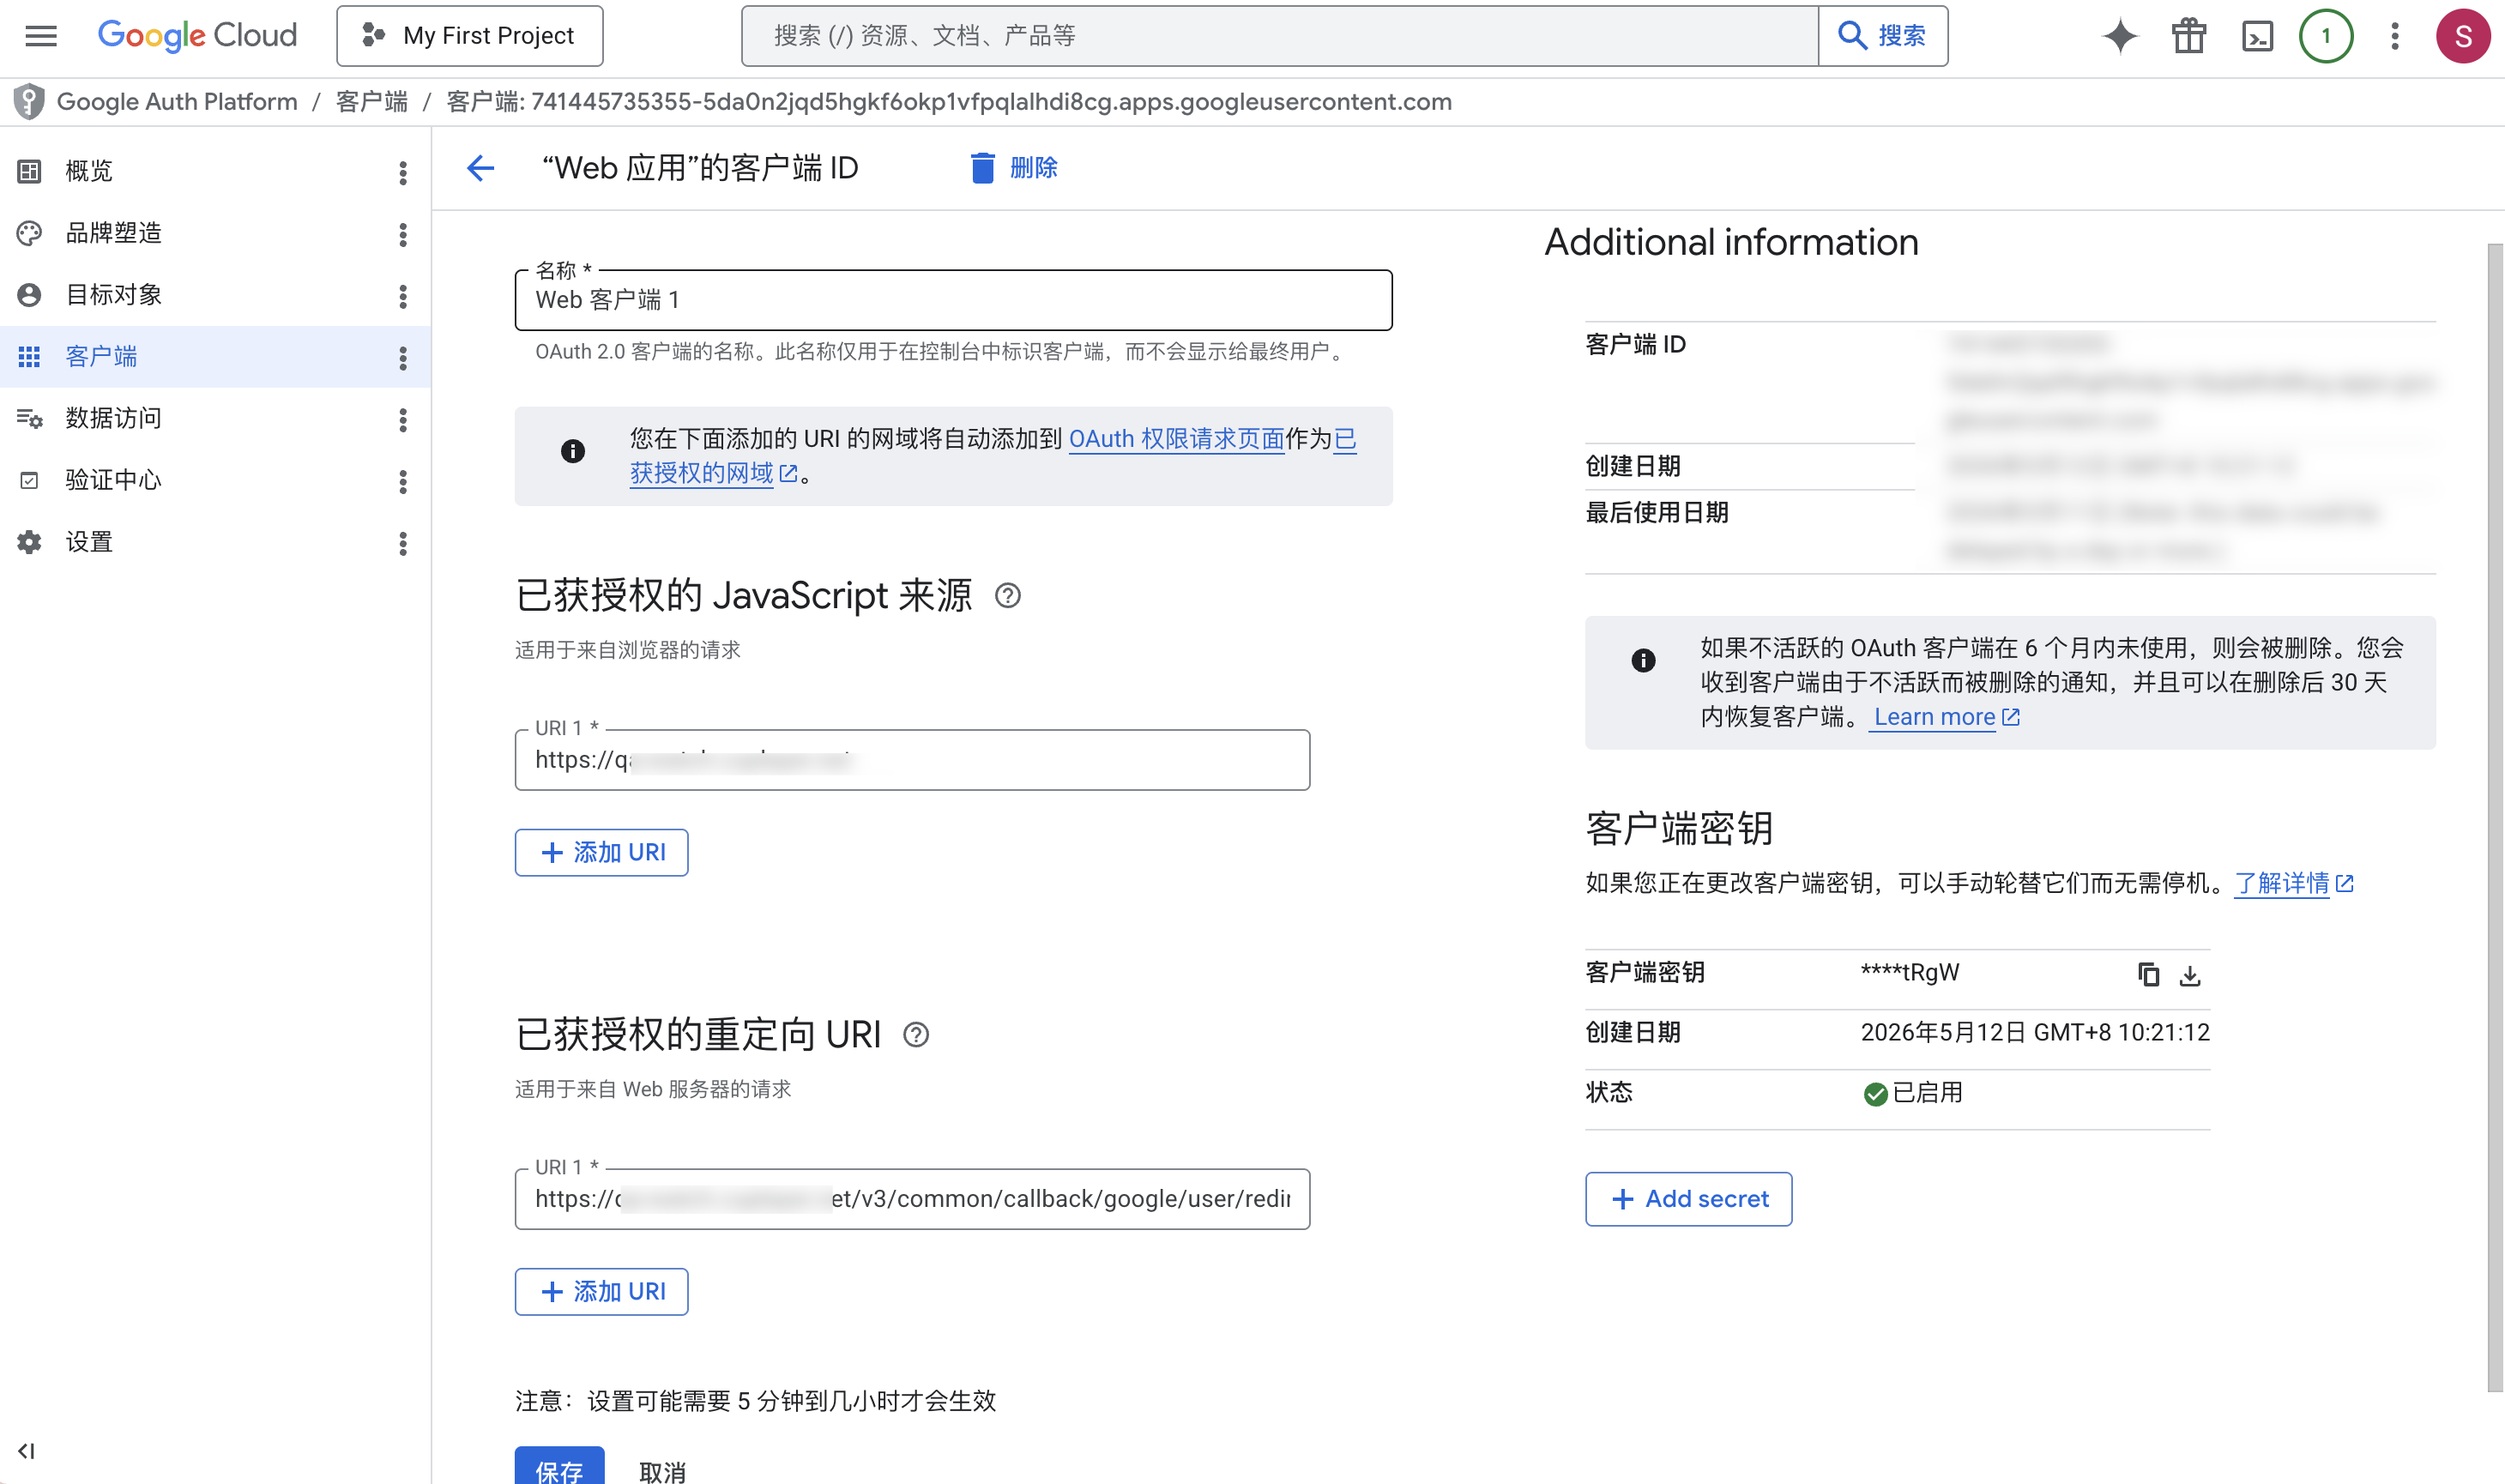
1.3 Create an OAuth Client
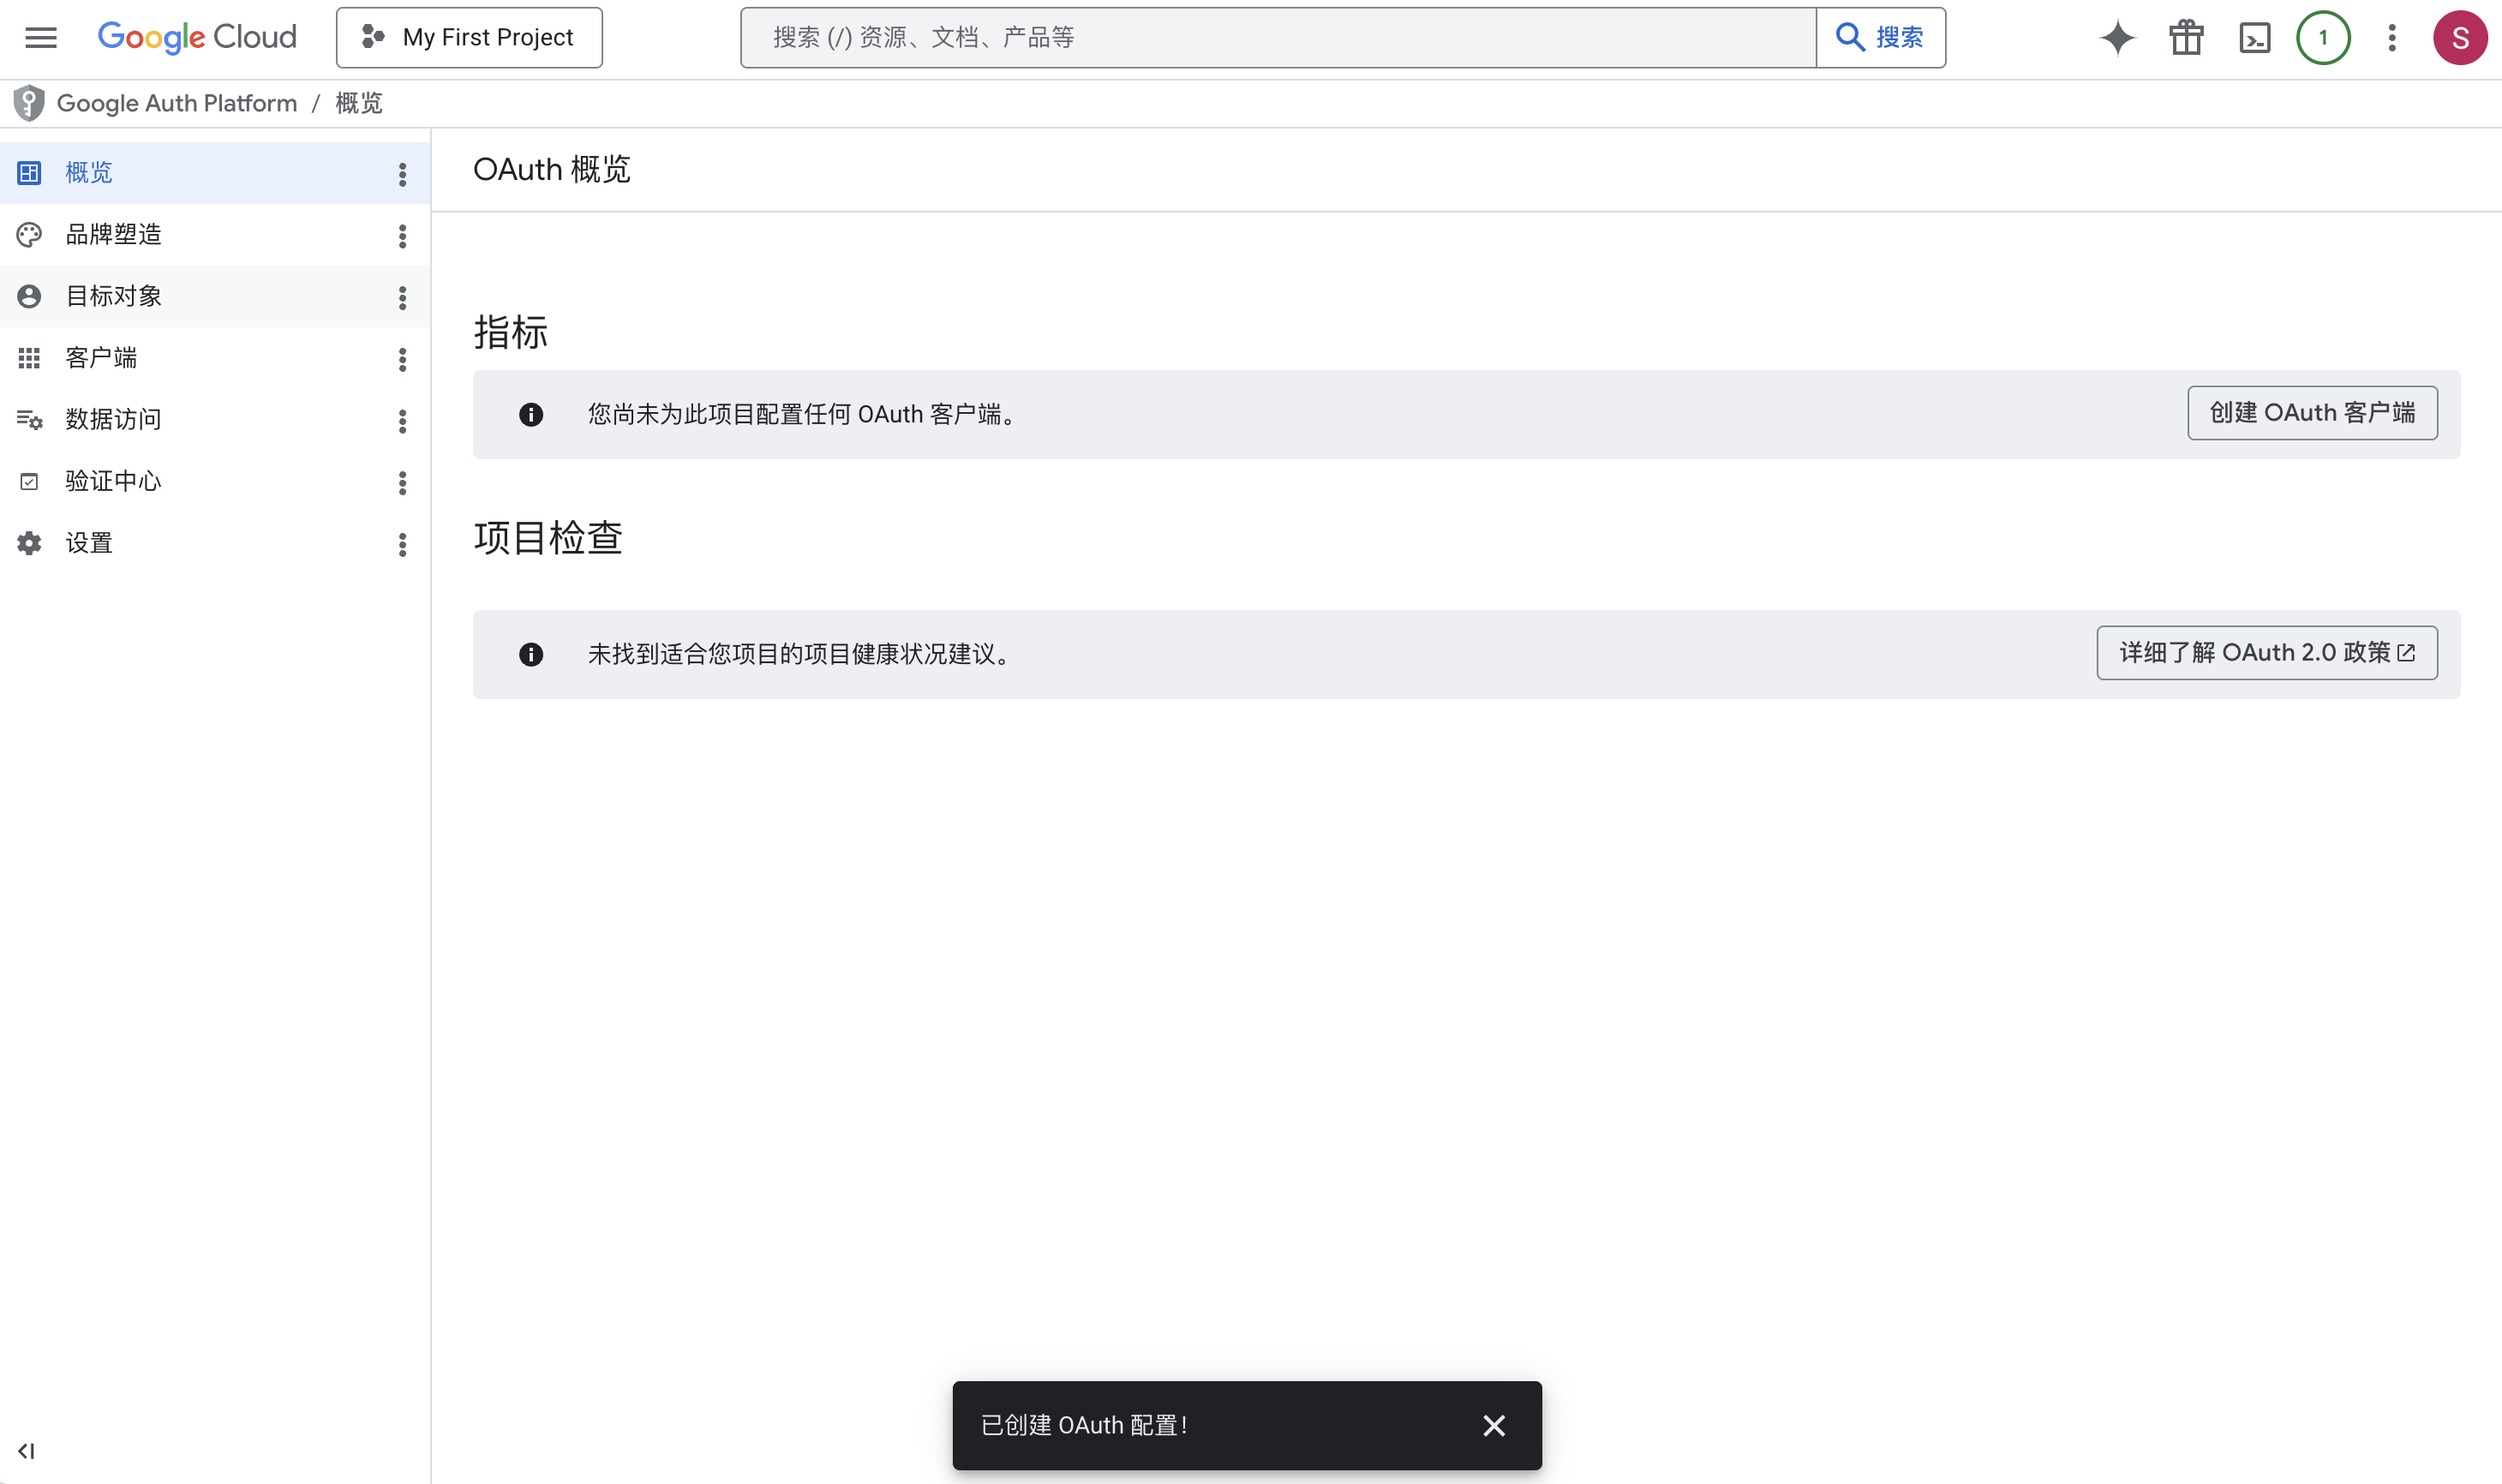
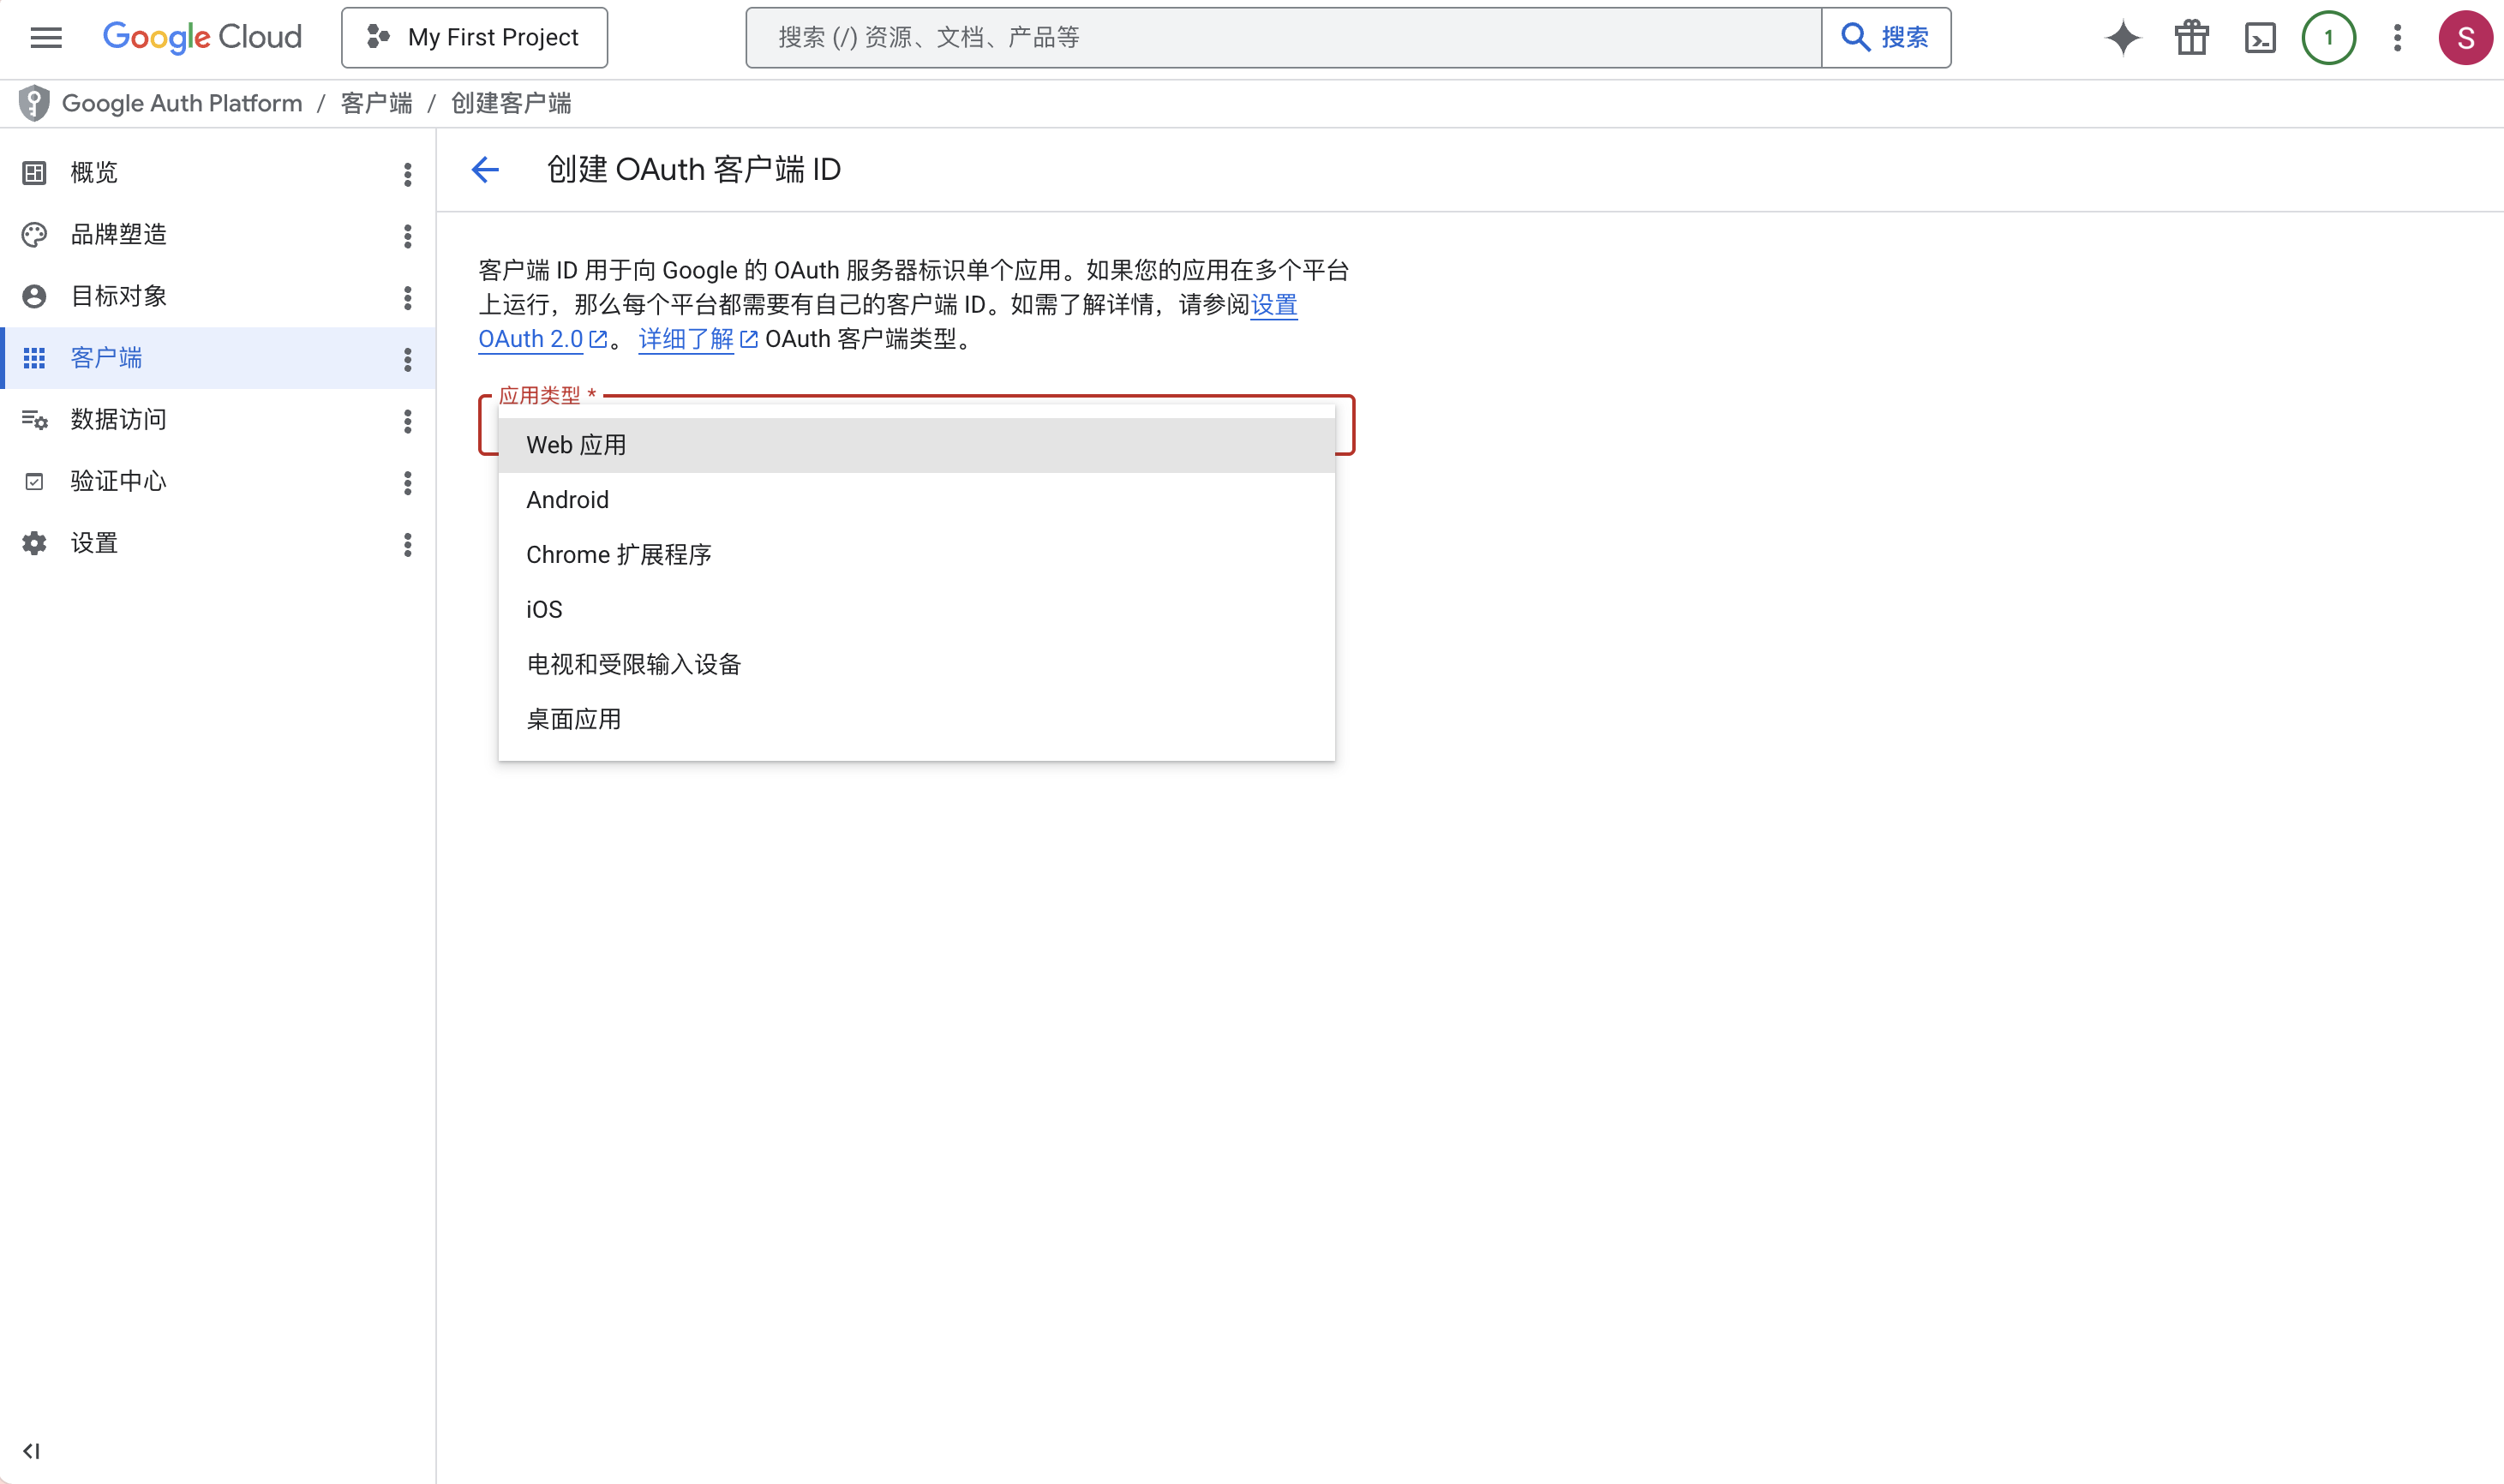
Go to the Credentials or Clients page and create a new OAuth Client.
It is recommended to fill in the configuration items as follows:
| Configuration Item | Instructions |
|---|---|
| Application type | Select based on your business needs |
| Name | Enter an easily identifiable name, such as company name or business name |
| Authorized JavaScript origins | Enter the origin address of the custom domain, e.g., https://www.example.com. Only fill in the protocol, domain, and port; do not include the path. |
| Authorized redirect URIs | Enter the complete authorized redirect URI corresponding to the custom domain. This item can include a path and must be consistent with the actual login redirect URI, e.g., https://www.example.com/v3/common/callback/google/user/redirect. |
After saving, Google Cloud Console will generate an OAuth 2.0 Client ID.
1.4 Copy the Client ID
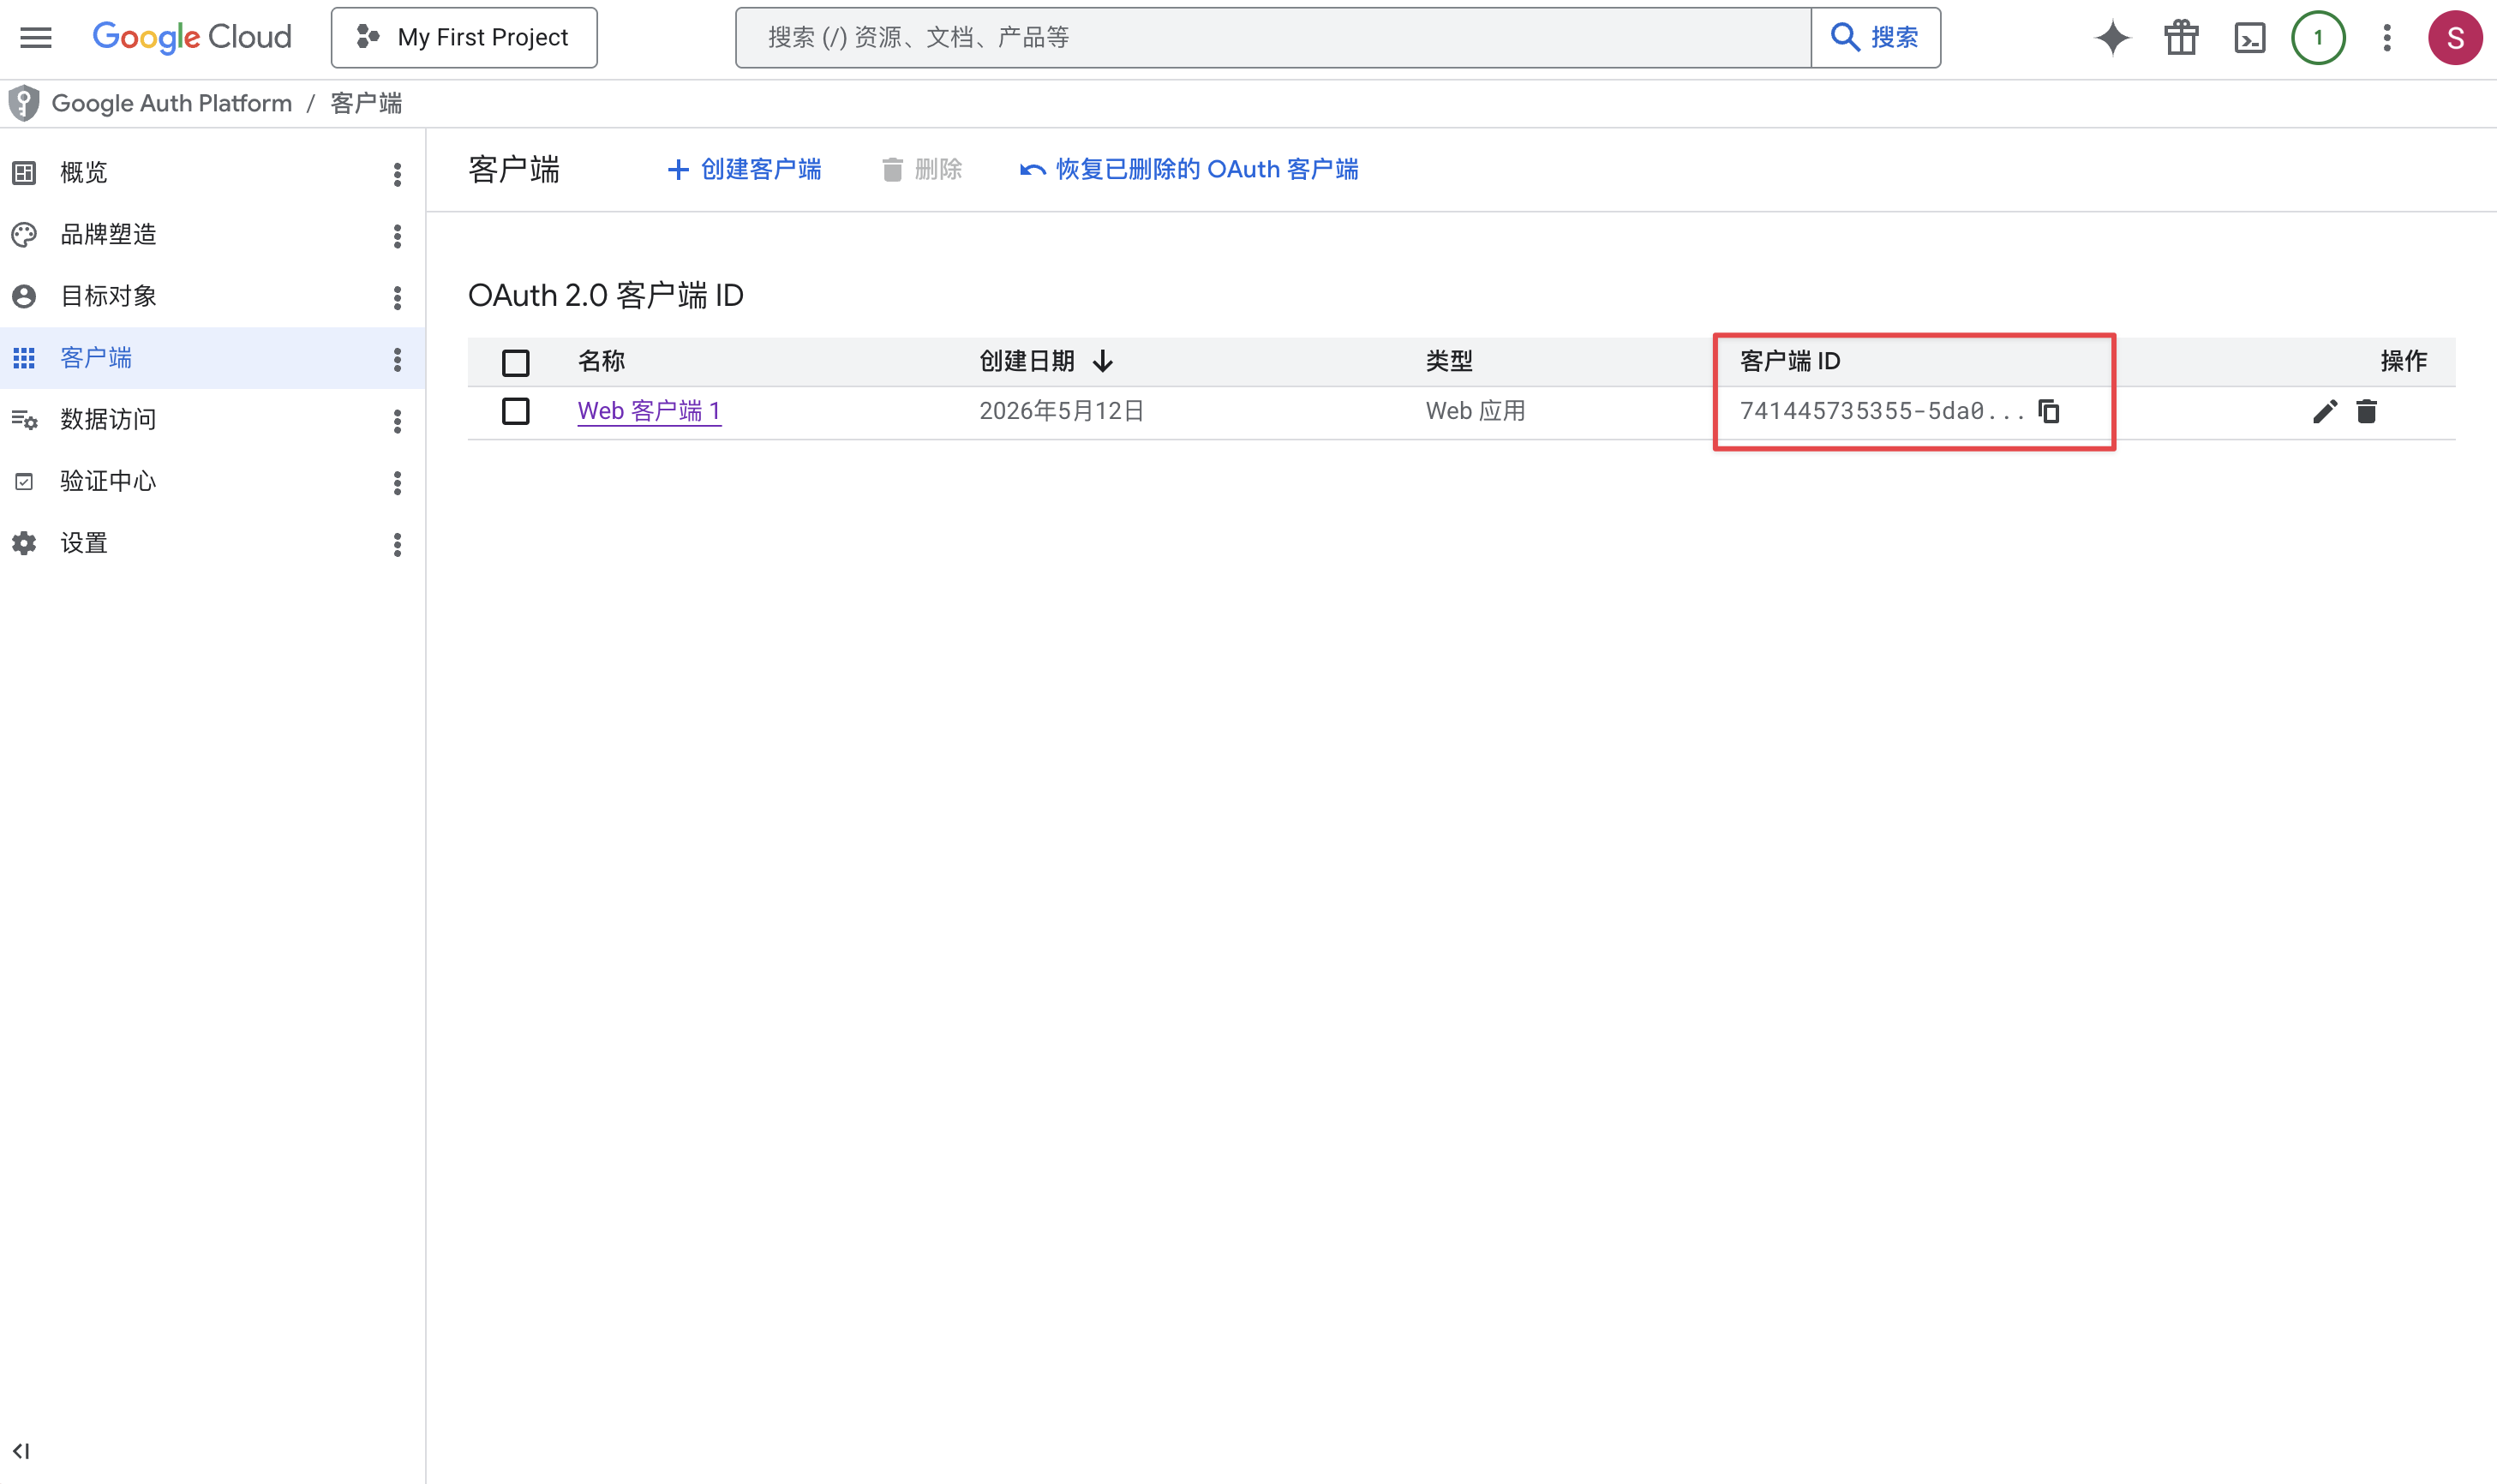
In the OAuth Client details, copy the generated Client ID. This value will need to be filled into the Google authorization configuration in the Polyv Live Streaming backend.
2. Configure Google Client ID in the Polyv Live Streaming Backend
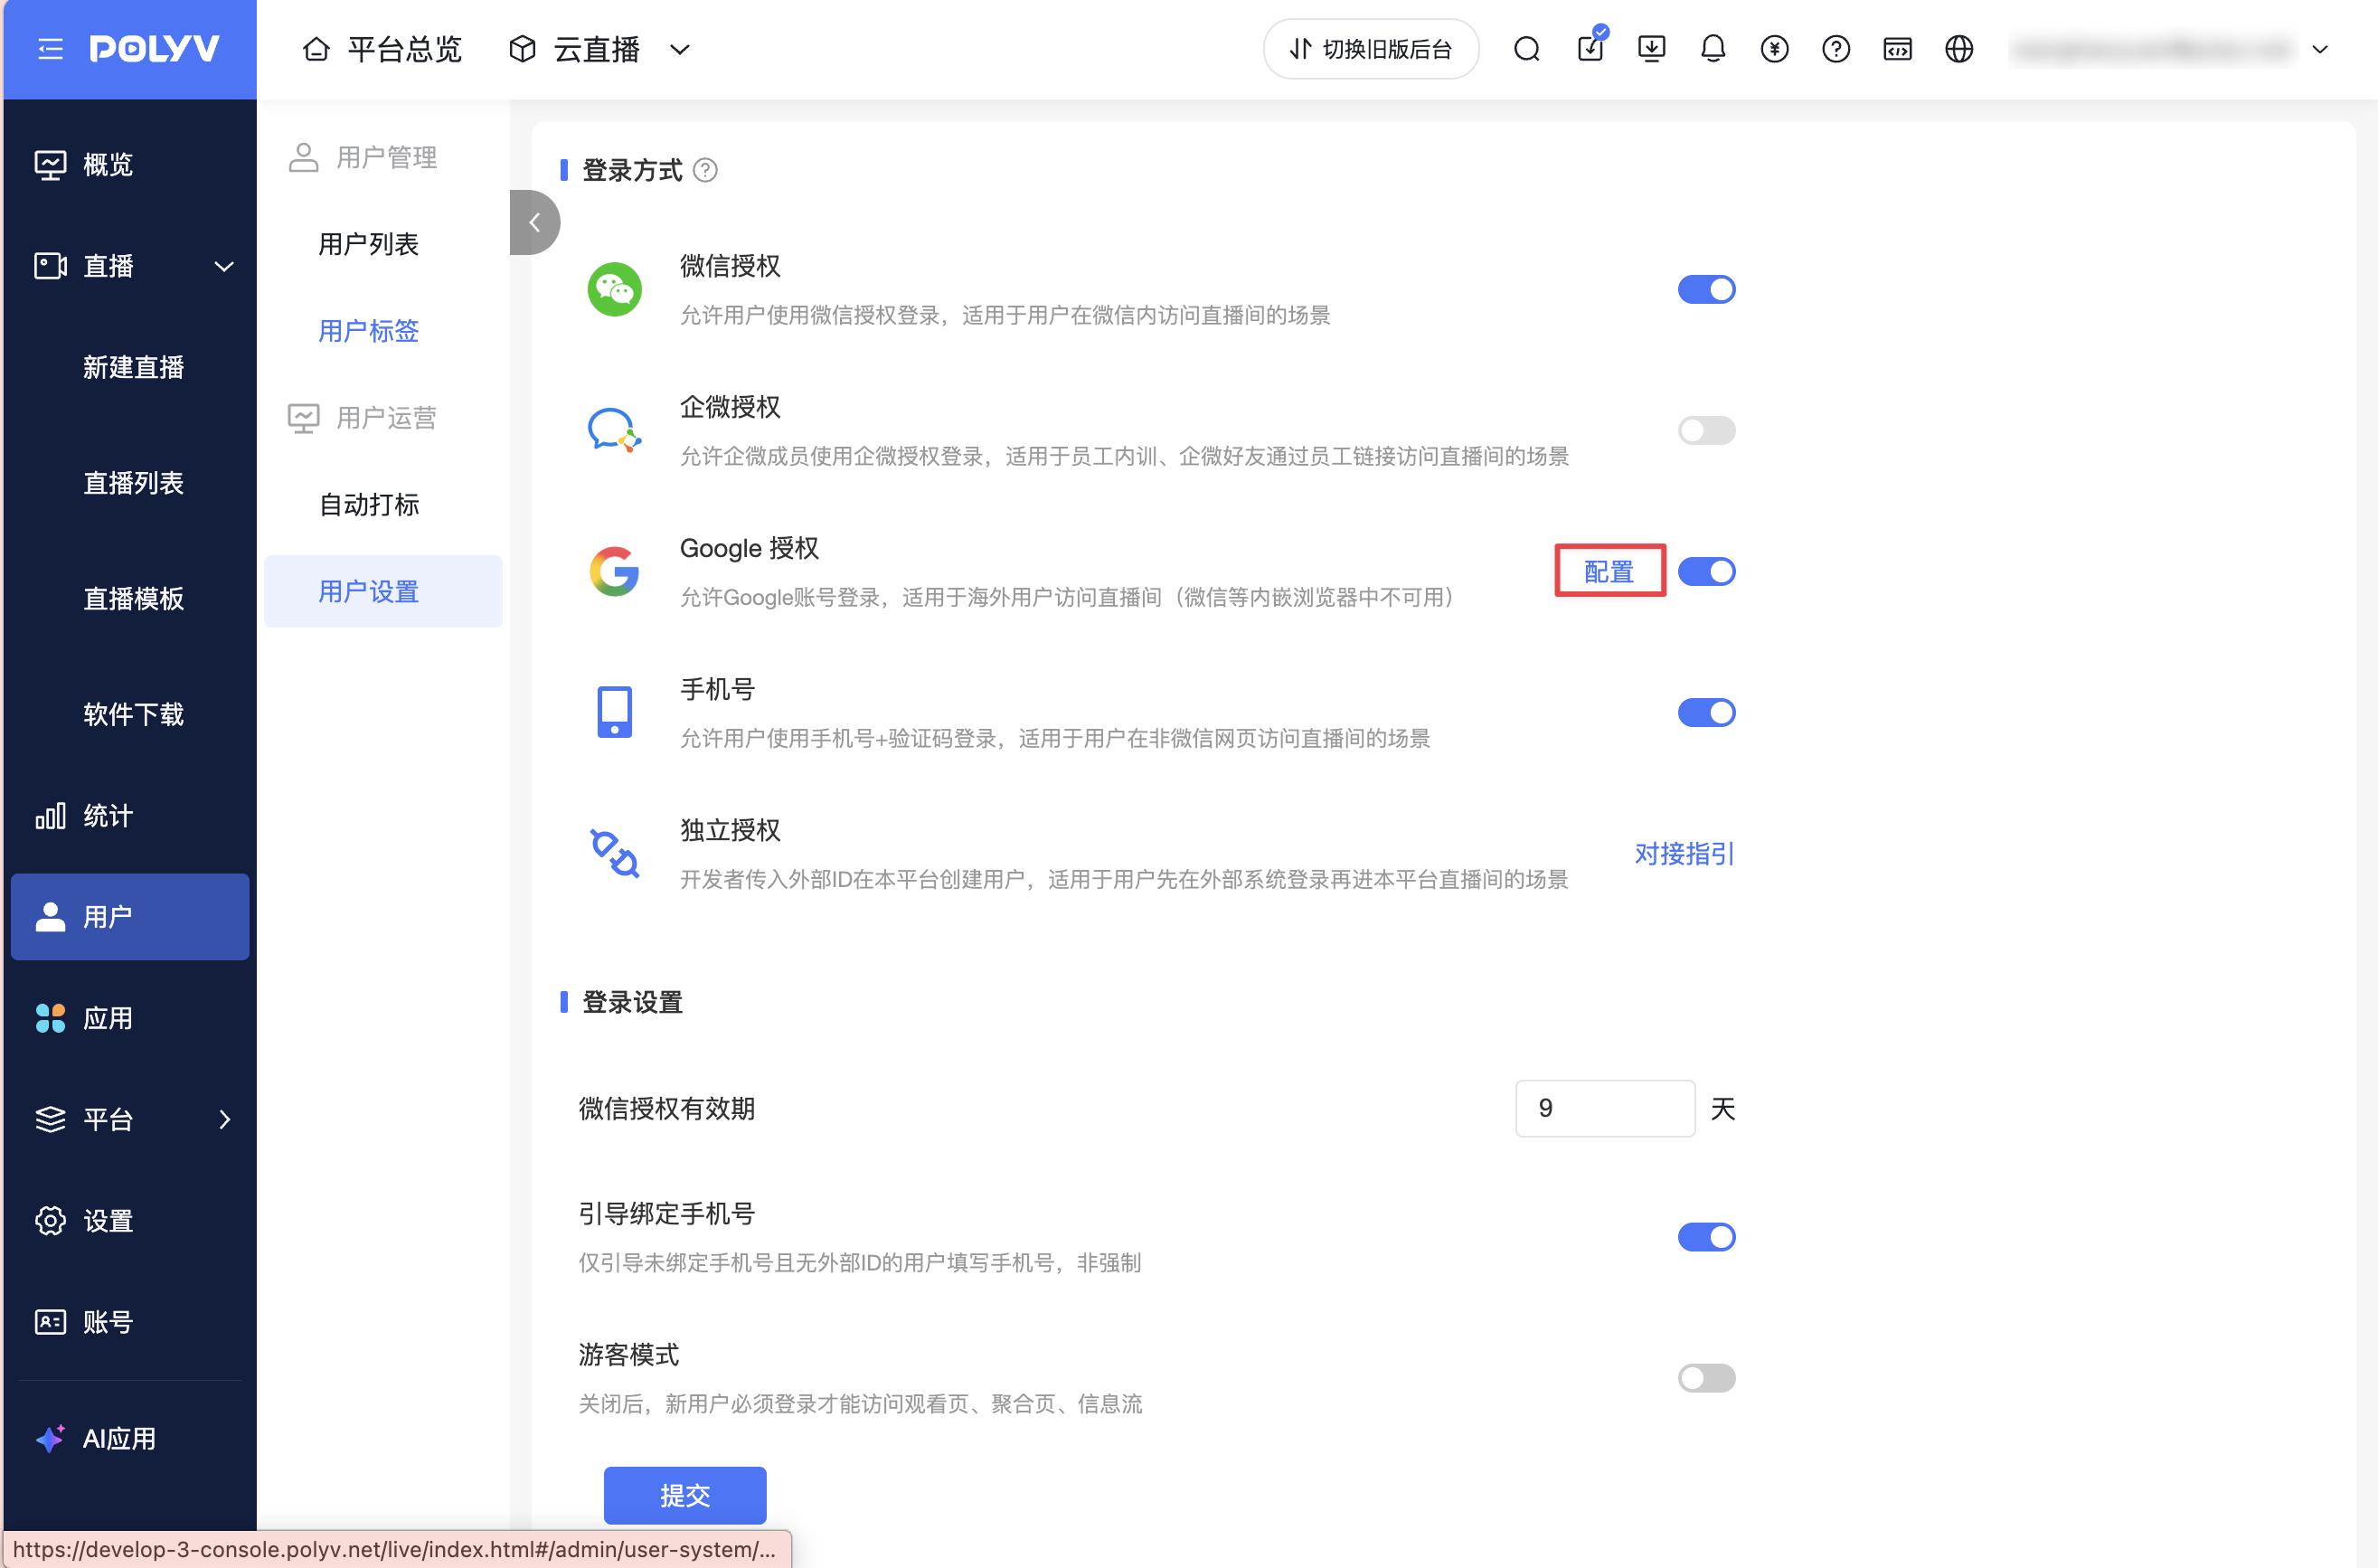
- Go to the user settings page in the Polyv Live Streaming backend.
- Find the Google authorization configuration item.
- Click the [Configure] button on the right side of the Google authorization row.
- In the configuration popup, enter the Client ID obtained from Google Cloud Console.
- Click [Save].
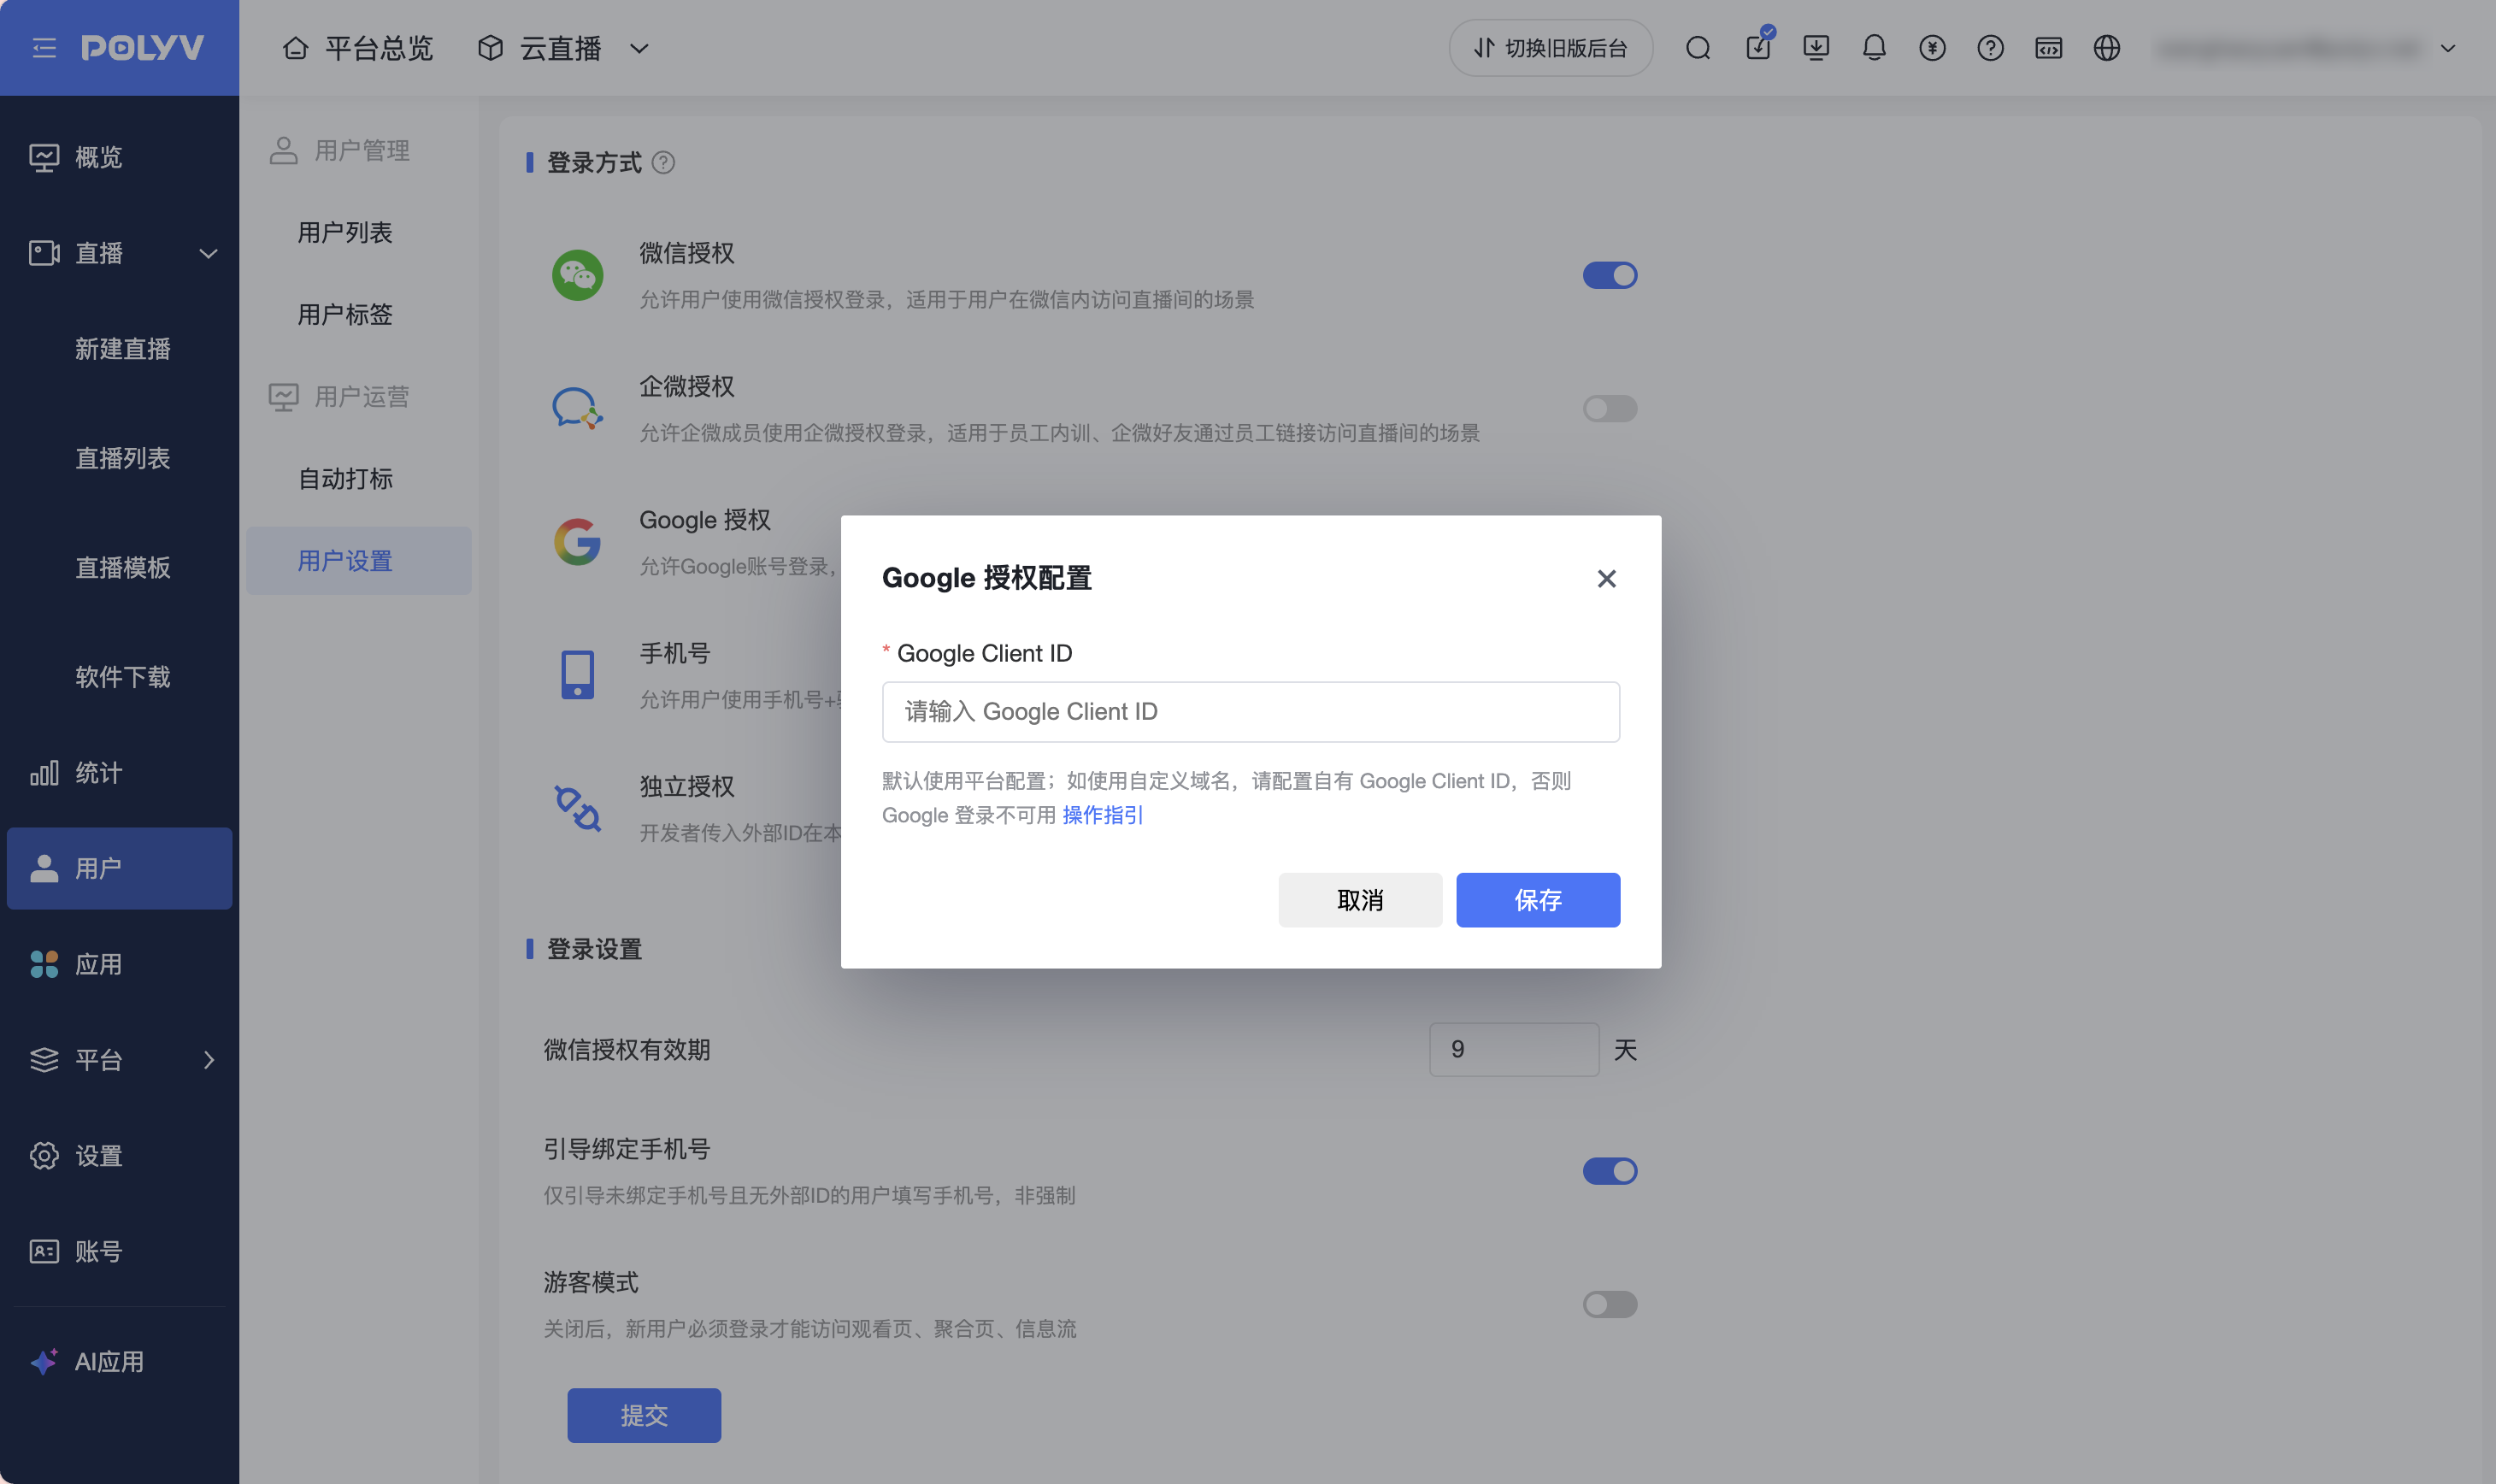
Upon saving, the system will verify if the Client ID is valid. Once verified, the configuration takes effect immediately.
3. View Configuration Status
The Google authorization configuration supports the following statuses:
| Status | Description |
|---|---|
| Currently using platform default configuration | No custom Client ID configured; the system continues to use the platform's default configuration. |
| Custom Client ID configured | The customer's own Client ID has been saved; the watch page's Google login will use this configuration. |
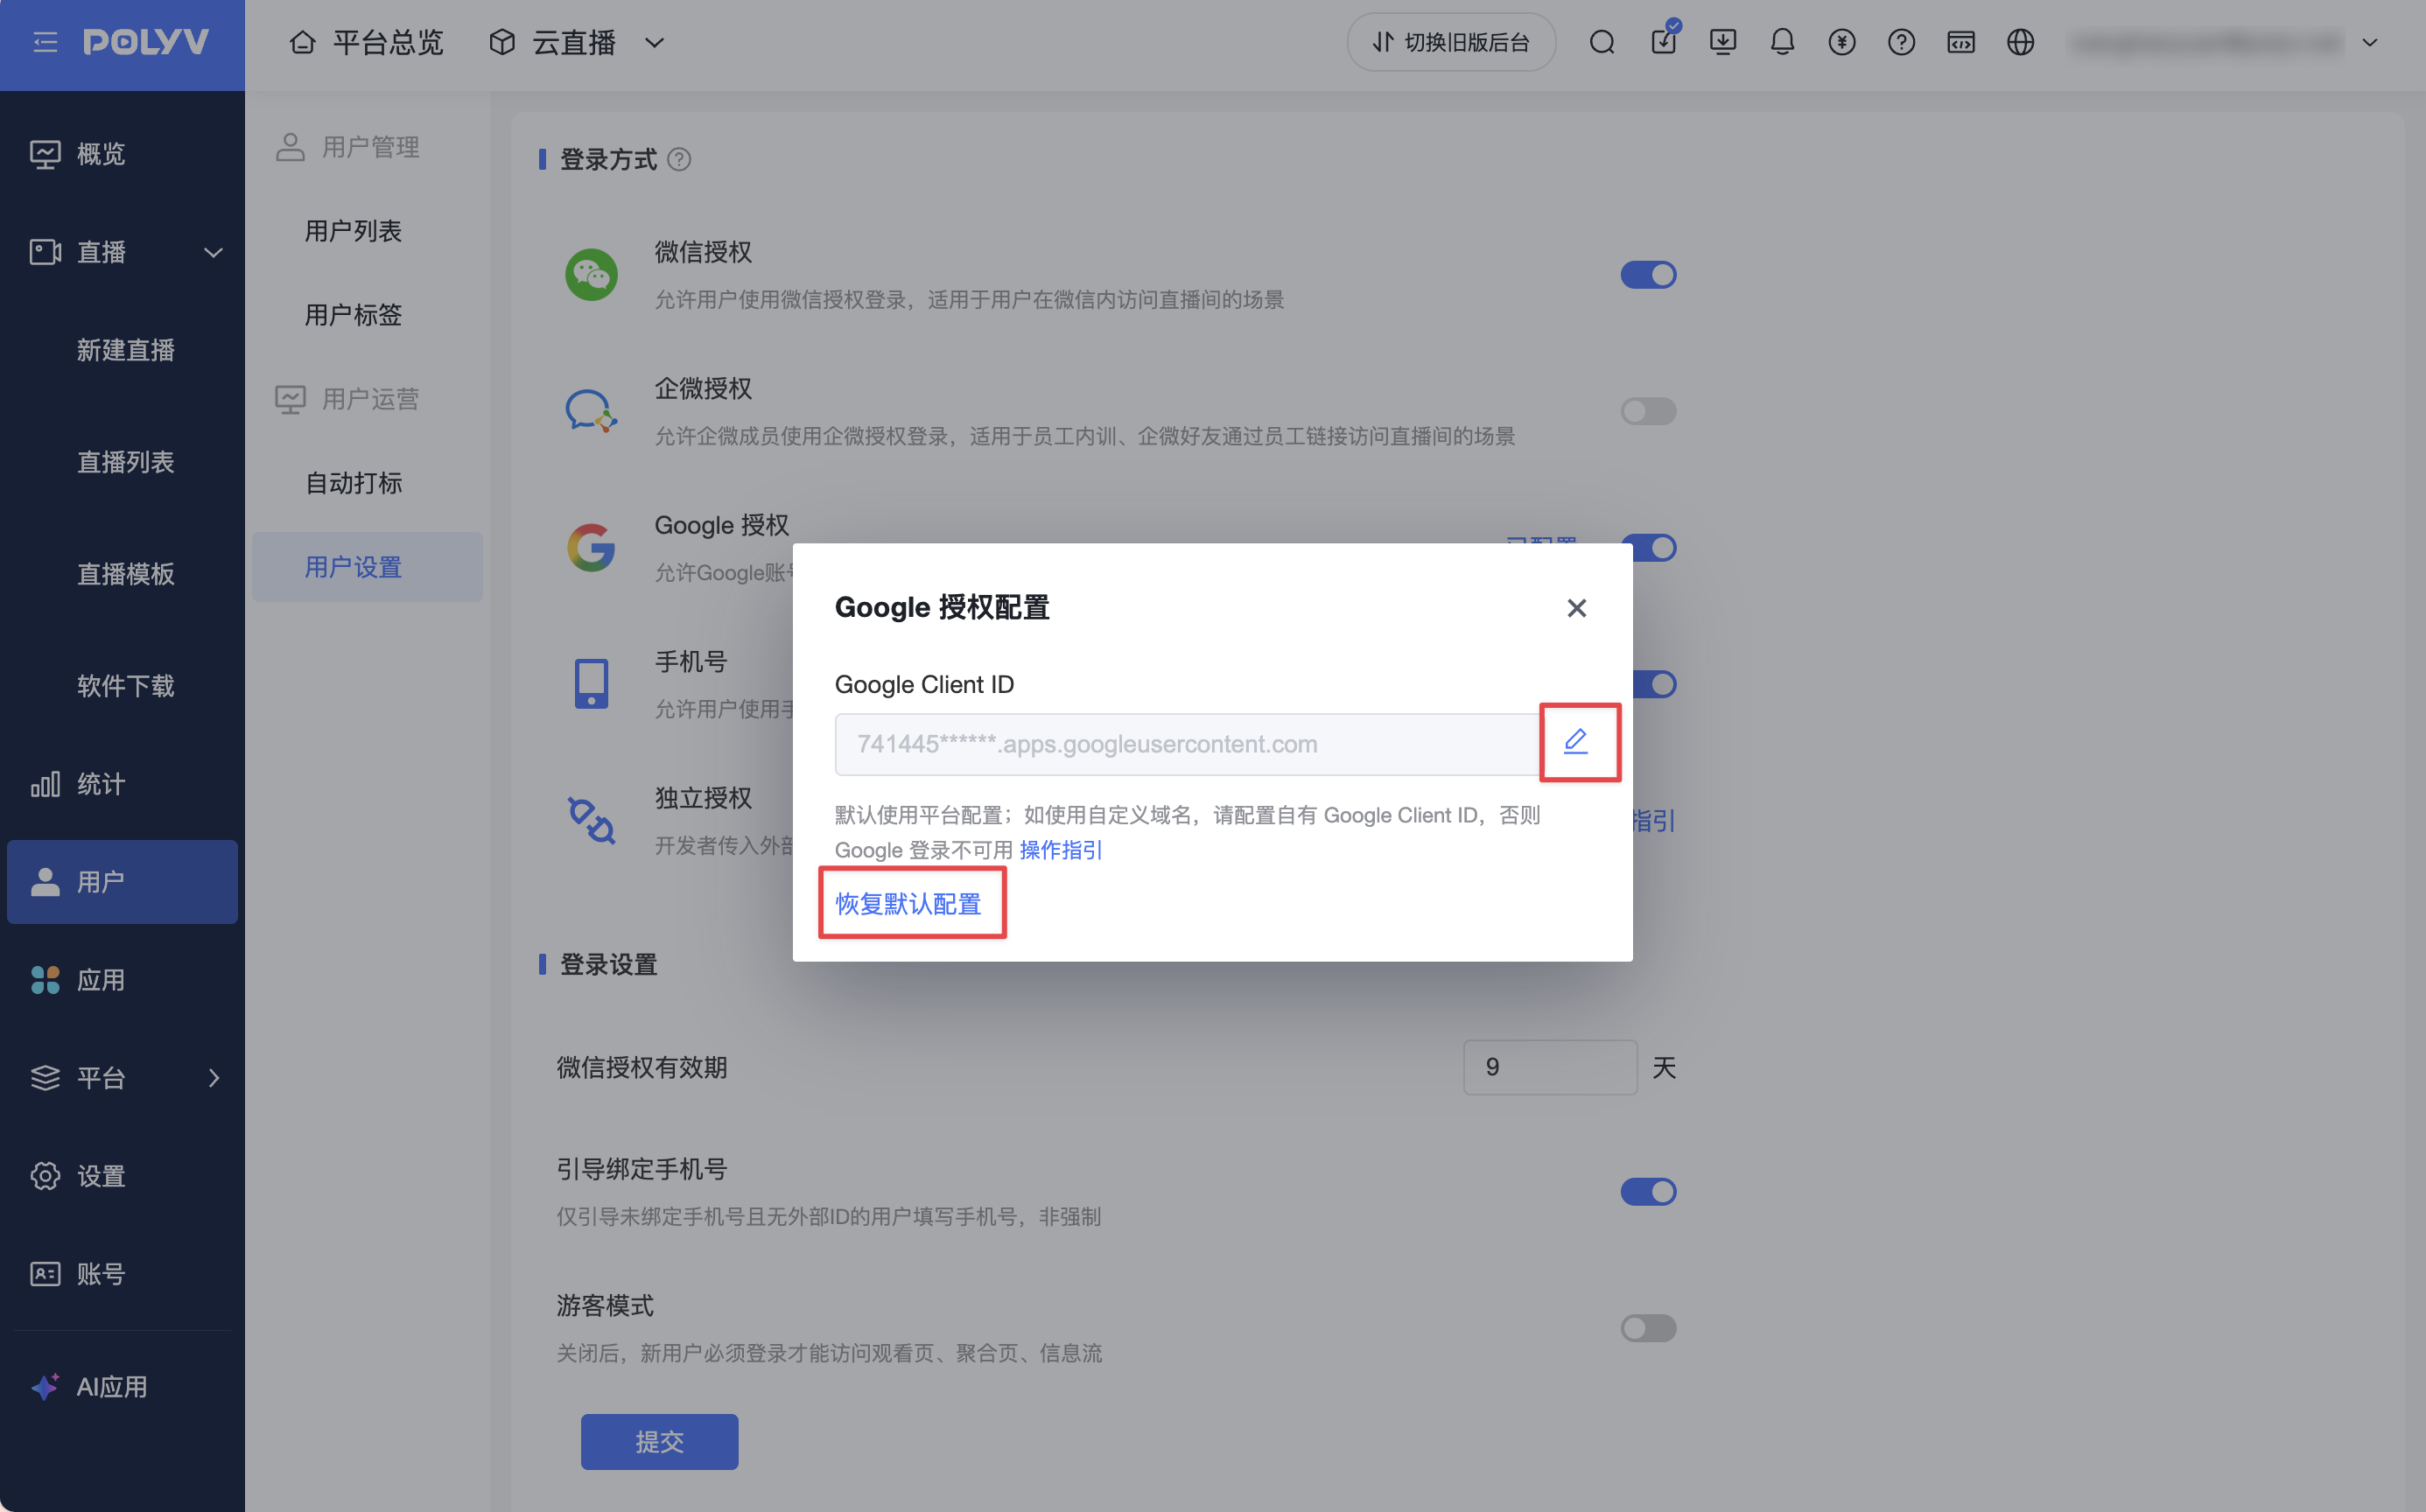
Once configured, the system will display the current Client ID in a masked format and supports modification or reverting to the default configuration.
4. Change or Revert to Default Client ID
After configuring a custom Client ID, you can perform the following actions in the configuration popup:
- Click the [Edit icon] to replace it with a new Client ID.
- Click [Revert to Default] to delete the current configuration and revert to using the platform's default configuration.
A confirmation prompt will appear before changing or reverting to the default Client ID.
After changing the Client ID, viewers who have previously logged in via Google will not be treated as new users upon their next login; historical data remains interoperable.
5. Post-Configuration Verification
After configuration, you can verify as follows:
- Open the watch page using the custom domain.
- Click the Google login button.
- Confirm that the Google authorization consent screen displays the customer's own application name and brand information.
- After completing authorization, confirm that the viewer can enter the watch page normally.
If authorization still fails, first check whether the domain and redirect URI filled in Google Cloud Console match the actual access address.
Frequently Asked Questions
1. Will changing the Client ID affect viewers who are already logged in?
Yes. After changing the Client ID, viewers who logged in with the old Client ID will be treated as new users upon their next login; historical data will not be interoperable.
2. What should I do if the system prompts "Invalid Client ID" when saving?
Please check the following:
- Whether the Client ID was copied completely.
- Whether the Application type in Google Cloud Console is
Web application. - Whether the custom domain has been added to the authorized origins or authorized redirect URIs.
- Whether the authorized redirect URI matches the actual login redirect URI.
