


Video Import Methods
Local Upload
The VOD management backend provides audio and video upload functionality, supporting batch operations and resumable uploads, making it easy to quickly upload and store audio/video files to the cloud VOD platform.
Supported Formats
| File Type | Supported Formats |
|---|---|
| Video | 3GP, ASF, AVI, DAT, FLV, F4V, M4V, MKV, MOV, MP4, MPE, MPG, MPEG, MTS, RMVB, TS, VOB, WMV, WEBM |
| Audio | MP3, AAC, WAV, WMA |
Uploading Audio/Video
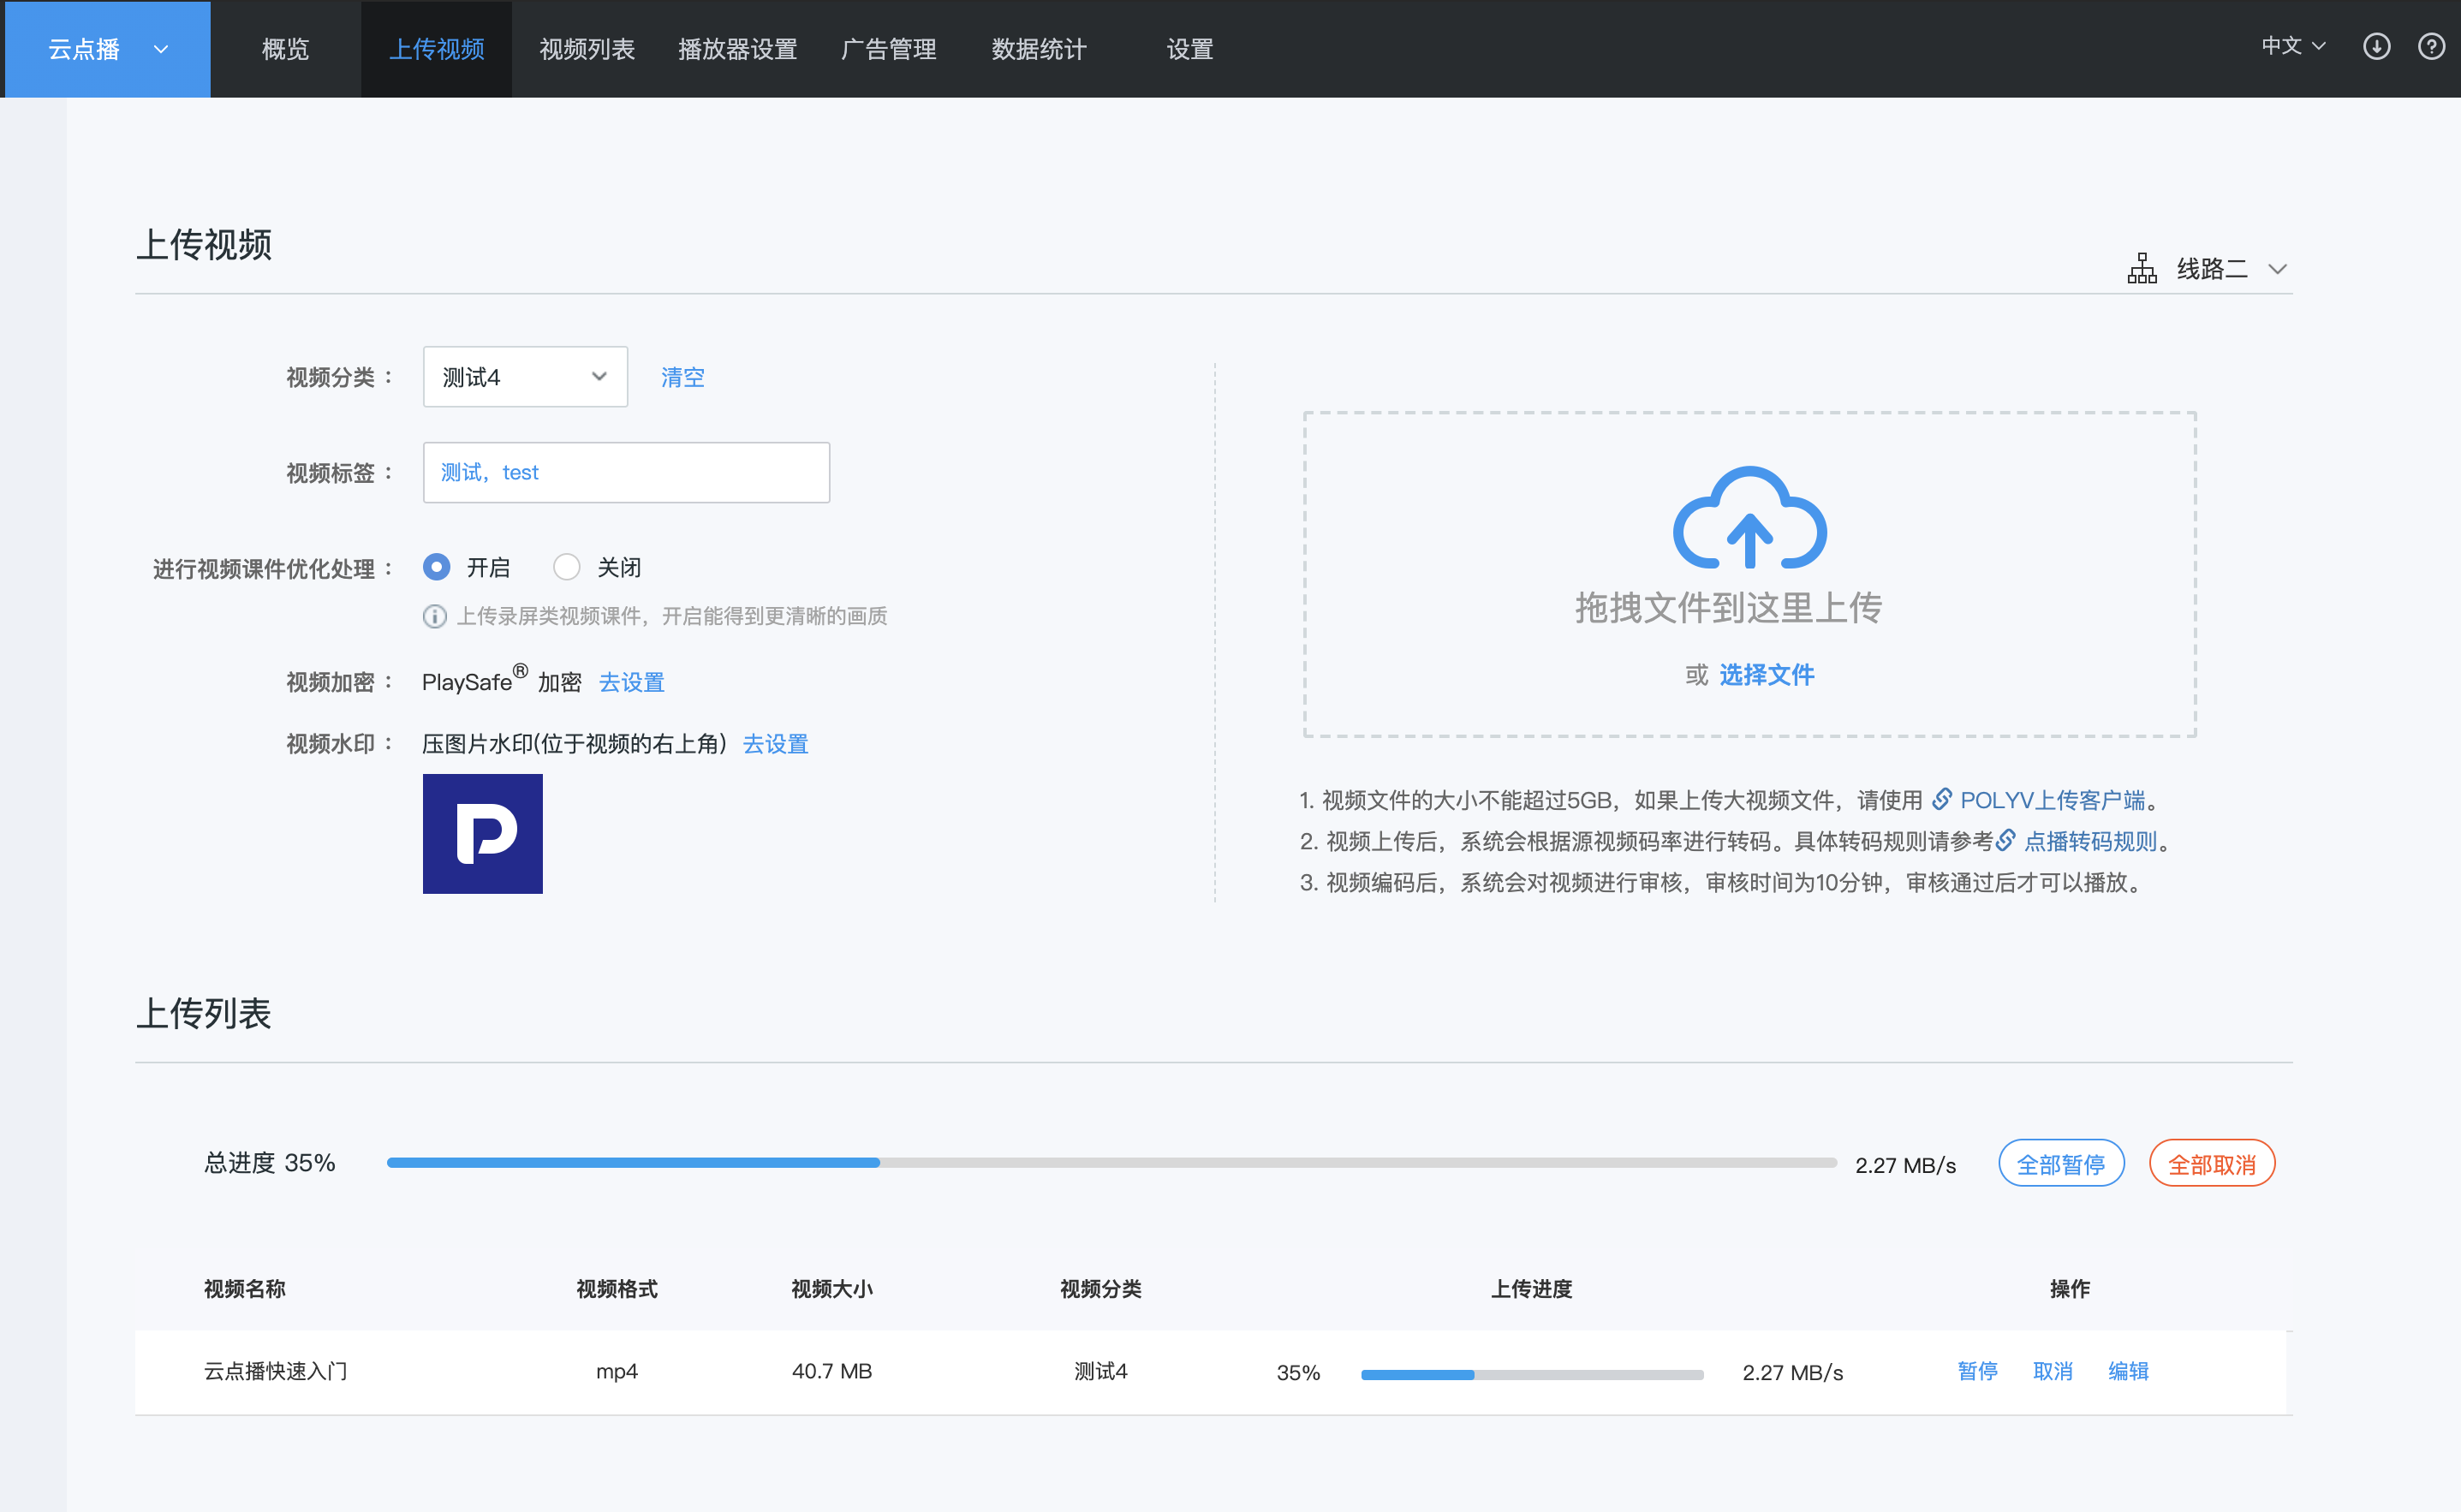
- Log in to the VOD management backend, click "Upload Video" in the navigation bar, and enter the video upload page.
- Configure upload options:
- Video Category: Select the category to upload the video to. If no category is selected, it will be uploaded to the default category.
- Video Tags: Add tags to the videos to be uploaded.
- Courseware Optimization: When enabled, for screen-recorded courseware teaching videos, it achieves higher clarity at a lower bitrate, resulting in better image quality with less data consumption and lower network requirements.
- Video Encryption: When enabled, videos uploaded to the cloud VOD will be transcoded into encrypted videos.
- Video Watermark: When set, videos uploaded to the cloud VOD will be transcoded into watermarked videos (The watermark cannot be removed from the transcoded video).
- Select local files to upload.
Remote Sync
For video files stored on a server, you can use the Video Sync feature to pull remote videos to the Polyv cloud VOD platform.
Importing Sync Tasks
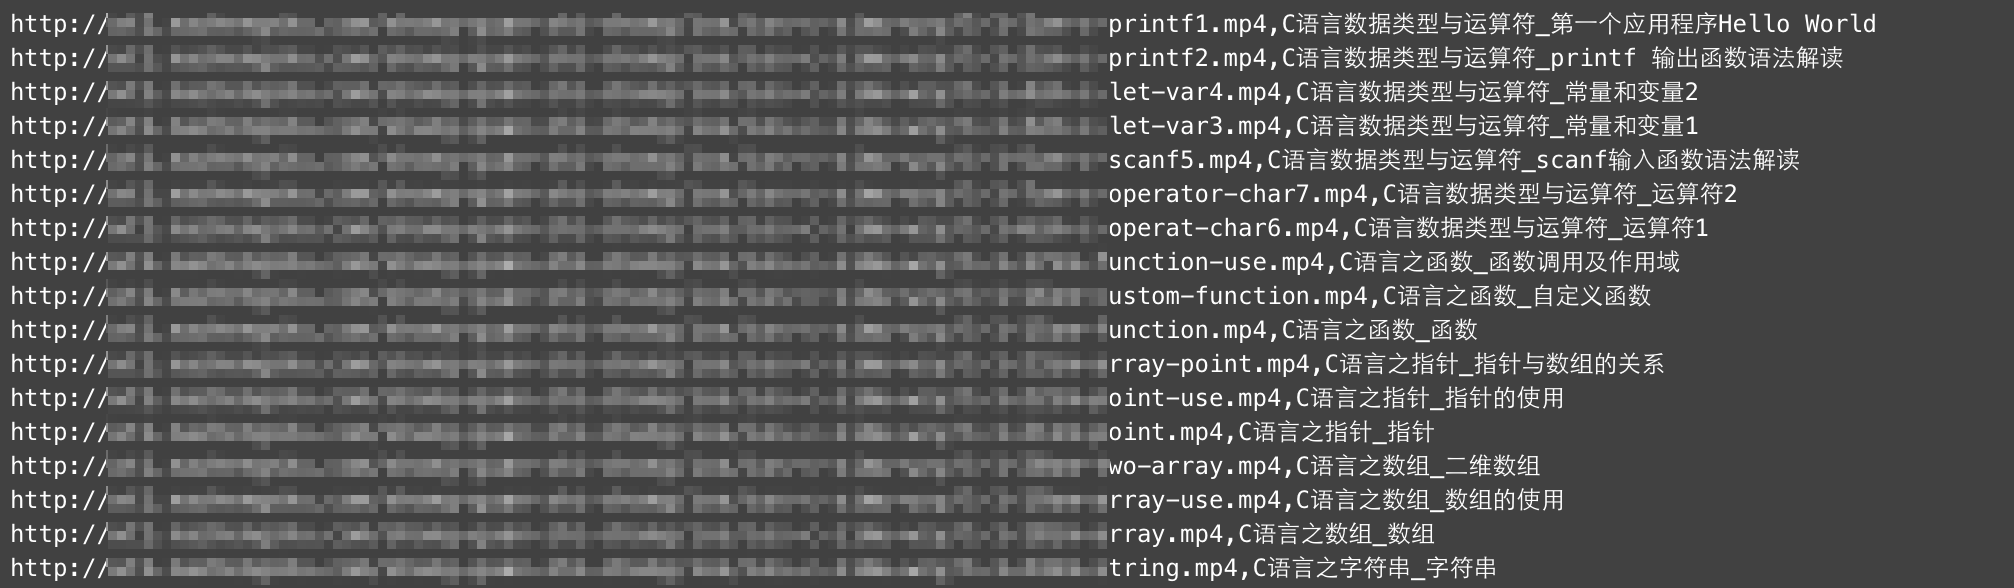
- First, organize the video information to be pulled to the cloud VOD platform. Separate the remote link and corresponding title of each video with an English comma, with one video entry per line, and save it as a CSV file, as shown below:
Log in to the cloud VOD management backend, select Video List in the navigation bar, then click [Video Sync] in the left sidebar.
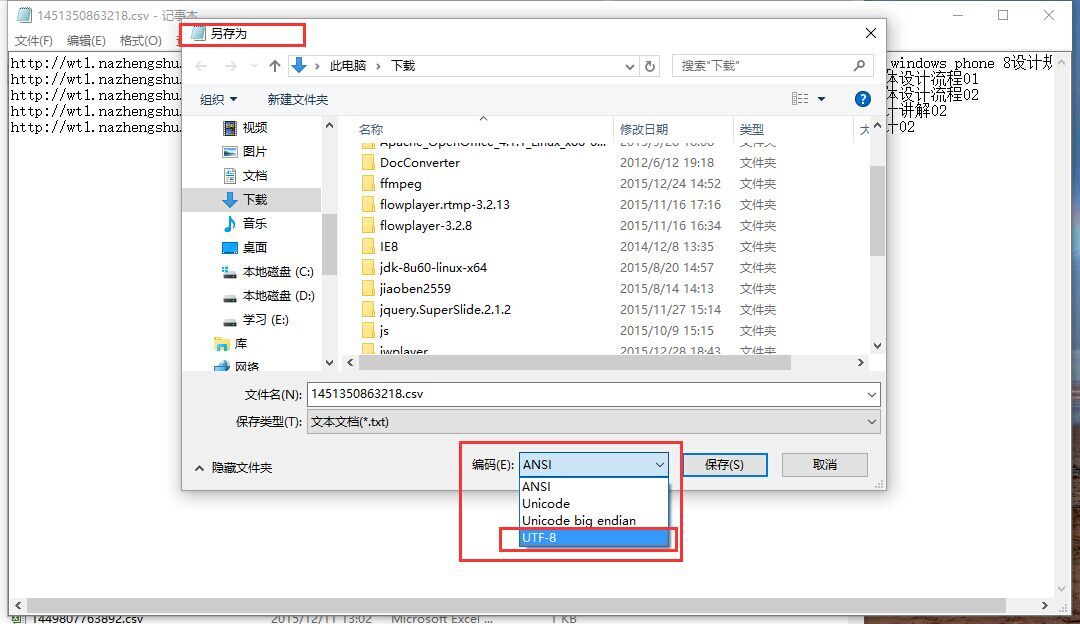
Click the "Import Task" button in the upper right corner, select the prepared CSV file, set the target sync category directory, and click "Save". Note: If the CSV file contains Chinese characters, it must be saved in UTF-8 encoding, as shown below:
Viewing Sync Tasks
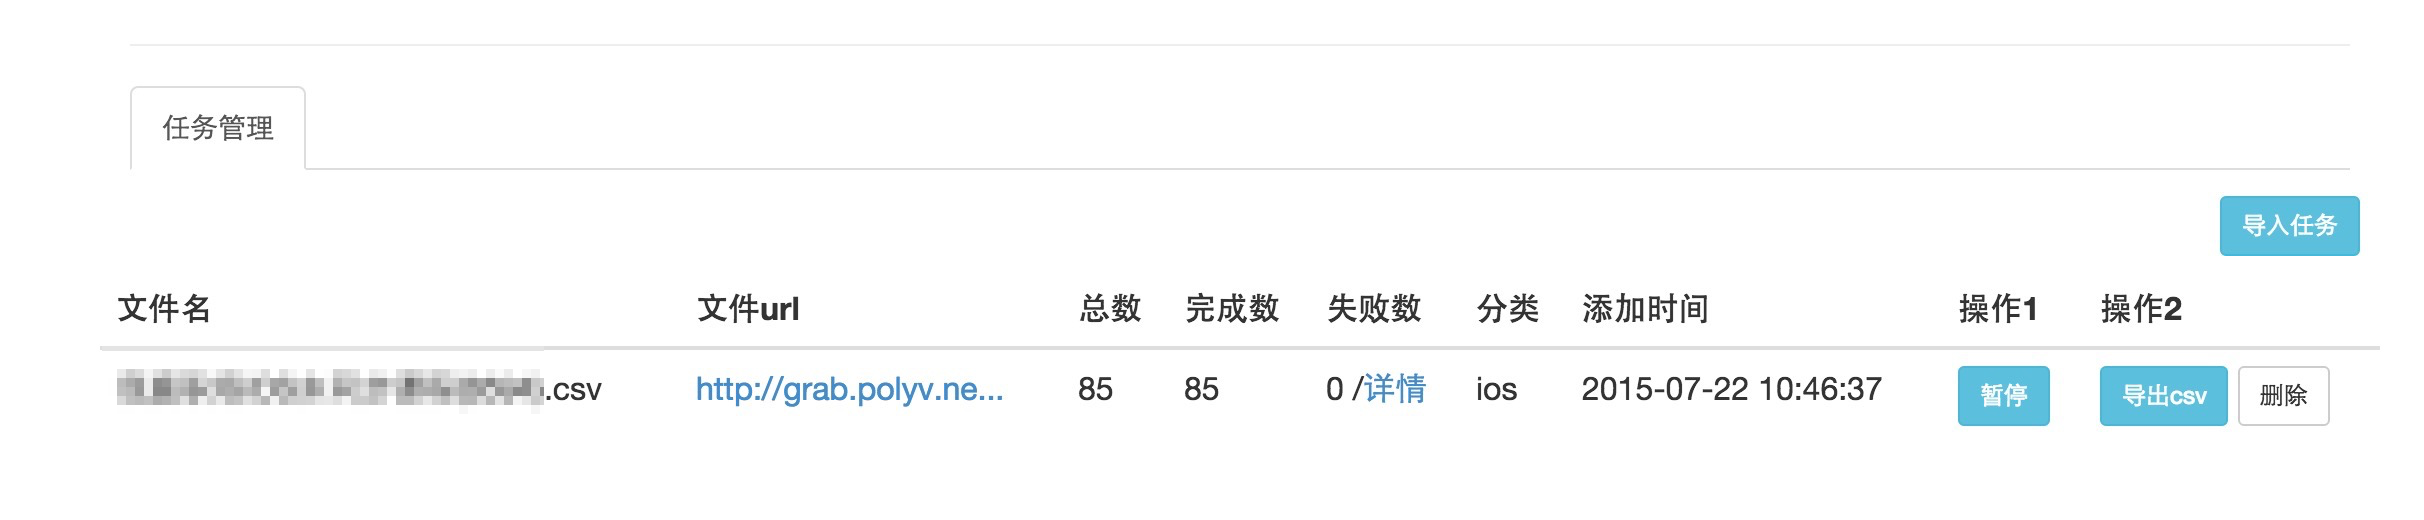
After the task is successfully imported, the system will automatically analyze the task details and start pulling video files from the remote server. In the task management list on the page, you can view the progress of task completion.
Exporting Video Information
After all sync tasks are completed, click the export button to export the task result details in CSV file format. In the CSV file, each video occupies one line, including the video title, VID, and completion time information.

