Quick Start
This document will guide you through quickly creating and starting your own seminar. Administrators can go to the [New Live Stream] page, select Seminar as the live stream scenario, fill in the name and category, and click the confirm button to complete the creation.
Note: If information is missing or does not meet the requirements, please follow the page prompts to make corrections before saving.
1. Prerequisites
You must have a registered Polyv account. If you are not registered, click here.
2. Operation Process
Step 1: Log in and enter the Polyv official website
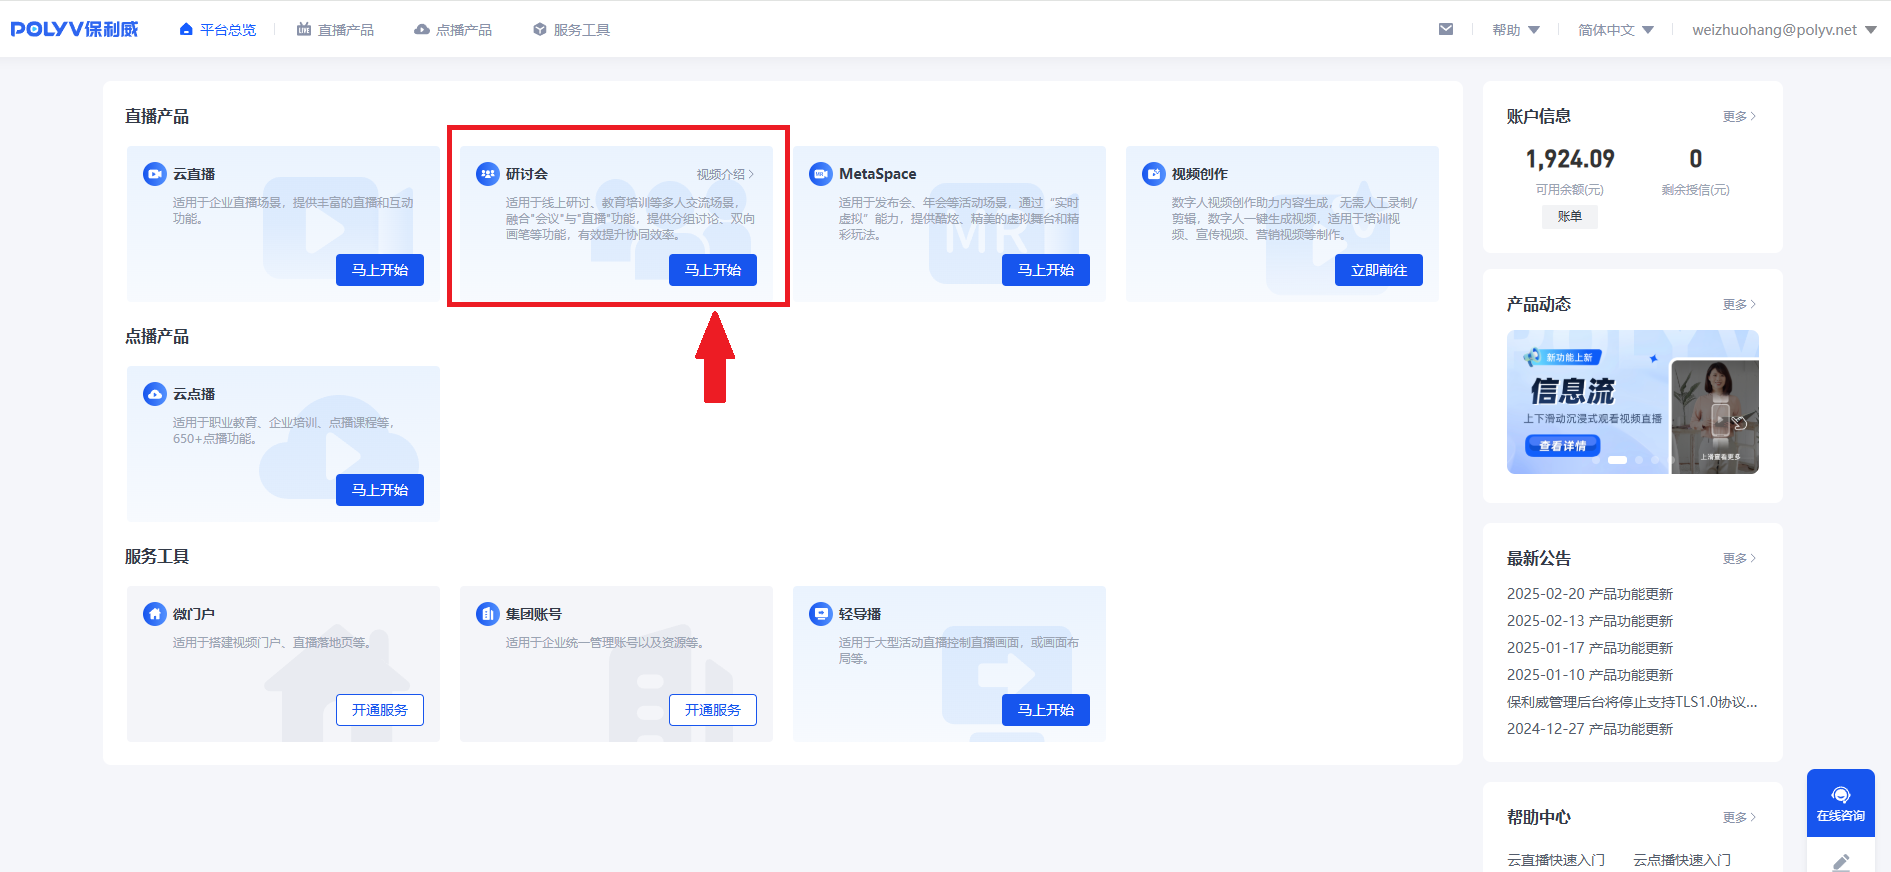
On the official website homepage, click the [Start Now] button under the Seminar section.
Step 2: Create a seminar live stream room
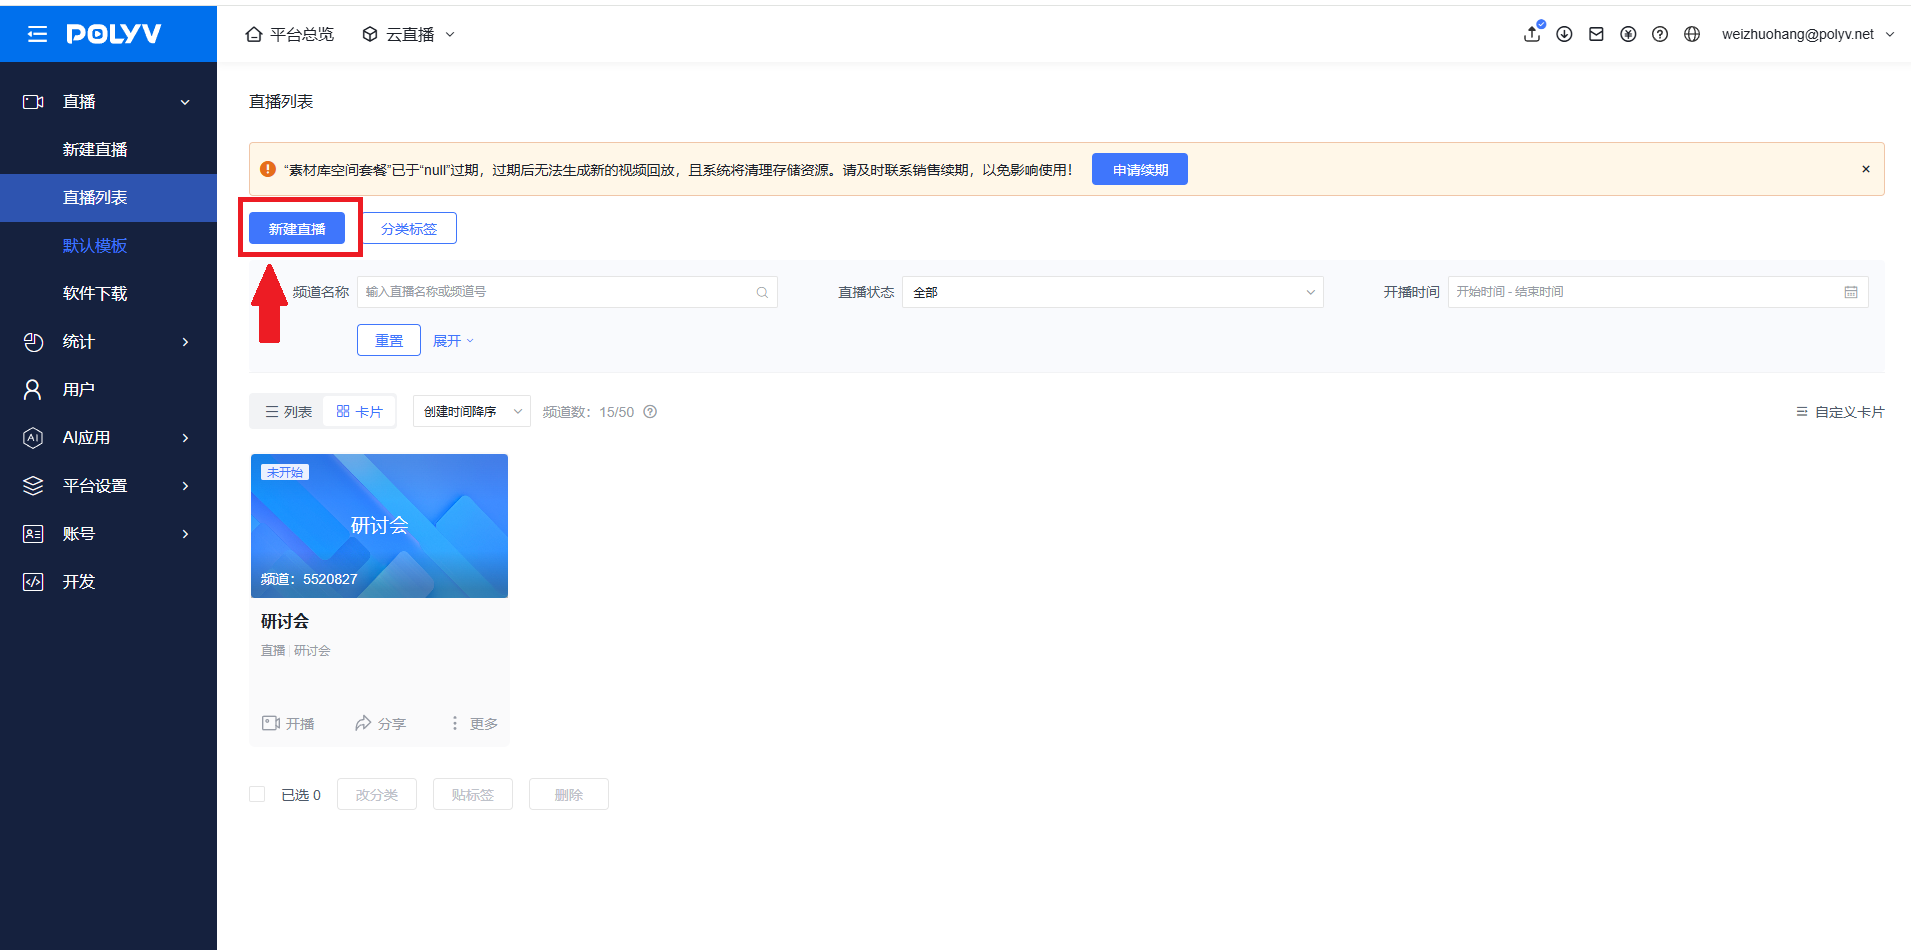
Click New Live Stream.
Enter the live stream room name, select Seminar as the live stream scenario, and configure other functional options as needed.
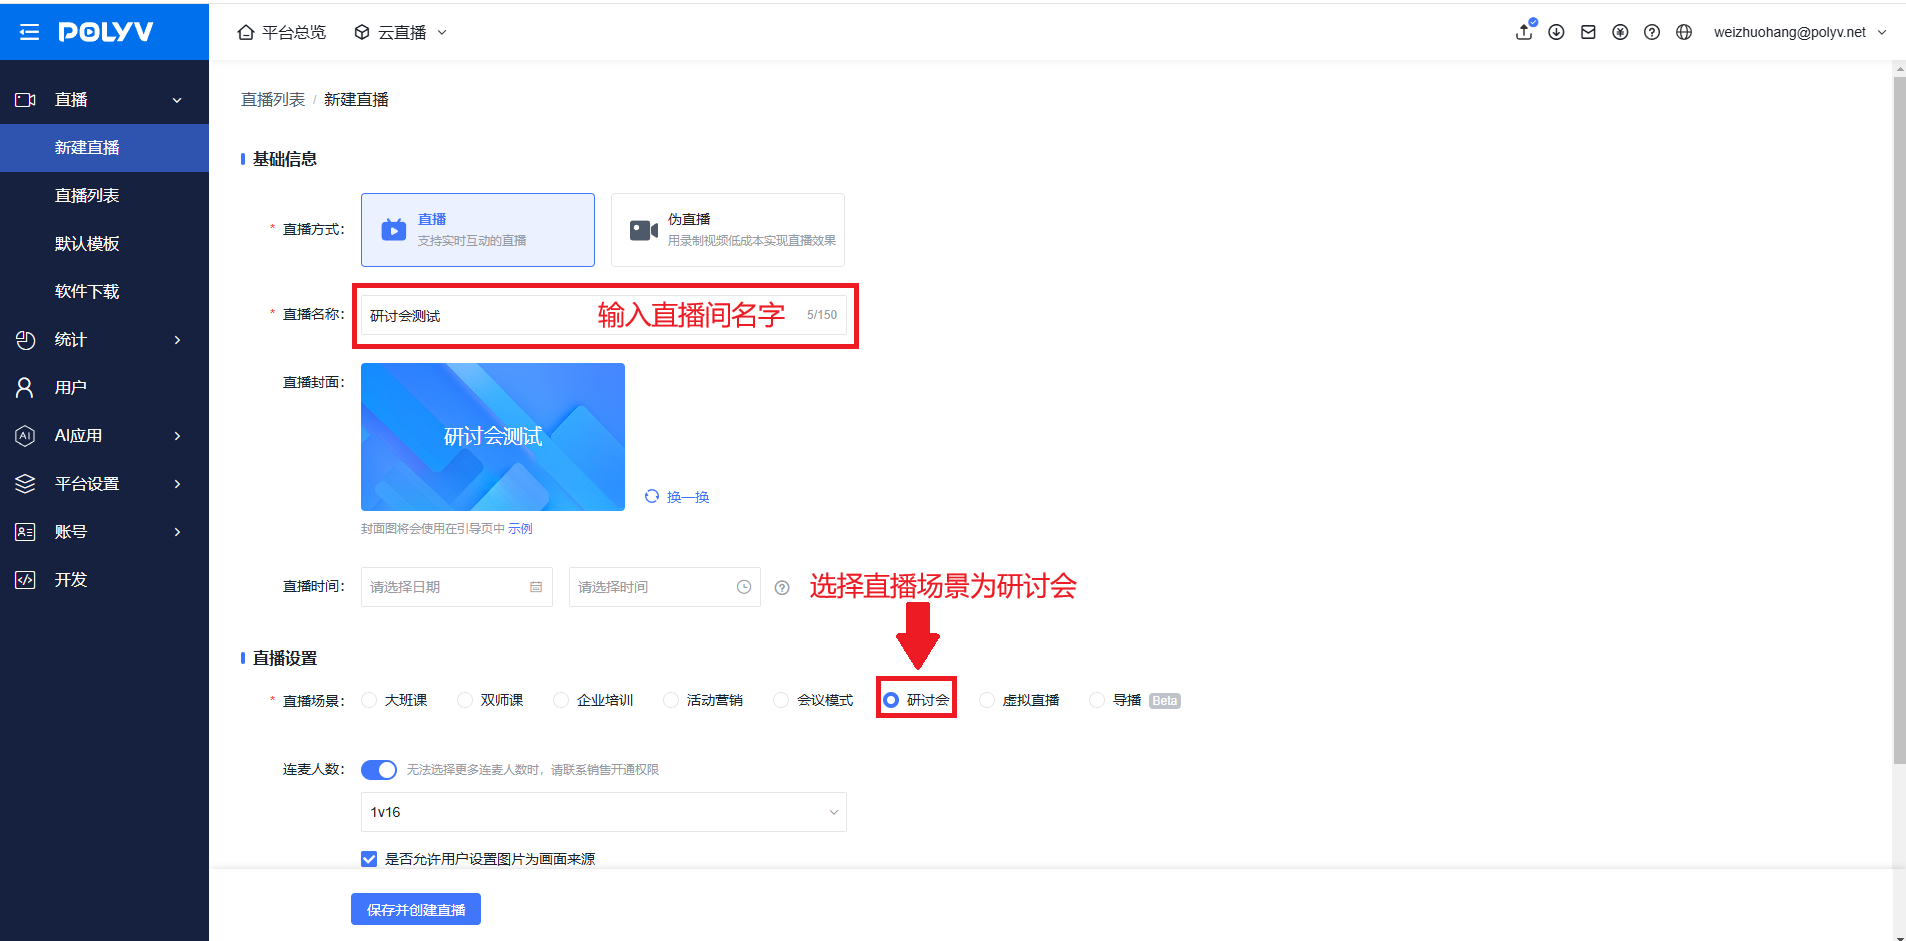
After confirming everything is correct, click Save and Create Live Stream.
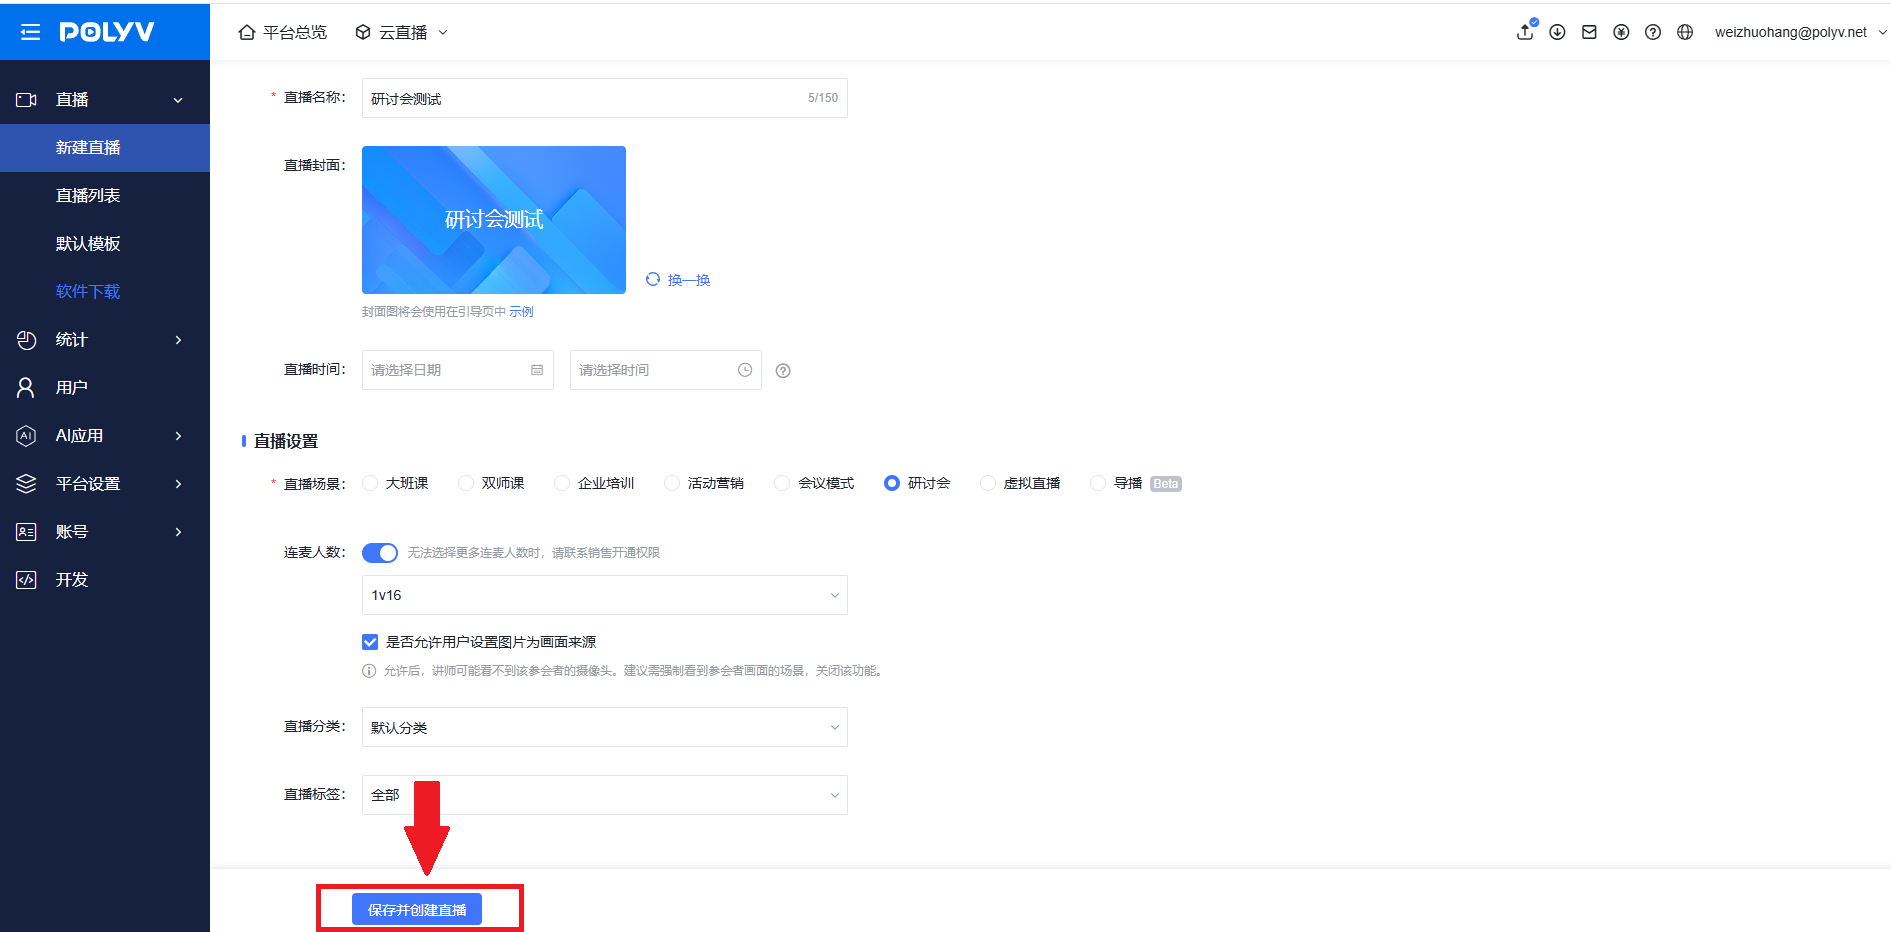
Step 3: Start the seminar
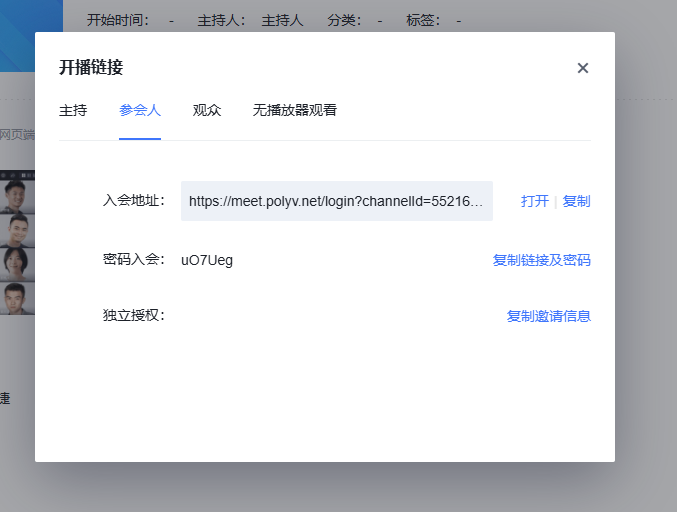
After successful creation, a pop-up window with the live stream link will appear automatically.
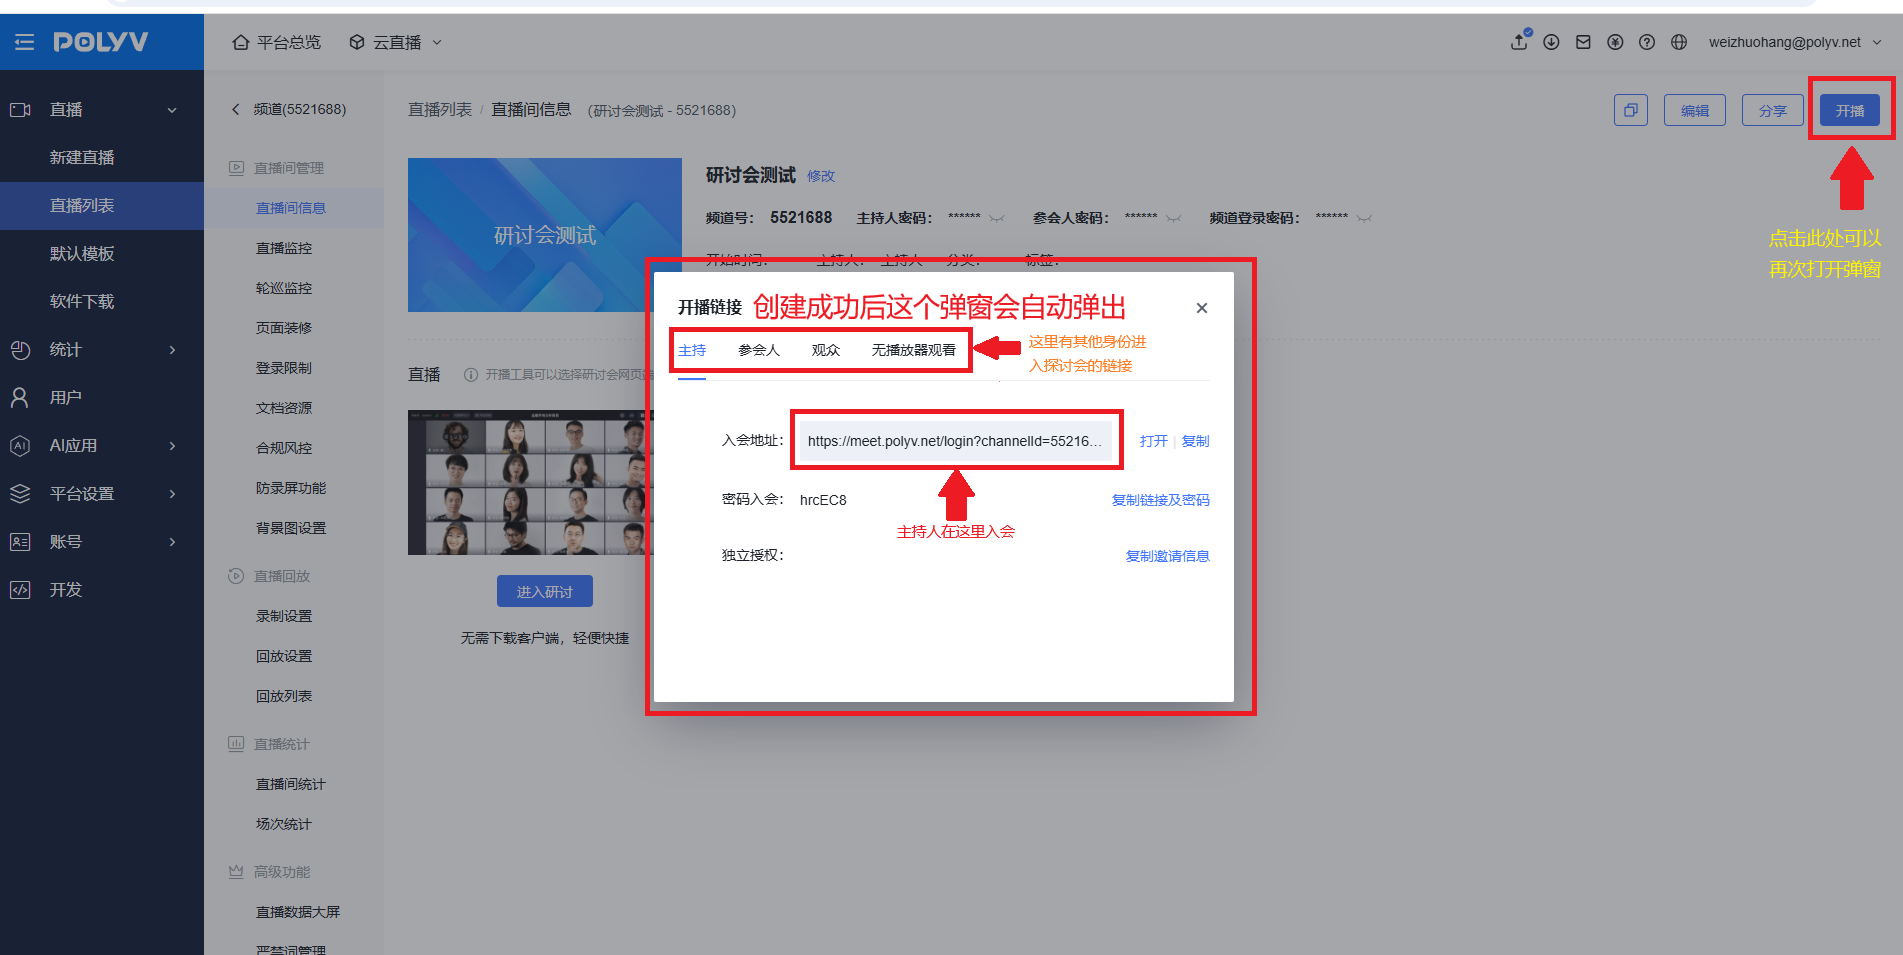
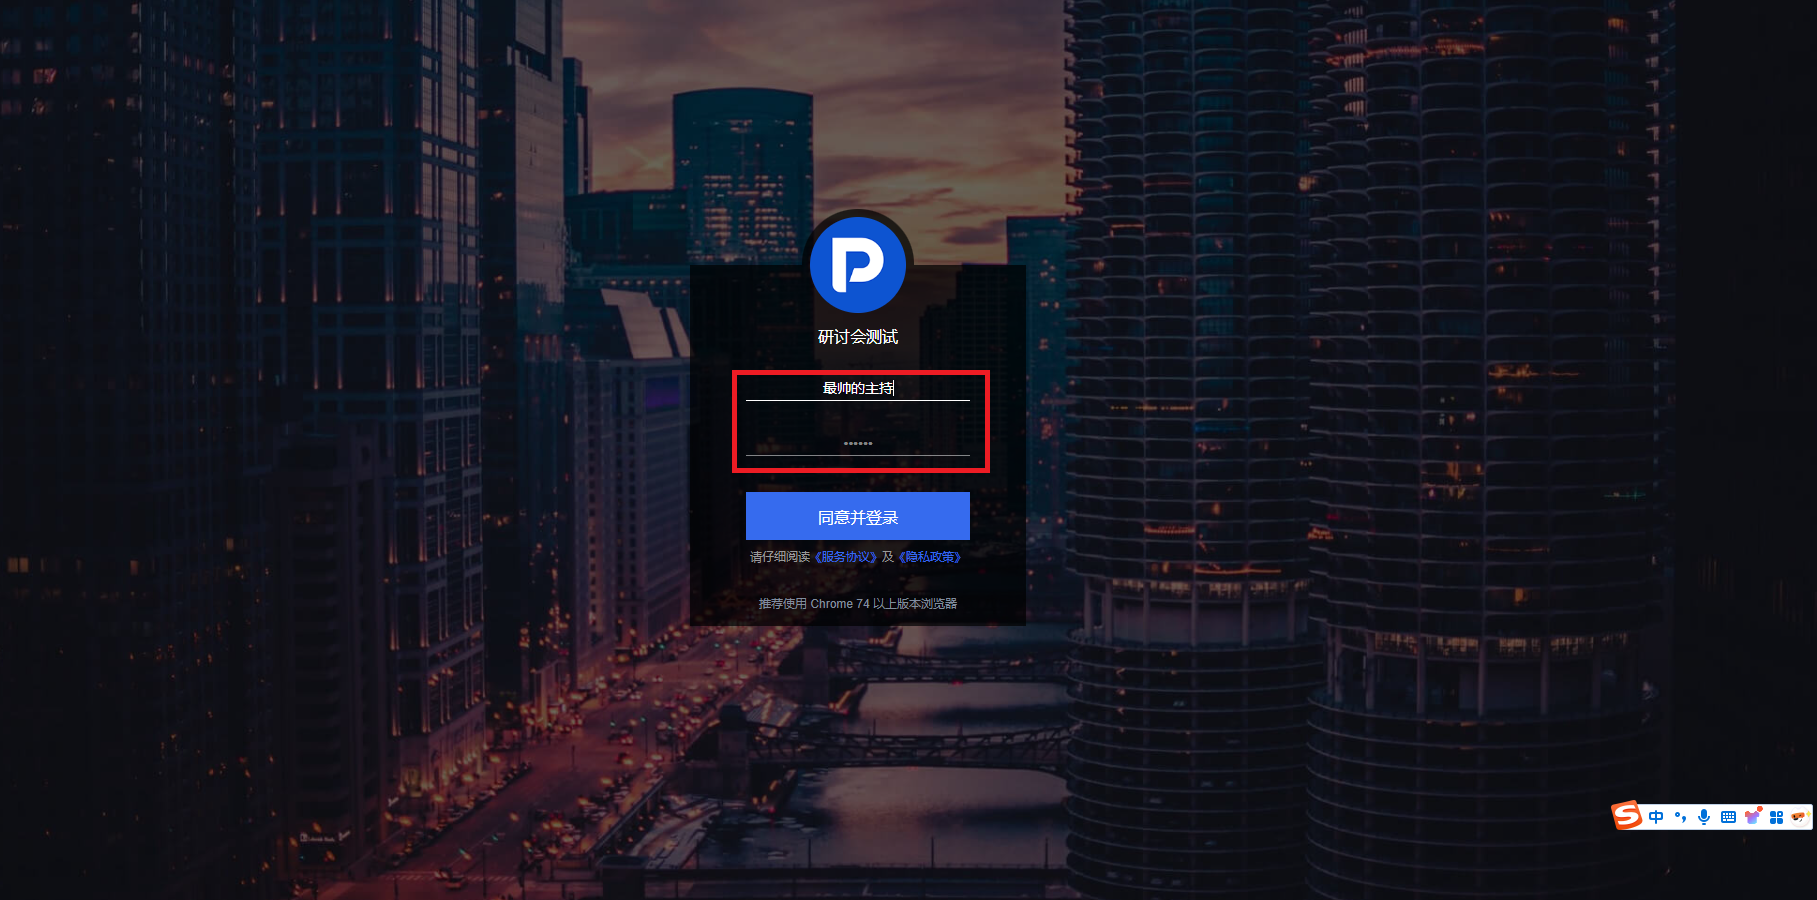
Open the meeting link, enter your nickname and password.
Start the live stream.
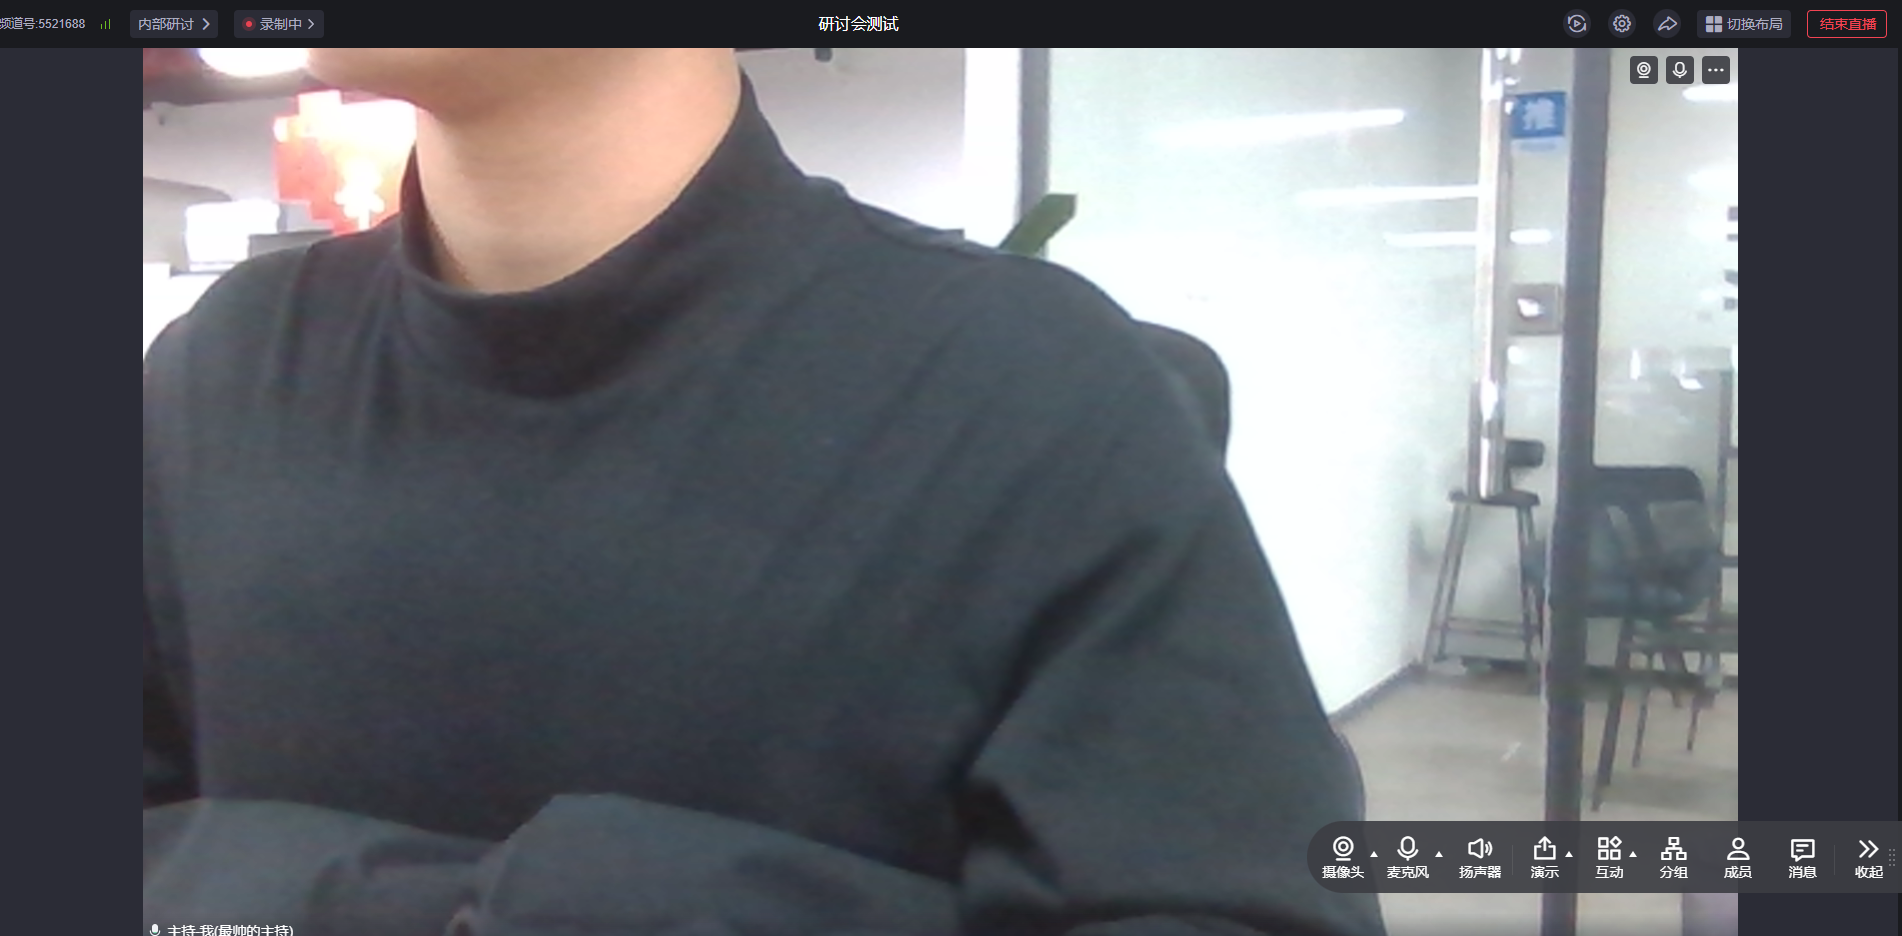
Step 4: Invite participants and viewers
Send the participant link and viewer link to the respective roles.
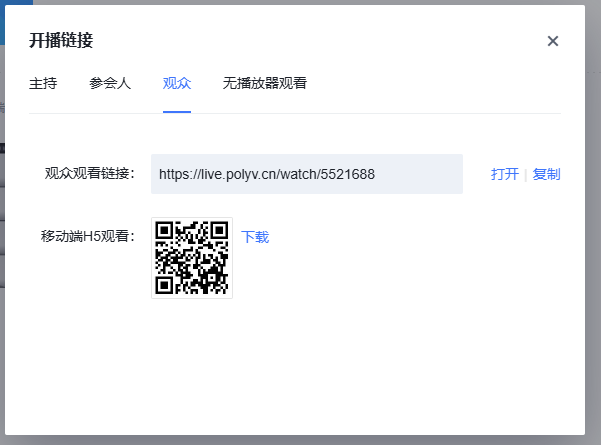
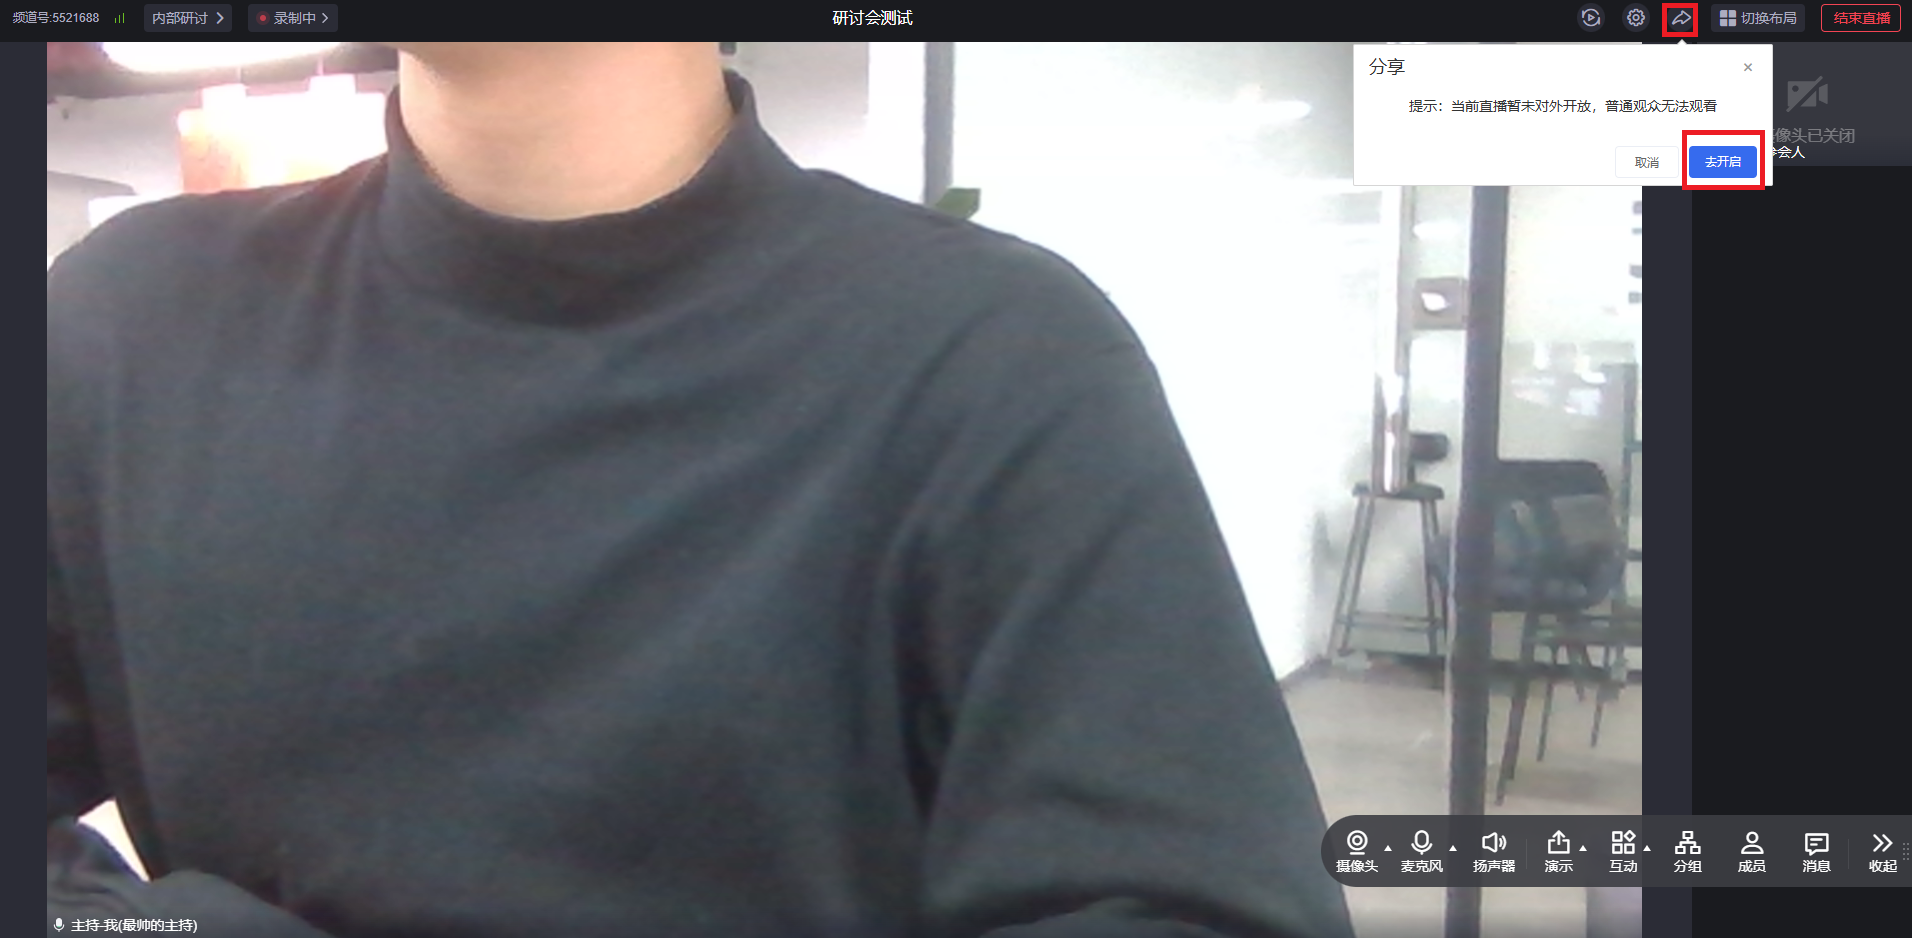
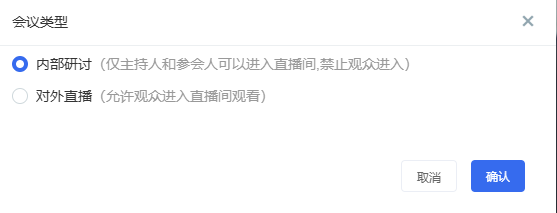
Note: For viewers to join, the host should switch the seminar mode from "Internal Seminar" to "External Live Stream" in advance.
Participants and viewers join the meeting normally.
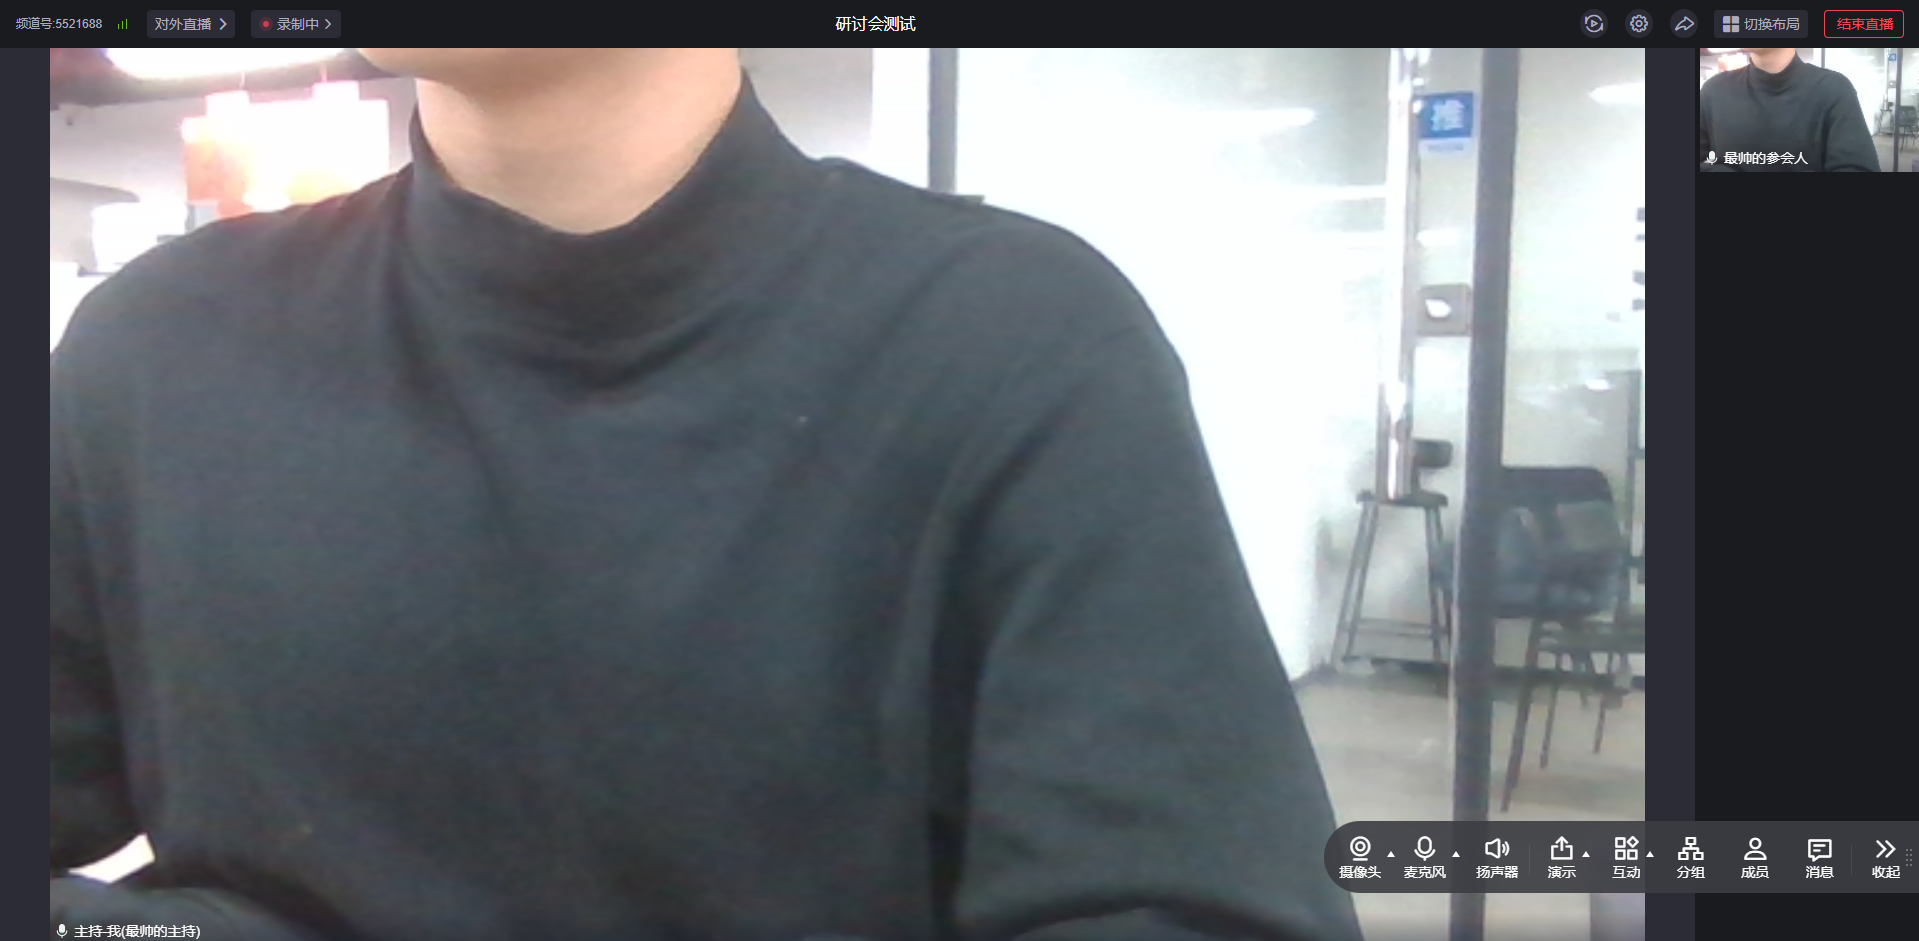
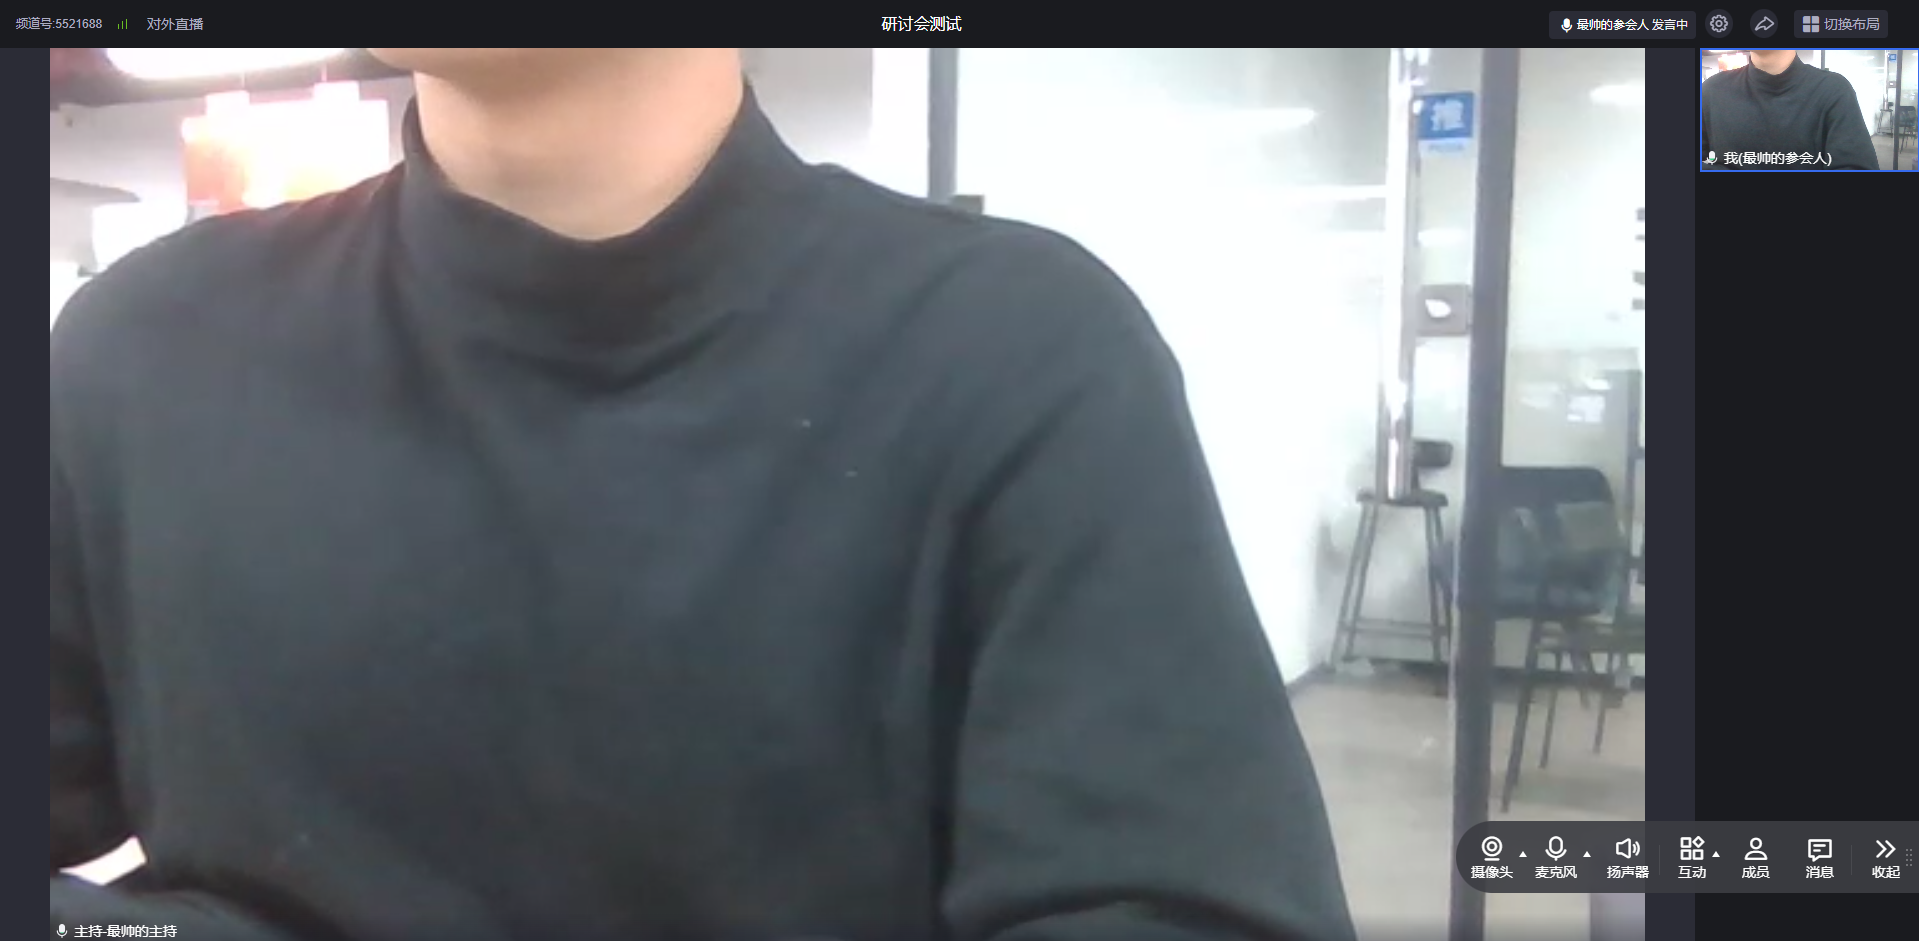
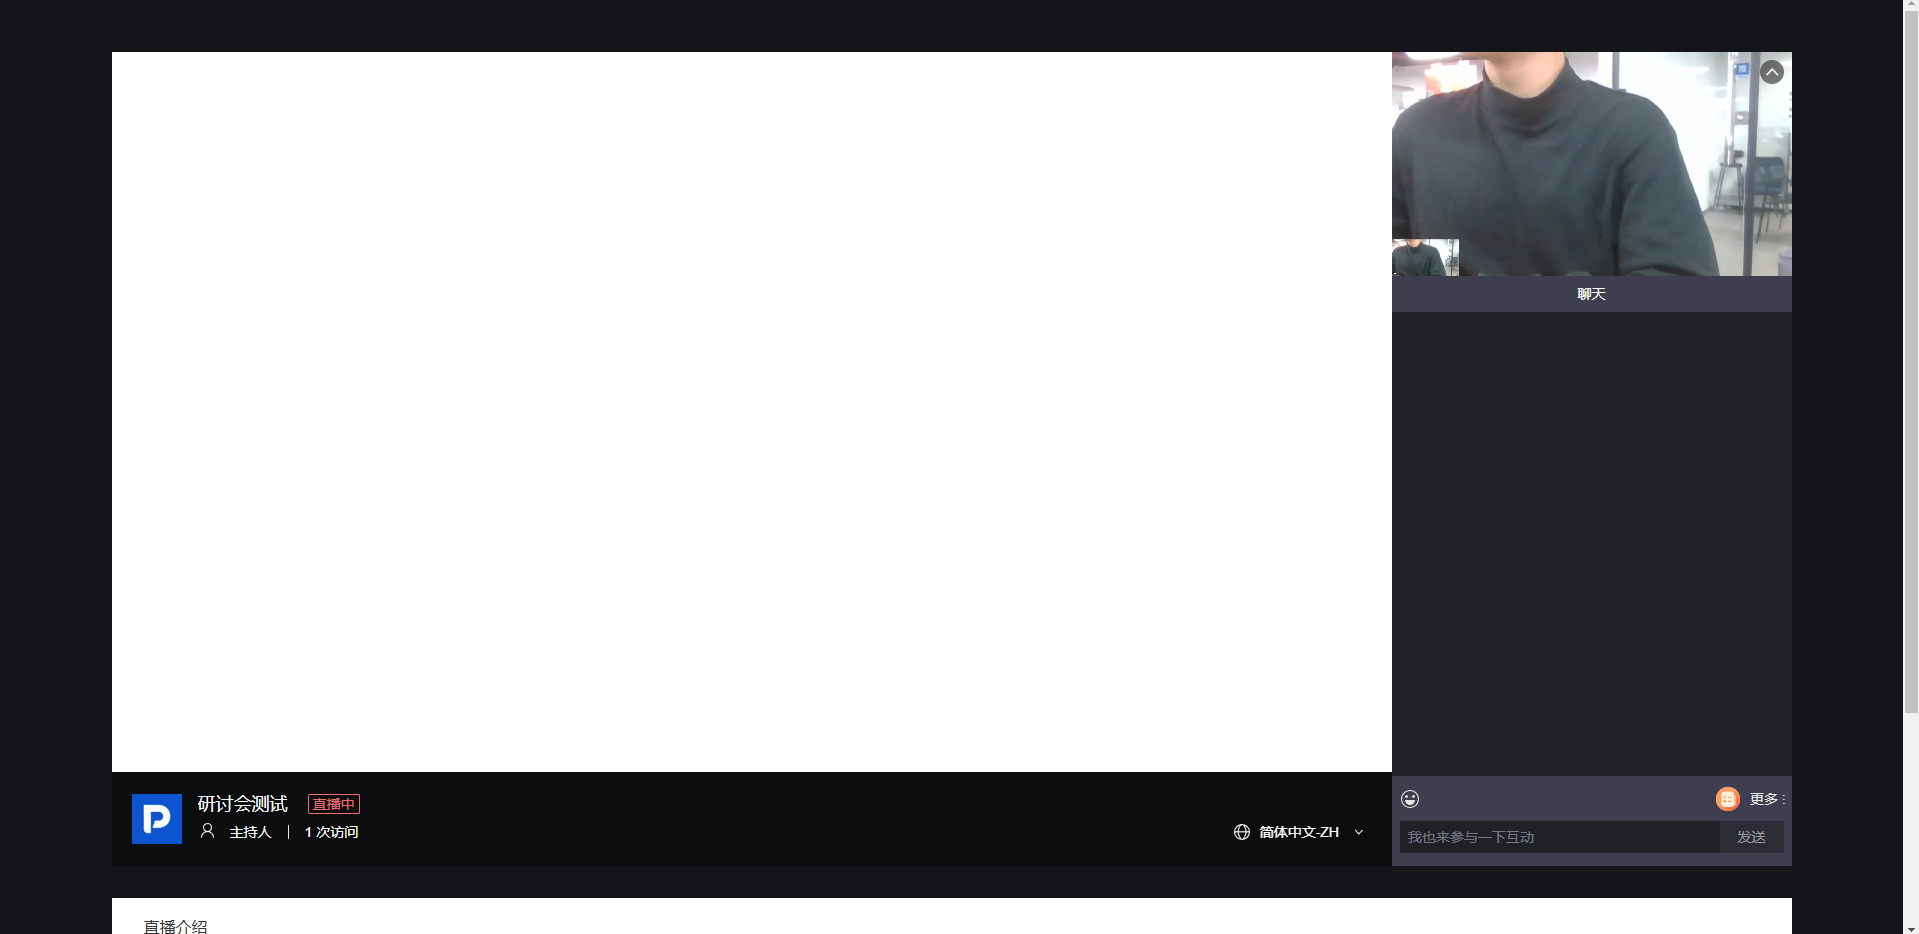
3. Effect Display
Web broadcast host view
Web participant view
Web viewer view
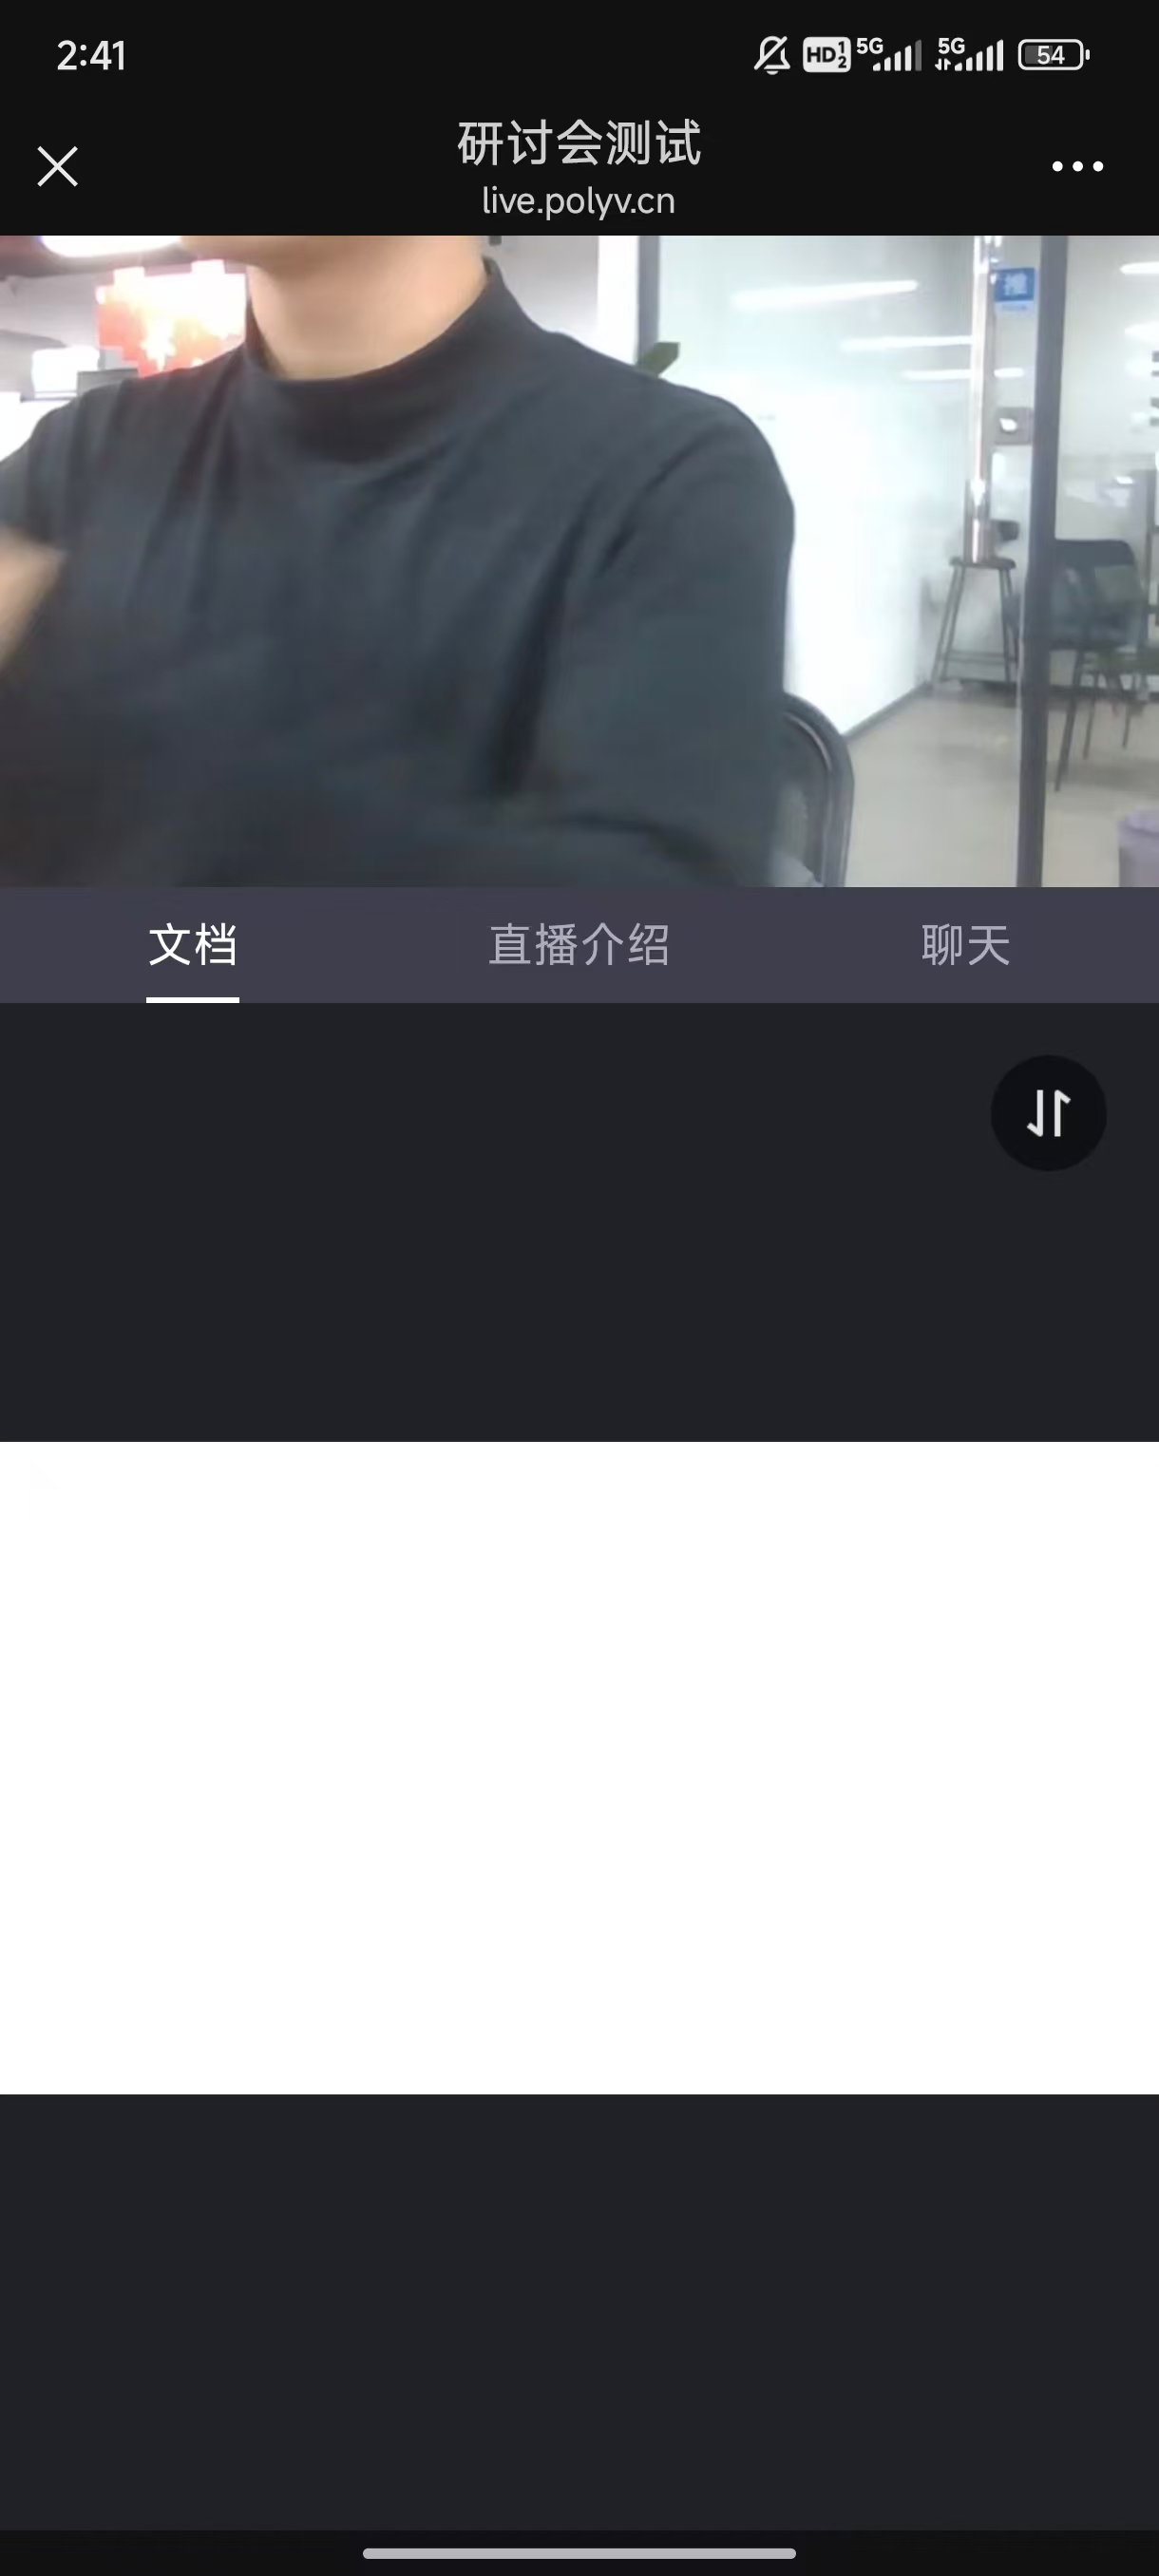
Mobile viewer view
<img src="https://liveimages.videocc.net/help_doc/bc992ee5-3258-456e-bdd3-ae2dfab86224.jpg"" alt="" width="40%">