New Director Console User Guide
Updated: 2022-05-24 14:25:56
About the New Director Console:
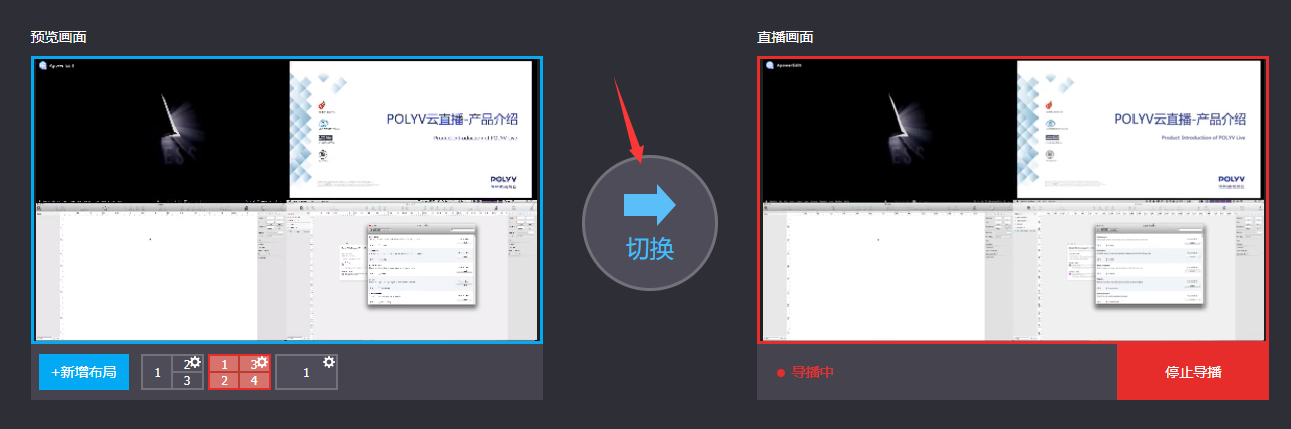
The new director console enables multi-location live streaming with simultaneous viewing, ideal for events with multiple sub-venues. It offers faster scene switching, smoother video, and an improved experience.
New Director Console Layout Overview:
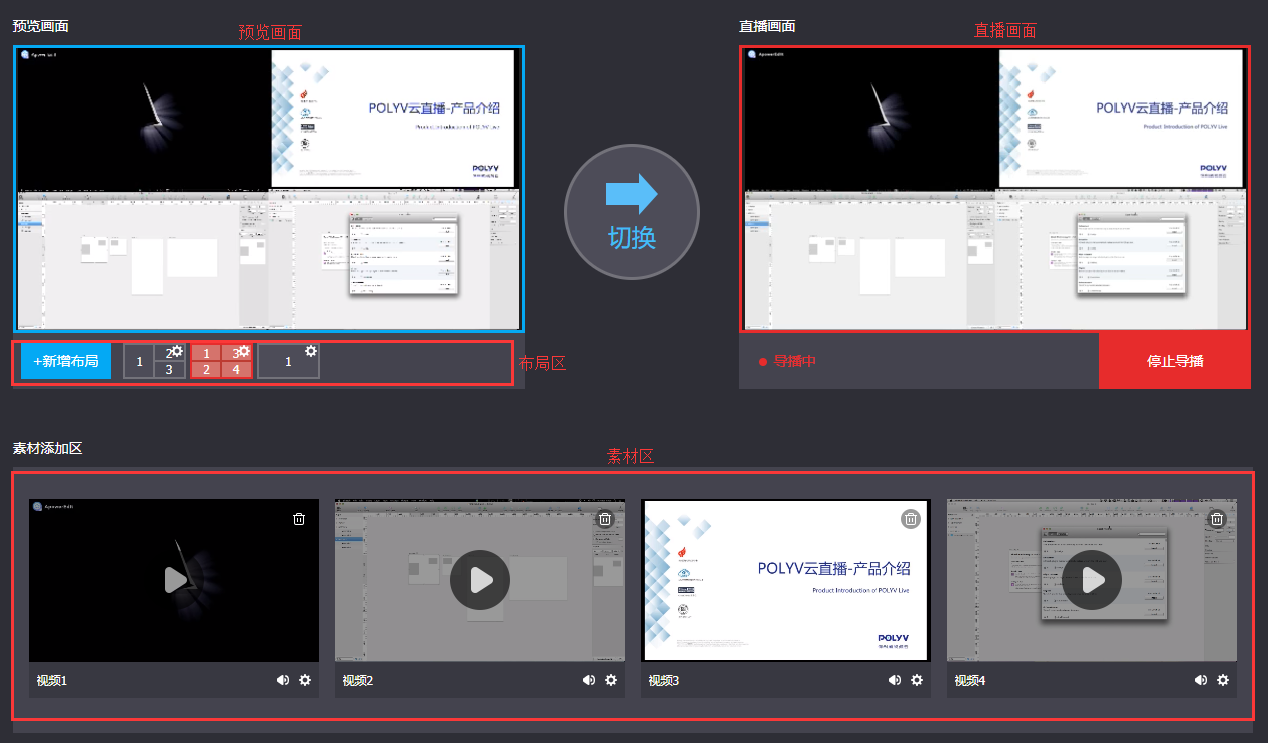
Usage Steps:
Creating a Path:
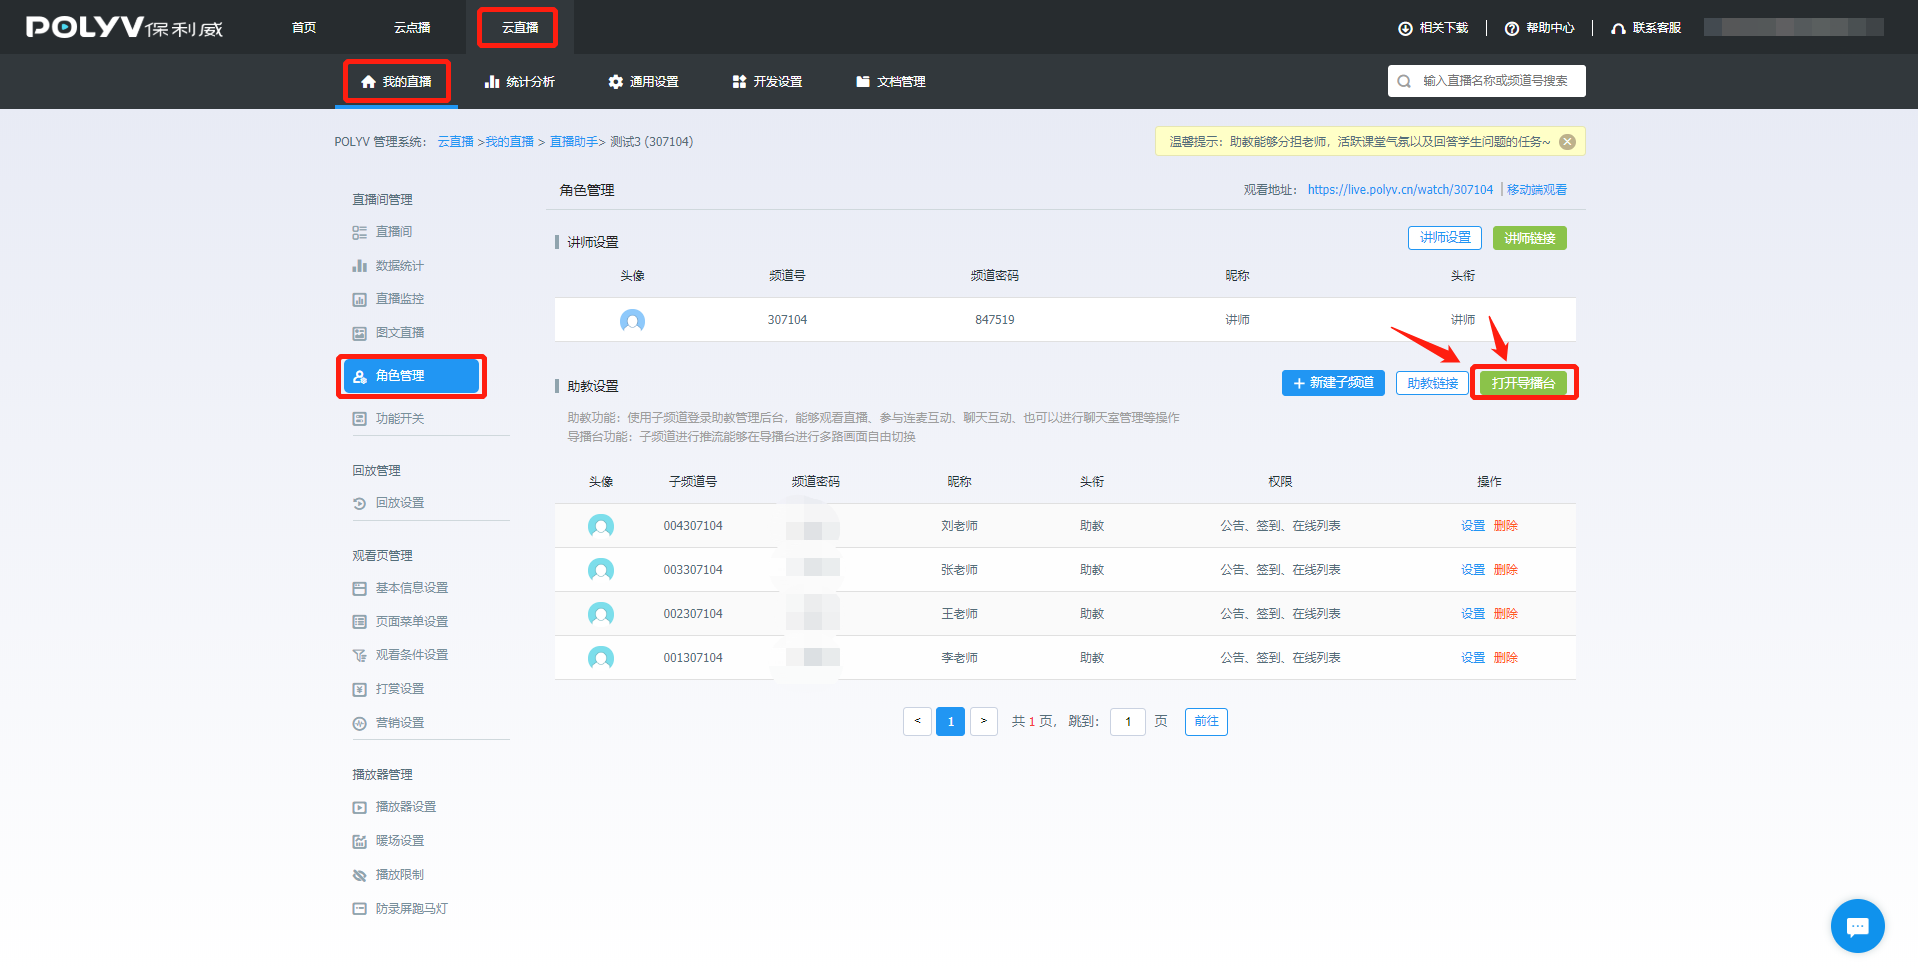
(1) Log in to the Polyv Management System.
(2) Click [Cloud Live] to enter the live streaming backend.
(3) Click [My Live Streams], then select the channel name that requires the director console (if no channel exists, click [New Live Stream] to create one).
(4) In the left menu, find [Role Management].
(5) Click [Open Director Console] to create.
Streaming Steps:
(1) First, add materials in the material area. There are three ways to add materials: using a client sub-channel for streaming, third-party streaming, or retrieving from on-demand. After successfully adding a video, it will appear in the corresponding position in the material area.
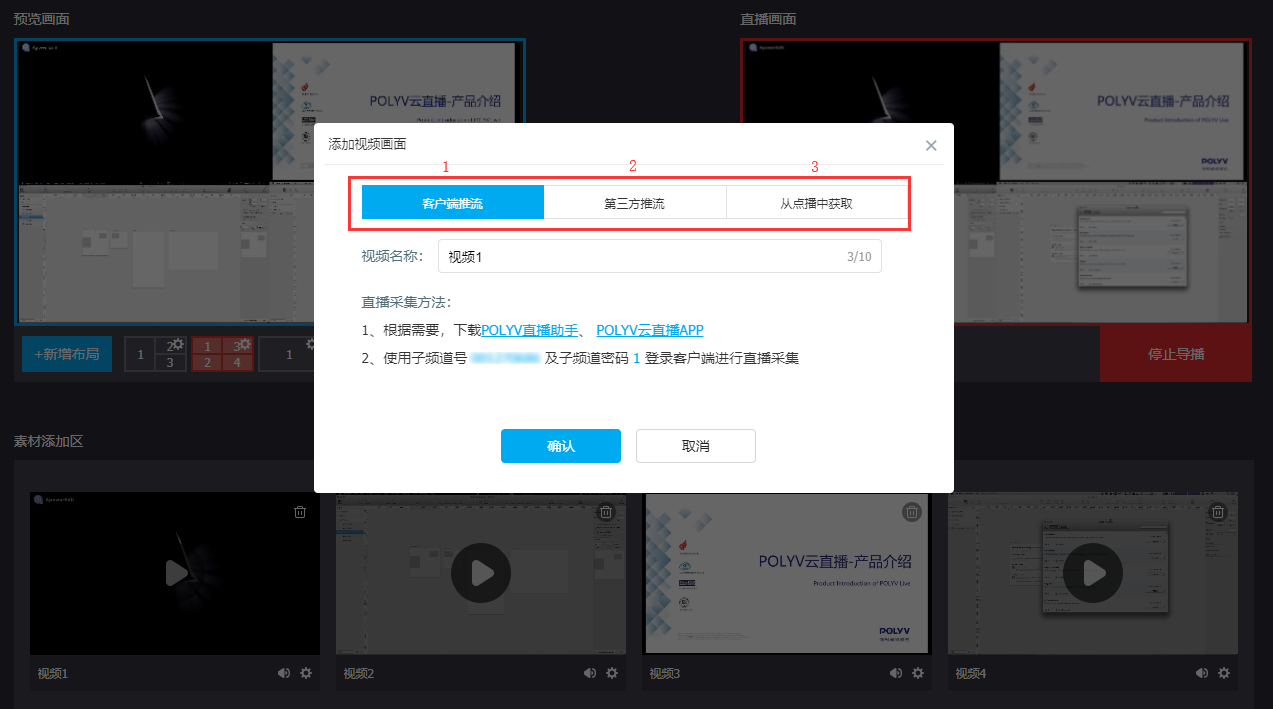
A. Client Streaming:
Use the newly created sub-channel ID to stream live via the POLYV live client (available clients: Live Assistant, Large Class, Android Cloud Live, iOS Cloud Live).
POLYV Live Client Download Link
POLYV Live Assistant Quick Start
B. Third-Party Streaming:
Copy the streaming URL to a third-party tool.
OBS Usage Steps
C. Retrieve from On-Demand
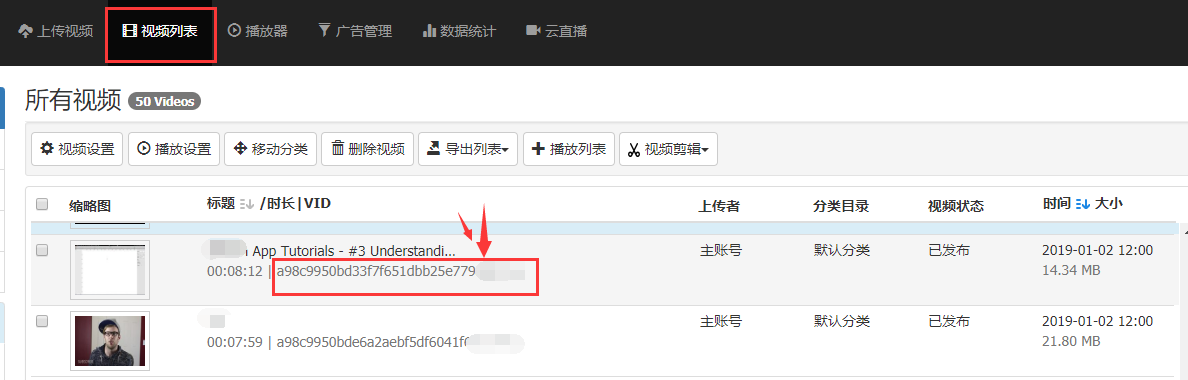
Go to the Polyv on-demand backend, copy the on-demand video VID, and paste it into the corresponding field in the add material popup.
On-demand videos must be: non-encrypted HD videos
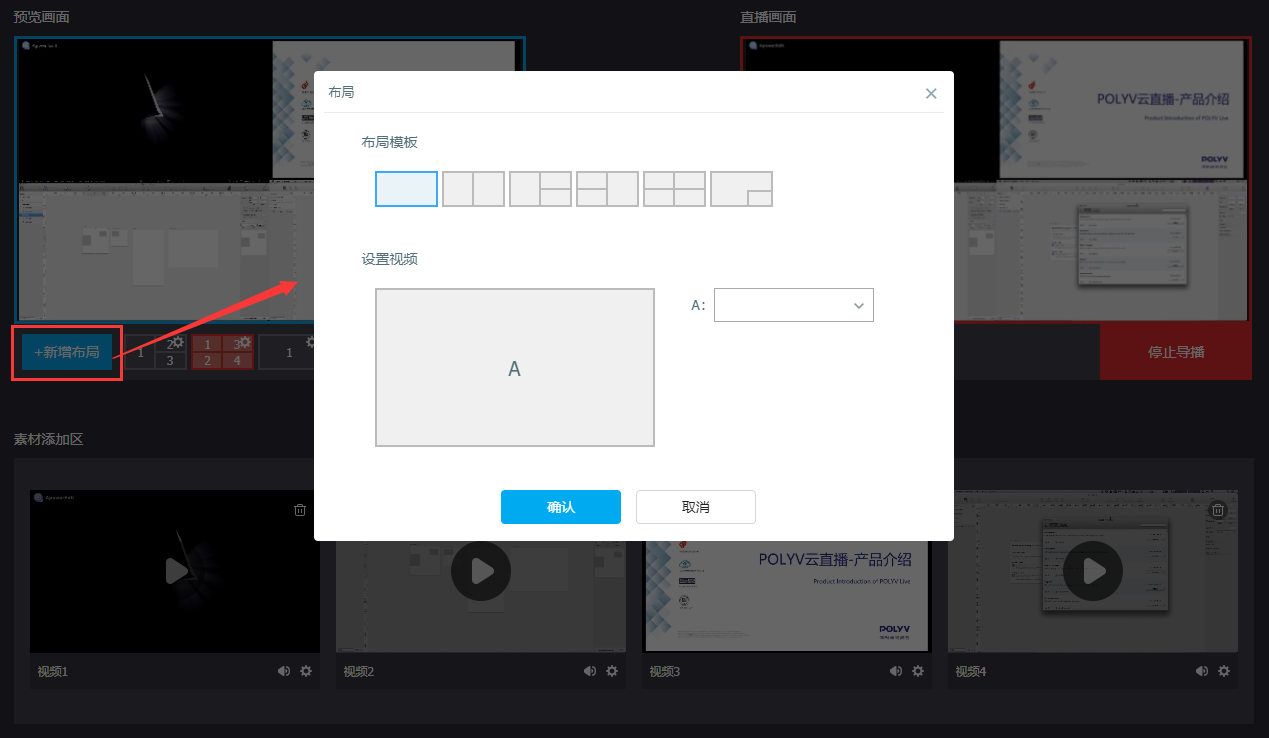
(2) Add a layout. After selecting a layout in the layout area, the successfully added layout will be displayed in the layout area.
(3) Select a layout in the layout area, then click "Start Director". The preview interface will show the mixed-stream effect. 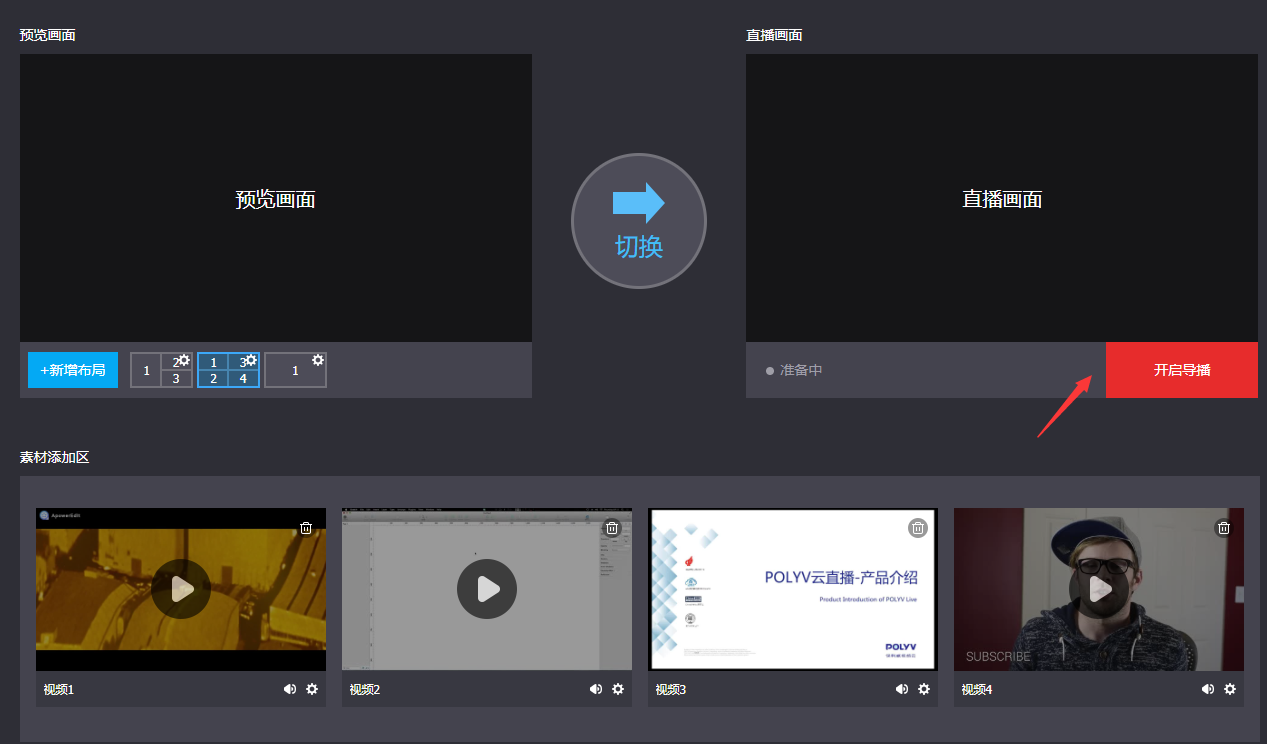
(4) Click "Switch" to switch the preview screen to the live screen, making it viewable on the viewing page. For materials switched to the live screen, you can adjust their volume.