Interactive Classroom Admin Panel Operations #
Course Management
1. Creating a Course
Enter the Interactive Classroom backend, navigate to the Course Management page, and click "Create Course".
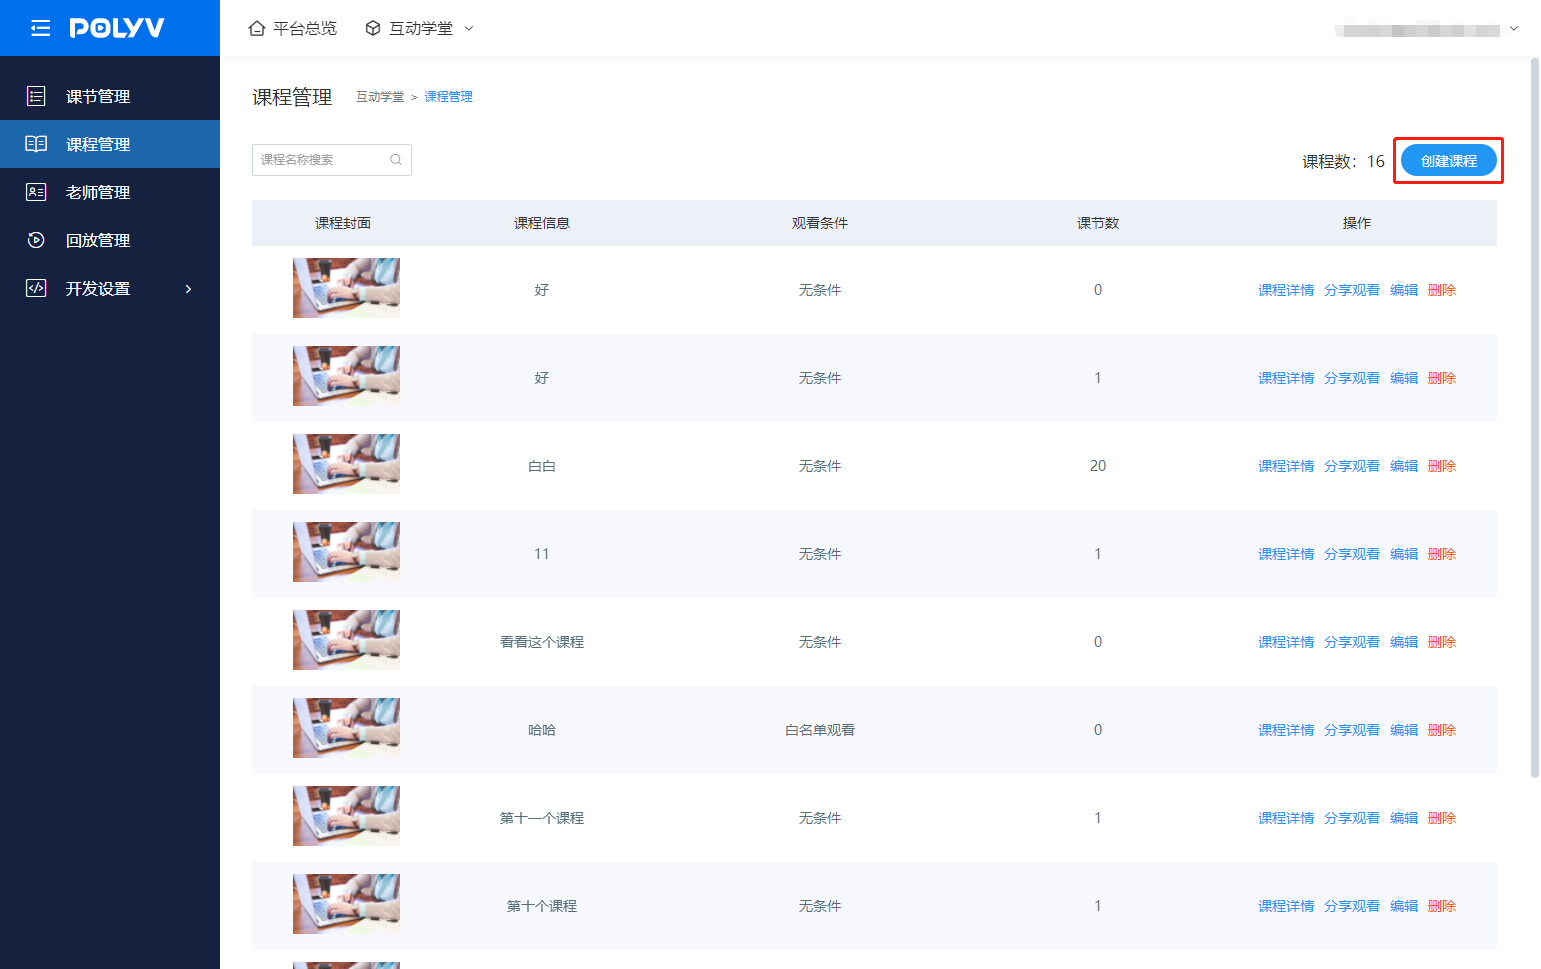
You need to set the course title, course cover image, and course viewing conditions to complete the creation.
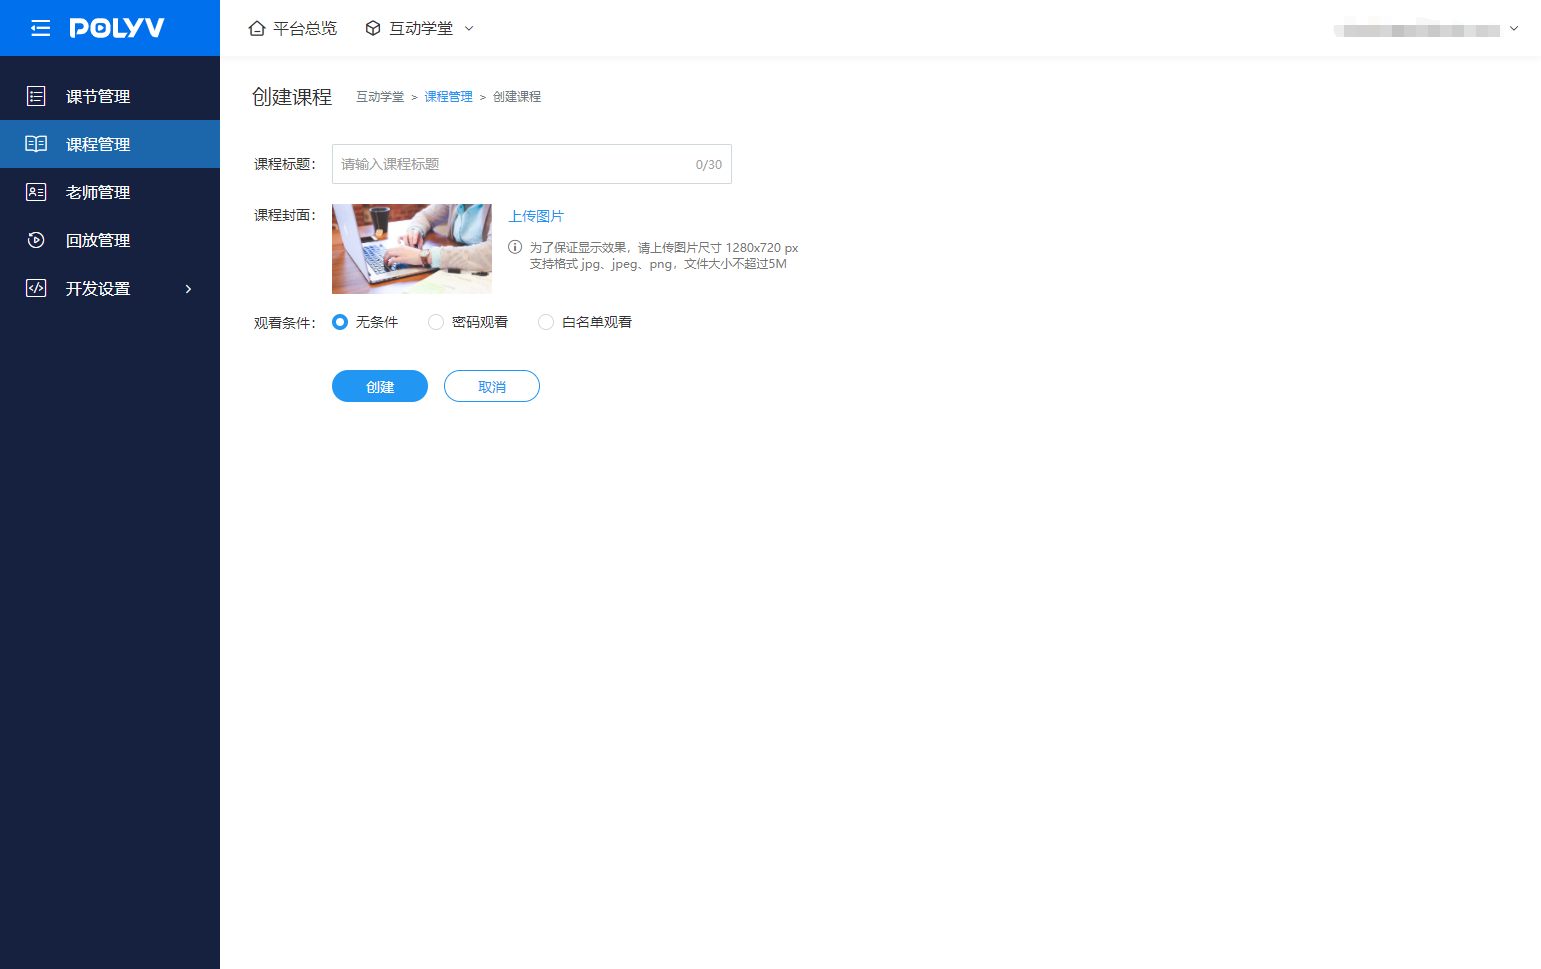
Below are the settings that require special explanation:
Viewing Conditions
You can set it to No Condition, Password, or Whitelist. When a password is set, students must verify the password to access the course link. When a whitelist is set, you need to configure it in the course details after creating the course.
Whitelist Settings
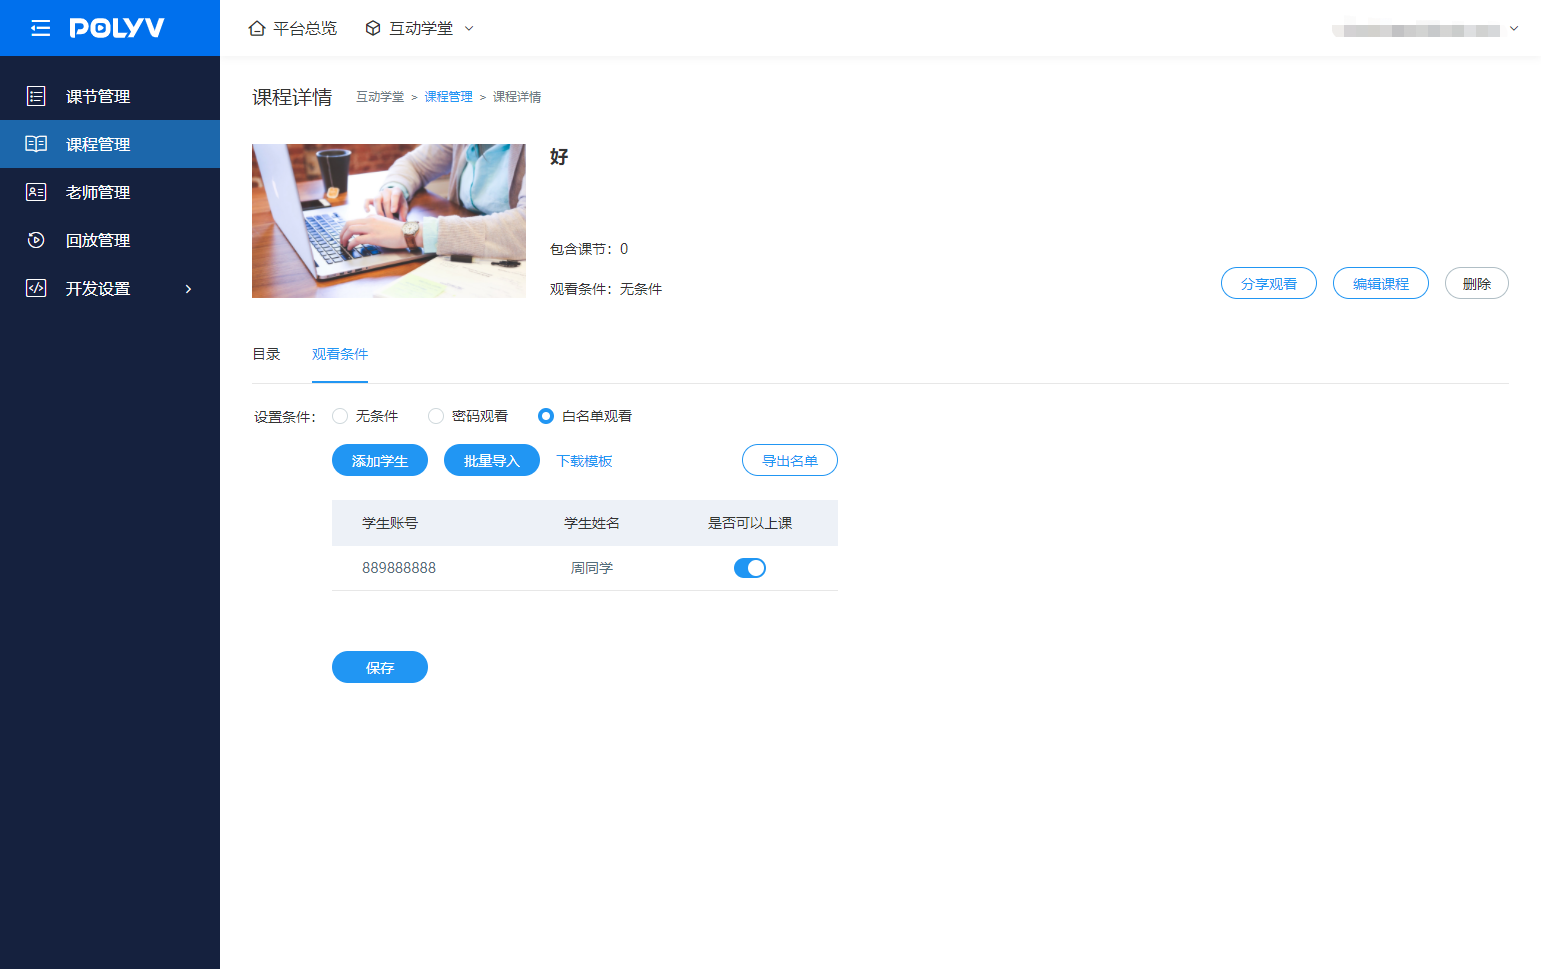
You can manually add whitelist accounts, or edit a whitelist table using an import template and batch import whitelist accounts. After adding, students must verify their student account to enter the lesson link; access is granted if the account is correct. Students can modify their name upon entry; if not modified, the corresponding name from the whitelist account is used.
Whitelist entries cannot be edited or deleted after addition. You can disable a specific whitelist account by toggling the "Can attend class" option.
2. Setting Up the Course Syllabus
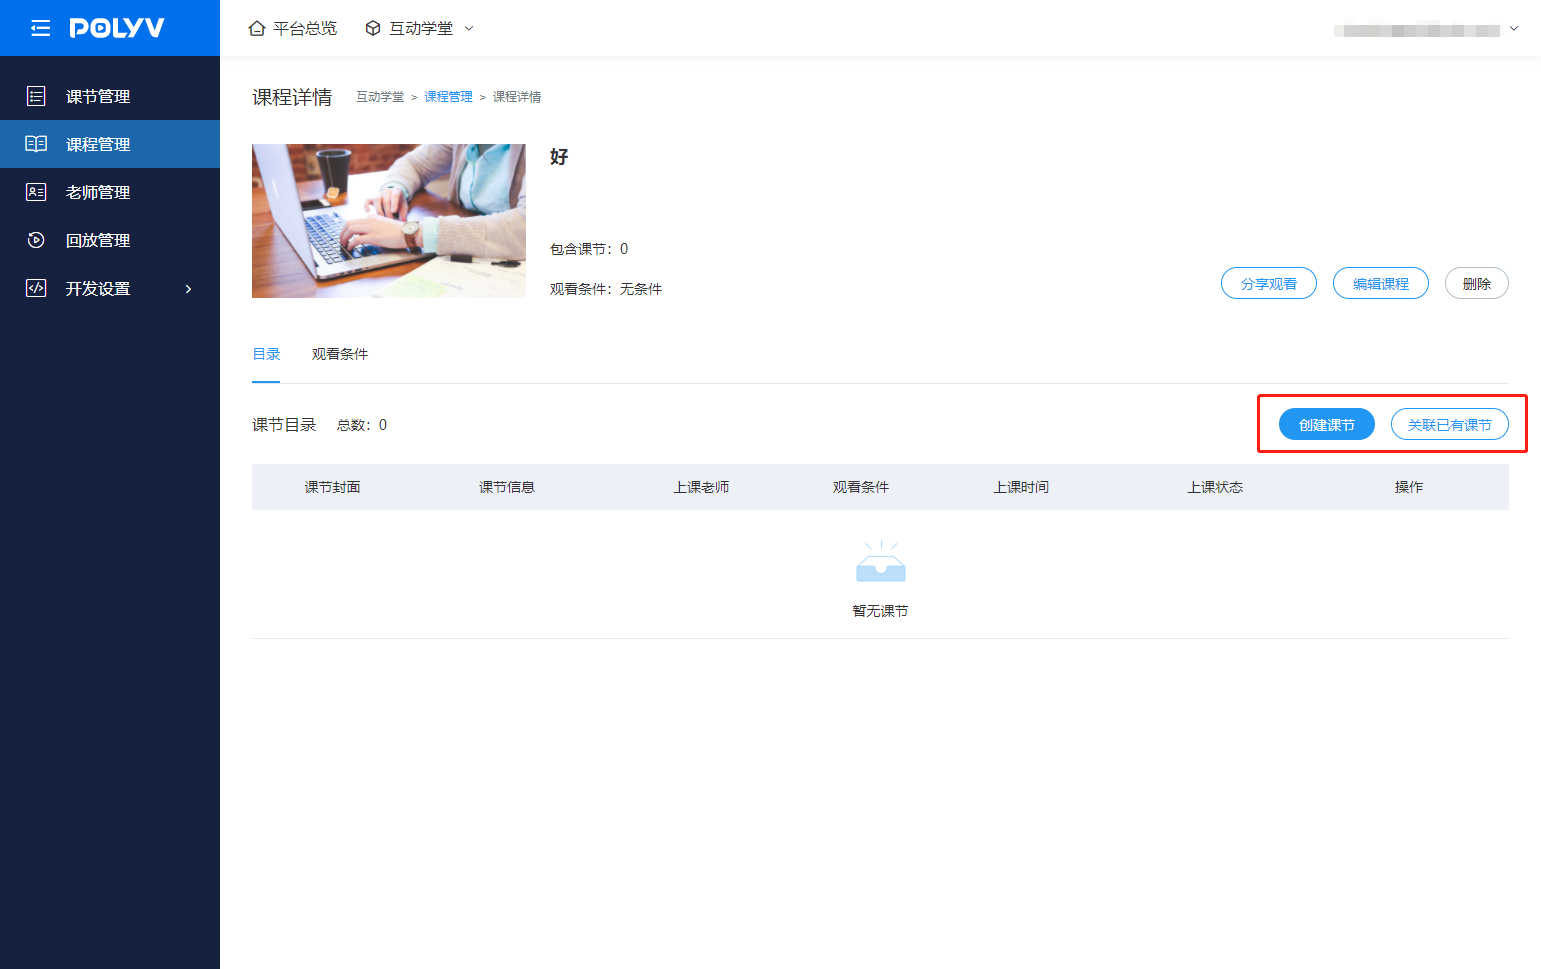
After creating a course, you can add lessons in the Course Details > Syllabus section. You can choose to create a new lesson or link an existing lesson.
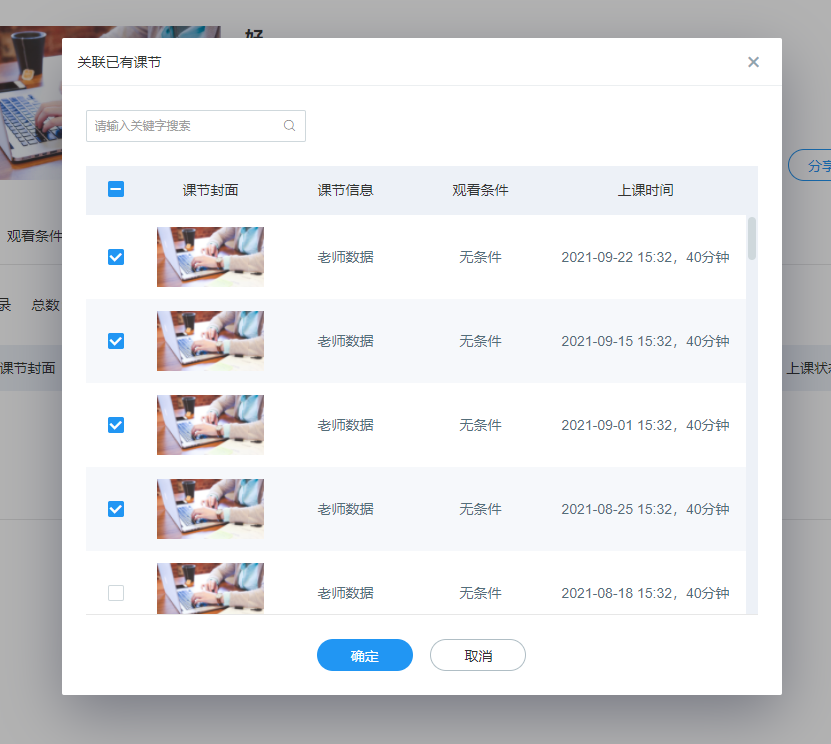
Click "Link Existing Lesson" to display all created lessons that are not yet linked. Select the lessons and click "Confirm" to add them to the syllabus.
3. Conducting a Class
Courses do not have a teacher-specific teaching link, only a student viewing link. If a teacher needs to conduct a class, they can use the corresponding lesson's teaching link or the unified teacher login address to select a lesson and start teaching.
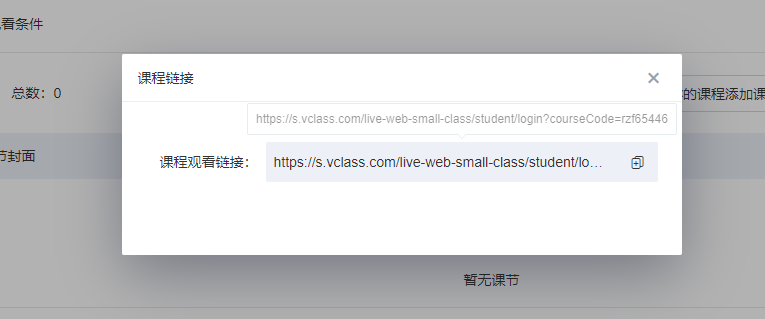
When students access the course link, they must verify the course's viewing conditions to see the syllabus. Once verified, they can enter any lesson without needing to verify the lesson's viewing conditions again.
Lesson Management
1. Opening the Interactive Classroom Backend - Lesson Management
Log in to the Polyv management backend (https://www.polyv.net, and click to enter the Interactive Classroom management backend from the homepage.
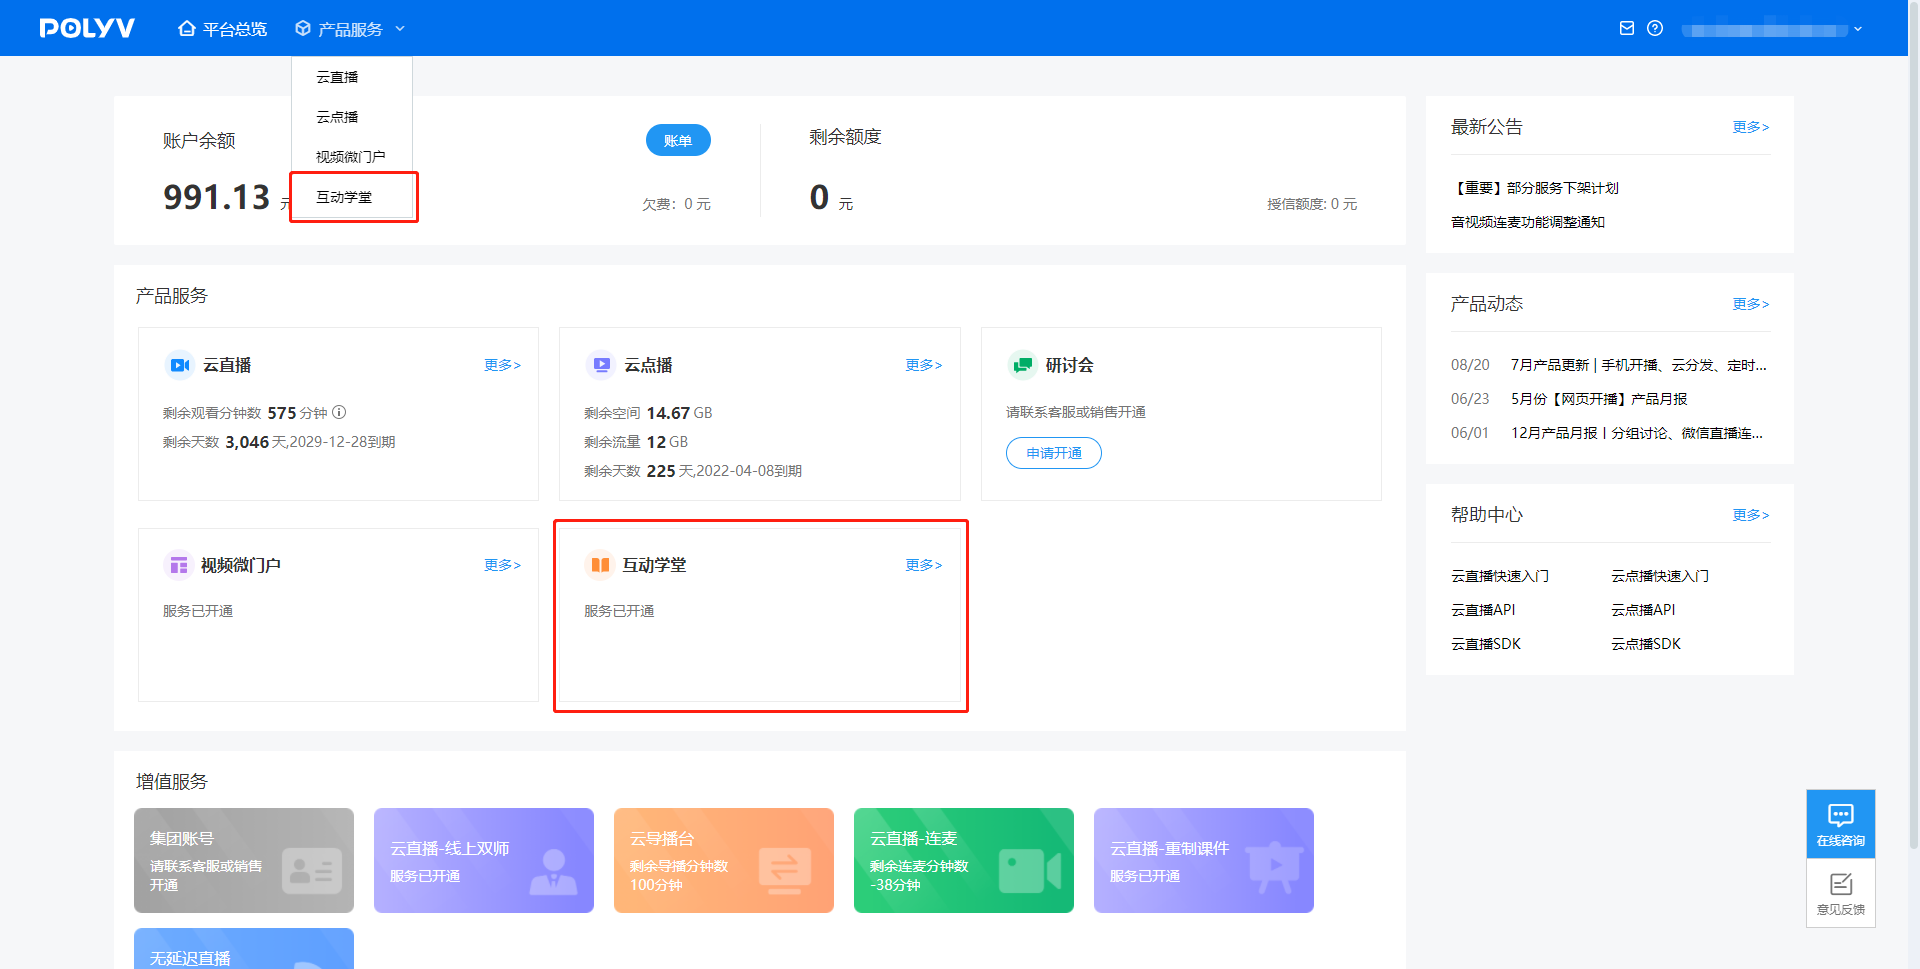
You will be directed to the Lesson Management page by default. Click "Create Lesson".
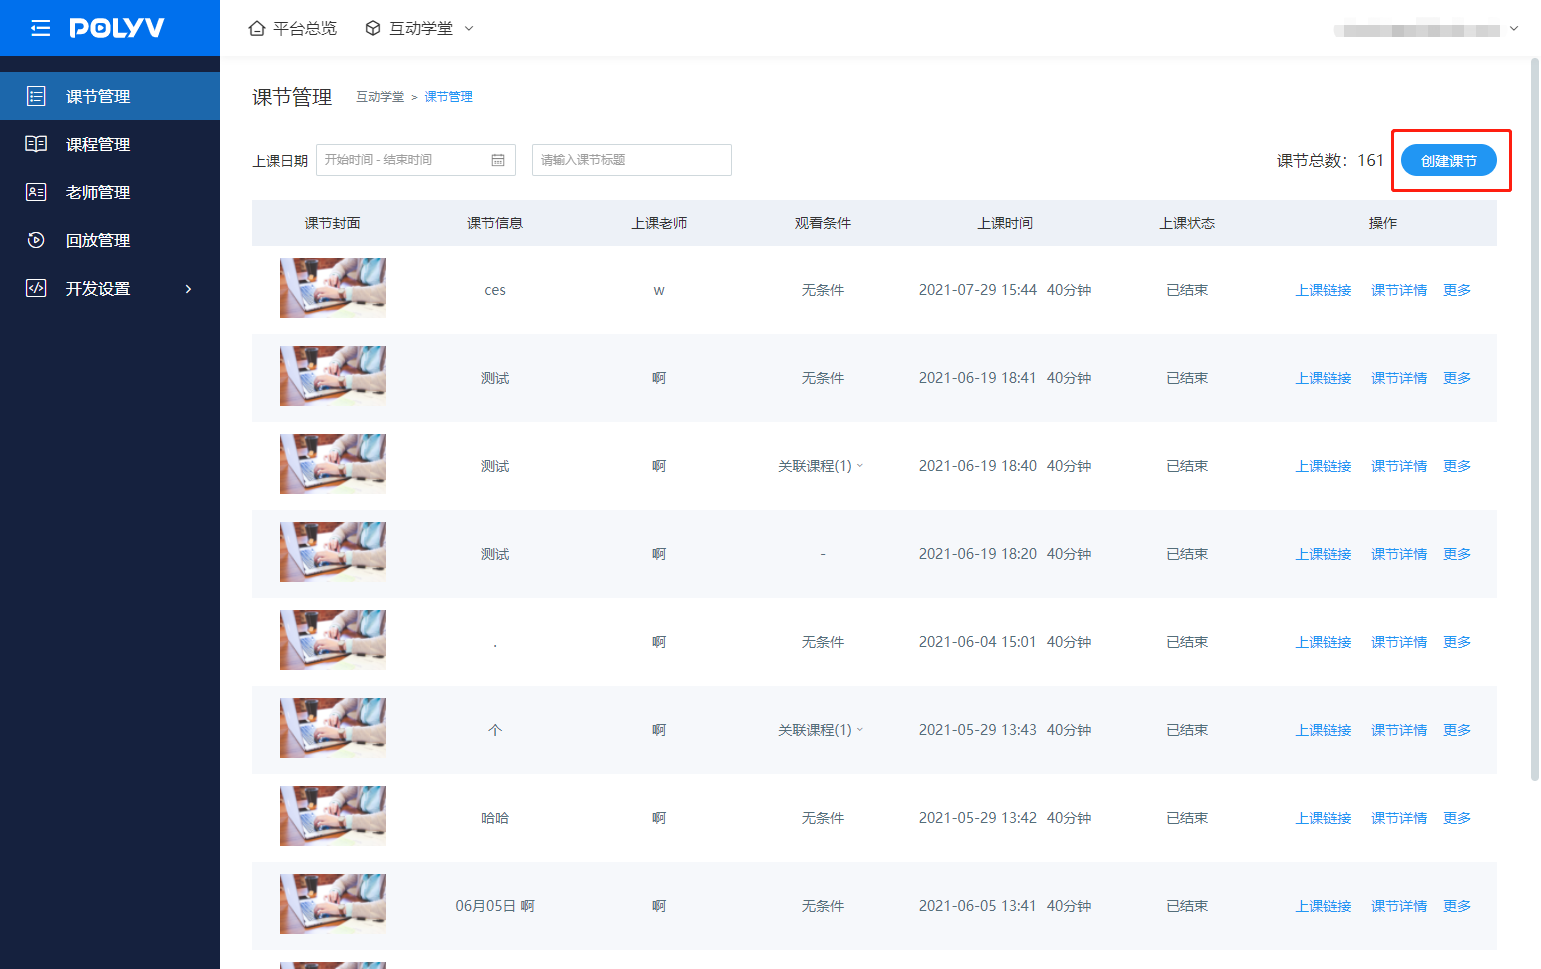
2. Creating a Lesson
You can create a single lesson or batch create multiple lessons based on a schedule.
Creating a Single Lesson:
You need to set the lesson title, lesson cover image, teacher, class time, co-host settings, recording settings, and lesson viewing conditions to complete the creation.
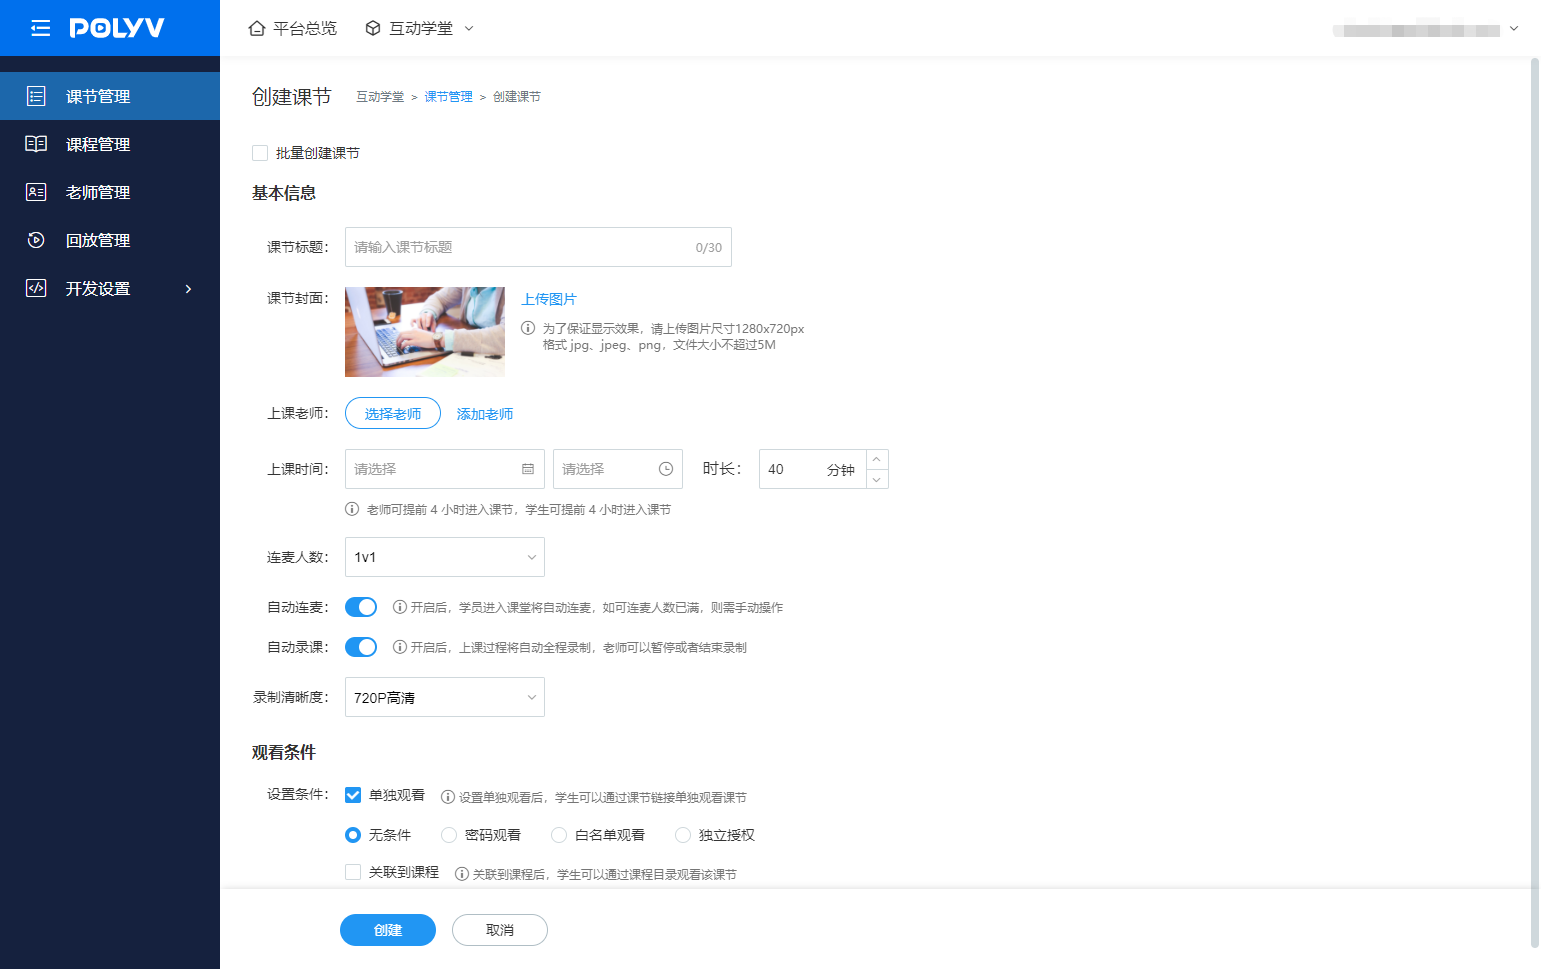
Below are the settings that require special explanation:
Teacher
Each lesson requires a teacher. After setting the teacher, you must use that teacher's account credentials to log in and teach.
For the first creation, click "Add Teacher" to create a teacher account.
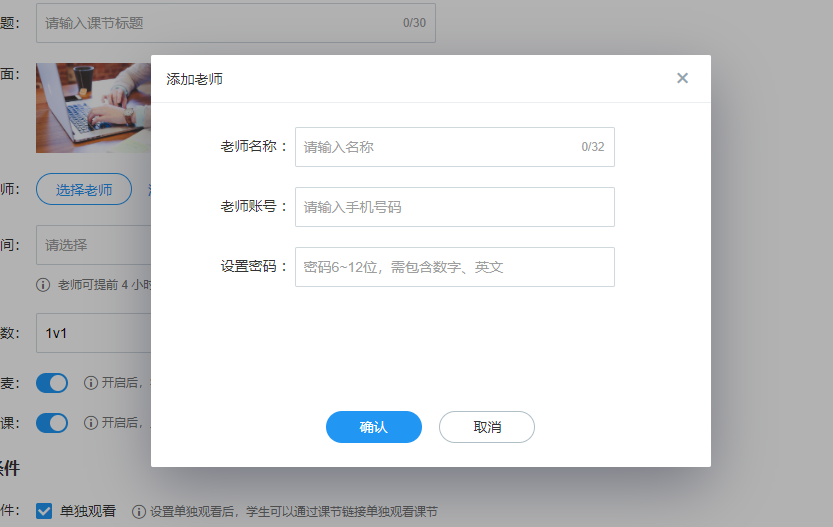
After creation, you can assign the teacher to the lesson.
Auto Co-host
When enabled, viewers entering the live room will automatically co-host. If the co-host limit is reached, auto co-host will not activate.
Viewing Conditions
Viewing conditions are divided into "Standalone Viewing" and "Linked to Course". The difference is that with standalone viewing, students can enter the live room directly via the lesson link. When linked to a course, students can only enter through the corresponding course's syllabus.
Standalone Viewing
You can set it to No Condition, Password, or Whitelist. When a password is set, students must verify the password to access the lesson link. When a whitelist is set, you need to configure it in the lesson details after creating the lesson.
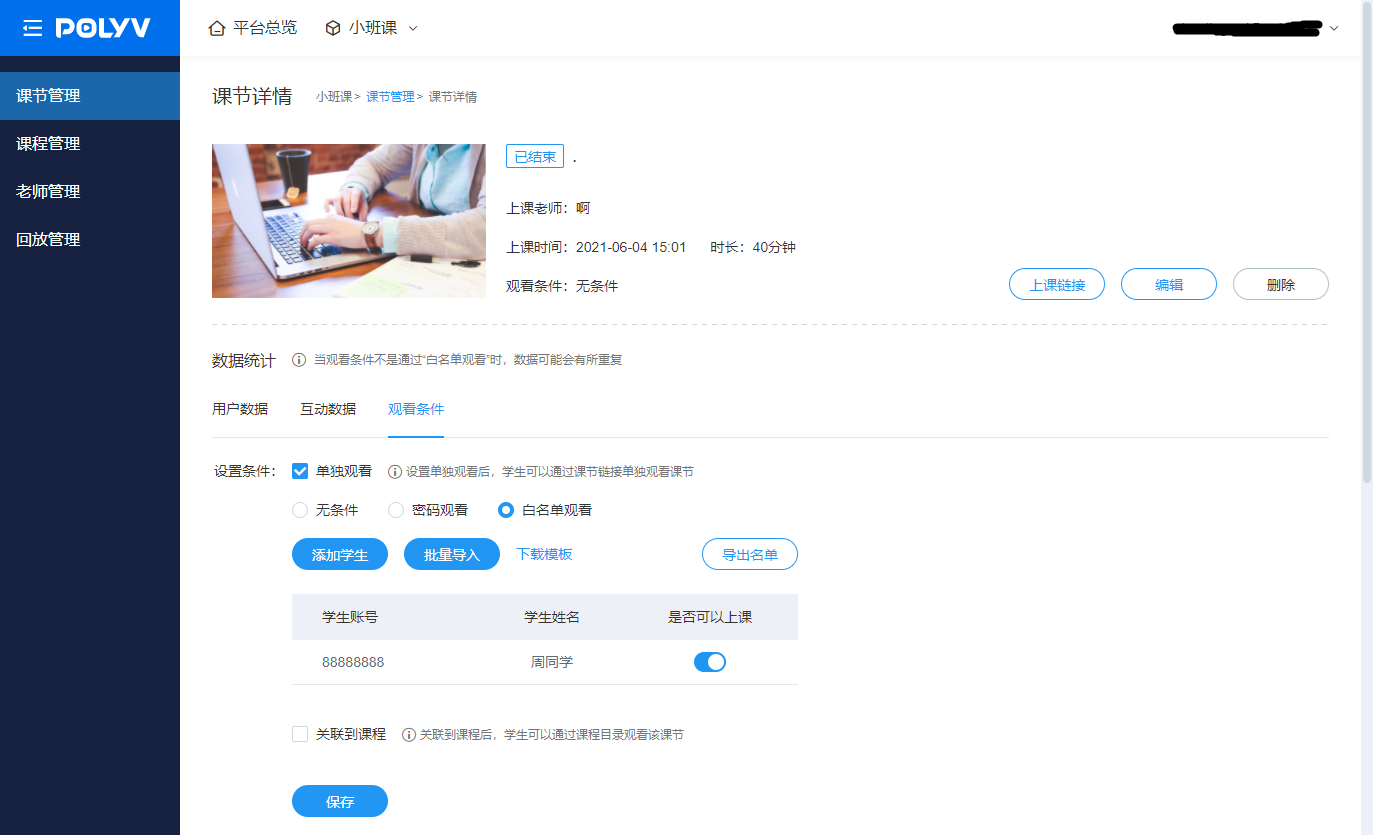
Whitelist Settings
You can manually add whitelist accounts, or edit a whitelist table using an import template and batch import whitelist accounts. After adding, students must verify their student account to enter the lesson link; access is granted if the account is correct. Students can modify their name upon entry; if not modified, the corresponding name from the whitelist account is used.
Whitelist entries cannot be edited or deleted after addition. You can disable a specific whitelist account by toggling the "Can attend class" option.
Linked to Course
You can select existing courses to link. Multiple courses can be linked. After linking, the lesson will appear in the syllabus of those courses.
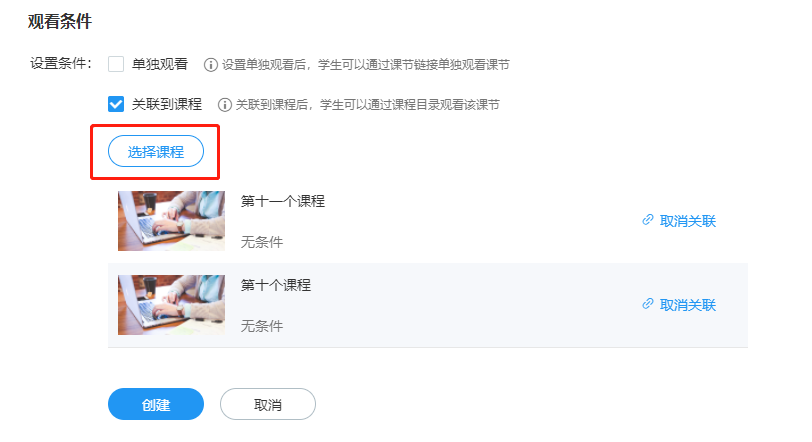
When a lesson has both "Standalone Viewing" and "Linked to Course" selected, it means the lesson can be accessed either via the lesson link or through the linked course's syllabus. This is typically used for large public classes, where the public class is added to various courses as an introductory lesson.
Batch Creating Lessons:
The difference between batch creating lessons and creating a single lesson is that batch creation requires setting the lesson schedule and allows batch setting of lesson titles based on class dates.
Lesson Schedule
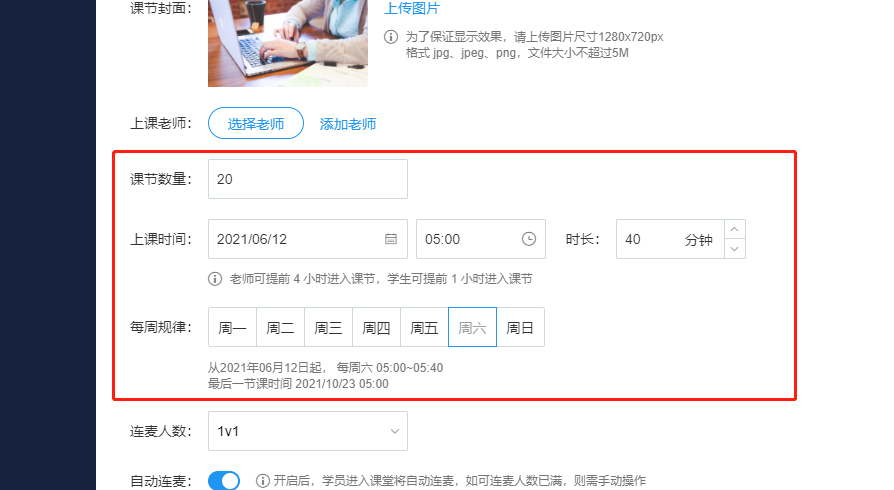
This refers to the number of lessons to create, the date of the first lesson, the class time and duration for each lesson, and the weekly recurrence pattern.
The class date here refers to the date of the first lesson in this batch. The class time and duration apply to all lessons in this batch.
The weekly recurrence pattern means setting which day(s) of the week the class occurs. After setting the first lesson's date, the weekly recurrence pattern automatically determines the corresponding day of the week. For example, if the first lesson is set for June 12th, which is a Saturday, the weekly recurrence pattern will automatically select Saturday, meaning there will be a class every Saturday.
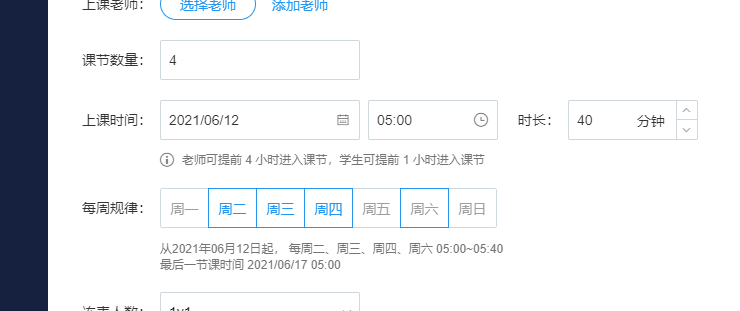
Note that if the number of lessons is insufficient, the weekly recurrence pattern option may be unavailable, as shown below.
Batch Setting Titles
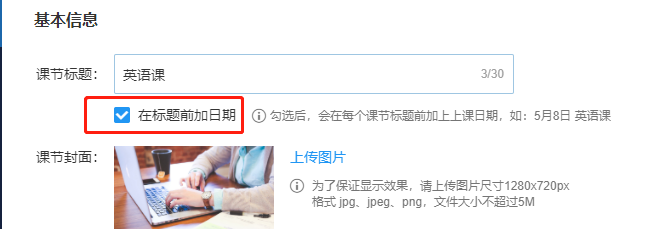
Check the "Add date before title" option under the title box. After creation, each lesson title will be prefixed with its class date. For example, if the title is "English Class" and this option is checked, it will become "May 8th English Class".
3. Conducting a Class
After creating a lesson, a teacher's teaching link and a student's viewing link are generated.
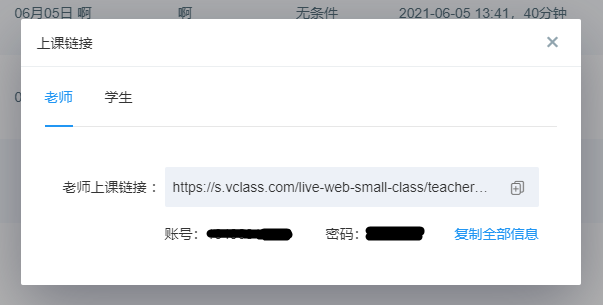
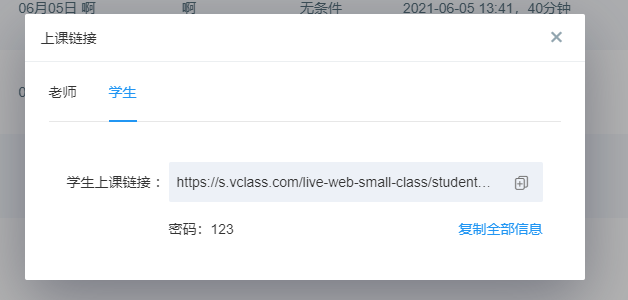
The teacher enters the teaching link, logs in with their account credentials, and can enter the lesson's live room. Teachers can enter the live room at any time in advance for device testing, material preparation, etc.
Students enter the viewing link, verify the lesson's viewing conditions, and can enter the lesson's live room. If the viewing condition is set to "No Condition", no verification is needed. If the teacher has not started the live stream, students will not see the live video.
4. Other Logic
Note that if a lesson has already been live-streamed, its class time cannot be modified. If a lesson has ended, its class duration cannot be modified either.
Teacher Management
1. Creating a Teacher
When creating a teacher, you can create a single teacher or batch create teacher accounts using an import template.
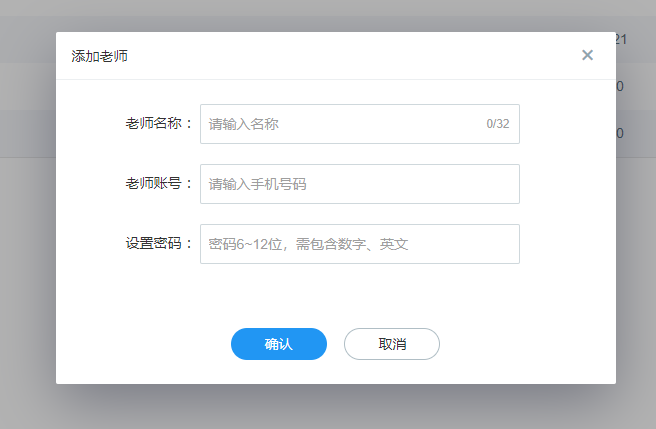
Creating a Single Teacher
Enter the teacher's name, account, and password, then click "Confirm" to create the teacher account.
Importing a Teacher List
Download the import template, fill in the teacher account information in the spreadsheet. Compared to single creation, the spreadsheet includes an "Area Code" column. Domestic phone numbers generally default to +86, but you can set international phone numbers here.
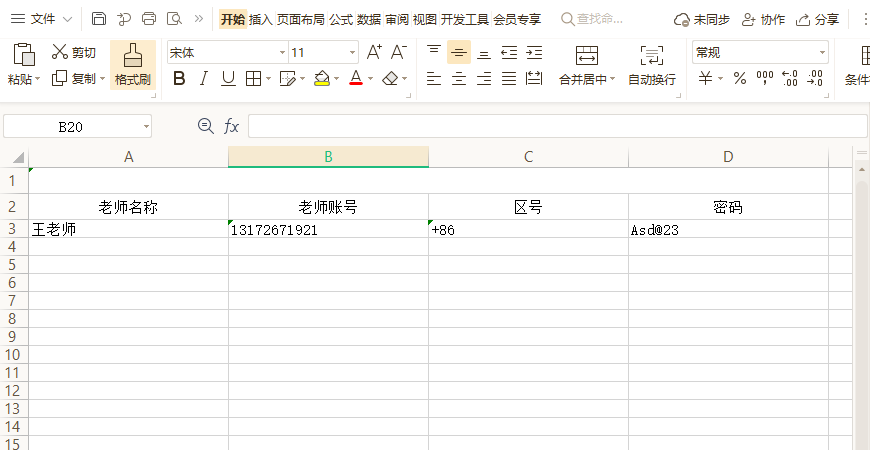
After filling in the information, click "Import" on the page to batch create teacher accounts.
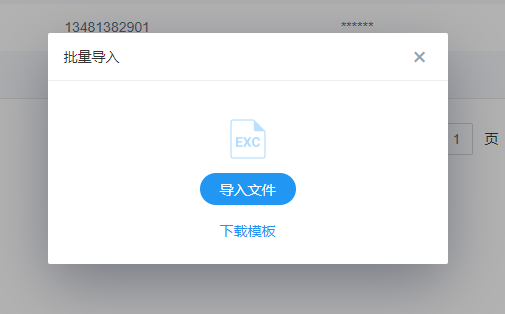
Note: Teacher accounts require a phone number, and the same phone number cannot be used to create multiple teacher accounts.
2. Disabling/Deleting a Teacher
In Teacher Management, click the "Disable" button to disable a teacher. Once disabled, the teacher cannot log in.
Click "Delete Teacher" to delete a teacher. Once deleted, the teacher cannot log in, and past teaching data cannot be recovered.
If the teacher has upcoming lessons at the time of deletion, you can click "Replace Teacher" during deletion to reassign all of that teacher's lessons to another teacher.
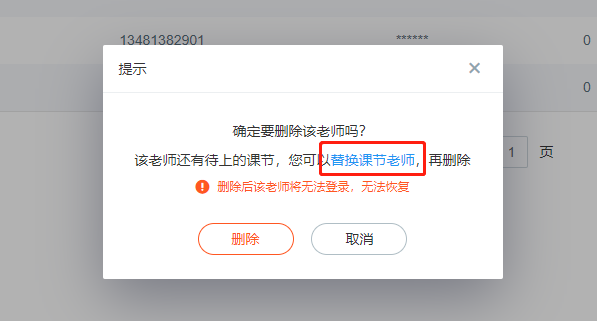
Note: Whether disabling or deleting, if the teacher is currently teaching, it will not affect their ongoing class.
3. Unified Login Address
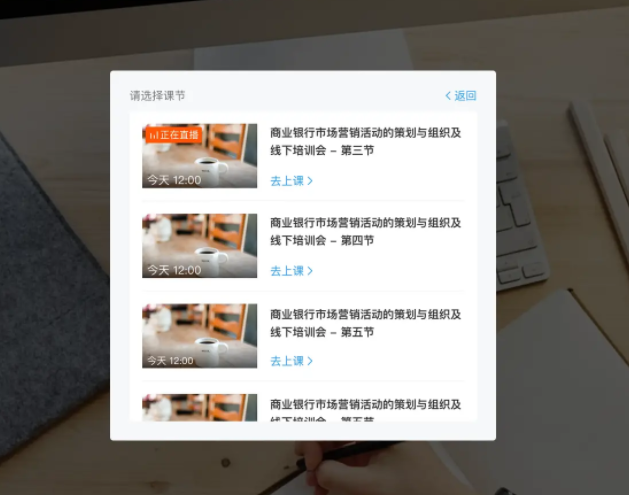
All teachers can log in via the unified login address. After logging in, teachers can see all lessons assigned to them that have not yet ended. Teachers can select any lesson to enter the live room.
Playback
1. Playback Generation Rules
Playback generation rules are closely related to the live recording function. When you use recording during a live stream, the system will automatically generate a playback from the recorded content after the recording ends. This playback is stored under the lesson's playback management. Generally, the system will complete generation within 24 hours after the recording ends.
If multiple recordings were made during the live stream, for example, recording from 0-10 minutes, no recording from 10-20 minutes, and recording from 20-40 minutes, the lesson will generate two playback segments: 0-10 minutes and 20-40 minutes.
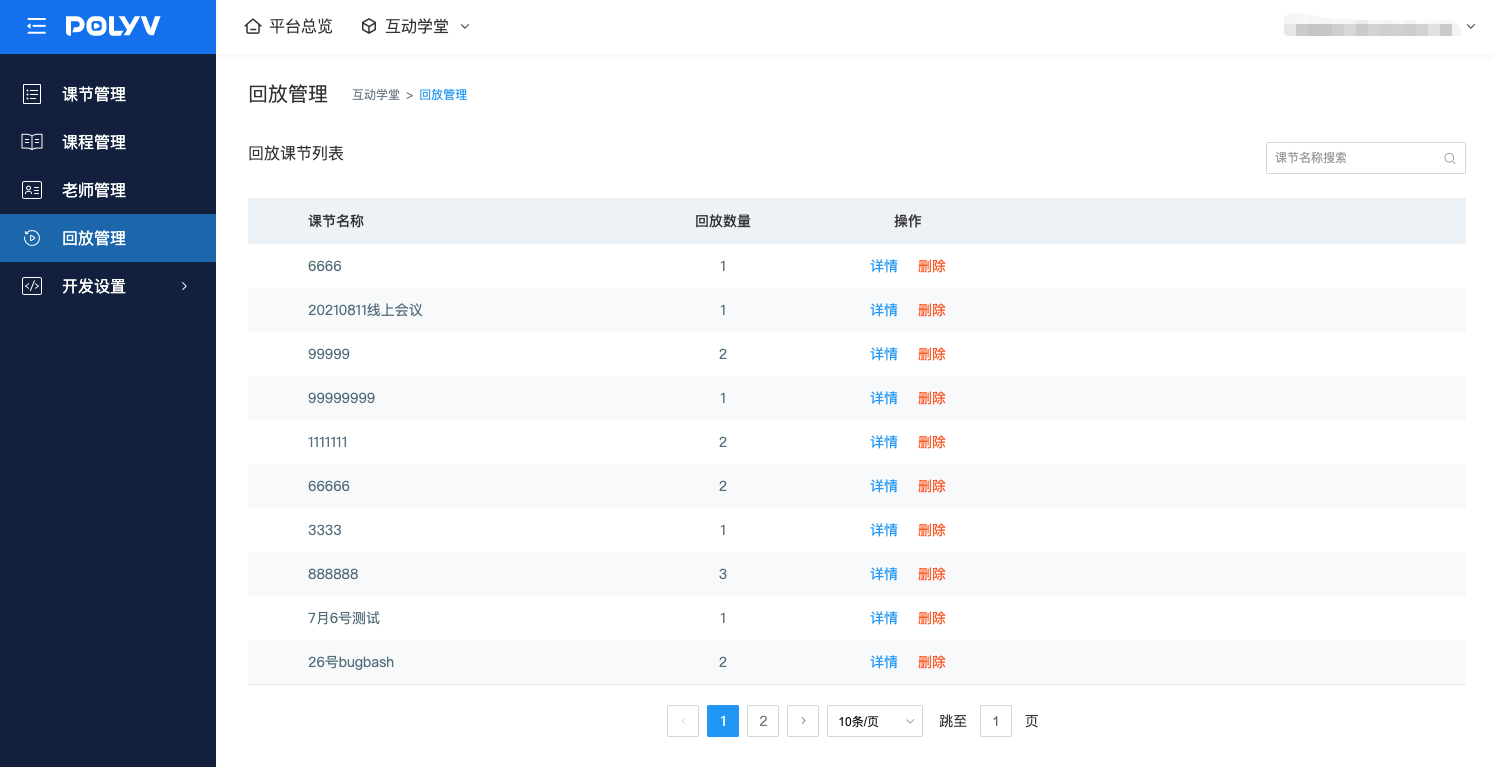
You can view the list of lessons with generated playbacks in Playback Management. This displays lesson information and the number of playbacks generated for that lesson.
2. How to Watch Playbacks
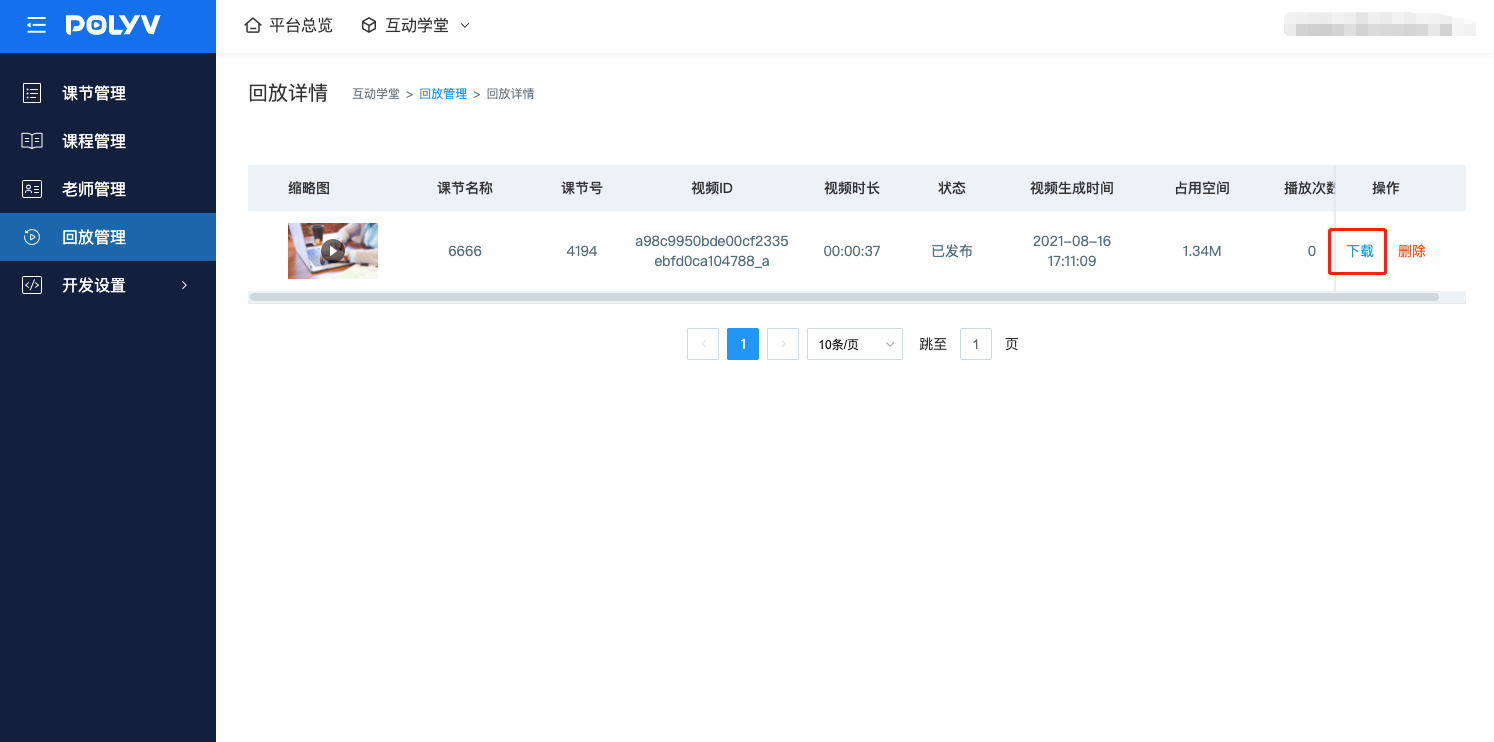
Currently, playbacks cannot be viewed via an online link. They can only be watched by downloading them locally. After a playback is generated, you can download the corresponding playback video in the backend under Playback Management > Details.